78 d-150 318 timing issue
 09-15-2012, 07:09 PM
#1
Mopar Fan
Thread Starter
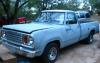
Hello all fellow wrenchers!! This is my first post, and I'm a newbie to the site.. I bought my son a 78 d150 2-wheel drive 5.2 318v8 2-bbl carb, all stock! and all original..(matching numbers on engine and trany.)
Seemed pretty gutless when we got it, so did the normal tune-up to her (cap,rotor,wires,plugs,filters) we also put a new carb on her.
Although it didn't really seem to help much.(took a slight miss out of her, thats it.) he has been driving it back and forth to work for around 3-months.
He drove it to work 3 days ago, parked it, worked the day, and when he got in her after work she would not start (cranks over fine, just would not fire-up)
I know for the most part "Fuel & Fire" are the 2 main ingredients on any engine to make her come to life....So I checked for fuel to carb and its getting fuel, so I moved on to fire. I pulled a spark plug wire off and put a screw driver in it and held it 1/4" from metal while son turned it over and NADA!! So, long story short (yea right,haha) We have over the last 3-days replaced EVERYTHING electrical ( starter relay, ignition switches, coil, fusible links, Re-manufactured distributor.)
The bad part is while I was at work, my son, replaced the distributor himself!!(he is 17 years old) I asked him if he marked it? and if he paid attention to the rotor location when he replaced it and he said that he did....The Good news is we have fire now...Bad news is it wont fire up...So I told him it sounded like it was 180 out. so, I told him to pull the dist. and turn it half-way and put back in and he should be good to go...well, he said he did that, and it still will not fire up...tries to, but wont...And, he said it will spit out the carb every now and then also while trying to start.... So, I thought that maybe the timing chain skipped a tooth or two....So, I just told him we should go ahead and re-place the timing gears and chain anyway, because that was probably why it was so gutless because the chain was so stretched out (even if it didnt skip a tooth) Well I have her all torn apart now, and the chain does have alot of slack in it...But, when the markes on the gears are lined up ( cam gear 6 oclock and crank gear at 12-noon.) the #1 piston is not/never TDC.. And if I keep turning crank so that the #1 piston is TDC, then the cam gear is at 12-oclock instead of 6-oclock?? no matter how many times I turn crank over, the #1 piston is never TDC with the cam gear at 6 oclock....So, now Im confused.. I don't know if its timing issue or not at this point..And it does not look like the gears skipped any teeth or the #1 piston would not be TDC with rotor pointed to the #1 piston right???? Or, have I just had to many beers at this point and Im missing something??? Sorry for being so long winded. But, any advise would be GREATLY appreciated.....Thanks in advance for any help...
 09-16-2012, 04:47 AM
#2
Admin
Welcome!
Do you have a service manual (factory or aftermarket is fine). If not, that would be the first thing I would get. Second thing is, setup the timing how it is supposed to be per the manual.
318 motors are known for skipping a tooth or two when the chain gets sloppy, it happens. Once you get the timing/TDC correct, make sure to install the wires correctly. It only takes two wires to be in the wrong locations on the dizzy to get the motor to not fire.
The following users liked this post:
oldiebutgoodie (09-17-2012)
09-16-2012, 07:39 AM
#3
Mopar Lover
Welcome!yea check the wires for mix up and set the timing chain and gear like it says in the manual making sure the tdc is on the right stroke other than that it sounds like ur on the right track
Do you have a service manual (factory or aftermarket is fine). If not, that would be the first thing I would get. Second thing is, setup the timing how it is supposed to be per the manual.
318 motors are known for skipping a tooth or two when the chain gets sloppy, it happens. Once you get the timing/TDC correct, make sure to install the wires correctly. It only takes two wires to be in the wrong locations on the dizzy to get the motor to not fire.
318 motors are known for skipping a tooth or two when the chain gets sloppy, it happens. Once you get the timing/TDC correct, make sure to install the wires correctly. It only takes two wires to be in the wrong locations on the dizzy to get the motor to not fire.
The following users liked this post:
oldiebutgoodie (09-17-2012)
09-16-2012, 08:43 AM
#4

You are incorrect in your assessment of TDC
First, what is your definition of TDC?
Do you mean the piston is simply "up" or do you mean the piston is up AND the no1 valves are closed, IE compression stroke, ready to fire?
HERE is the thing the BOOKS do not tell you. When you align the timing marks on a cam drive "by the book" on a typical US V8, and that is, crank at 12 o'clock, cam at 6 o'clock, marks aligned, THIS IS NOT placing no1 piston "ready to fire," but rather NUMBER SIX!!!!!
Most timing drives must be BOTH marks at 12 in order for no1 to be up and ready to fire
SO with the marks at 6 and 12, the piston IS up on both no6 and no1, it's simply that no1 is not on the compression stroke.
Install the cam, 6 and 12, because this is easier to align and "see" that you are correct
Put the engine together, and install the distributor gear. With the timing marks at TDC you want the slot of the gear pointing to the first intake manifold bolt on the driver side. THIS HAS NOTHING to do with whether the engine will run, it simply sets up the gear so that the vacuum can and the "proper" plug tower will all be in order

Now you need to determine if you are "180 off" or not. There is no reason to fight this. To easily determine this, there are two ways:
1---Pull the no1 plug, stick your finger in the hole, and bump the engine until you START to feel compression. Watch the timing marks coming up and set the engine NOT at TDC, but rather where you want initial time, IE about 10BTC for a stock cam.
2--If you have either valve cover still off, bring the timing marks to 10BTC and look at the no1 and the no6 valves. One cylinder will have both valves CLOSED, and the other will have the two valves "about" equally OPEN. The cylinder which is closed is ready to fire. If no6 valves are closed, you can either plug the dist. in with the rotor pointing back, or rotate the engine one turn, to get no1 ready to fire. Plug the dist in pointing forward
Now mark the rim of the dist directly under the no1 plug tower, so that you don't have to argue with the cap. Rotate the dist RETARDED (cw on a small block). This is to get the "slack" out of everything. Now slowly bring the dist ADVANCED (ccw on a small block) until the rotor is near the mark you made, AND the reluctor tip is centered in the core of the pickup coil. This should be close enough that the engine will fire right up.
First, what is your definition of TDC?
Do you mean the piston is simply "up" or do you mean the piston is up AND the no1 valves are closed, IE compression stroke, ready to fire?
HERE is the thing the BOOKS do not tell you. When you align the timing marks on a cam drive "by the book" on a typical US V8, and that is, crank at 12 o'clock, cam at 6 o'clock, marks aligned, THIS IS NOT placing no1 piston "ready to fire," but rather NUMBER SIX!!!!!
Most timing drives must be BOTH marks at 12 in order for no1 to be up and ready to fire
SO with the marks at 6 and 12, the piston IS up on both no6 and no1, it's simply that no1 is not on the compression stroke.
Install the cam, 6 and 12, because this is easier to align and "see" that you are correct
Put the engine together, and install the distributor gear. With the timing marks at TDC you want the slot of the gear pointing to the first intake manifold bolt on the driver side. THIS HAS NOTHING to do with whether the engine will run, it simply sets up the gear so that the vacuum can and the "proper" plug tower will all be in order
Now you need to determine if you are "180 off" or not. There is no reason to fight this. To easily determine this, there are two ways:
1---Pull the no1 plug, stick your finger in the hole, and bump the engine until you START to feel compression. Watch the timing marks coming up and set the engine NOT at TDC, but rather where you want initial time, IE about 10BTC for a stock cam.
2--If you have either valve cover still off, bring the timing marks to 10BTC and look at the no1 and the no6 valves. One cylinder will have both valves CLOSED, and the other will have the two valves "about" equally OPEN. The cylinder which is closed is ready to fire. If no6 valves are closed, you can either plug the dist. in with the rotor pointing back, or rotate the engine one turn, to get no1 ready to fire. Plug the dist in pointing forward
Now mark the rim of the dist directly under the no1 plug tower, so that you don't have to argue with the cap. Rotate the dist RETARDED (cw on a small block). This is to get the "slack" out of everything. Now slowly bring the dist ADVANCED (ccw on a small block) until the rotor is near the mark you made, AND the reluctor tip is centered in the core of the pickup coil. This should be close enough that the engine will fire right up.
The following users liked this post:
oldiebutgoodie (09-17-2012)
09-17-2012, 06:27 PM
#5
Mopar Fan
Thread Starter
A special thanks to "78D200, Gorts 5th, and 440roadrunner...And thank you 440roadrunner for the great explanation and picture you gave me...And you where right on the money about me not totally understanding TDC (I thought as long as #1 cylinder was up, and the rotor was pointed at #1 wire on dist cap, that I was good to go!!) so thanks for that....
New Parts are ordered and will be here tue. so We will be putting her back together soon... I Got new ""Timing gears and chain, gasket kit, water pump, and a chilton book"" and the boy is going crazy with the flat high heat paint on parts...lol
I do have 1 question for 440roadrunner, you said, #1. Watch the timing marks coming up and set the engine NOT at TDC, but rather where you want initial time, IE about 10BTC for a stock cam. sorry, I didn't totally understand that part...might have something to do with you being light years ahead of me on mechanical knowledge, you think you could explain that part for me again?? Thanks....
09-17-2012, 09:52 PM
#6
Many times on the www and forums, you hear guys talk about setting a distributor in, and many say "bring up to tdc," etc
But if you set the dist. up with the engine at TDC, then THAT is approximately where the timing will BE, and it will in fact be pretty retarded.
ESPECIALLY when firing a new engine or one that has just gone together, you don't want to have to spend time arguing with timing.
My method is based, in fact, on such things as the "old VW bug" method, in which you static timed the engine with a test lamp. With the old bugs, you set the engine on the "marks" and used a 12V test lamp or buzzer across the points to see when they open. But read on, below, you really don't NEED a lamp, you can just "look" for a spark.
TIming these V8s is the same idea, except with breakerless distributors, you cannot use a test lamp
What you are trying to do is preset the timing as close as you can get to an actual runnable timing figure, IE 5 or 10* BTC for a fairly stock cam like a /6 or 318, or 10 or more for a little hotter cam like a 340 or 383/440 HP cam, or even more --15-20 for a real "thumper."
IN fact, once you learn this, and get good at it, you can even "trigger" the ignition to get it closer, (breakerless distributor, that is.)
The way I do it is this: Set up no1 ready to fire as I mentioned earlier.
Set up the dist "close" to firing, with the marks where you want timing, in the case of my Dart, 12-15* BTC
I turn the ignition to "run" and retard the dist, pull the coil wire, and either hook it to a grounded plug, or otherwise "rig" a spark gap. You don't actually have to SEE the spark, if it's quiet, you can HEAR it.
So starting with the distributor purposely retarded, you move the dist. housing toward advance until the ignition "triggers" and you hear the spark. You STOP just as quick as you can with dist. rotation, and note where the vacuum can is pointed for a physical reference
Then you do this a couple, three, or four more times --- back to retard, then move advanced, each time trying to slow down the dist. movement and each time trying to stop distributor rotation as soon as you hear the spark. You can get fairly close this way --- certainly close enough, that you can put timing out of your mind, and concentrate on other things, like fuel, the throttle, and looking for leaks, oil pressure, etc, as you fire it. This whole procedure back and forth, with practice, takes maybe, 30 seconds.
Things like this are ESPECIALLY important when installing a new cam, because you do not want to be cranking on the starter or arguing with the distributor trying to get the engine to run. You want that bitch to FIRE and RUN and then raise the RPM as the cam maker instructs so you can properly break in the cam.
The following users liked this post:
oldiebutgoodie (09-20-2012)
09-20-2012, 04:09 PM
#7
Mopar Fan
Thread Starter
maybe not timing after all!!
Well, I think I may have found the issue?? The green wire coming off the (-) coil post is not running/hooked up to anything!! Only the (+) post side wire off the coil is hooked up...green wire coming off the coil is not hooked up to anything!! and according to a diagram I have, it should be running to the #2 pin of the ECU?? (which is also a green wire) Can anyone confirm this for me?? I have the dual ballast set-up with the 5 pin ECU..when I asked my son about this he just says that "it was never hooked up to anything"?? (which I find highly unlikely) Can I just run a new wire off the #2 ECU pin to the -coil to verify this and see if she fires up???? also that same wire coming off the #2 ECU pin is tied in with a wire coming off the dual ballast plug, but neither is running to anything.... Im starting to think the solution to all this trucks problems now is to simply keep my boy out from under the hood of the truck...Im going to have to look-at and re-check everything now!!! Even though the timing chain needed replaced anyway, Im begining to think it was never the issue!!
Thanks again....
Thanks again....
09-20-2012, 05:18 PM
#8
EDIT. Didn't notice that you say you have the "dual ballast" Here is the simplified diagram from "MyMopar." Colors vary over the years. If you have no tachometer, there should only be ONE wire hooked to coil NEG, and you are correct, it should run directly to the ECU
Make sure the coil is NOT hooked up reversed polarity. Disconnect the ECU connector, and disconnect the wire hooked to coil POS. Turn the key to run, and check the voltage on that wire. You should have close to battery voltage at that wire. Even though this goes through the ballast resistor, there will be no load on the circuit, checking in this manner
(Wire colors may vary over the years)
Last edited by 440roadrunner; 09-20-2012 at 05:23 PM.
The following users liked this post:
oldiebutgoodie (09-22-2012)
09-22-2012, 04:34 PM
#9
Mopar Fan
Thread Starter
Well, Here is the latest and greatest...I confirmed there is spark at the plugs...I removed the ECU (new) cleaned the paint off the back and re-tightened to the firewall to make sure its grounded good...THE ONLY THING I found after searching wiring is there is a fusible link in the wire coming off the starter relay that runs to the starter that had a blown 30amp fuse in it...so I replaced it..BUT she still wont come to life...( although I do get a spark now at the positive cable when hooking it back up to + batt post, and before I did not.....I also ran a temporary wire from that (-) coil post (mentioned above) that was not hooked up to anything, to the #2 ECU pin...also, to no avail, she just still will not come to life...I do have a question though...I do still have everything off the front of the engine from re-placing the timing gears and chain (water pump is off, alt is off, power steering pump off, timing cover and fuel pump off...) but by manually squirting gas into the carb she would still fire up right?? I mean, I dont need any of the other items to make her run right?? (at least temporally anyway) I know you have to have water pump to cool engine, alt to charge batt, ect. but these items being off of it would not prevent it from starting, right??
Im just at a loss on this thing....And electrical issues have always stumped me in the past....I can rebuild an engine, but electrical issues has never been my strong point....I tried using a OHM meter to check items but get frustrated and confused fairly quick...I pulled the wires off one side of the dual ballast and checked with the key on, and I get 12.9-13.0 volts threw it.....also got 12.9 threw the green wire off ECU plug (disconnected from ECU) but nothing from any of the 4 other prongs.....I just do not know where to go from here, other than hanging my head low in defeat, and taking it to a shop somewhere:icon_confused:...unless someone can give me some kind of check list to go down to eliminate certain items, or can explain to me what/how to check important items with the OHM meter.....Also I just seen that in my first post I said "we replaced the ignition switches" when I should have said switch (not switches) we replaced the switch under the steering column, BUT NOT THE KEYED SWITCH ON THE COLUMN (tilt wheel) Anyone think this might be the issue??? and is there a easy way to test it to confirm it is good or bad??? mannnnny thanks if you can help me out!!!
Im just at a loss on this thing....And electrical issues have always stumped me in the past....I can rebuild an engine, but electrical issues has never been my strong point....I tried using a OHM meter to check items but get frustrated and confused fairly quick...I pulled the wires off one side of the dual ballast and checked with the key on, and I get 12.9-13.0 volts threw it.....also got 12.9 threw the green wire off ECU plug (disconnected from ECU) but nothing from any of the 4 other prongs.....I just do not know where to go from here, other than hanging my head low in defeat, and taking it to a shop somewhere:icon_confused:...unless someone can give me some kind of check list to go down to eliminate certain items, or can explain to me what/how to check important items with the OHM meter.....Also I just seen that in my first post I said "we replaced the ignition switches" when I should have said switch (not switches) we replaced the switch under the steering column, BUT NOT THE KEYED SWITCH ON THE COLUMN (tilt wheel) Anyone think this might be the issue??? and is there a easy way to test it to confirm it is good or bad??? mannnnny thanks if you can help me out!!!
09-23-2012, 07:49 AM
#10
Mopar Fan
Thread Starter
OK. Take deep breaths & count to 10
I carefully read all chapter 5 in the Haynes book last night & think I have a better grasp on this electrical thing....I went to the parts store & got a adjustable "Ignition tester" o-40,000 volts with electrode tip to test if the spark is strong enough or to week at plug wires, also got a continuity tester with battery and light to check for shorts or breaks in any/all wires...also got a can of good ole STARTING FLUID which if my memory serves me right should tell me for sure if its a FUEL issue or ELEC issue....( If she fires-up with starting fluid its a fuel issue) I was also looking online at pictures under the hood on this truck and see that the coil should be mounted on top of the intake on passenger side by dist (its currently mounted on the firewall) unsure if this is relative in any way, other than maybe the coil is not being grounded correctly mounted on the firewall.....So, I have a few more things to check today before I throw in the towel (because I really dont want this thing to beat me)
09-23-2012, 11:09 AM
#11
One problem I have with you here is that I do not have a 78 wiring diagram, so when you say "a green wire," I can't relate
I found a 79 diagram, please confirm that your wiring is the same. Let's go through this one wire at a time Please go through yours and confirm this is correct.
1---Look at the ECU in the top of the diagram, top left terminal. This shows DARK GREEN goes down to the top left of the ballast
2---Top right terminal, BLACK goes to coil NEG
3---Far right terminal, RED comes from key and should be hot in "run"
4---Bottom left, BROWN/ WHITE stripe goes to distributor
5---Bottom right, GREEN, goes to distributor
At the Ballast, what is left, we have:
6---Top left, covered above
7---Top right PINK goes to coil + and also has a PINK wire which is hot ONLY in "start". This is known as "IGN2" or the ignition bypass. On older vehicles, this comes from the key. On some newer ones (this 79) it's a separate contact on the starter relay
8--Bottom right and bottom left should be hooked together, RED, should be hot 12V in "run" coming from the ignition switch
The following users liked this post:
oldiebutgoodie (09-23-2012)
The following users liked this post:
oldiebutgoodie (09-23-2012)
09-23-2012, 02:42 PM
#13
Mopar Fan
Thread Starter
Here is what I have done today so far.....Using starting fluid I dont even get a hic-up out of her, so I think I can rule out FUEL issue......After slowly taking it step by step as instructed by Haynes, this is what I know.....#1.) With key ignition on...I get 12.4 volts on the (+) coil post (with 12.7 at Batt)....#2.) again with key on, I also get 12.4 volts on the (-) coil post......#3.) again with key on, and with the 5 pin harness plug pulled off the ECU, I also get 12.4 volts on the #2 pin (black wire with yellow strip which runs to the (-) post of the coil...) #4.) I also checked resistance between cavities 4 & 5 pins of the ECU connector and get around 284 ohms (according to book, this is norm. or at least "within range") #5.) I also checked the ohms on the ECU itself (without harness plugged in) and get a reading off the #5 ECU pin ( so according to book ECU is good.)
But that is where the normal stops I think...The book says I should have around 12.4 volts at the #1 pin of the harness also (red wire) but there is nothing.....The book says that means there is "PROBABLY a short circuit between the ECU connector and the ignition switch" but the book does not elaborate any further...like which switch?? keyed switch or switch bolted to lower portion of column? and says nothing about how to check/test this (we did replaced the NON-keyed switch on the lower portion of the column)
but if I remember right the boy/son told me that the old switch he pulled off had a GREEN colored plastic housing, and the new one had a BLUE colored plastic housing (I don't know if the color of the switch is relative or not?? and the book says nothing about this at all)
Another Observation/Test I made myself is as follows.....
With the key ON, and ECU harness disconnected, and my meter set on 2000 ohms...
Pin #1 = 180-190 ohms
pin #2 = NOTHING
pin #3 = 180-190 ohms
pin #4 = NOTHING
pin #5 = NOTHING
With the key OFF, and ECU harness disconnected and meter set on 2000 ohms...
pin#1 = NOTHING
pin#2 = 180-190 ohms
pin#3 = NOTHING
pin#4 = NOTHING
pin#5 = NOTHING
I wanted to list here the color and placement of the wires coming off our ECU harness connector.....
#1 pin / red wire...splits off..one end goes to bottom left of ballast,other goes toward Dist.
#2 pin / black wire w/ yellow strip..running to (-) coil post..
#3 pin / green wire running to top left of ballast....
#4 pin / gray wire running to dist.
#5 pin / brown w/white strip running to dist.
Man o Man is my brain starting to hurt......lol
09-23-2012, 02:52 PM
#14
Mopar Fan
Thread Starter
Which is fine I think because, This engine does not have a EGR valve...It has a block off plate where one originally sat. (driver side next to carb on intake.) unless someone changed the intake out on it. EGR is just for Cali Emissions crap anyway right? so we dont need it? We are in Texas. They arnt probing up the tail pipes around here YET! thank goodness..
Last edited by oldiebutgoodie; 09-23-2012 at 03:22 PM. Reason: add
09-23-2012, 03:07 PM
#15
Mopar Fan
Thread Starter
One problem I have with you here is that I do not have a 78 wiring diagram, so when you say "a green wire," I can't relate
I found a 79 diagram, please confirm that your wiring is the same. Let's go through this one wire at a time Please go through yours and confirm this is correct.
1---Look at the ECU in the top of the diagram, top left terminal. This shows DARK GREEN goes down to the top left of the ballast
2---Top right terminal, BLACK goes to coil NEG
3---Far right terminal, RED comes from key and should be hot in "run"
4---Bottom left, BROWN/ WHITE stripe goes to distributor
5---Bottom right, GREEN, goes to distributor
At the Ballast, what is left, we have:
6---Top left, covered above
7---Top right PINK goes to coil + and also has a PINK wire which is hot ONLY in "start". This is known as "IGN2" or the ignition bypass. On older vehicles, this comes from the key. On some newer ones (this 79) it's a separate contact on the starter relay
8--Bottom right and bottom left should be hooked together, RED, should be hot 12V in "run" coming from the ignition switch
I found a 79 diagram, please confirm that your wiring is the same. Let's go through this one wire at a time Please go through yours and confirm this is correct.
1---Look at the ECU in the top of the diagram, top left terminal. This shows DARK GREEN goes down to the top left of the ballast
2---Top right terminal, BLACK goes to coil NEG
3---Far right terminal, RED comes from key and should be hot in "run"
4---Bottom left, BROWN/ WHITE stripe goes to distributor
5---Bottom right, GREEN, goes to distributor
At the Ballast, what is left, we have:
6---Top left, covered above
7---Top right PINK goes to coil + and also has a PINK wire which is hot ONLY in "start". This is known as "IGN2" or the ignition bypass. On older vehicles, this comes from the key. On some newer ones (this 79) it's a separate contact on the starter relay
8--Bottom right and bottom left should be hooked together, RED, should be hot 12V in "run" coming from the ignition switch
also, I was WRONG before about the green wire (It was merely a second wire that was also connected with the black wire w/ yellow strip going to #2 pin....I just didn't look close enough at it the first time!! I suspect it was some kind of axilluary wire someone put there in the past before we ever got the truck, for what I don't know? but don't think I need it....I also tried to add a few pics of my set up, etc. But Im having trouble adding pics to post. I must be cropping pics wrong via Picasso or something, cant get them to the allowable KBs....I will keep trying and get my wife to help me....
Last edited by oldiebutgoodie; 09-23-2012 at 03:15 PM. Reason: to add info
09-23-2012, 03:37 PM
#16
Mopar Fan
Thread Starter
almost forgot, With the adjustable spark tester tool I got, We do get spark, but it seems fairly week....its a yellow spark vrs the deep blue the tester says it should be, and stops arching at around 10,000 on the tool ( o-40,000 adjustable.) Although I do not know what this means?
09-23-2012, 05:17 PM
#17
Mopar Lover

No power at Red wire leads me to the firewall connector to the cab. Inside cab I show one Red wire to fuse panel, one Red wire to Ignition switch. My diagram shows it at #22, which doesn't mean much. I would find those Red wires and check for power on both sides of firewall first with sharp probe or pin to penetrate wire insulation. If you have power on the cab side, remove the firewall connector, inspect and clean.
That 0-40,000 is suppose to be amount of voltage to plug, jumping a larger gap is suppose to mean more voltage. They are a helpful diagnostic tool but your assesment of the colour is a far superior way to quickly see performance of spark.
That 0-40,000 is suppose to be amount of voltage to plug, jumping a larger gap is suppose to mean more voltage. They are a helpful diagnostic tool but your assesment of the colour is a far superior way to quickly see performance of spark.
Last edited by Coronet 500; 09-23-2012 at 05:24 PM.
The following users liked this post:
oldiebutgoodie (09-23-2012)
09-23-2012, 05:35 PM
#18
Mopar Fan
Thread Starter
getting closer with every wire checked!!!
OK, 440Roadrunner...Everything checks out per your list EXCEPT #3---Far right terminal, RED comes from key and should be hot in "run"====This red wire is not hot on run( key on.) did not check it while cranking over. So does this mean the key switch is bad?? (not the key tumbler, Right?? but the part that the key switch turns that has the wires running to it.....or even possibly a shorted wire in the column running up to switch? which Seems to be more common on older tilt wheel columns
I had an old 82 chevy trk that had a problem similar to this one time (also tilt wheel) along with a broke turn signal...It was cheaper to get a used column at the junk yard, and I just swapped out the entire steering column, which fixed all the problems....and saved me time and money..
I had an old 82 chevy trk that had a problem similar to this one time (also tilt wheel) along with a broke turn signal...It was cheaper to get a used column at the junk yard, and I just swapped out the entire steering column, which fixed all the problems....and saved me time and money..
09-23-2012, 05:48 PM
#19
Mopar Fan
Thread Starter
No power at Red wire leads me to the firewall connector to the cab. Inside cab I show one Red wire to fuse panel, one Red wire to Ignition switch. My diagram shows it at #22, which doesn't mean much. I would find those Red wires and check for power on both sides of firewall first with sharp probe or pin to penetrate wire insulation. If you have power on the cab side, remove the firewall connector, inspect and clean.
That 0-40,000 is suppose to be amount of voltage to plug, jumping a larger gap is suppose to mean more voltage. They are a helpful diagnostic tool but your assesment of the colour is a far superior way to quickly see performance of spark.
That 0-40,000 is suppose to be amount of voltage to plug, jumping a larger gap is suppose to mean more voltage. They are a helpful diagnostic tool but your assesment of the colour is a far superior way to quickly see performance of spark.
09-29-2012, 06:49 PM
#20
Mopar Fan
Thread Starter
Hey CORONET 500 & 440Roadrunner, I finally got time to work on the truck again today(sat) And My boy had 2 red wires BACKWARDS coming off the ballast resistor to ECU, coil harness.....Which is also why before I had 12v at both coil posts I suspect.... (Thanks SEAL to your cool jumper wire suggestion I figured it out..) I reversed the red wires and I got the 12v at one & the 6v at the other on the ECU plug. So I think we are good to go now...I will put everything back together on her tomorrow (hopefully anyway, supposed to rain all day tomorrow.) And she should fire right up!!!!
A special thanks to CORONET 500 & 440Roadrunner, as well as This post below (that I will cut and paste on here) that helped me figure it out........(Below post is from another site, but it might give more/additional insight for someone that's dealing with this same/similar kind of issue)
SEAL""In the run position you should have 12 volts at only 1 side of the resistor and 6-8 volts on the other side that feeds the coil. Do you have 12 volts at the resistor with the key in the run position? If you do there is a problem between the resistor and the #1 wire on the ECU. You could temporarily jumper this to test it if needed. If you don't there is a problem between the ignition (keyed) switch and the resistor or the switch is faulty. You can test this by temporarily jumping 12 volts to the resistor.""
The following 2 users liked this post by Coronet 500:
oldiebutgoodie (09-30-2012),
RacerHog (09-30-2013)
09-30-2013, 04:29 PM
#22

Questions
EDIT. Didn't notice that you say you have the "dual ballast" Here is the simplified diagram from "MyMopar." Colors vary over the years. If you have no tachometer, there should only be ONE wire hooked to coil NEG, and you are correct, it should run directly to the ECU
Make sure the coil is NOT hooked up reversed polarity. Disconnect the ECU connector, and disconnect the wire hooked to coil POS. Turn the key to run, and check the voltage on that wire. You should have close to battery voltage at that wire. Even though this goes through the ballast resistor, there will be no load on the circuit, checking in this manner
--------QUOTE END--------------------------------
1. Is this the same ECU pinout model for 79?
2. Existing wire is what?
3. How are the pins numbers and the flow process of the pins.
4. What is ballast bottom and what is ballast top?
I have plenty of diagrams and do not need any.
I run 2 hot wires to the ballast bottom pins at the bottom from a junction that the hot red wire thru firewall comes from. No spark.
(Wire colors may vary over the years)
The following users liked this post:
RacerHog (09-30-2013)

Thread
Thread Starter
Forum
Replies
Last Post
Moparkid
Engines, Exhaust and Fuel systems
12
10-20-2012 02:31 PM


