71 Charger rebuild


The following users liked this post:
Buffalojoe426 (02-10-2013)

The following users liked this post:
Buffalojoe426 (02-10-2013)

The following users liked this post:
Buffalojoe426 (02-10-2013)
 02-03-2013, 10:19 AM
#64
Administrator with a large ban hammer !

The following users liked this post:
Buffalojoe426 (02-10-2013)
The following users liked this post:
Buffalojoe426 (02-10-2013)
02-10-2013, 10:43 PM
#66
Mopar Lover
Thread Starter

Hello all.
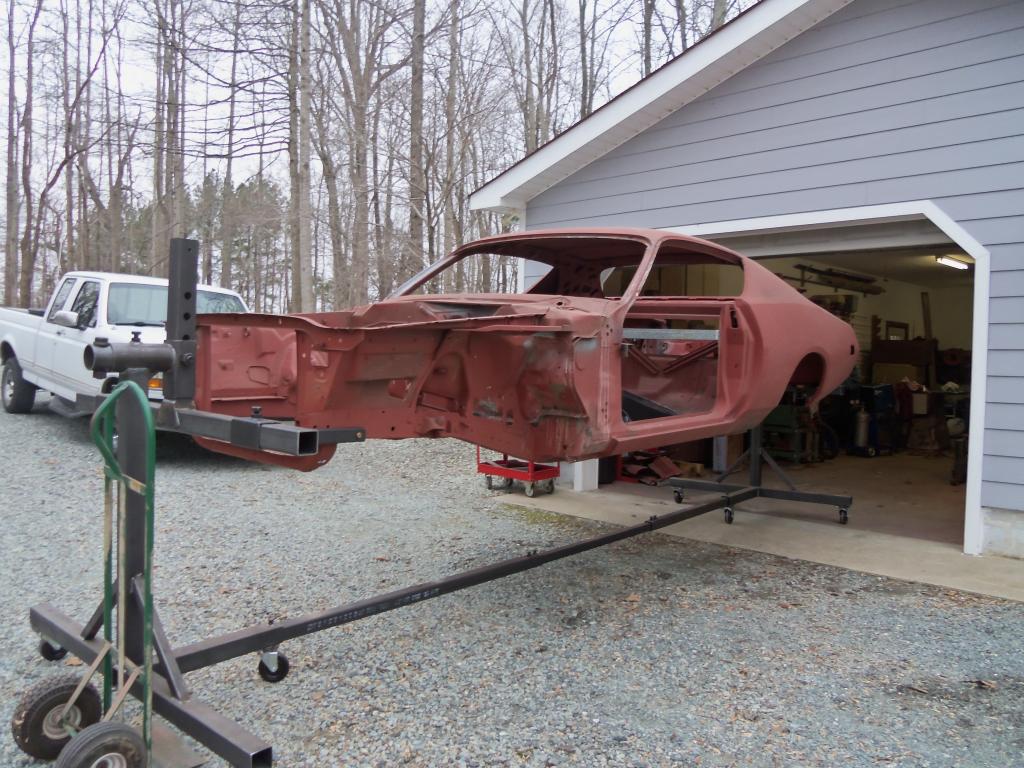
Ive been tide up at work for a while but I managed to get some things done on the charger. I got my sub frame connectors and torque boxes. After talking with some others in the area. I have decided to set the car back on its wheels with the doors and fenders on so I can ensure the body is straight enough to weld them in place.
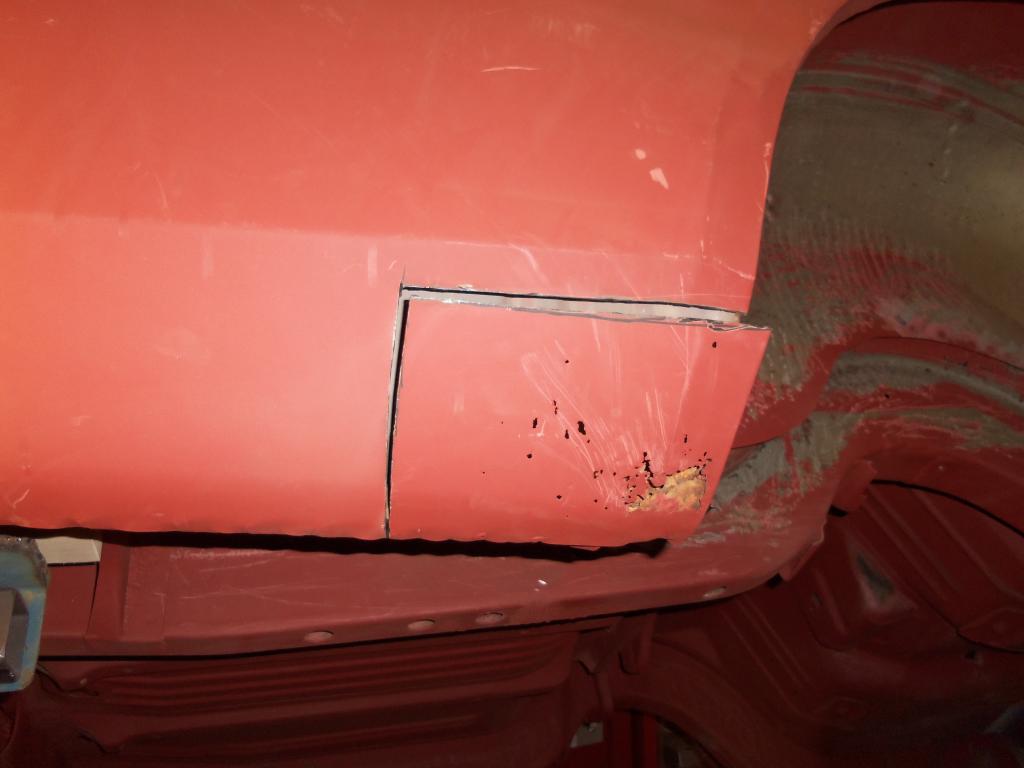
I also got the last patch panel I should need for the body. The only other thing I need to get is the tunnel shifter hump, for either a manual or auto on the floor. What ever I can find matched up to a 440.
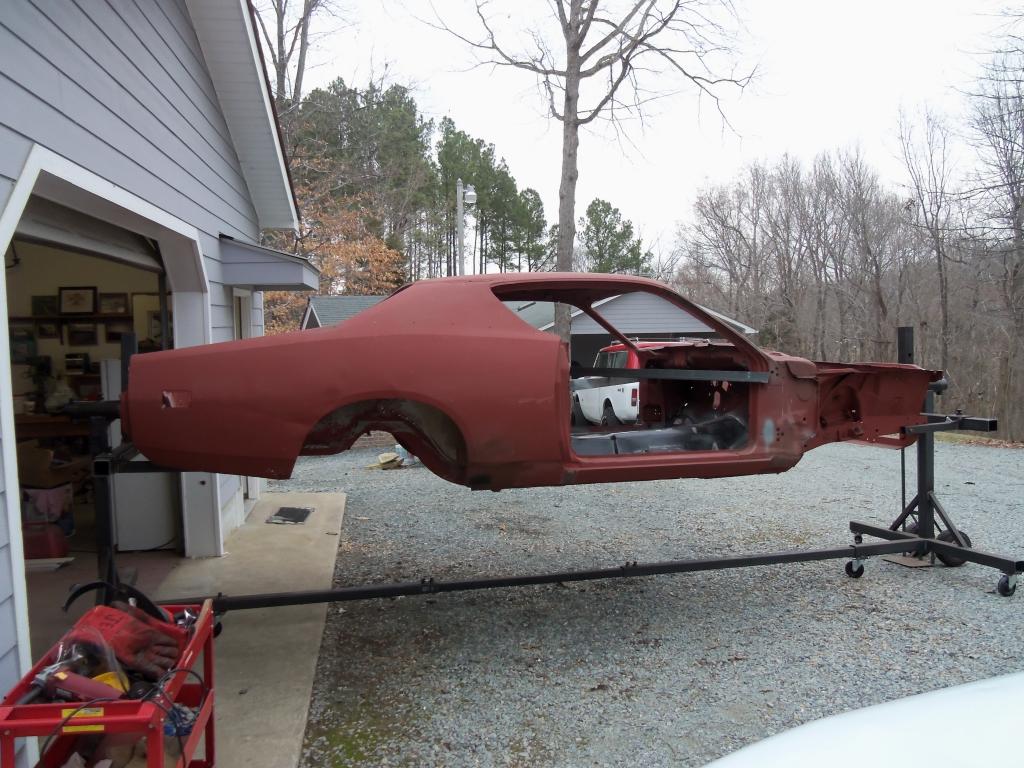
I took the car out side and blew most of the dust and sand out of it.
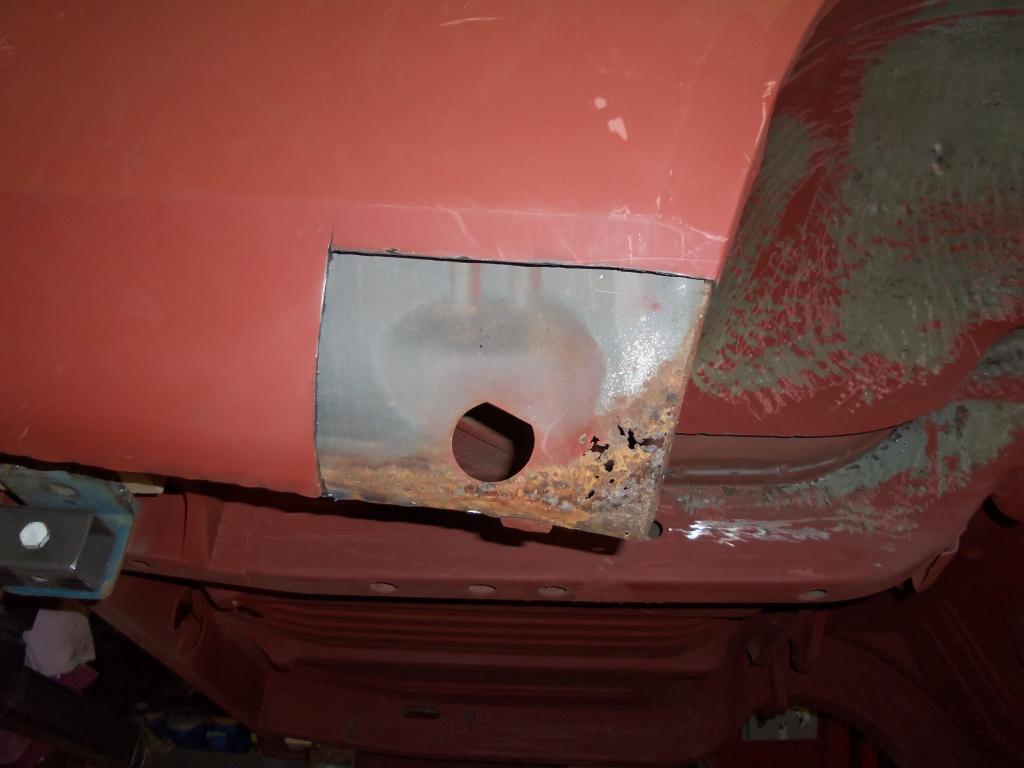
I then proceeded to cut out the last bad spot of rust.


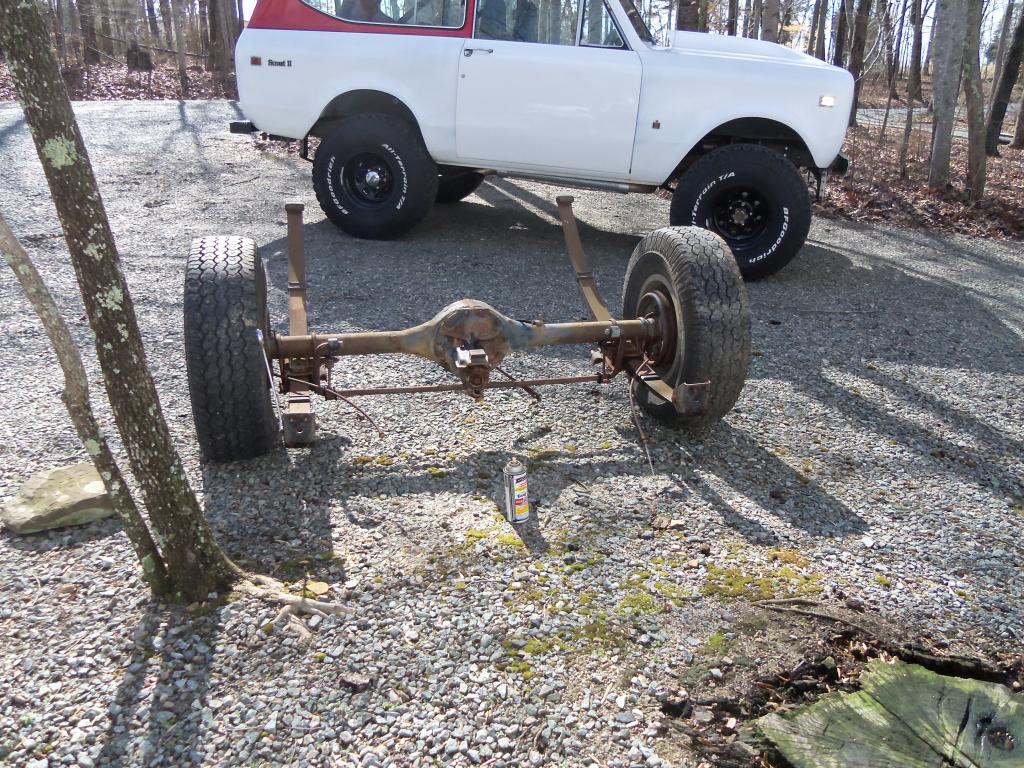
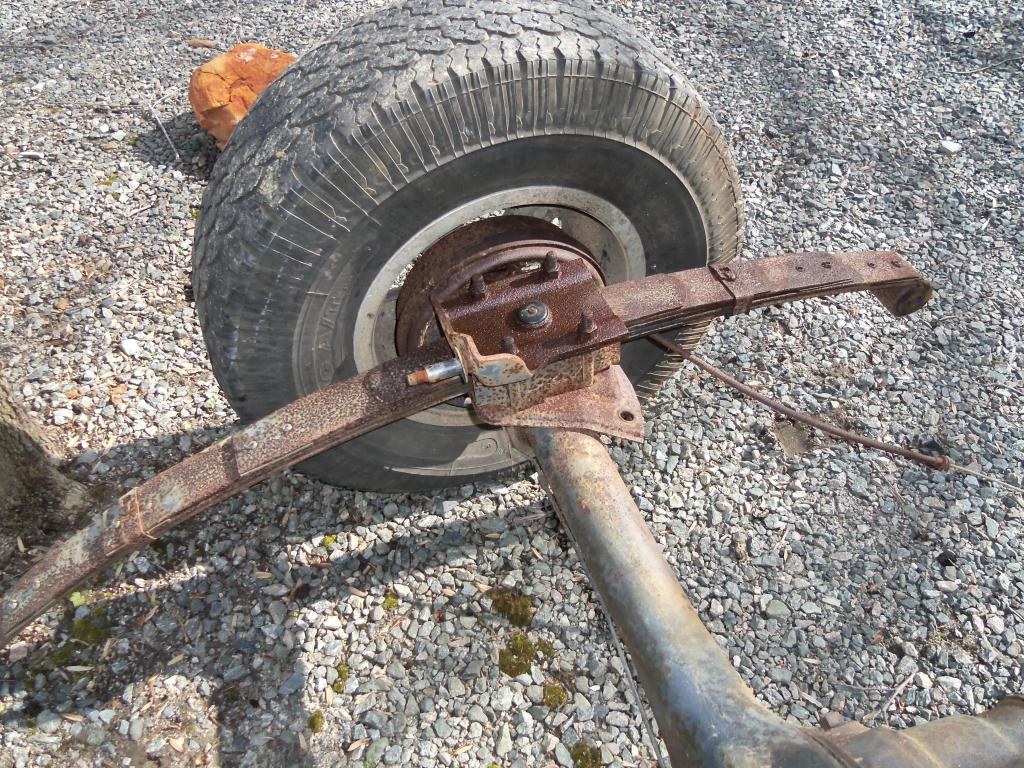
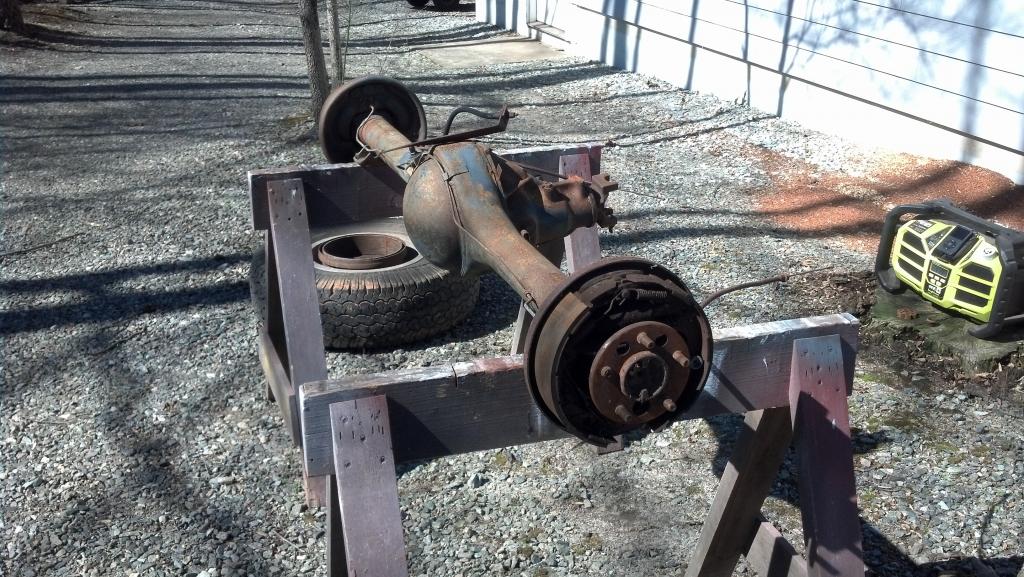
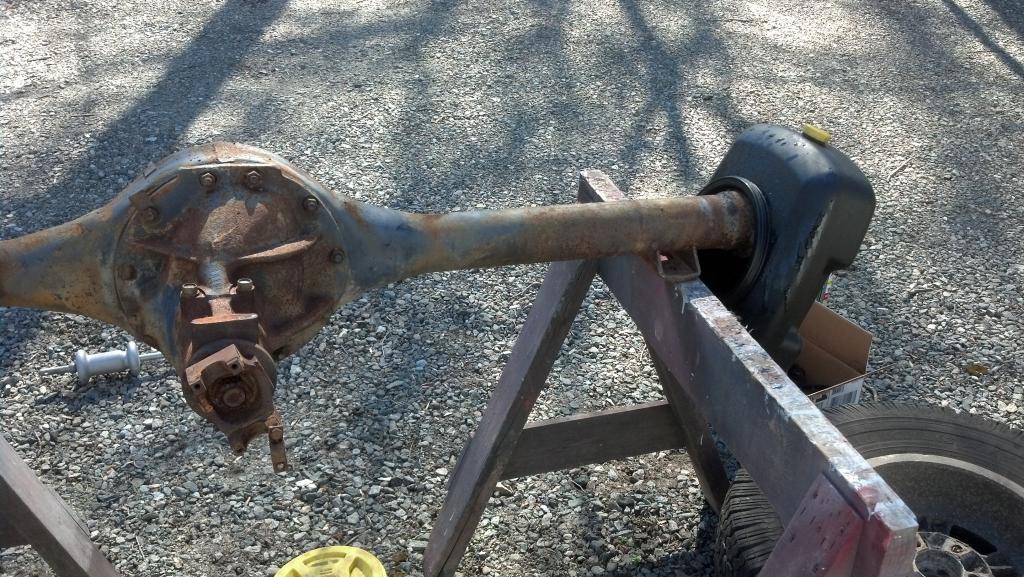
I also pulled the rear axle up to the shop and began stripping it.
Ive been tide up at work for a while but I managed to get some things done on the charger. I got my sub frame connectors and torque boxes. After talking with some others in the area. I have decided to set the car back on its wheels with the doors and fenders on so I can ensure the body is straight enough to weld them in place.
I also got the last patch panel I should need for the body. The only other thing I need to get is the tunnel shifter hump, for either a manual or auto on the floor. What ever I can find matched up to a 440.
I took the car out side and blew most of the dust and sand out of it.
I then proceeded to cut out the last bad spot of rust.
I also pulled the rear axle up to the shop and began stripping it.
The following 2 users liked this post by Buffalojoe426:
old tired rebel (02-11-2013),
PURPLE HORONET (02-10-2013)
03-05-2013, 05:54 PM
#67
Mopar Lover
Thread Starter
Hi every one! Its picture time!
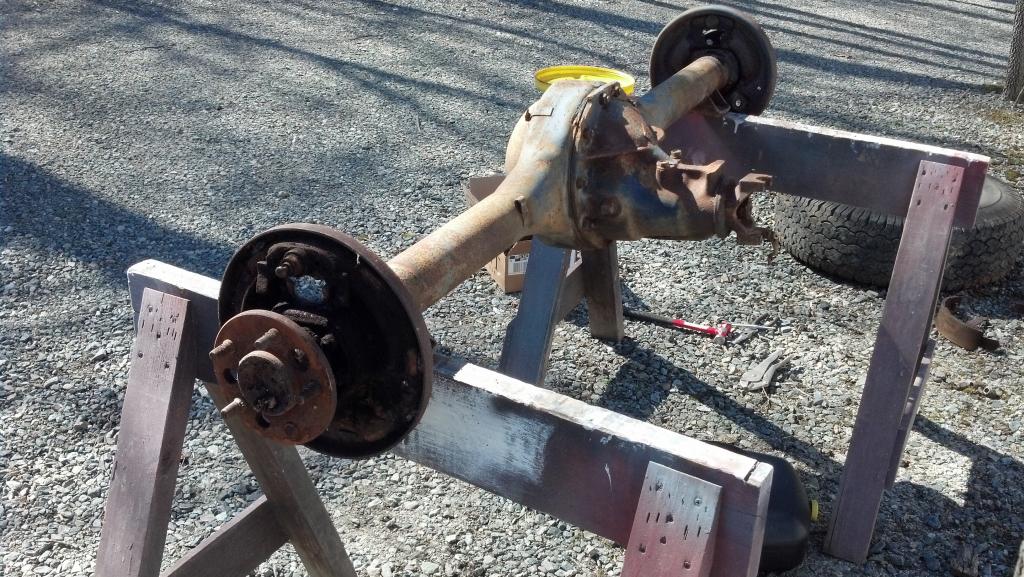
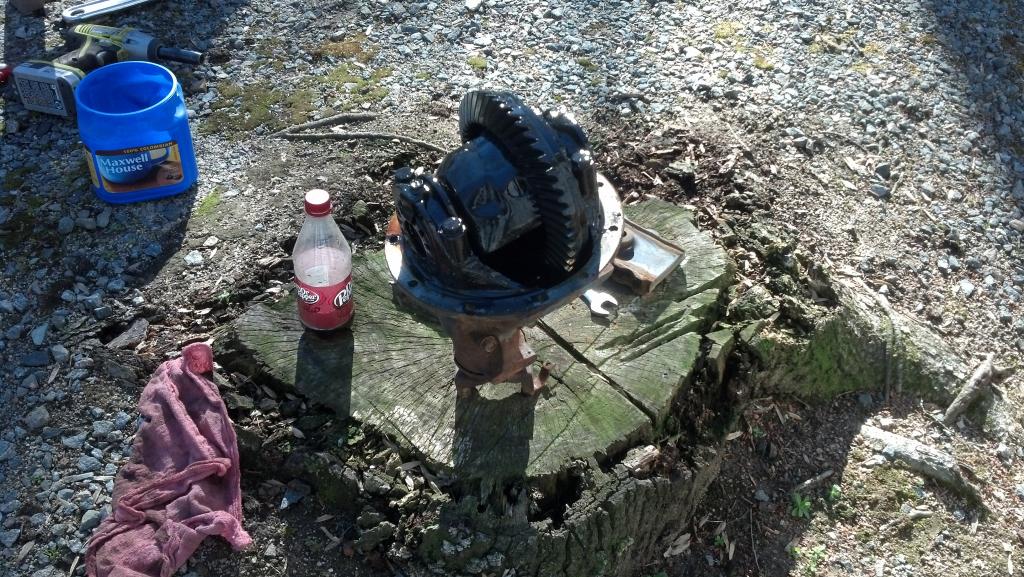
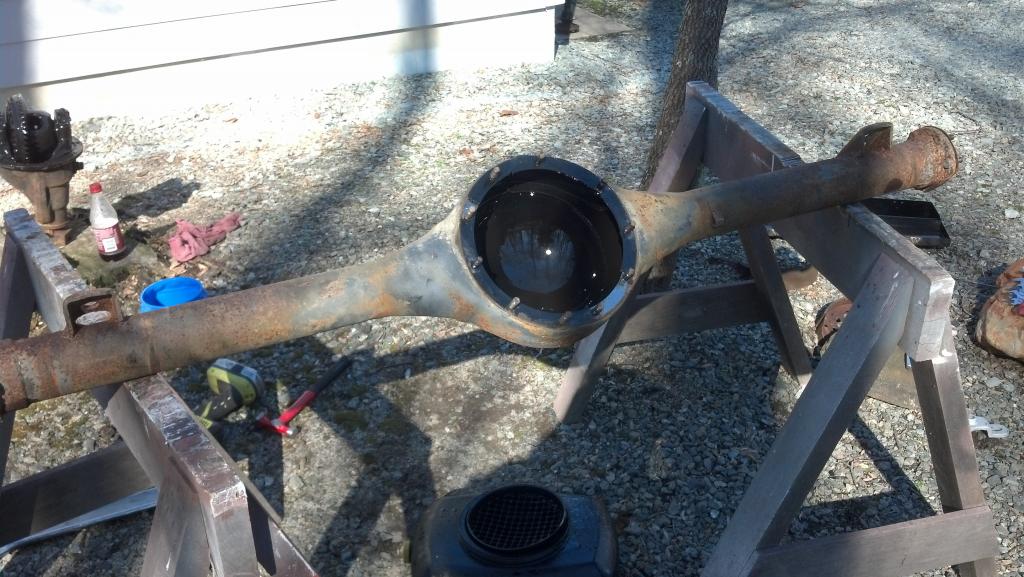
Due to limited space in the shop I shifted to stripping down the rear axle.
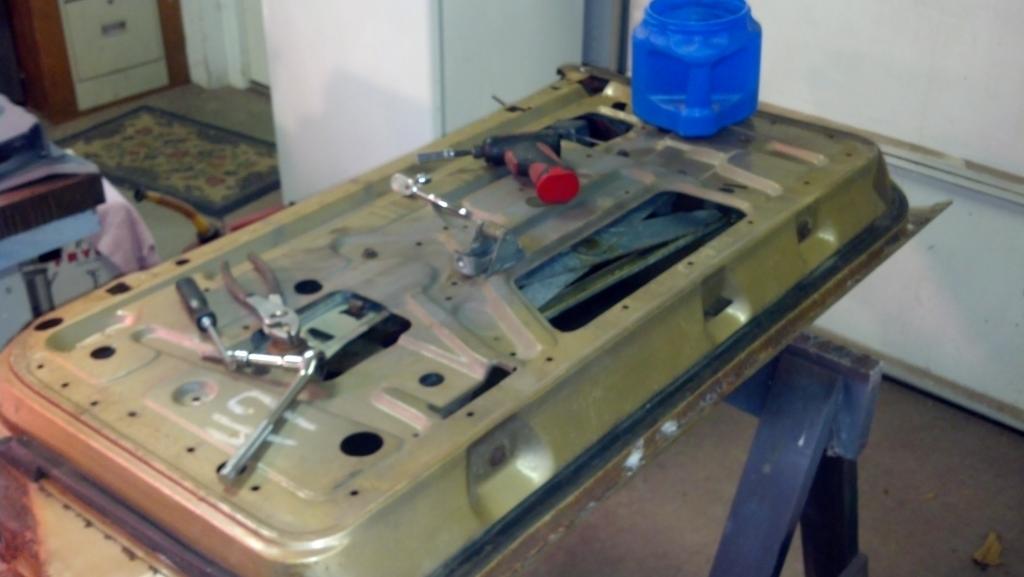
I also took the doors out of storage and started to strip them of hardware.
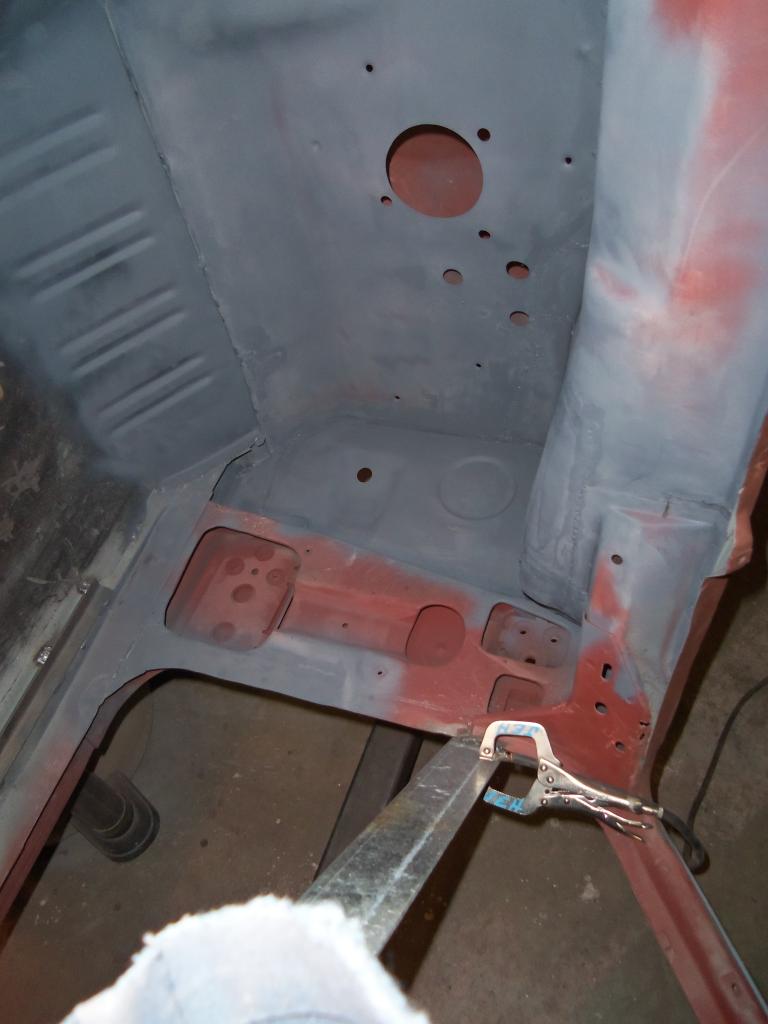
I started trimming and fitting the left sub frame connector.


Tacked it in a few places.
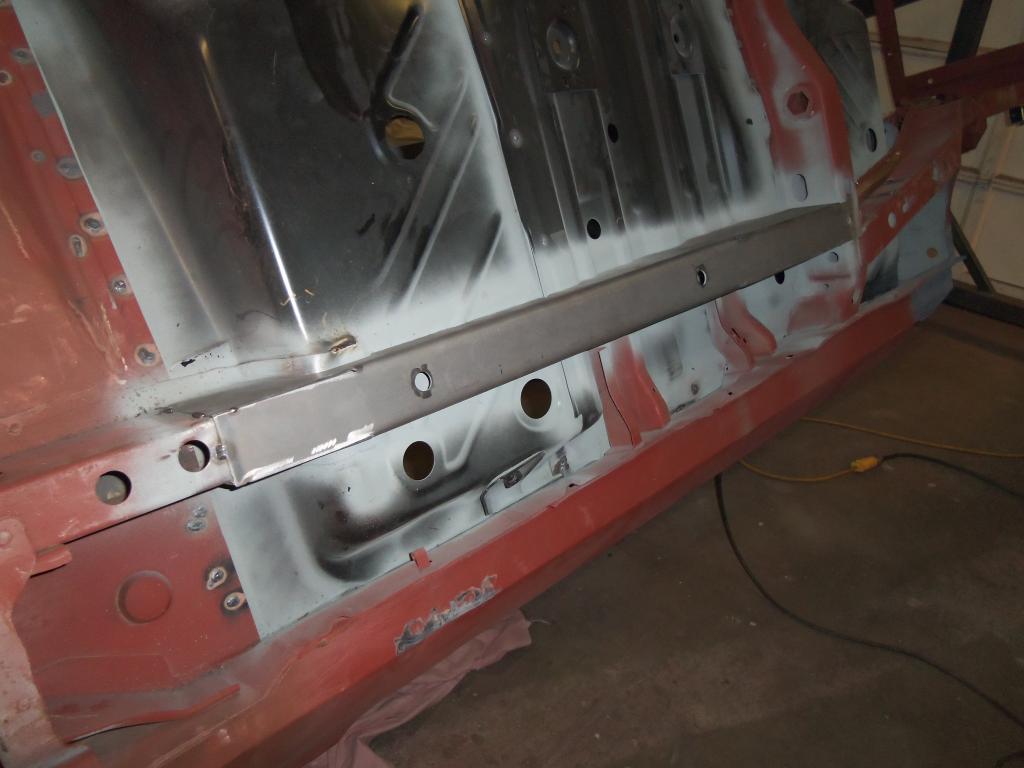
With a little time with the grinder, I got it fitting sung.
I'm waiting for the ground to dry out so I can take a load of steel to the scrap yard. I plan on using the money to blast the doors, hood, fenders, trunk lid, and the rear axle and springs.
Due to limited space in the shop I shifted to stripping down the rear axle.
I also took the doors out of storage and started to strip them of hardware.
I started trimming and fitting the left sub frame connector.
Tacked it in a few places.
With a little time with the grinder, I got it fitting sung.
I'm waiting for the ground to dry out so I can take a load of steel to the scrap yard. I plan on using the money to blast the doors, hood, fenders, trunk lid, and the rear axle and springs.
03-05-2013, 10:41 PM
#68

I have no idea whatsoever why your putting it that extra piece from the rear sub frame to the front subframe. The car as it is will handle a good 440. Add the sub frame to rocker brackets used on the hemi and convertable cars you would never twist the car at all.
Well that and your gonna have a hell of a time fitting in the parking brake cables.
Well that and your gonna have a hell of a time fitting in the parking brake cables.
03-06-2013, 07:53 PM
#69
Mopar Lover
Thread Starter
I have no idea whatsoever why your putting it that extra piece from the rear sub frame to the front subframe. The car as it is will handle a good 440. Add the sub frame to rocker brackets used on the hemi and convertable cars you would never twist the car at all.
Well that and your gonna have a hell of a time fitting in the parking brake cables.
Well that and your gonna have a hell of a time fitting in the parking brake cables.
03-06-2013, 09:54 PM
#70
Uhm okay. I'll just pretend I never saw this while I cringe in the corner.
Still have fun with the parking brake cables. You may want to mock those up into it now before you get painting as your gonna have to cut a groove in there to fit them and allow them to work.
Don't get me wrong you have done a sheer amazing job with the rest so far. I'm just more of the leave something stock type of person.
The following users liked this post:
Buffalojoe426 (03-07-2013)
03-07-2013, 08:31 PM
#71
Mopar Lover
Thread Starter
Uhm okay. I'll just pretend I never saw this while I cringe in the corner.
Still have fun with the parking brake cables. You may want to mock those up into it now before you get painting as your gonna have to cut a groove in there to fit them and allow them to work.
Don't get me wrong you have done a sheer amazing job with the rest so far. I'm just more of the leave something stock type of person.
Still have fun with the parking brake cables. You may want to mock those up into it now before you get painting as your gonna have to cut a groove in there to fit them and allow them to work.
Don't get me wrong you have done a sheer amazing job with the rest so far. I'm just more of the leave something stock type of person.
03-31-2013, 06:40 PM
#72
Mopar Lover
Thread Starter
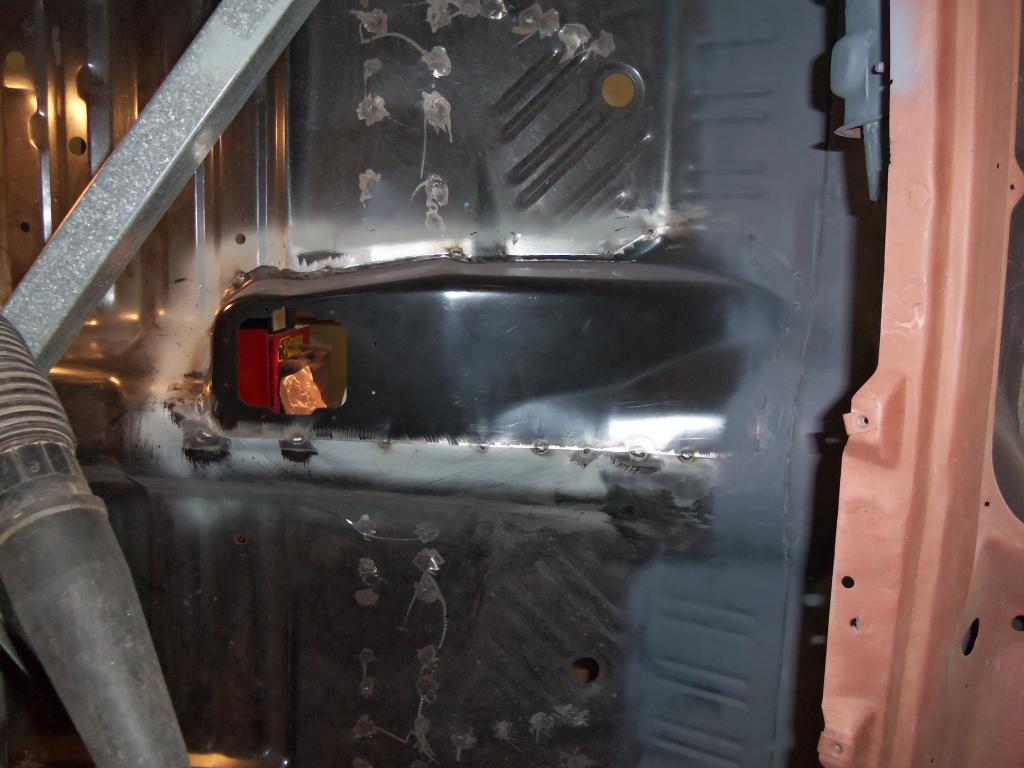
Haven't had much of a chance to work on the charger as of late. But I did get some work done on Wednesday.
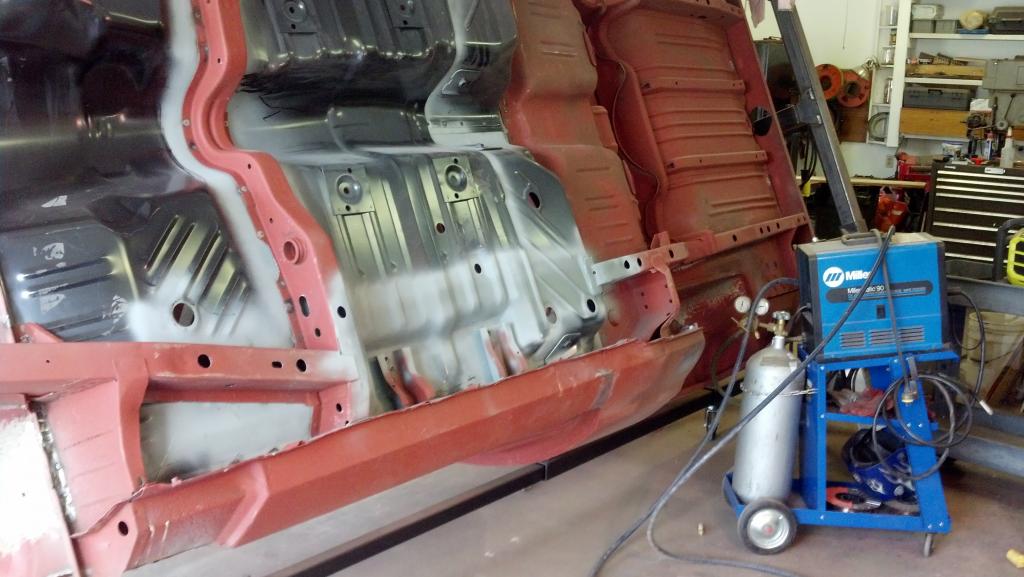
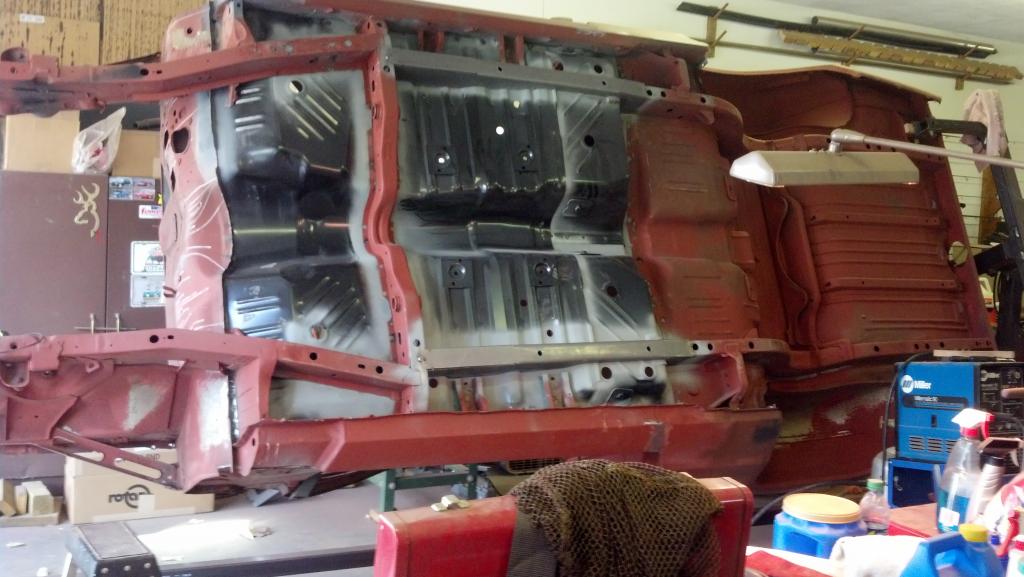
I got the other sub frame connector trimmed up and tacked into place. I also fix a few rust holes in the firewall. Then I ran out of gas for the welder, as well as time. However being that I got 7 days off this coming up week, I hope to get a lot done. I planned on doing more the last few weeks, but my Scout decided to commit suicide by cutting its own upper radiator hose and producing electrical problems. So Ive been busy getting it running again. I hope to get the rest of the car blasted and start fixin it.
I got the other sub frame connector trimmed up and tacked into place. I also fix a few rust holes in the firewall. Then I ran out of gas for the welder, as well as time. However being that I got 7 days off this coming up week, I hope to get a lot done. I planned on doing more the last few weeks, but my Scout decided to commit suicide by cutting its own upper radiator hose and producing electrical problems. So Ive been busy getting it running again. I hope to get the rest of the car blasted and start fixin it.
04-01-2013, 10:19 AM
#73
Woot a miller good choice but the tiny tank is a no no. There is a tank about the same height as a regular acetylene tank that seems to last longer. Not sure who you get your gas from but I find the co2 argon mix(called gold shield here) seems best. Just one word of advise. There manuals all say something like 'it welds best at 10 pounds pressure' set to 15 rust gives off oxygen as you weld it which on old cars is a given on most metals.
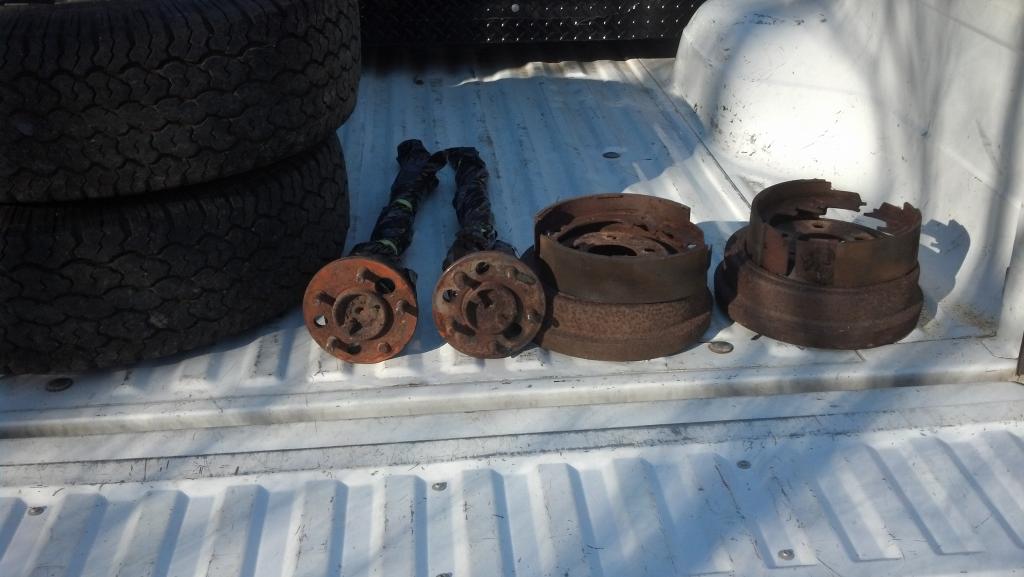
The rear axle looks like it has 10 x 2.5 drums missing the cooling springs. If its the 11 x 2.5 its good. If not upgrade them now. Trucks up to 88 had the same backing plates and drums, fined though. Some already had the larger bolt pattern though so you have to check to be sure.
One thing I should warn you about. Weld Thru primer does NOT protect the metal its only for welding and pretty much comes off it you look at it wrong. It's also expensive. Here we have a company called Rona, not sure if that is in the states or not. However they have a brand name rust paint that is acylic enamel. This has two advantages. One it has the same zinc in it that weld through primer has and two actually dries hard enough to prevent rust. It's a little interesting to weld with but when you get the hang of it you will be surprised at the result.
I apply wet and put into place then start welding. It flares up where you are welding and is easy to put out with an air blower. The good thing is by the time you finish your welds the weld itself is sealed. Usually the paint is also dryed to a hard surface too. Experiment with it first. Just a trick I learned years ago when I needed to put a floor in my k car. after 12 years that floor pan is still rock solid and rust free. The rest of the car isnt but that repair is.
The following users liked this post:
Buffalojoe426 (04-03-2013)
04-03-2013, 12:16 PM
#74
Mopar Lover
Thread Starter
Woot a miller good choice but the tiny tank is a no no. There is a tank about the same height as a regular acetylene tank that seems to last longer. Not sure who you get your gas from but I find the co2 argon mix(called gold shield here) seems best. Just one word of advise. There manuals all say something like 'it welds best at 10 pounds pressure' set to 15 rust gives off oxygen as you weld it which on old cars is a given on most metals.
The rear axle looks like it has 10 x 2.5 drums missing the cooling springs. If its the 11 x 2.5 its good. If not upgrade them now. Trucks up to 88 had the same backing plates and drums, fined though. Some already had the larger bolt pattern though so you have to check to be sure.
One thing I should warn you about. Weld Thru primer does NOT protect the metal its only for welding and pretty much comes off it you look at it wrong. It's also expensive. Here we have a company called Rona, not sure if that is in the states or not. However they have a brand name rust paint that is acylic enamel. This has two advantages. One it has the same zinc in it that weld through primer has and two actually dries hard enough to prevent rust. It's a little interesting to weld with but when you get the hang of it you will be surprised at the result.
I apply wet and put into place then start welding. It flares up where you are welding and is easy to put out with an air blower. The good thing is by the time you finish your welds the weld itself is sealed. Usually the paint is also dryed to a hard surface too. Experiment with it first. Just a trick I learned years ago when I needed to put a floor in my k car. after 12 years that floor pan is still rock solid and rust free. The rest of the car isnt but that repair is.
Im actuall trying to work the parking break cables past the subframe connectors today. Unforutanly all I have on hand is a mulit year/model Chrysler book. My other littitature is in Durham. I got all of the parking break componets down from storage, howerver I have totaly no Idea how it is routed. Do you have a diagram on how they are routed? Thanks!!
04-03-2013, 03:07 PM
#76
The parking brake cable system comes two ways. I cant remember which your car has though. The first is comes through the drivers side center rail on the outside of where your new center rail is. This points to the passenger wheelhouse. Another cable attaches to this that goes directly to the inside of the rear rail. The end of the cable has a section of 5/16 course thread and a locking nut. This goes into a wing clip where the two rear cables from the axle. The two cables are hooked into a bracket welded to the inside of the rear frame of the car.
The second method is a little more complicated as the cable from the inside of the car ends in a threaded cable that sits in the middle of the car. There is a small angled piece of metal that hooks over another cable. This cable has another hook from the passenger side of the car. From the rear on each side of the car is the cables from the rear axle into small brackets welded to the inside of the frame. There is a cable that runs from one rear axle cable through the front drivers side hook, the passenger front hook that the other rear axle cable. The adjustment is on the front cable. Little more work.
The second method is a little more complicated as the cable from the inside of the car ends in a threaded cable that sits in the middle of the car. There is a small angled piece of metal that hooks over another cable. This cable has another hook from the passenger side of the car. From the rear on each side of the car is the cables from the rear axle into small brackets welded to the inside of the frame. There is a cable that runs from one rear axle cable through the front drivers side hook, the passenger front hook that the other rear axle cable. The adjustment is on the front cable. Little more work.
04-04-2013, 01:38 PM
#77
Mopar Lover
Thread Starter
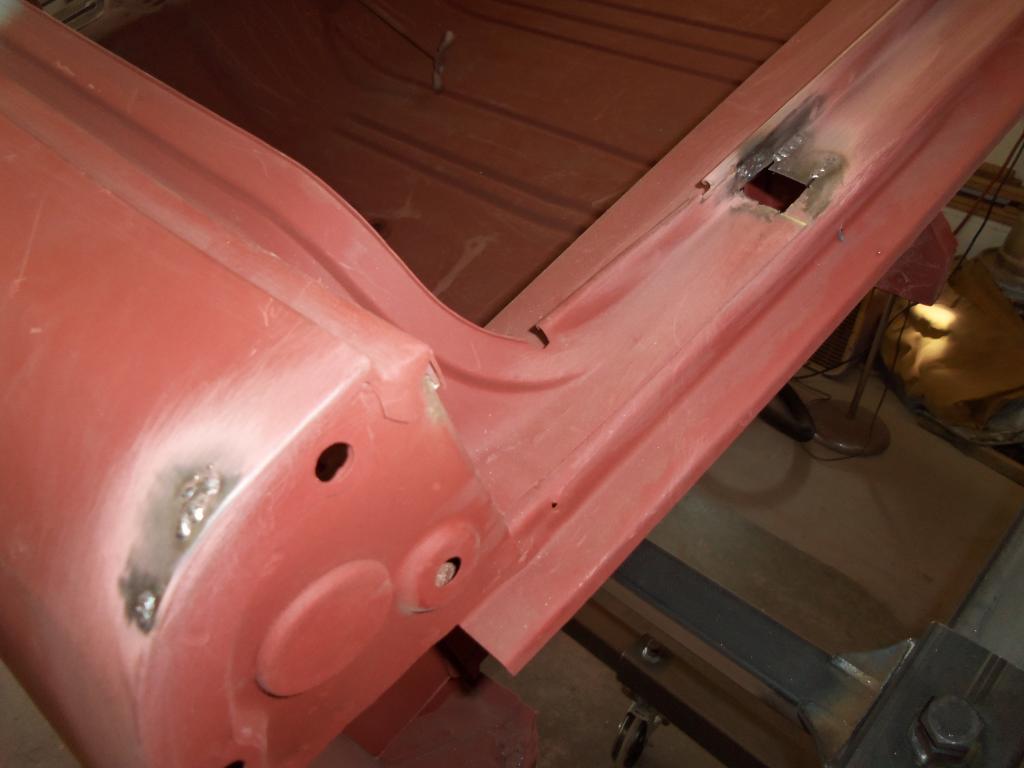
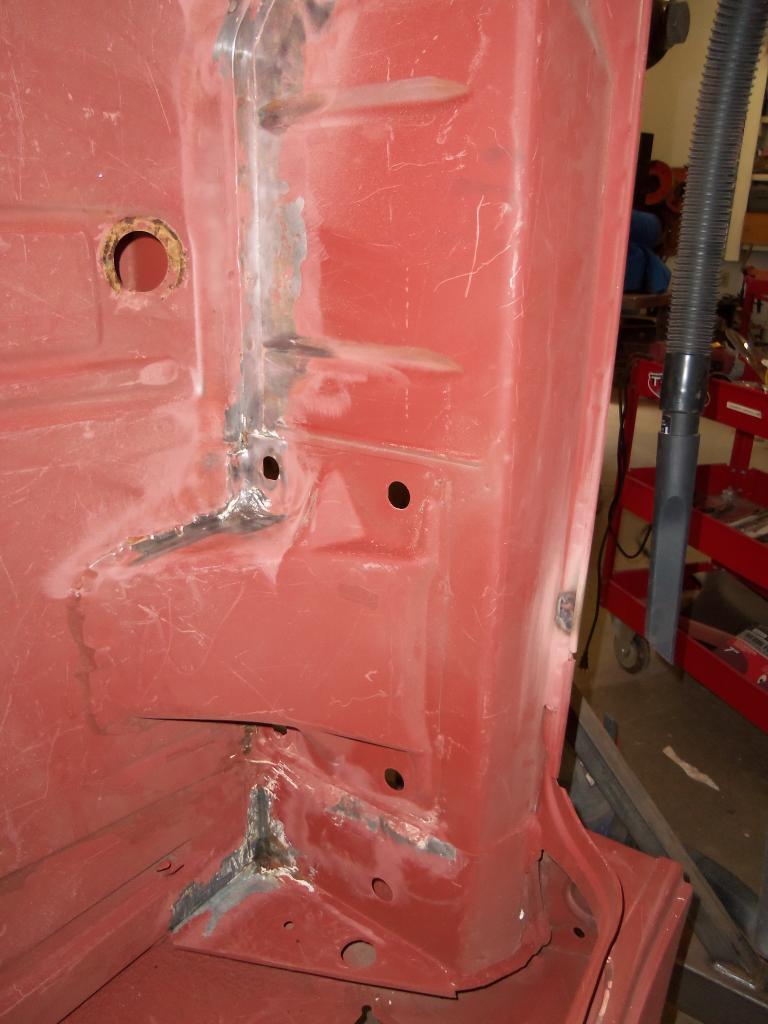
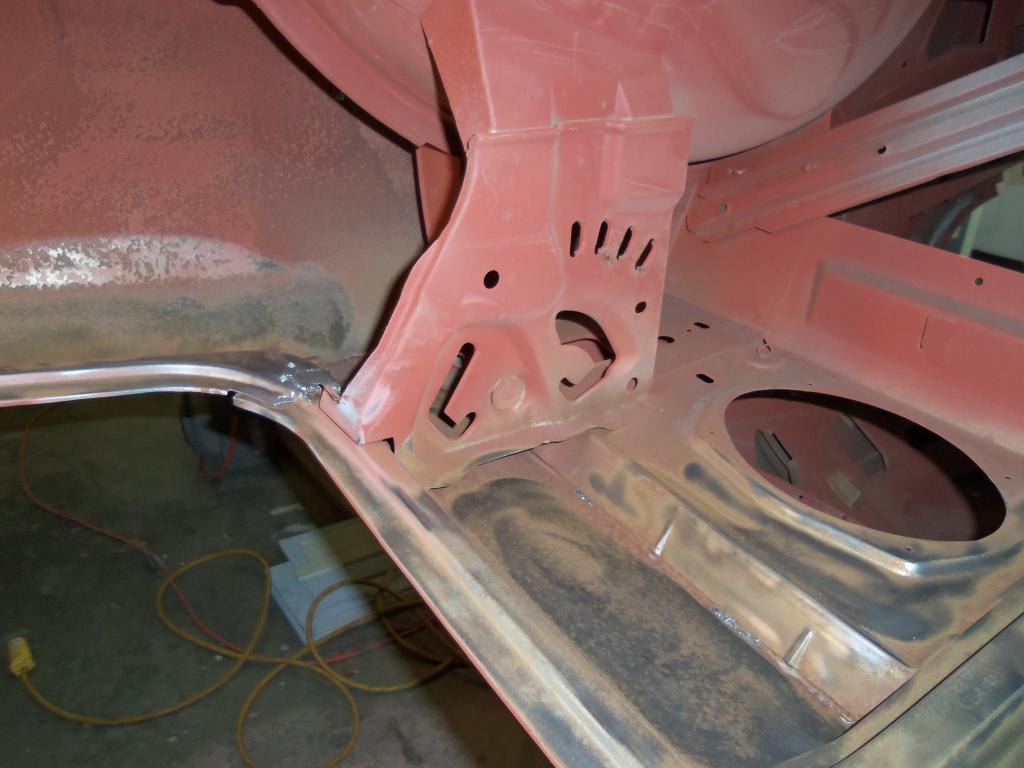
Got some pictures!
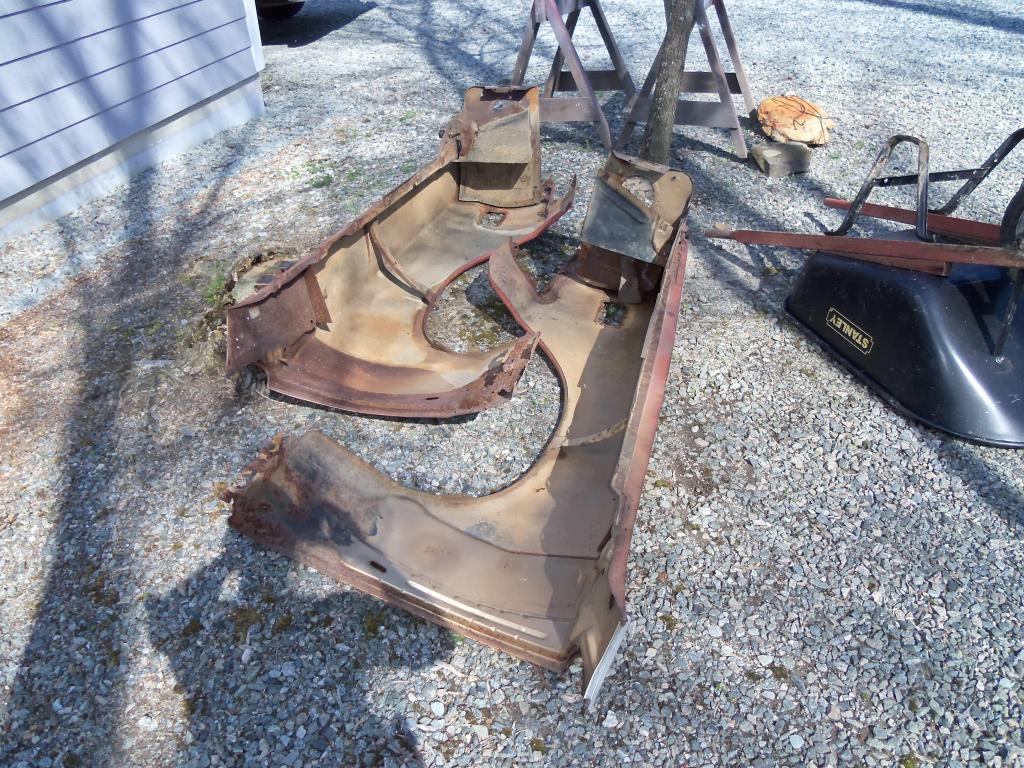
Got the Fenders down from storage!
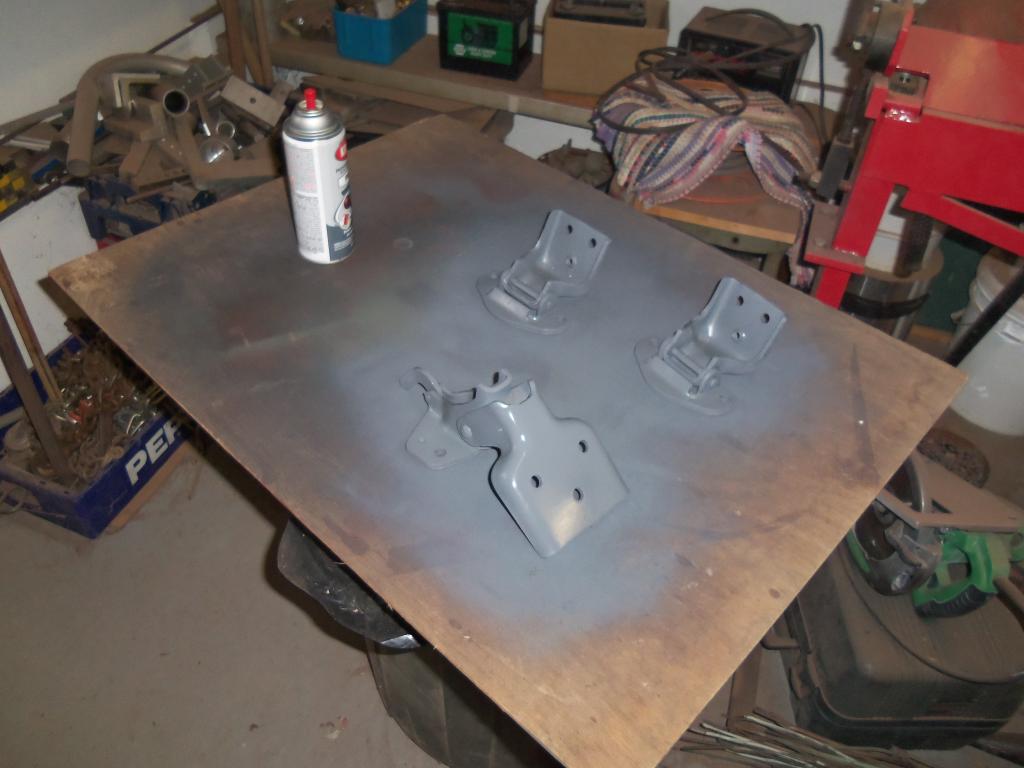
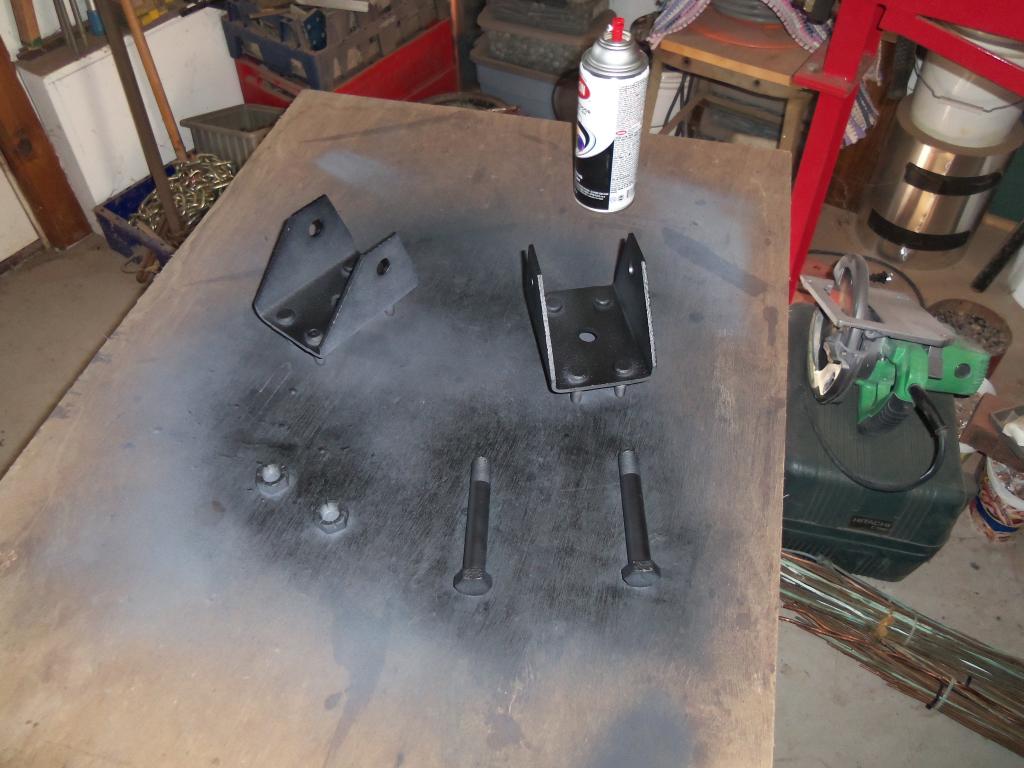
Sand Blasted and primed up some door hinges.
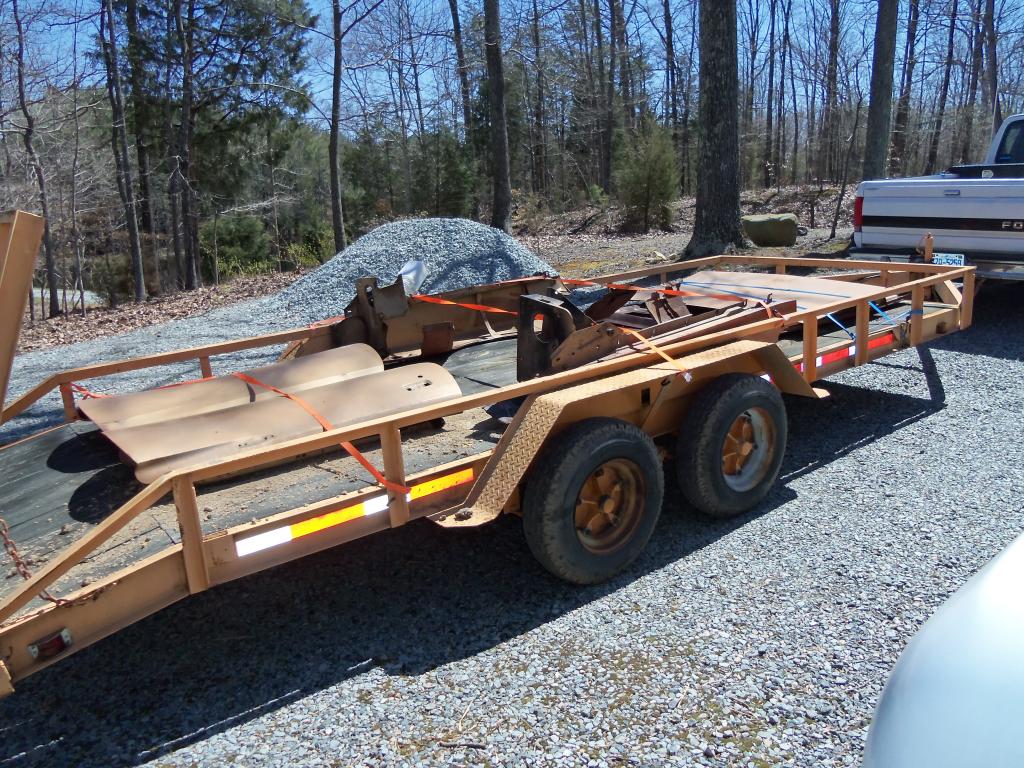
Got every thing loaded to go to the blasters!
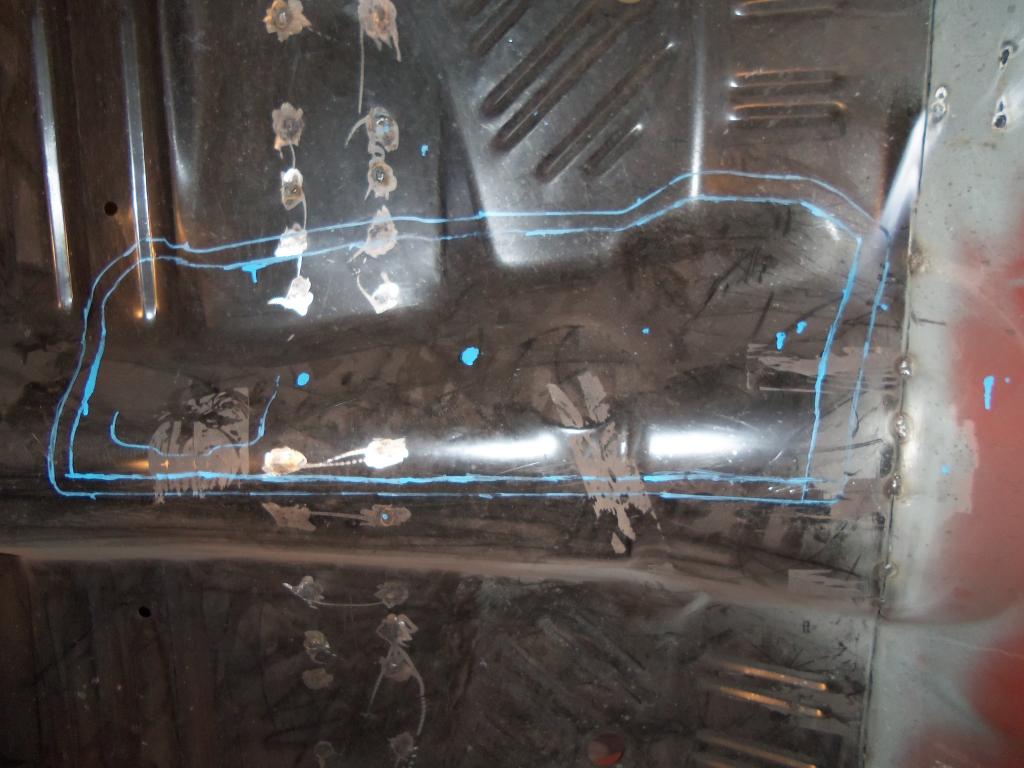
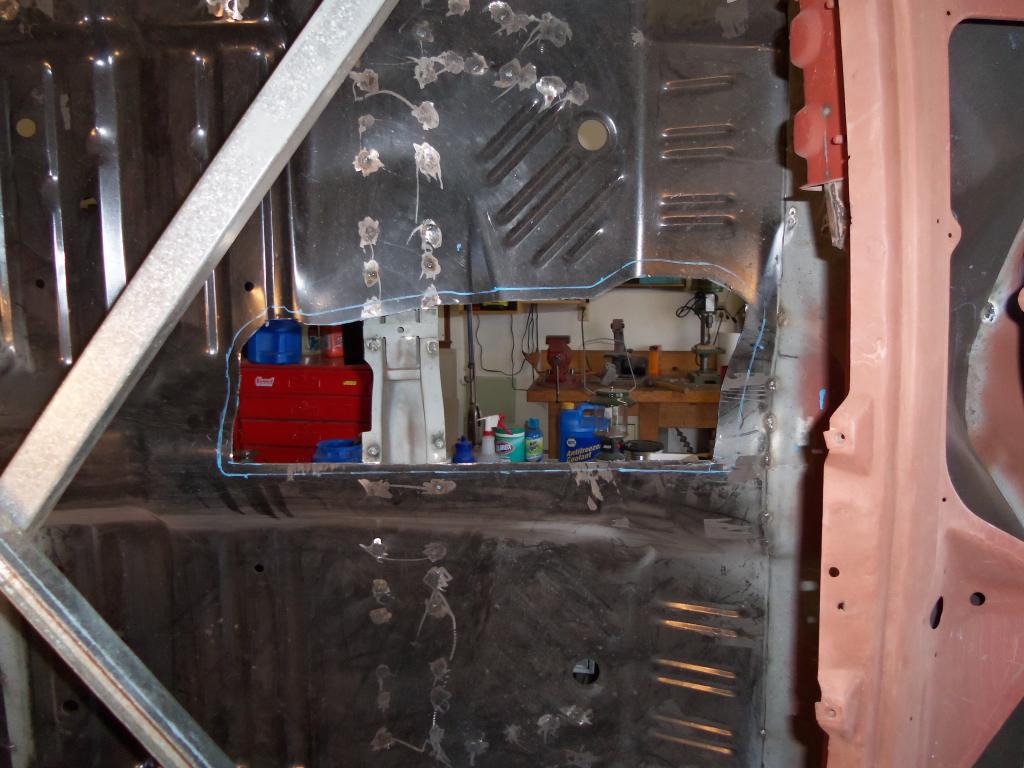
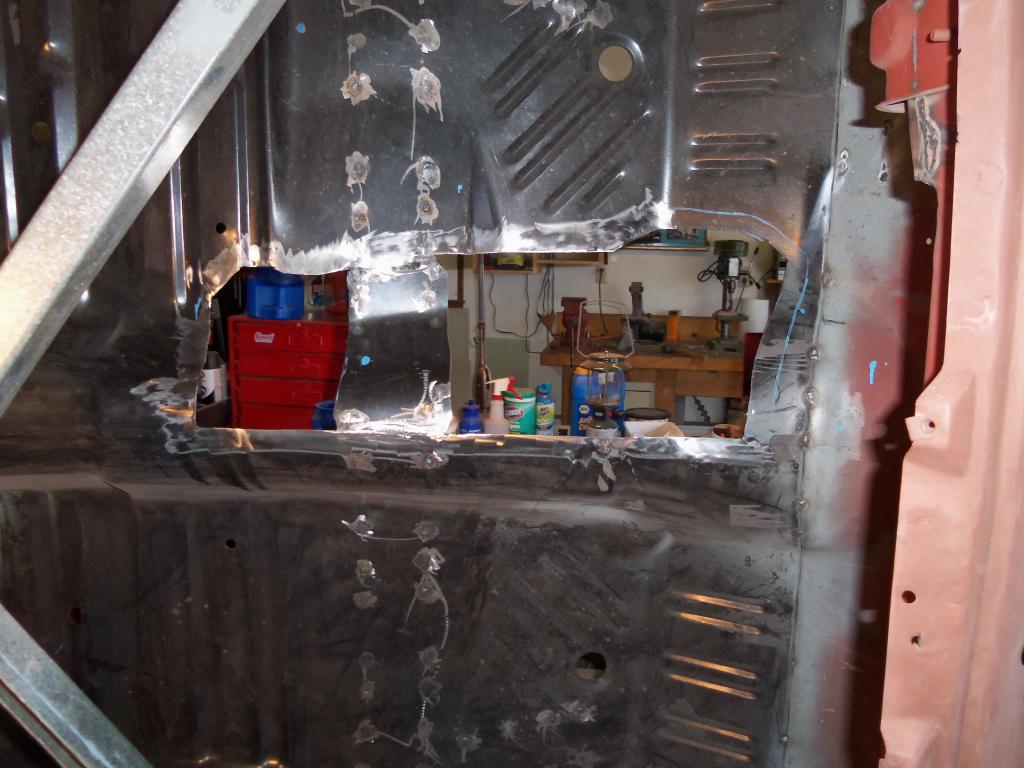
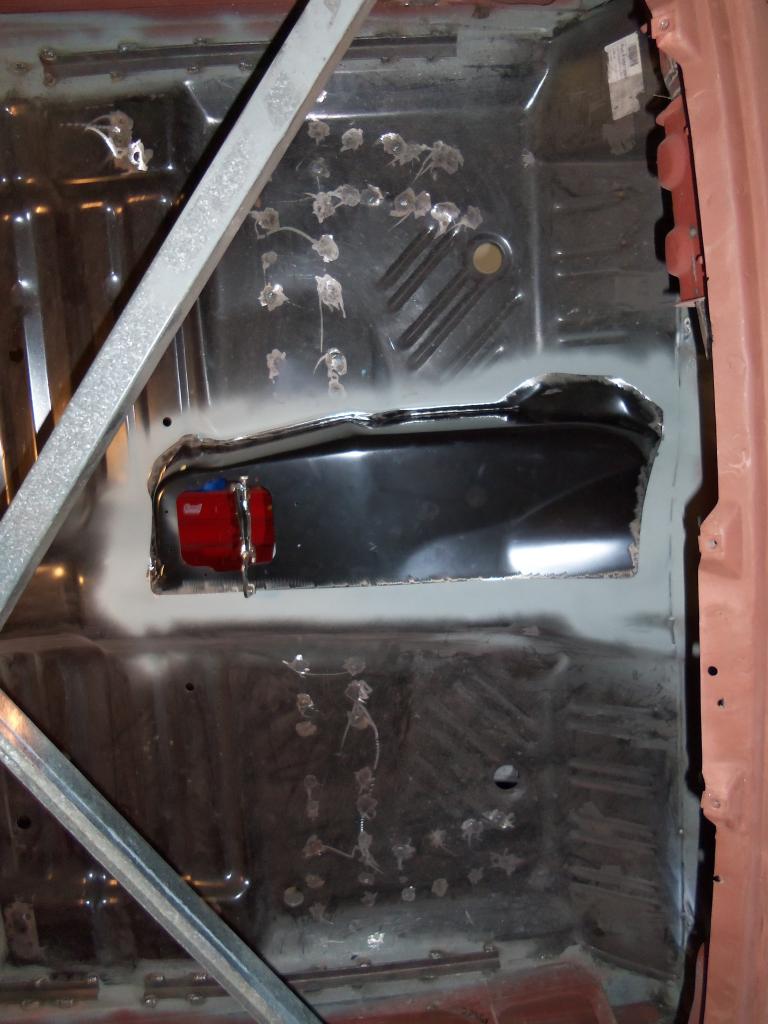
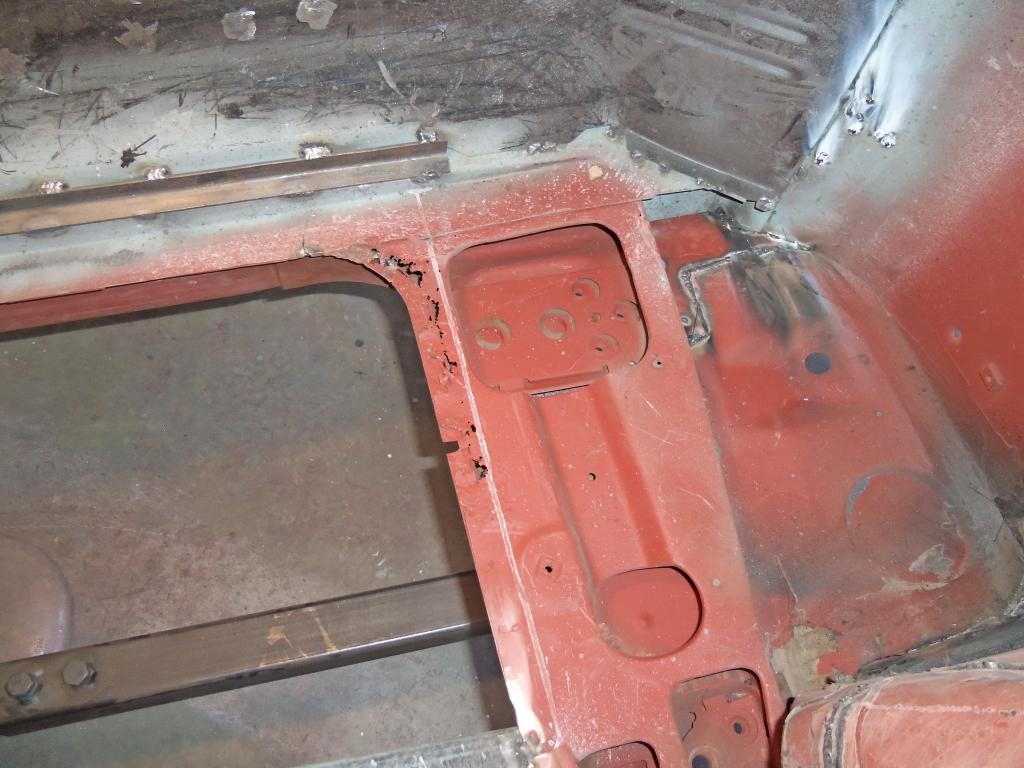
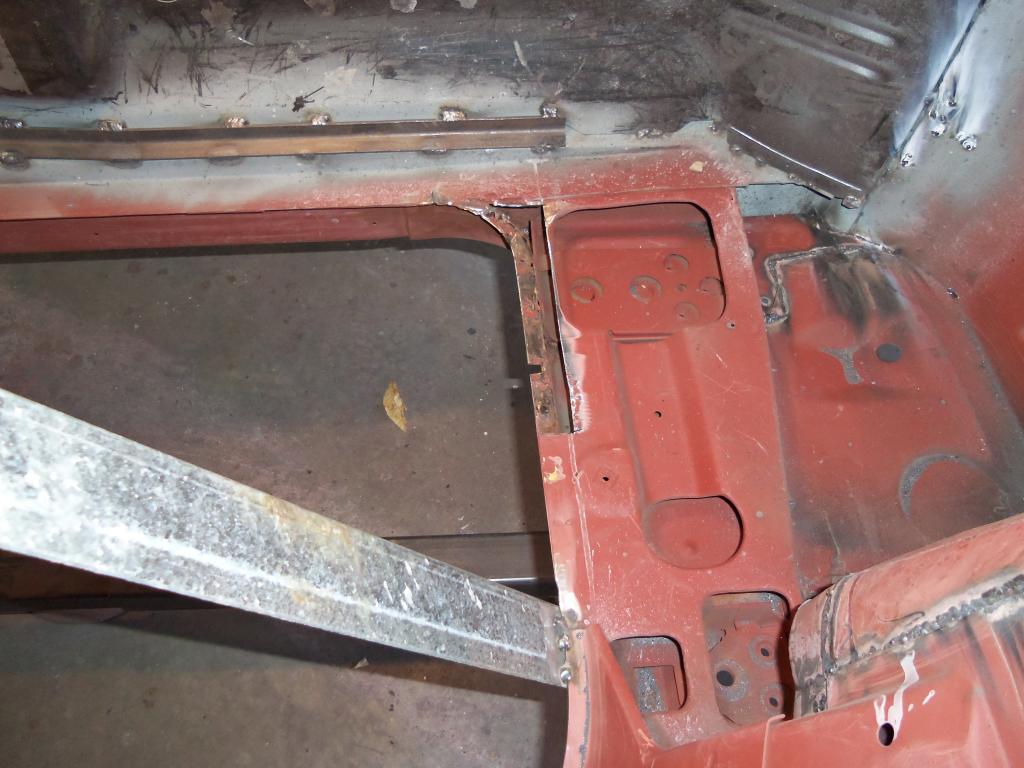
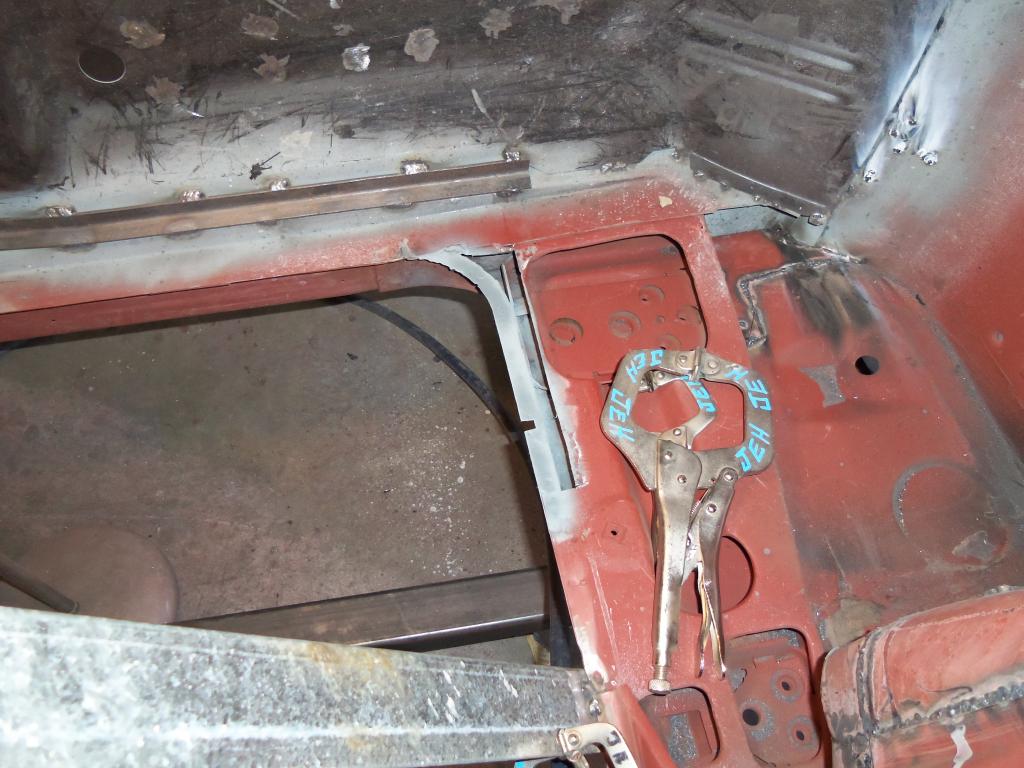
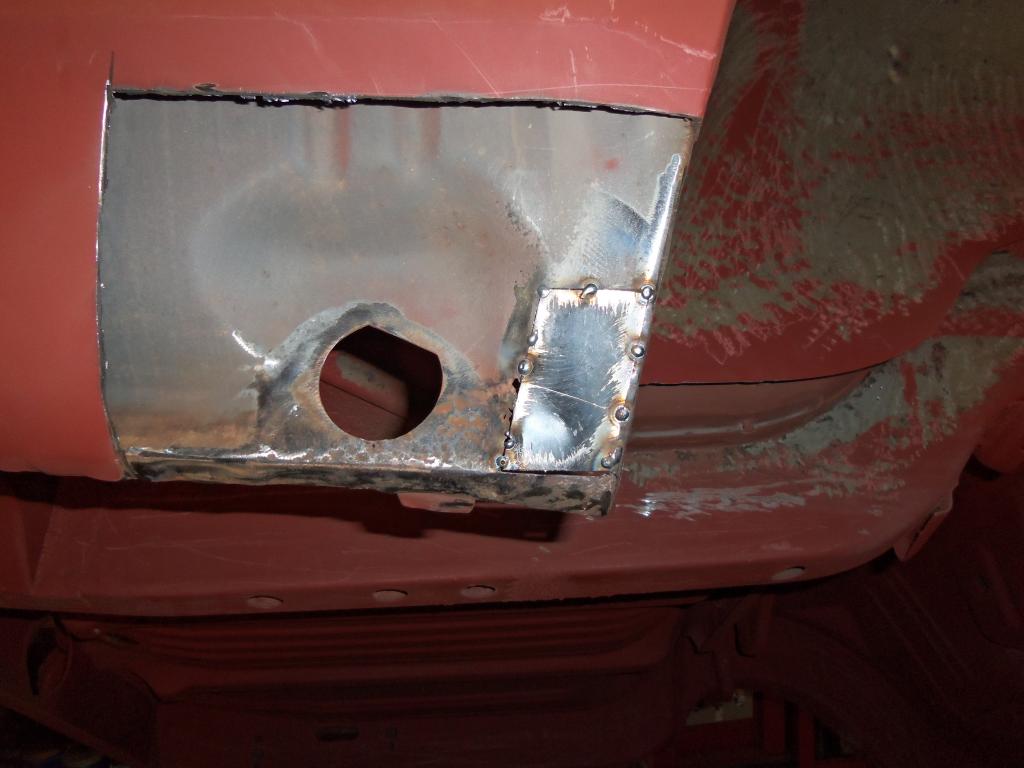
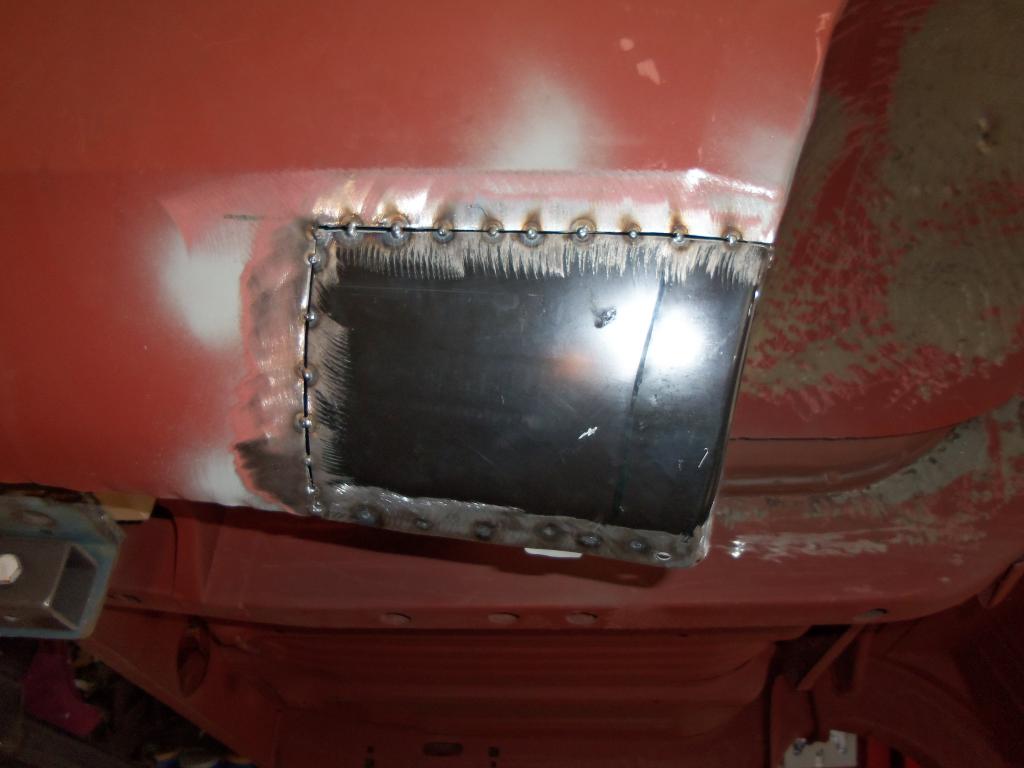
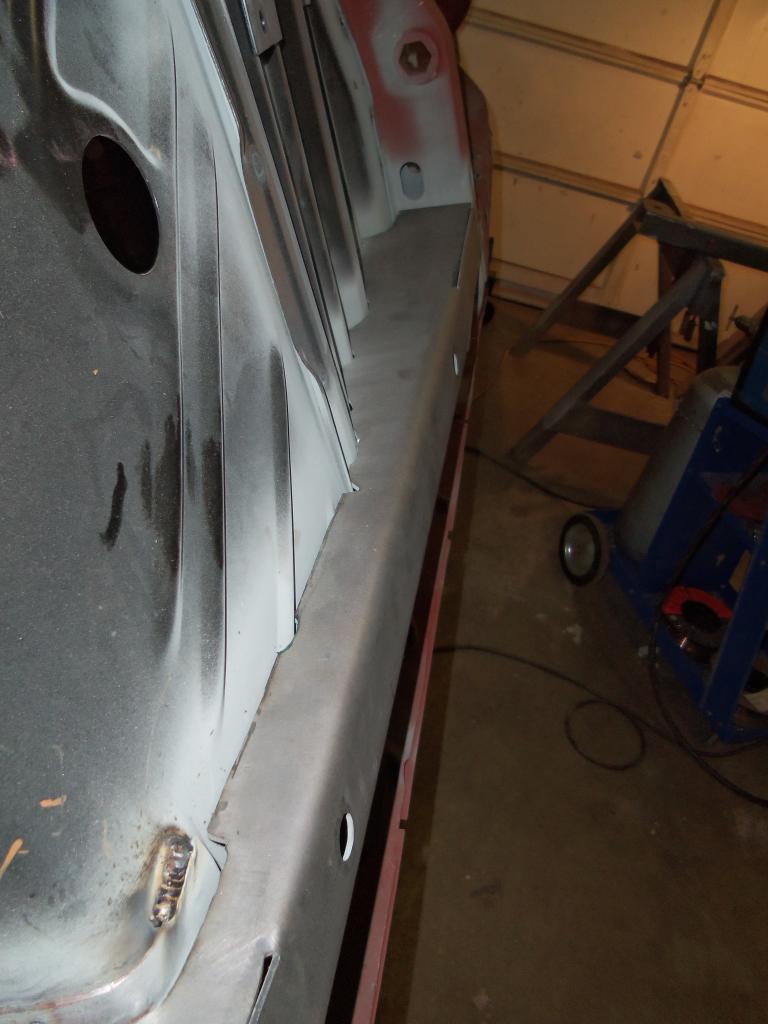
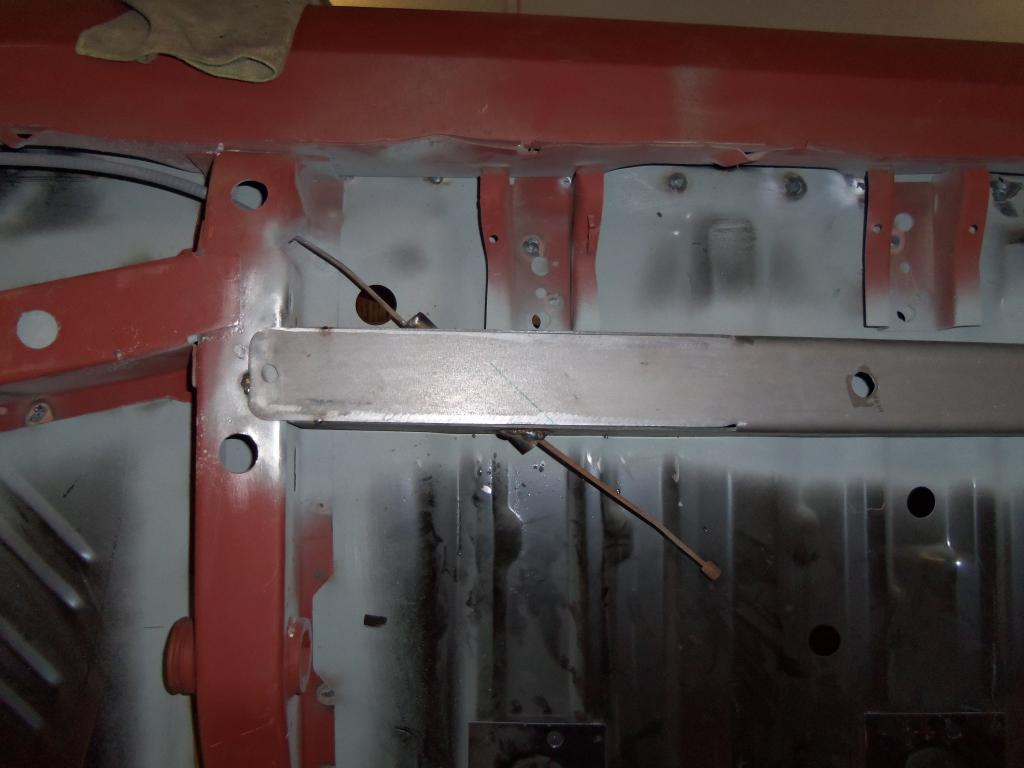
And this is how I routed the parking break cable through the sub frame connector.
Got the Fenders down from storage!
Sand Blasted and primed up some door hinges.
Got every thing loaded to go to the blasters!
And this is how I routed the parking break cable through the sub frame connector.
04-04-2013, 01:45 PM
#78
Mopar Lover
Thread Starter
By rust proofing do you mean like a rubberized under coat?
jacilynn_s, I got the break system figured out, I cut a hole through the sub frame connector and welded in a small section of pipe for the cable to go through. On the other side I will have to shorten the J hook adjuster and drill a hole for it to attach into the sub frame connector by drilling a hole for it. Thanks for pointing that out before I got to far along.
04-04-2013, 02:02 PM
#79
Rubberized undercoating is NOT rust proofing! It's the opposite actually as the rubber holds the water against the metal.
So you got the second method cable. Oh fun. Better make that an oval tube as the cable moves backwards and forwards. Compressed small section of muffler pipe would do it.
It took me a bit but I gather you put in a 4 speed tunnel.
So you got the second method cable. Oh fun. Better make that an oval tube as the cable moves backwards and forwards. Compressed small section of muffler pipe would do it.
It took me a bit but I gather you put in a 4 speed tunnel.
04-04-2013, 02:10 PM
#80
Mopar Lover
Thread Starter
Rubberized undercoating is NOT rust proofing! It's the opposite actually as the rubber holds the water against the metal.
So you got the second method cable. Oh fun. Better make that an oval tube as the cable moves backwards and forwards. Compressed small section of muffler pipe would do it.
It took me a bit but I gather you put in a 4 speed tunnel.
So you got the second method cable. Oh fun. Better make that an oval tube as the cable moves backwards and forwards. Compressed small section of muffler pipe would do it.
It took me a bit but I gather you put in a 4 speed tunnel.
What is rust proofing? Could you please clarify?
04-04-2013, 03:44 PM
#81
Rust proofing is putting 3 layers of paint on the inside of a piece of metal before you weld it to the car. Enamel for example is non porus paint. Primers, laquer, water base paint, base coat clear coat paints are porus and water gets behind at the metal starting rust before you even move the car.
An older method of rust prevention is Tar or mineral oil. The proper use of sealants require you to paint first before putting on the sealant. Some people miss that step and then wonder why the join failed. Many of the seam sealers dry out and act as a sponge.
An older method of rust prevention is Tar or mineral oil. The proper use of sealants require you to paint first before putting on the sealant. Some people miss that step and then wonder why the join failed. Many of the seam sealers dry out and act as a sponge.
 04-08-2013, 02:10 PM
#83
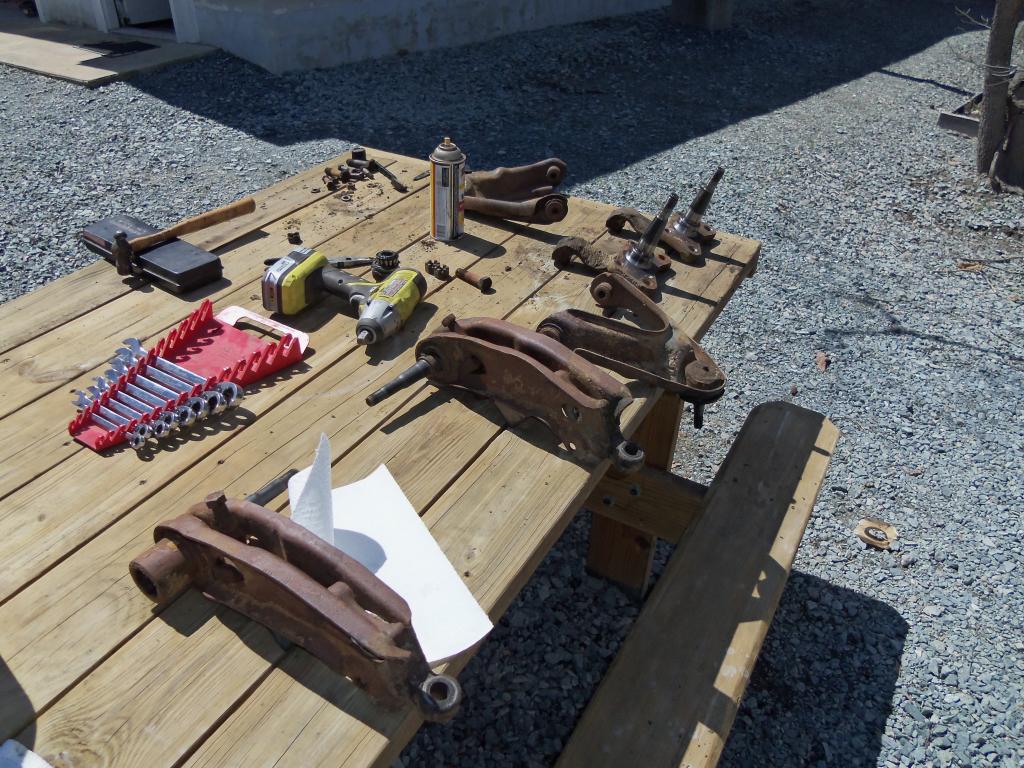
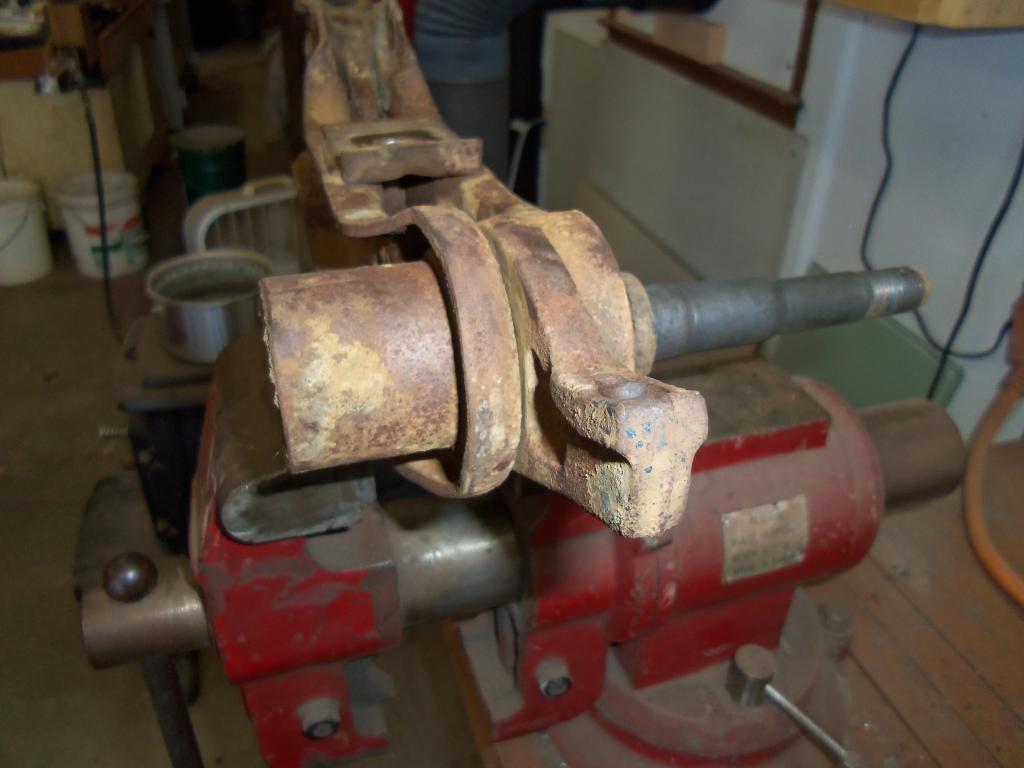
Word of advice. Go to napa and order the upper and lower control arm bushing kits. If they are being stubborn even though they are listed in their books, piston ring/ autovalue can also get them. Change them now before you paint. They are not that expensive, not that hard to do, and gives you a piece of mind when you put it all back together.
the ball joint i can see looks ...dry from here. Take the tip and see if the ball joint jiggles easilly. 1/16 jiggle is about normal for a good used ball joint. anything in excess of that is wear and it will be your risk. The uppers screw in, are not super hard to replace but sandblast any rust out of the threads and make asolutly sure you do not cross thread them.
the ball joint i can see looks ...dry from here. Take the tip and see if the ball joint jiggles easilly. 1/16 jiggle is about normal for a good used ball joint. anything in excess of that is wear and it will be your risk. The uppers screw in, are not super hard to replace but sandblast any rust out of the threads and make asolutly sure you do not cross thread them.
Last edited by jacilynn_s; 04-08-2013 at 02:13 PM.
The following users liked this post:
Buffalojoe426 (04-09-2013)
04-08-2013, 03:42 PM
#84
Mopar Lover
[QUOTE=Buffalojoe426;100721]By rust proofing do you mean like a rubberized under coat?
rubberized undercoating like 3-M is more for chip guard and touching up, or top coating an existing coating ie paint or factory rubber coating but the bare metal is always sealed first with something,
from what i can see from the pictures your installed rails are bare inside also spraying a zinc sealer coating in there would help then paint and undercoat
joe it's been so long i don't remember the name of what we used but your local body shop supplier will have what you need.
you can buy a mid grade pump-up sprayer and wand to coat the inside of the rails.
they may even have a small undercoating pack with the coating and all the wands and heads you could ever need a simple disposable kit.
The following users liked this post:
Buffalojoe426 (04-09-2013)
04-08-2013, 03:51 PM
#85
Mopar Lover
back in the good ol days of the big three they always had uncoated parts somewhere
until they introduced the zinc tanks for bathing the chassis in we all remember how they rusted. of course i live in florida so only salt air.
i have even looked down inside new vehicles and still find the same but they are bathing them in zinc the only help some areas get especially in the uni-body systems.
so wand the hell out of her. she'll love you in the morning, lol
The following users liked this post:
Buffalojoe426 (04-09-2013)
04-09-2013, 12:41 PM
#86
Mopar Lover
Thread Starter
I was looking through Summit Racing and found a couple of rust products, one is POR 15, the second is called rust bullet. The descriptions of both seem to match. I am going to see if the local automotive paint shop is still open tonight when I go to work. Hopefully the call volume wont be so high. I'll see what products they have and recommend. Gorts 5th I was thinking of making some home made nozzles to reach all the hard to get places with the rustproofing. I like you idea about the spray tank.
Jacilynn s, I plan on just going ahead and replacing the ball joints, I was also looking at bushing kits at classic industries, but your right, Napa should have it all. Ill give them a try when I get back to Roxboro.
I was trying to say awake on Sunday night so I decided to check out what I could find on E Bay. I found and bought a used front bumper. I tried looking for random parts instead of specif parts and found something I needed.
I can't wait till this weekend! So much to do, and my little brother has agreed to come give me a hand. He never offered to help me on the Scout.
04-30-2013, 05:41 PM
#87
Mopar Lover
Thread Starter
Well I guess its been a while so here we go.
My brother did.... not make it up for the weekend in question....
How ever I managed to piddle and toil away.
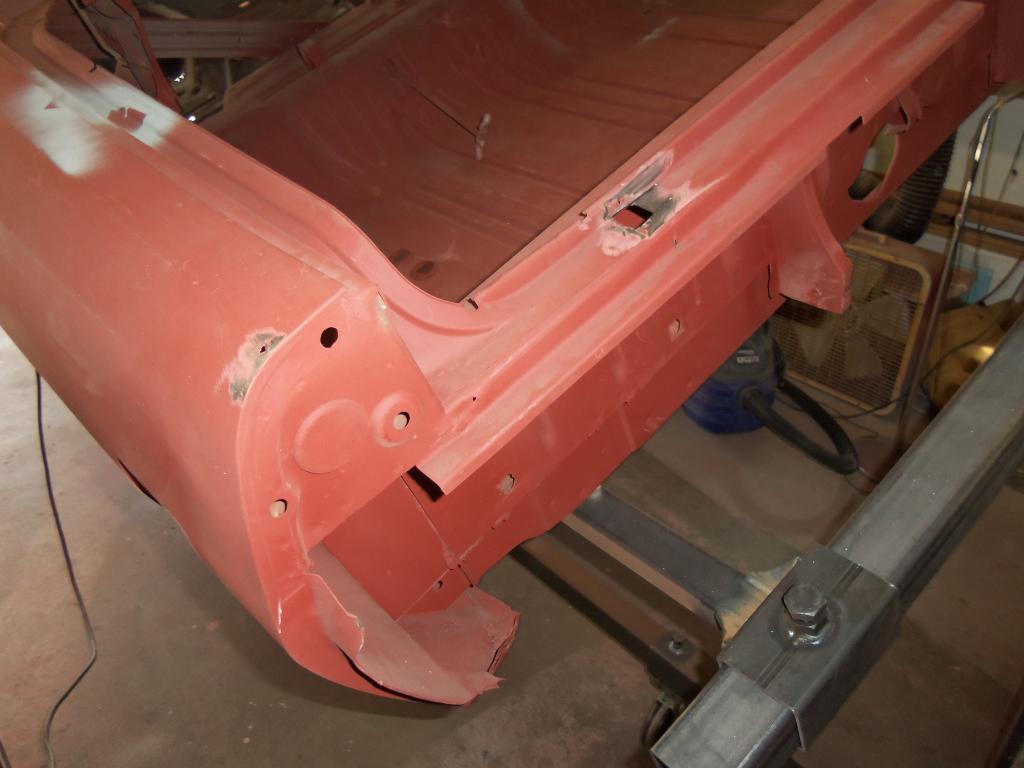
Fixed a few small holes in the back.
Cleaned out some seams in the trunk area.
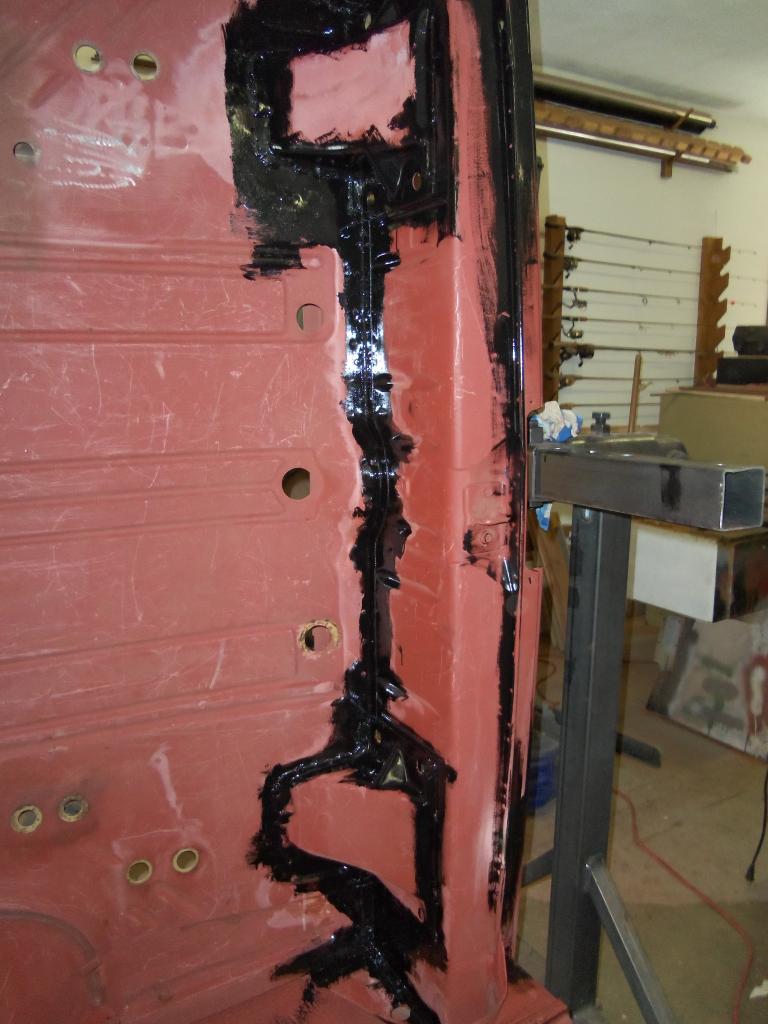
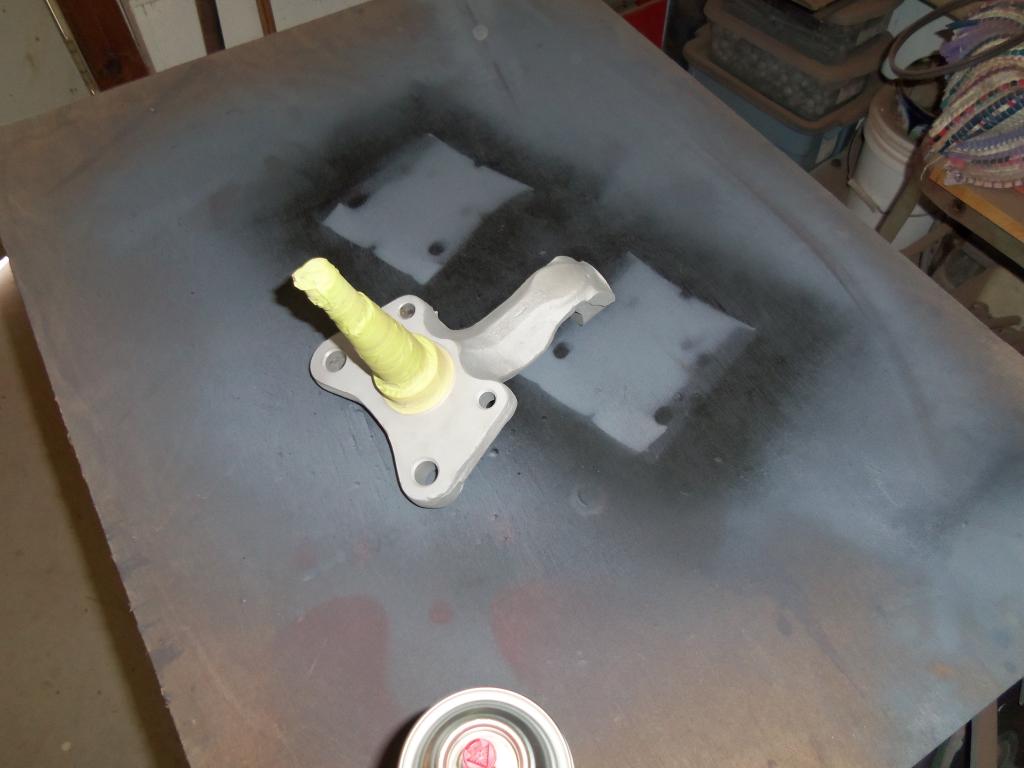
Tested some POR 15
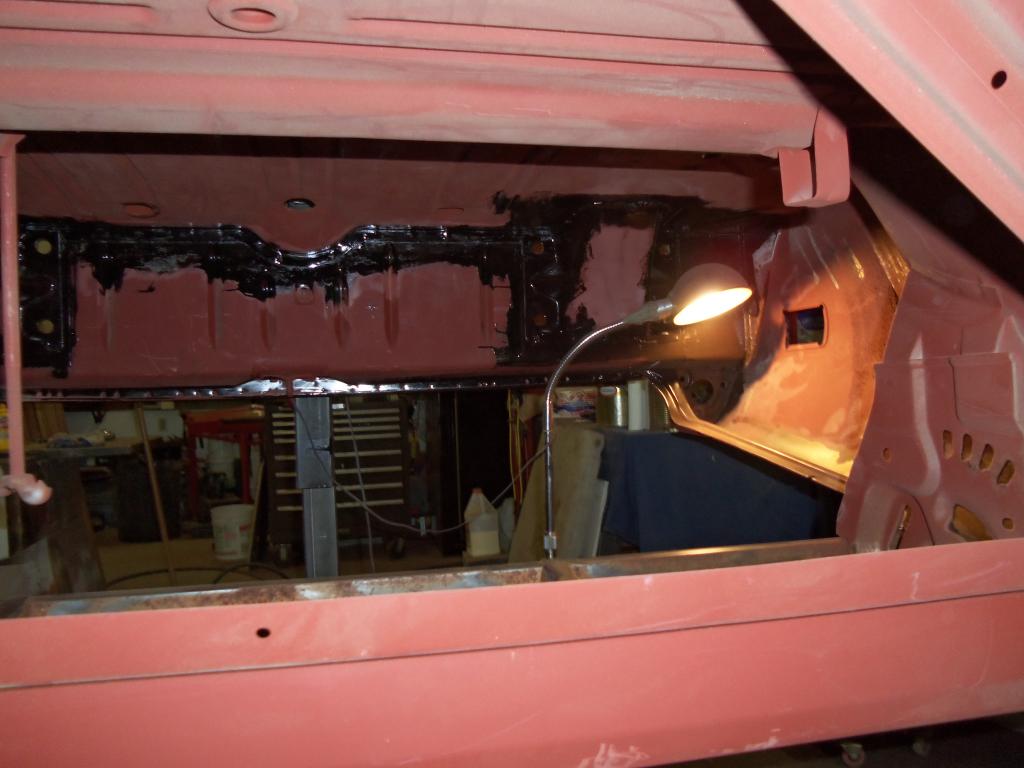
Went inverted!
Wire brushed and killed some rust.
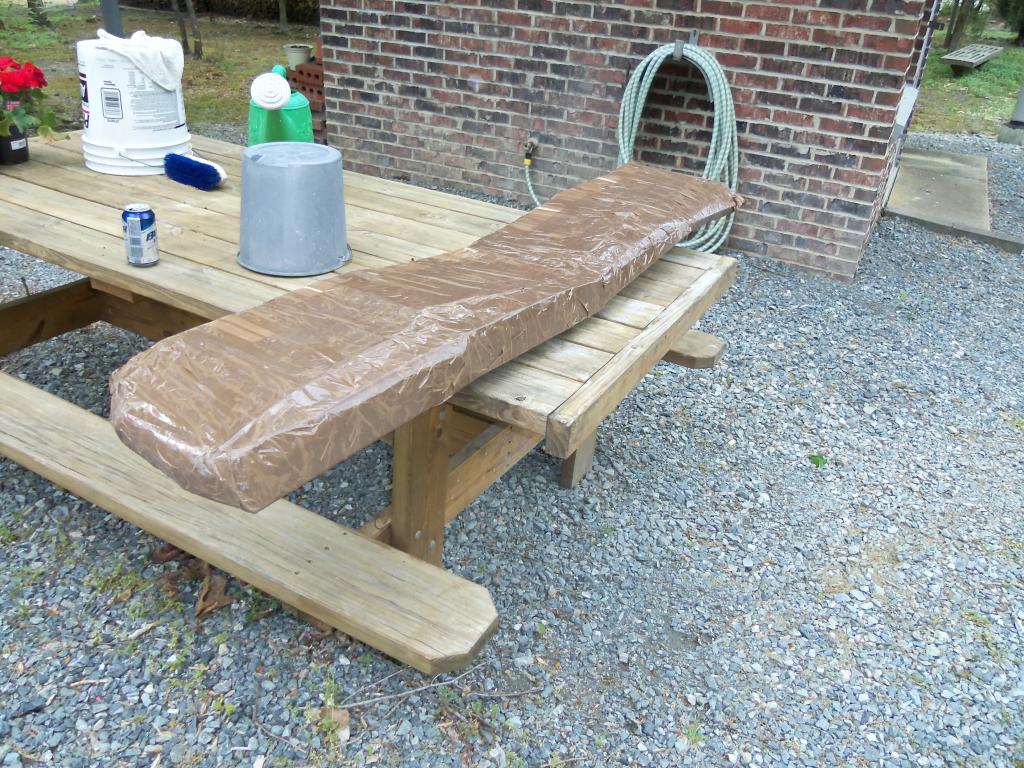
A large parcel appeared!
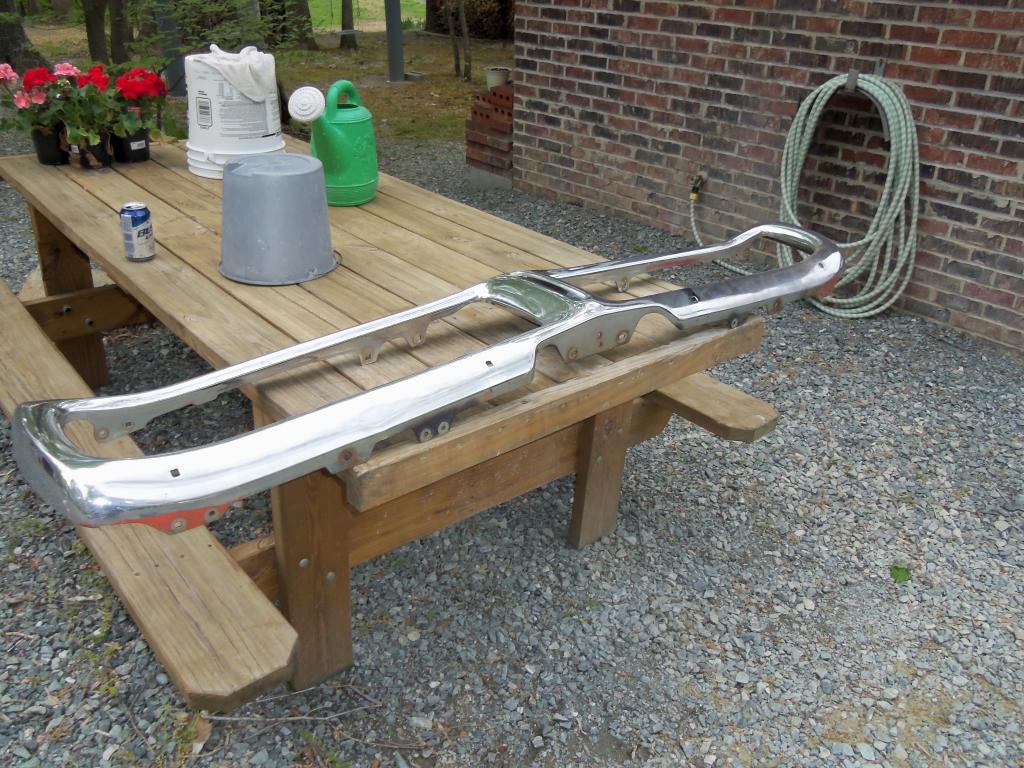
A Bumper!

Pulled it out to degrees with marine clean and then prep with prep and ready. The I shot it with some POR 15.
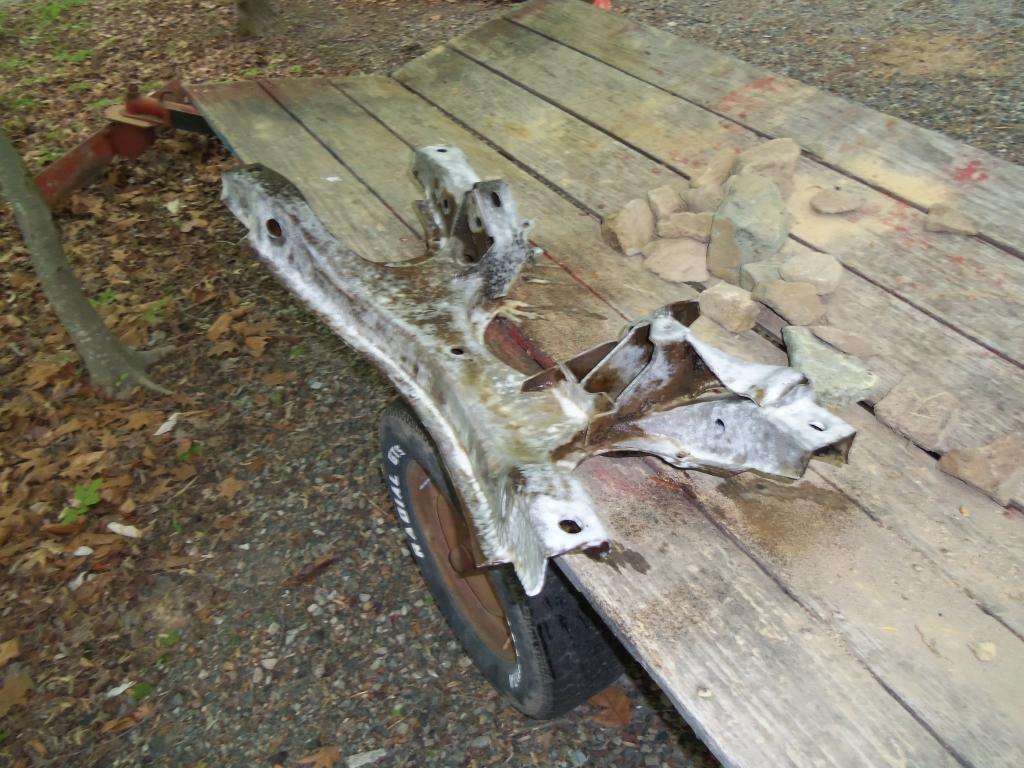
I have found that oven cleaner works very good for cleaning parts.
After this picture was taken I blasted the K frame and sprayed it with some prep and ready. I got some bushings and ball joints on the way. It seems like I'm at a point where it doesn't appear like a lot is happening.
But I got the rest of the week off. Once again my brother has said he would come up to help me work. I plan to make him work hard..... On something..... I am mainly waiting for other parts to return from the blasters. Went by there a week or 2 after I took the parts. Still sitting in the same place. Its unlikely that they will do anything this week on account of the weather.
My brother did.... not make it up for the weekend in question....
How ever I managed to piddle and toil away.
Fixed a few small holes in the back.
Cleaned out some seams in the trunk area.
Tested some POR 15
Went inverted!
Wire brushed and killed some rust.
A large parcel appeared!
A Bumper!
Pulled it out to degrees with marine clean and then prep with prep and ready. The I shot it with some POR 15.
I have found that oven cleaner works very good for cleaning parts.
After this picture was taken I blasted the K frame and sprayed it with some prep and ready. I got some bushings and ball joints on the way. It seems like I'm at a point where it doesn't appear like a lot is happening.
But I got the rest of the week off. Once again my brother has said he would come up to help me work. I plan to make him work hard..... On something..... I am mainly waiting for other parts to return from the blasters. Went by there a week or 2 after I took the parts. Still sitting in the same place. Its unlikely that they will do anything this week on account of the weather.
04-30-2013, 05:58 PM
#88
Mopar Lover
Thread Starter
I just noticed something. I started this project, and this post a year ago this month.
Thanks for all the encouragement everyone!!! You Guys are AWESOME!!!
Thanks for all the encouragement everyone!!! You Guys are AWESOME!!!
The following users liked this post:
Buffalojoe426 (04-30-2013)
04-30-2013, 07:14 PM
#90
Mopar Lover

First thing, frame connectors are a must, not putting them in is foolish and waiting for bad fitting doors and window leaks.
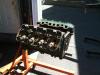
A suggestion for your K frame, cut off and continuous weld the flange around the oil pan area. This opens up room for oil pan clearance. Reweld and add weld at all the bracketry that's on there too. Easy to do now.
A suggestion for your K frame, cut off and continuous weld the flange around the oil pan area. This opens up room for oil pan clearance. Reweld and add weld at all the bracketry that's on there too. Easy to do now.
The following users liked this post:
Buffalojoe426 (04-30-2013)


