electrical sparks
 03-16-2012, 09:10 AM
#1
New Member
Thread Starter

Join Date: Mar 2012
Posts: 7
Likes: 0
Received 0 Likes
on
0 Posts
electrical sparks
Everything was fine and half way to work I hit a bump in the road (literally) and when I did sparks started popping out of the amp gauge on the dash. Now my battery is over charging and boiling over. Does anyone know if I just have to replace the gauge or is it deeper than that. This is on a 1966 Plymouth Valiant 200 with the 225 motor. Thank you in advance for your help. Oh and I noticed the gauge is no longer straight in the dash.
 03-16-2012, 09:46 AM
#2
Admin
I would definitely look at the back of the gauge. I'd be willing to bet that you have a loose wire or two on the back side. You may need to replace it but I would check the connections first. Make sure that the wires and connections are in good shape too. If not, cut it back some and clean it up before reconnecting it.
 03-16-2012, 05:43 PM
#5

There are several inherent problem areas in Mopar wiring
First, ya have a shop manual? You can download one here, for free:
http://www.mymopar.com/index.php?pid=31
linky:
http://www.mymopar.com/downloads/ser...ice_Manual.zip
Also, read this article on the MAD electrical site:
http://www.madelectrical.com/electri...p-gauges.shtml
from here:
http://www.madelectrical.com/
Now, whether you elect to bypass the ammeter, NOTICE the simplified diagram down the page, which highlights several areas of concern, IE
The battery feed and charging line going through the BULKHEAD CONNECTOR, the ammeter connections, the "in harness splice" which is a welded spice in the under - dash harness which feeds the headlights, ignition switch, hot fuse buss, and a couple of other things. These splices do fail.
What is NOT shown is the "IGNITION RUN" (IGN 1) buss from the key back out through the bulkhead. This entire harness can develop voltage drop which can cause overcharging.
Add to that the old style alternator is barely adequate, the problems with the bulkhead connector, and the fact that the old - style alternators do not charge very well at low RPM, and you get DIM headlights.
One BIG help for this is to spit the headlight hi/ low feed and hook up a couple of relays to run the headlights.
03-16-2012, 07:22 PM
#6
Super Moderator

You have the relay/points style regulator in that year model. Maybe your voltage regulator is stuck/burned on all the time. That's one reason you might be boiling your battery.
03-19-2012, 10:04 AM
#7
New Member
Thread Starter
Join Date: Mar 2012
Posts: 7
Likes: 0
Received 0 Likes
on
0 Posts
Man y'all are so very helpful!!  I thank you all so very much. Spent most of the day Sunday running new wires to eliminate the burnt crusty ones. Disconnected the original amp-meter at the dash wired in new aftermarket gauge. Gauge works good. All of the wires came off the back of the ignition switch (not original) and man what a time I had trying to figure that out. Each wire was individually plugged in to the switch. Finally got the car to start but now none of the ACC work (heater blower and such). I think I still have a wire crossed but not sure which one. One of the connectors had 2 wires in it and all the rest are singles. I have (on the switch) batt., acc., ign1, ign2, str., grnd. There was never anything hooked to the ground terminal. I think its the wire hooked to the acc point and another one I have mixed. Does any of this make sense. (sorry for the ramblings)
I thank you all so very much. Spent most of the day Sunday running new wires to eliminate the burnt crusty ones. Disconnected the original amp-meter at the dash wired in new aftermarket gauge. Gauge works good. All of the wires came off the back of the ignition switch (not original) and man what a time I had trying to figure that out. Each wire was individually plugged in to the switch. Finally got the car to start but now none of the ACC work (heater blower and such). I think I still have a wire crossed but not sure which one. One of the connectors had 2 wires in it and all the rest are singles. I have (on the switch) batt., acc., ign1, ign2, str., grnd. There was never anything hooked to the ground terminal. I think its the wire hooked to the acc point and another one I have mixed. Does any of this make sense. (sorry for the ramblings)
03-19-2012, 05:36 PM
#8
Yeah, you don't need ground If the wiring is halfway original you should be able to follow the shop manual. Also, useable diagrams can be downloaded at "MyMopar"
http://www.mymopar.com/downloads/1966/66ValiantA.jpg
http://www.mymopar.com/downloads/1966/66ValiantB.jpg
On diagram "A" above, the layout of the switch on the diagram should be just like your switch
You have:
RED goes to "B" for BATTERY, which is NOT fused and fed from the "in harness splice" taped up in the dash harness. You must have the ammeter hooked up for that to work
BLACK goes to "A" for "switched accessories". This goes to the switched buss in the fuse box, supplies fuses like wiper, heater, etc, that are switched in "run" or "accessory"
DARK BLUE goes to "IGN 1" or "IGN RUN" which feeds power to the cluster, and the ignition system and regulator
BROWN goes to "IGN 2" which is the "resistor bypass" circuit for starting. It goes directly through the bulkhead to the coil side of the ballast resistor
YELLOW goes to "ST" which is "START" and goes directly through the bulkhead connector to one of the "push on" terminals on the start relay.
03-21-2012, 04:40 PM
#9
New Member
Thread Starter
Join Date: Mar 2012
Posts: 7
Likes: 0
Received 0 Likes
on
0 Posts
So today I took the car to this little old man close to where I work for the over charging issue. Well...he fixed it in about 3 minutes...I had no idea you had to nor did I know how you had to adjust the voltage regulator. Everyday I learn something new. Saturday is ignition switch day. I still love the time with my son and working on the this project.
03-21-2012, 07:09 PM
#10
"Adjusting the regulator" does NOT explain the sparks you described.
Furthermore, if he adjusted it without curing the harness voltage drop, he merely covered up a a problem with a bandaid.
Furthermore, if he adjusted it without curing the harness voltage drop, he merely covered up a a problem with a bandaid.
03-22-2012, 06:02 PM
#11
New Member
Thread Starter
Join Date: Mar 2012
Posts: 7
Likes: 0
Received 0 Likes
on
0 Posts
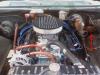
I have disconnected the in dash meter and installed a aftermarket 3 gauge display. Is there something else I need to do? I don't need another fireball (see below) This used to be my wife's van. I hardly ever get to drive here new car...I wonder why.
03-25-2012, 05:58 PM
#13
New Member
Thread Starter
Join Date: Mar 2012
Posts: 7
Likes: 0
Received 0 Likes
on
0 Posts
Sweet, thanks to everyone here I am now back up and running like a champ. Thank you all!!!
Next on my list is to find out where the connect the new temp gauge. The existing port is way to small. Any ideas on that???
Next on my list is to find out where the connect the new temp gauge. The existing port is way to small. Any ideas on that???

Thread
Thread Starter
Forum
Replies
Last Post
mytracy
A-Body
9
04-24-2011 11:08 PM


