1994 Jeep Cherokee XJ
 04-11-2015, 06:15 AM
#1
Mopar Fanatic
Thread Starter

1994 Jeep Cherokee XJ
To make this simple I am going to copy and paste my build thread from another forum. It skims along fairly quickly but if you have questions or want more about something I do have more pictures of most of the installs.
I will also include the build on the 1947 Bantam trailer that is being built to turn the XJ into an expedition style wheeler.
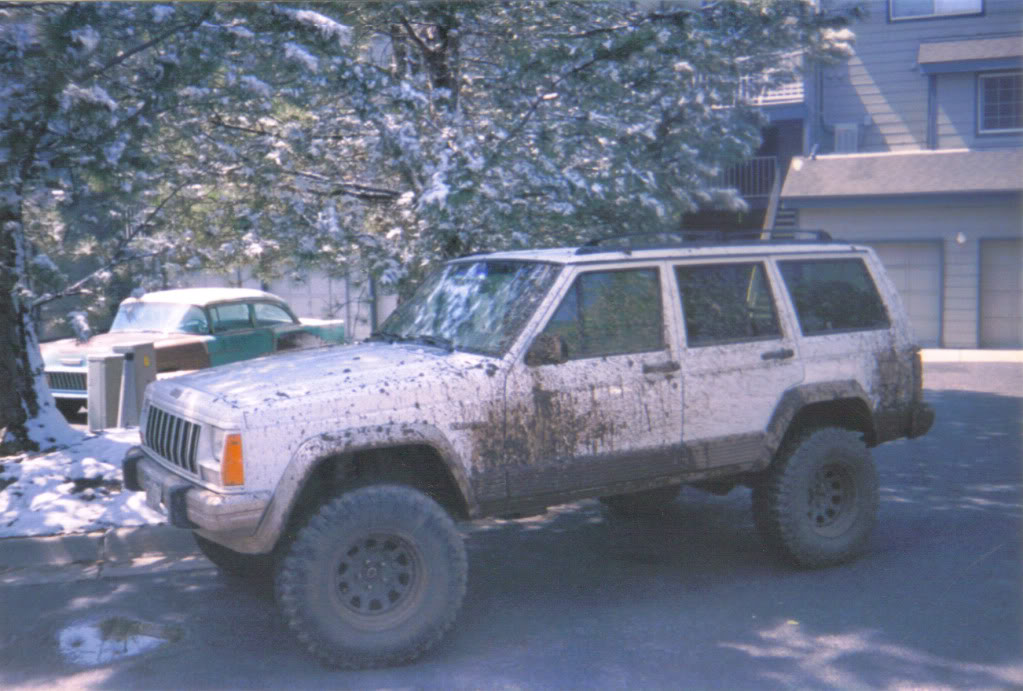
Got my Cherokee 12 years ago before knowing much about working on vehicles. First mod I made was a 3.5" Rubicon Express lift which I rocked with little tires for a while before I got 31's. Came with fixed lower control arms and track bar.
Spun a bearing in the motor and needed it on the road ASAP so we dropped in a rebuilt motor. Original motor eventually rebuilt and put in brothers XJ.
Bigger heavier tires and steel rims were making the highway drive to the trails a pain and since we didn't know how to do ring and pinion ourselves at that time I got some G2 Dana 44 axles with 4.88 gears and Eaton E-lockers. We have since done R&P on brothers XJ with excellent success
I will also include the build on the 1947 Bantam trailer that is being built to turn the XJ into an expedition style wheeler.
Got my Cherokee 12 years ago before knowing much about working on vehicles. First mod I made was a 3.5" Rubicon Express lift which I rocked with little tires for a while before I got 31's. Came with fixed lower control arms and track bar.
Spun a bearing in the motor and needed it on the road ASAP so we dropped in a rebuilt motor. Original motor eventually rebuilt and put in brothers XJ.
Bigger heavier tires and steel rims were making the highway drive to the trails a pain and since we didn't know how to do ring and pinion ourselves at that time I got some G2 Dana 44 axles with 4.88 gears and Eaton E-lockers. We have since done R&P on brothers XJ with excellent success
 04-11-2015, 06:17 AM
#2
Mopar Fanatic
Thread Starter
With 3.5 inch lift and 31's I was still rubbing a bit and not wanting to trim yet so while doing axles we installed 2" coil spacers and longer shackles to give me just a little more. Upgraded stock steering with a Rusty's HD Steering. Did not work well for me and will be upgrading soon. At about 5.5" lift could barely rub 31's but had massive flex for a little truck.

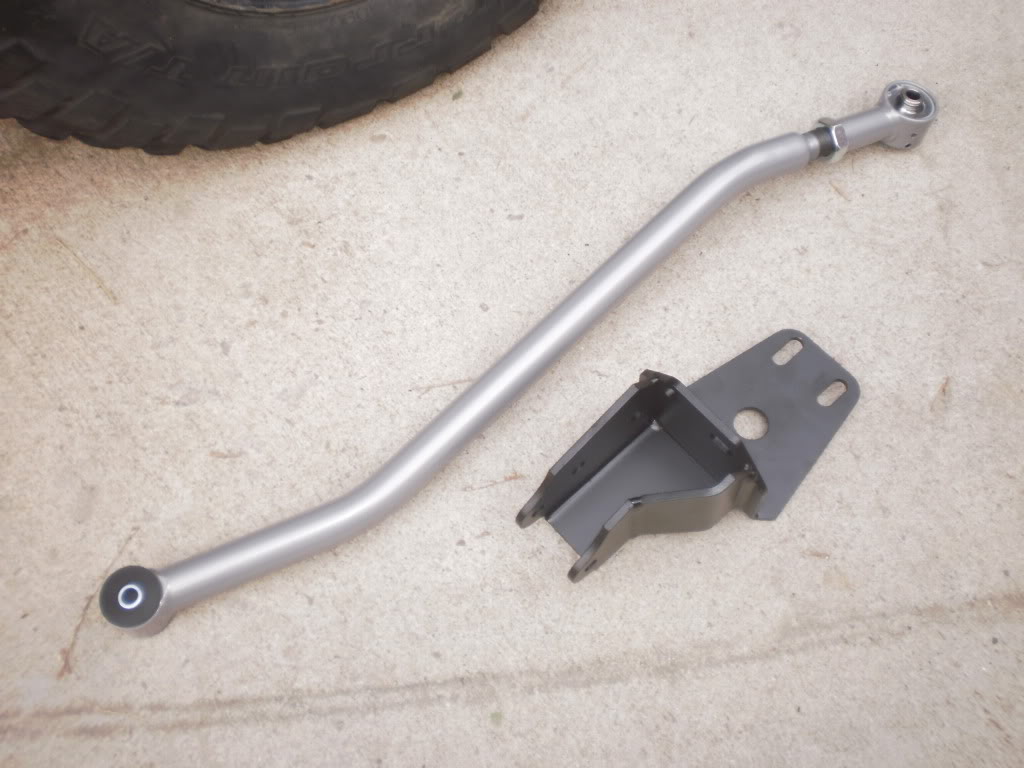
Don't remember when but had at this point upgraded control arms to Teraflex Monster upper and lower controls arms (adjustable). Upgraded to a Rubicon Express adjustable track bar with the drop bracket to help with bump steer.
It was at this point we had started to build some confidence and the ball started to roll. I upgraded front bumper with a Smittybilt XRC winch bumper. Took some trimming but got it installed and it just looked silly without a winch so I installed a Smittybilt X2O comp 8k winch.
04-11-2015, 06:20 AM
#3
Mopar Fanatic
Thread Starter
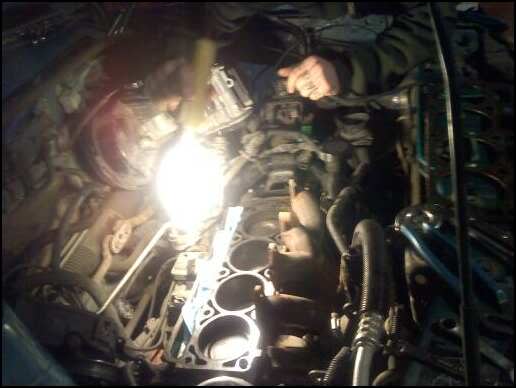
From there I wanted to help the engine breath better on trail. Already have electric fan wired into toggle switch for constant operation. Picked up some JY hood louvers from a Lebaron and went to town on the hood.


Next I had to modify and prevent frame from twisting so added TnT customs frame stiffeners. Made a huge difference. Can park with one tire on third step of porch and rear hatch opens and closes nice and smooth.


Got both front skid and gas tank skid finally installed and put in a 2" reciever hitch.


After a oops moment on a trail run came home and ordered up some JCR Offroad rock sliders. They come bare metal so had to be painted after test fit.


- - - Updated - - -
Due to the steering hitting the diff cover I decided to try a different one. Still hits but I like it more.


Being a family man with a good sized dog I needed more cargo space. Went with a Cargo Master roof rack.

Next I had to modify and prevent frame from twisting so added TnT customs frame stiffeners. Made a huge difference. Can park with one tire on third step of porch and rear hatch opens and closes nice and smooth.
Got both front skid and gas tank skid finally installed and put in a 2" reciever hitch.
After a oops moment on a trail run came home and ordered up some JCR Offroad rock sliders. They come bare metal so had to be painted after test fit.
- - - Updated - - -
Due to the steering hitting the diff cover I decided to try a different one. Still hits but I like it more.
Being a family man with a good sized dog I needed more cargo space. Went with a Cargo Master roof rack.
04-11-2015, 06:21 AM
#4
Mopar Fanatic
Thread Starter
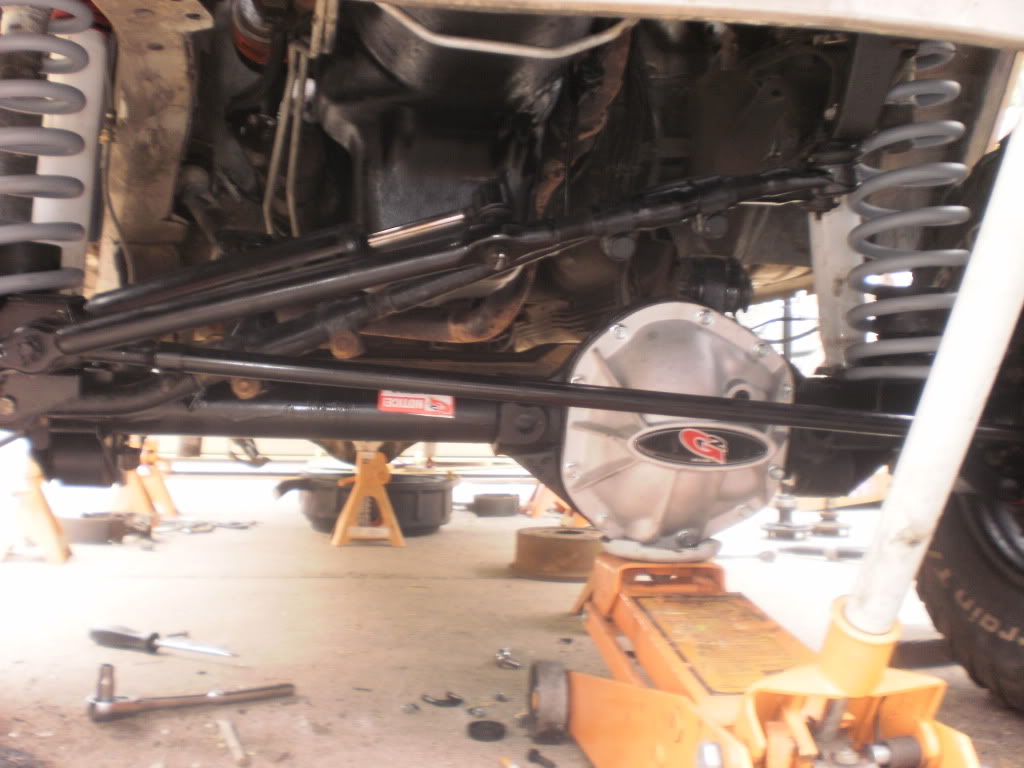
Decided it was time to upgrade the stopping power. Got a G2 Disk brake upgrade kit.


Decided it was time for my truck to get a little taller since the leaf springs were starting to sag after 10+ years of wheeling. Upgraded to RE 4.5" Coils and leafs and left spacers and boomerang shackles in for around 6.5" of lift. Due to sag of springs got about 2" lift.


Added the bull bar to front bumper

- - - Updated - - -
Next I wanted to improve on road drive ability and possibly increase flex. Installed a TnT Customs Long arm conversion. Had to cut off factory lower control arm mounts.


Next came the rear bumper. Got Smittybilt with swing away tire carrier. Brand new bumper and had to wait a while to get it. My daughter at 12 got involved in helping this install. Learned to use an impact and torque wrench.


After over a year of running 31 inch tires on 4.88 gears I finally got my 35's. Went with BFG AT. This lead to some fender trimming to make it kinda work and eventually some fender flares.


Decided it was time for my truck to get a little taller since the leaf springs were starting to sag after 10+ years of wheeling. Upgraded to RE 4.5" Coils and leafs and left spacers and boomerang shackles in for around 6.5" of lift. Due to sag of springs got about 2" lift.
Added the bull bar to front bumper
- - - Updated - - -
Next I wanted to improve on road drive ability and possibly increase flex. Installed a TnT Customs Long arm conversion. Had to cut off factory lower control arm mounts.
Next came the rear bumper. Got Smittybilt with swing away tire carrier. Brand new bumper and had to wait a while to get it. My daughter at 12 got involved in helping this install. Learned to use an impact and torque wrench.
After over a year of running 31 inch tires on 4.88 gears I finally got my 35's. Went with BFG AT. This lead to some fender trimming to make it kinda work and eventually some fender flares.
Last edited by xaza; 04-11-2015 at 06:38 AM.
04-11-2015, 06:27 AM
#5
Mopar Fanatic
Thread Starter
With 35 inch tires I needed to be able to inflate my tires back up to drive home and don't like waiting 30 minutes. Installed a 5000 watt power inverter and 120v 6 gallon pancake compressor and 25 ft retractable hose. Will be modifying this when it get installed back into the truck.


So the slight fender trimming didn't work and my ne fender armor showed up. It is Rusty's Fender Flares. They are steel and I have walked on them since installing to know they are sturdy.


Factory temp gauge was not accurate and made me nervous. Added a new mechanical gauge. Still have to modify it for a flow through design but does work great as is.


I had previously installed a 3" exhaust which left me with no back pressure and lacking low end torque. Upgraded to a professionally installed 2.5" high flow cat and muffler. Routed tail pipe differently due to nature of trucks use.


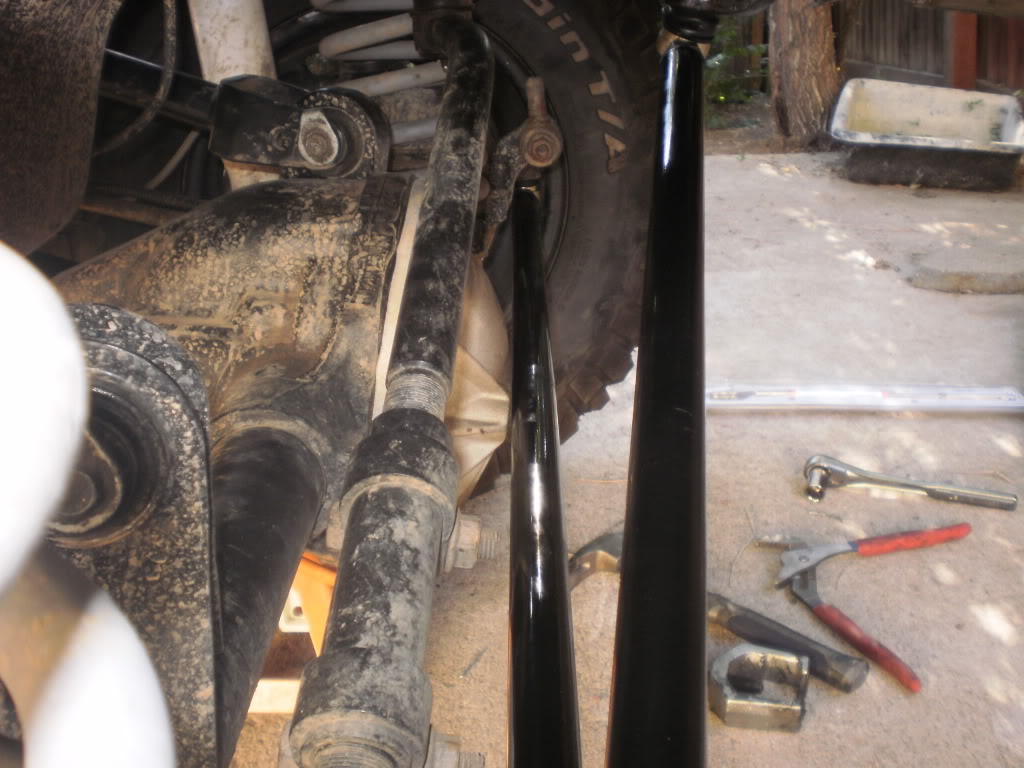
 Didn't like the slop from Rusty's steering so I got the Currie Currectlinc steering installed on the Cherokee with new gearbox and drop pitman arm. I kept my stabilizer mount because it's ridiculous strong, but no longer needed a bushing for it to clamp tightly on steering rod. Drove a lot better on the way to the alignment shop and amazing on the way home. The steering is very solid and considerably stronger than the Rusty's and does not have the slop from tie rod roll. It get's my 2 thumbs up rating for an under the knuckle steering! Slapped skid plate on it to make a run to the hills and found the steering hits on the skid plate. Will modify skid later, took it off and went wheeling. Found after sway bar is disconnected and tied up tight like I do, the drooping side hits the steering. Sway bar disconnects came with mounts to hold it where I want, will have to install them to hold it in the middle. After a day of wheeling it was pretty nice to get home without my hands hurting from squeezing the wheel.


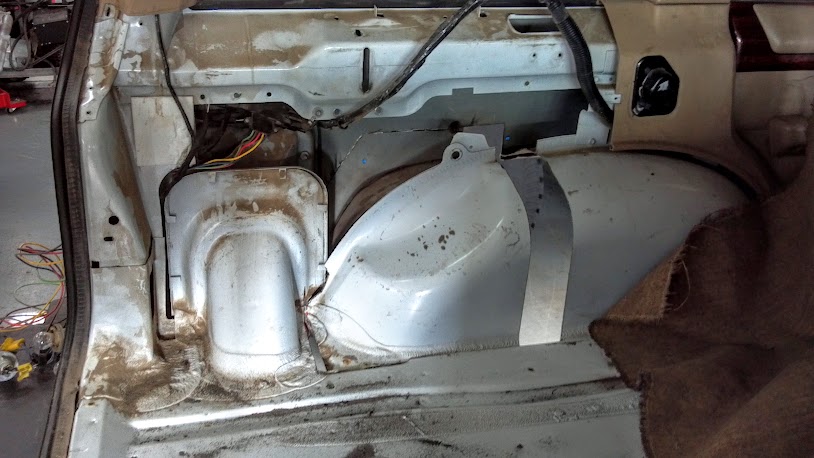
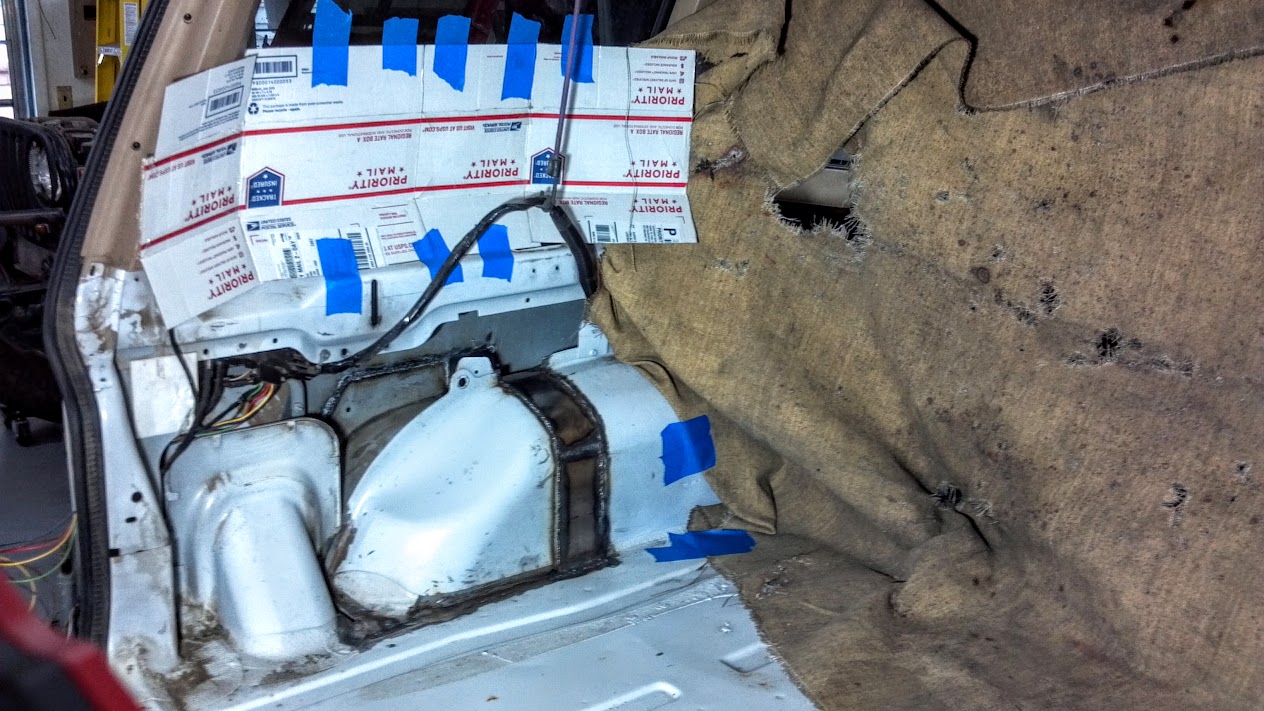
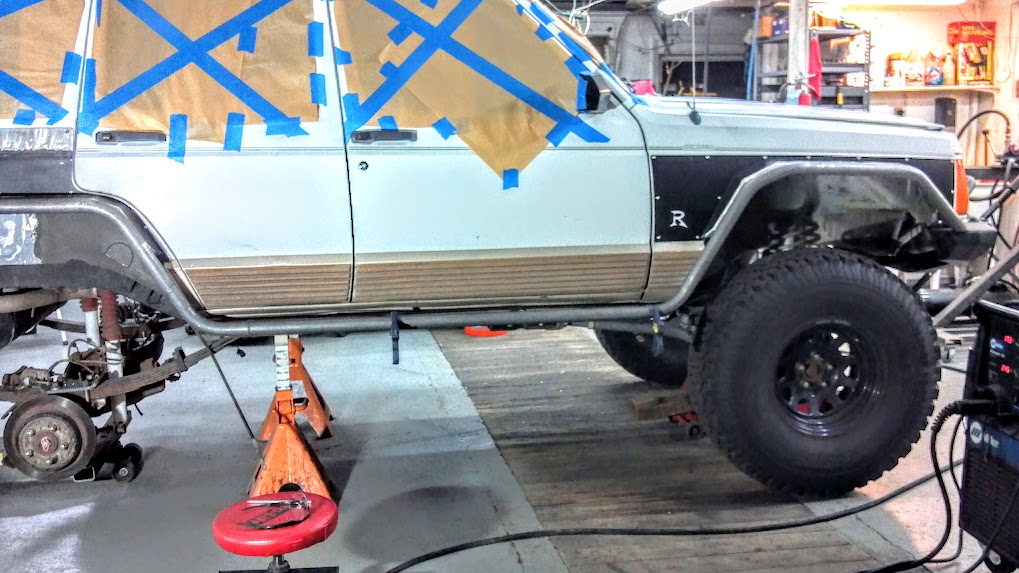
This is basically current on the truck. We have removed everything from the back to expose metal and address rust issues and make things easier for my fabricator. After removing carpet I am pleased to say there is almost no rust and none all the way through on the rear half of truck. Originally truck was getting cage installed, rear axle perches changed to move axle back 1-3 inches and front frame stiffener extensions installed Mid March. Fabricator had to have back surgery so I am waiting for him to heal properly before taking on my project. I am proud of how much of this truck we have done ourselves but with the safety of my family riding on those welds, I want to know it is done right.
So the slight fender trimming didn't work and my ne fender armor showed up. It is Rusty's Fender Flares. They are steel and I have walked on them since installing to know they are sturdy.
Factory temp gauge was not accurate and made me nervous. Added a new mechanical gauge. Still have to modify it for a flow through design but does work great as is.
I had previously installed a 3" exhaust which left me with no back pressure and lacking low end torque. Upgraded to a professionally installed 2.5" high flow cat and muffler. Routed tail pipe differently due to nature of trucks use.
This is basically current on the truck. We have removed everything from the back to expose metal and address rust issues and make things easier for my fabricator. After removing carpet I am pleased to say there is almost no rust and none all the way through on the rear half of truck. Originally truck was getting cage installed, rear axle perches changed to move axle back 1-3 inches and front frame stiffener extensions installed Mid March. Fabricator had to have back surgery so I am waiting for him to heal properly before taking on my project. I am proud of how much of this truck we have done ourselves but with the safety of my family riding on those welds, I want to know it is done right.
Last edited by xaza; 04-11-2015 at 06:48 AM.
04-11-2015, 06:33 AM
#6
Mopar Fanatic
Thread Starter
The other thing we are currently working on is a trail trailer for it. It is a 1947 Bantam trailer that we inherited, it was my wife's great grandfathers trailer. It will eventually have a rooftop tent on it and give cargo space to allow us expedition style camping. The first thing we did was flip the axle and give it about 6 inches lift. Got rims to match XJ and some decent truck tires. Had the paint stripped by a local shop with a starblast media. I am practicing with a truck tool box to learn to lay down some paint. Going to match with XJ colors of black and white. Modified the coupler to allow for more articulation and extra length to allow tire carrier to swing out. Has 360 degree rotation which will allow truck or trailer to flop without flopping the other. This was our first welding project other than repairing a control arm mount on brothers XJ.


04-11-2015, 06:37 AM
#7
Mopar Fanatic
Thread Starter
With the sub zero temps around here I haven't gotten as much done as I wanted. We did manage to get the paint laid down before it rolled into full freeze. Brother had the better hand at painting so he took on the task of painting white. Wife and I taped off trailer and laid down black. Did it backwards because I knew we would screw up and it would drive me nuts to not fix it. Have some black over spray to fix. Some is from poor taping, some is from the paper absorbing moisture from the air from over night rain storm (no direct rain) No big deal, when Spring hits we will tape up black and lay down another layer of white and top the whole thing with clear coat. Inside will also get bed liner at that time.


Got trailer wiring routed just need to insulate it. Might use nylon or rubber hose rather than loom. Got driver side light mounted and the hole cut for passenger side light. Made the mounting bracket but still have to weld to trailer. The side marker lights have arrived but need installed. They are pretty cool, called dragon eye lights because they look like an evil eye.

Hope you have enjoyed the reading. If you want to see my XJ in some action check out my Youtube page
https://www.youtube.com/user/xaza23
Got trailer wiring routed just need to insulate it. Might use nylon or rubber hose rather than loom. Got driver side light mounted and the hole cut for passenger side light. Made the mounting bracket but still have to weld to trailer. The side marker lights have arrived but need installed. They are pretty cool, called dragon eye lights because they look like an evil eye.
Hope you have enjoyed the reading. If you want to see my XJ in some action check out my Youtube page
https://www.youtube.com/user/xaza23
 04-11-2015, 11:06 AM
#9
Super Moderator

What type of hitch/receiver do you use for your 4 wheeling? It would seem that you would need a lot of articulation.
04-11-2015, 11:16 AM
#10
Super Moderator
I forgot to mention, I think the trailer was a score and will look great behind your rigs for years to come. It will probably out last you!
04-11-2015, 02:50 PM
#11
Mopar Fanatic
Thread Starter
https://locknroll.com/
I should note that it has not been tested beyond the drive to sand blaster, look forward to getting it on a trail test soon.
Last edited by xaza; 04-11-2015 at 02:52 PM.
04-11-2015, 05:09 PM
#12
Mopar Lover

I like these with a Ring.....
http://www.wallaceforge.com/pintle-h...tle-hooks.aspx
Thats pretty kind of cool also...
http://www.wallaceforge.com/pintle-h...tle-hooks.aspx
Thats pretty kind of cool also...
04-11-2015, 06:58 PM
#13
Mopar Fanatic
Thread Starter
I wanted something quieter than a ring and pintle to allow me to hear potential vehicle hazards while wheeling. Also wanted more articulation if possible. Pintle is tried and proven for sure though. Never knew they had a swivel style, those are sweet.
Last edited by xaza; 04-11-2015 at 07:00 PM.
The following users liked this post:
xaza (04-12-2015)
04-12-2015, 06:13 AM
#15
Mopar Fanatic
Thread Starter
Easy access to inner part of fender now, hopefully helps to reduce the amount of bending and twisting Aaron will be having to do. Will build and install metal shelf when truck gets back. Also planning on leaving carpet out and using bed liner for interior.


04-12-2015, 08:29 AM
#16
Admin
Are you going to modify the interior and fender wells so that you can stuff the 35s up higher or do they already not rub?
Also, are you planning on installing an anti-wrap bar on the rear axle?
Also, are you planning on installing an anti-wrap bar on the rear axle?
04-12-2015, 10:05 AM
#17
Mopar Fanatic
Thread Starter
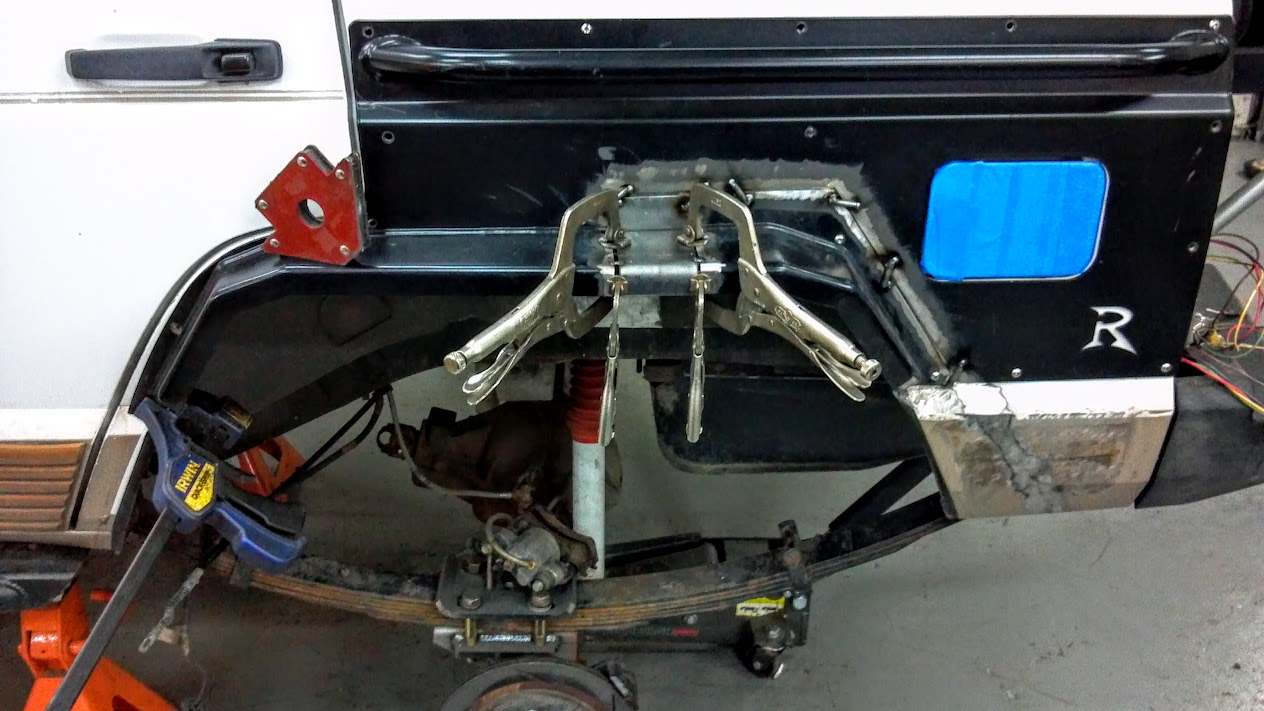
They do not rub on the top but ever so slightly on the sides. The perches being welded on axle will have 3 different holes for the leaf spring centering pin to allow me to set axle back 1, 2 or 3 inches. Will likely be going 2" back. Hope to not need an anti-wrap bar considering I am running a HD leaf spring behind a little inline 6. The back portion of the wheel well will need modified which should have tires free and clear to flex up and not rub.
04-12-2015, 11:52 AM
#18
Admin
I've seen plenty of SOA jeeps with 6 cylinders and Toyota trucks with the 22RE 4 banger have axle wrap. Military wrapped springs help, longer than usual spring perches (longer on the proper side) also help.
Just throwing it out there.
Just throwing it out there.
06-13-2015, 06:34 AM
#19
Mopar Fanatic
Thread Starter
The truck is officially at the shop. He is sending me pictures as things progress. He is not up to full strength so progress is going slower than he would like, but I am happy he is taking care of himself.
We will start with the before pictures


The perches

The axle removed and perches installed


How the truck sits with perches all the way back


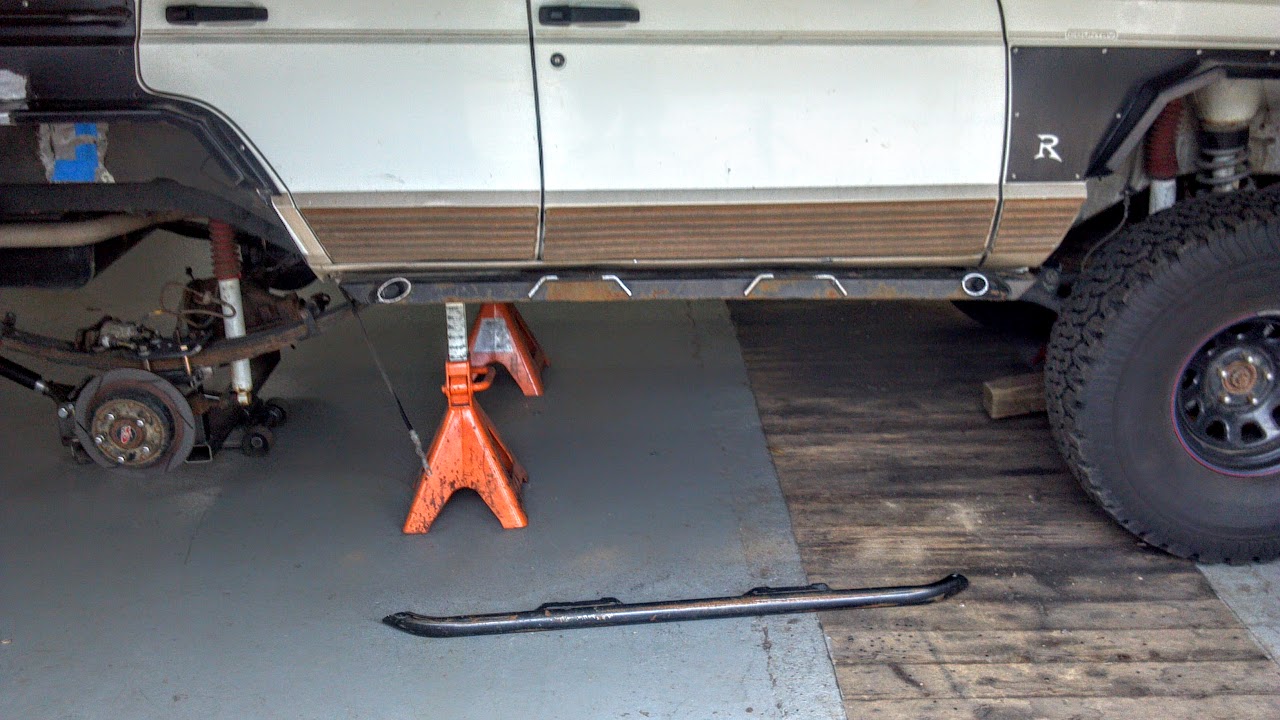
Removal of fender armor and a little trimming


I am going to be getting more pictures this weekend so will have update soon.
We will start with the before pictures
The perches
The axle removed and perches installed
How the truck sits with perches all the way back
Removal of fender armor and a little trimming
I am going to be getting more pictures this weekend so will have update soon.
06-25-2015, 04:53 PM
#20
Mopar Fanatic
Thread Starter
A little note I forgot to mention earlier, we like to video tape our trail runs. Got a few other misc videos on my page but it is mostly our rigs in action and can be found here
https://www.youtube.com/user/xaza23
A little bit of an update:
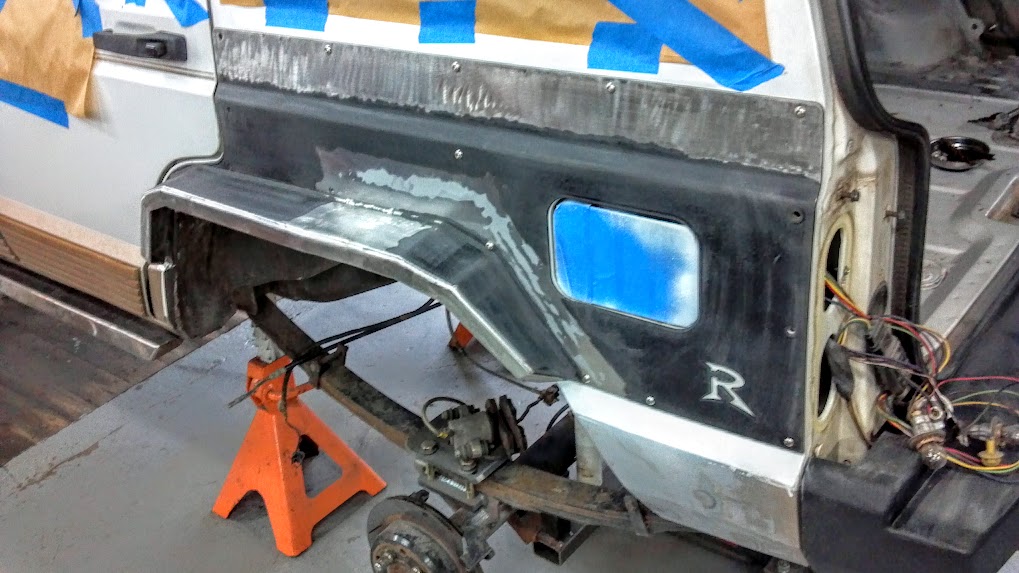
Drivers fender filled in

Fender armor cut


and slid back and filled


Passenger fender started


He is aiming to start cage tomorrow and truck complete next week. Will post more when I have it! I can't describe how excited I am, might have to make a shake down run before I start interior. I am a little on the crazy side with my interior ideas, we'll see when we get there though.
https://www.youtube.com/user/xaza23
A little bit of an update:
Drivers fender filled in
Fender armor cut
and slid back and filled
Passenger fender started
He is aiming to start cage tomorrow and truck complete next week. Will post more when I have it! I can't describe how excited I am, might have to make a shake down run before I start interior. I am a little on the crazy side with my interior ideas, we'll see when we get there though.
07-04-2015, 07:02 AM
#23
Mopar Fanatic
Thread Starter
Work continues. Passenger side fender armor cut and filled


I am not exactly sure the plan for the tubing removed from fender armor and rock sliders but IIRC he was explaining that they will be replaced by one solid tube rather than trying to tie into them. I am excited as can be and have absolute faith in my fabricator so I am sitting back enjoying this ride.


I am not exactly sure the plan for the tubing removed from fender armor and rock sliders but IIRC he was explaining that they will be replaced by one solid tube rather than trying to tie into them. I am excited as can be and have absolute faith in my fabricator so I am sitting back enjoying this ride.


 07-22-2015, 04:23 AM
#29
Mopar Fanatic
Thread Starter
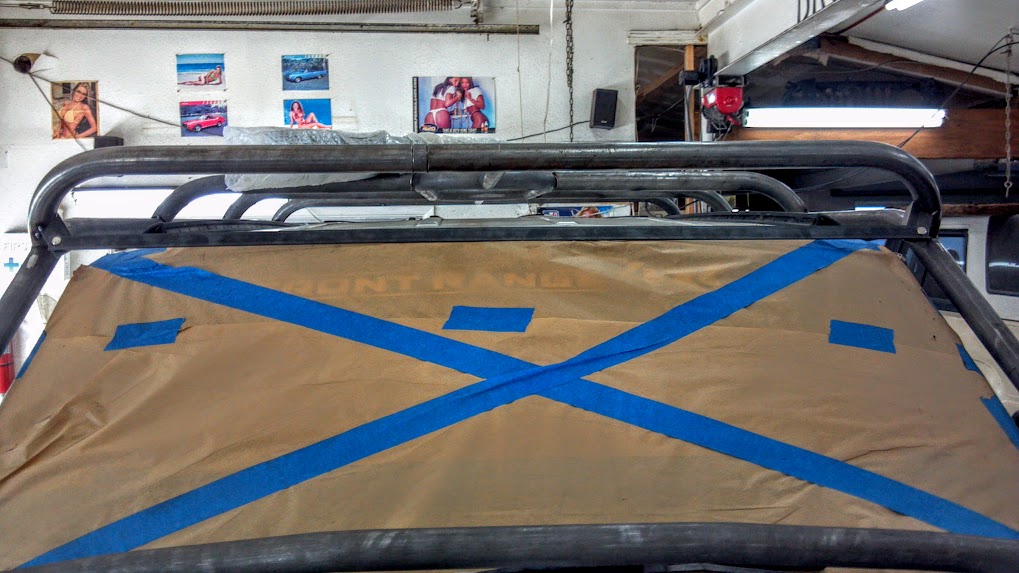
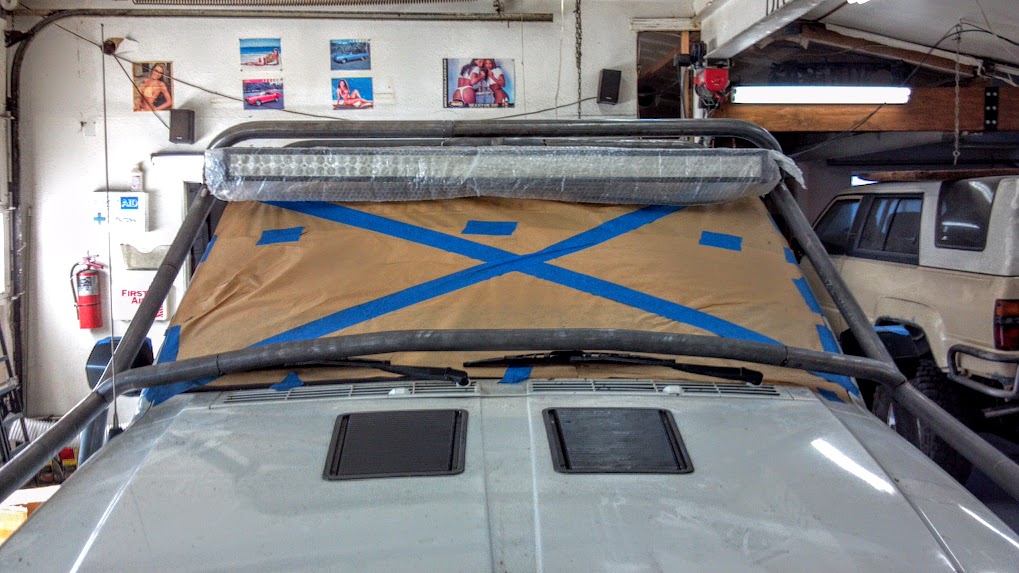
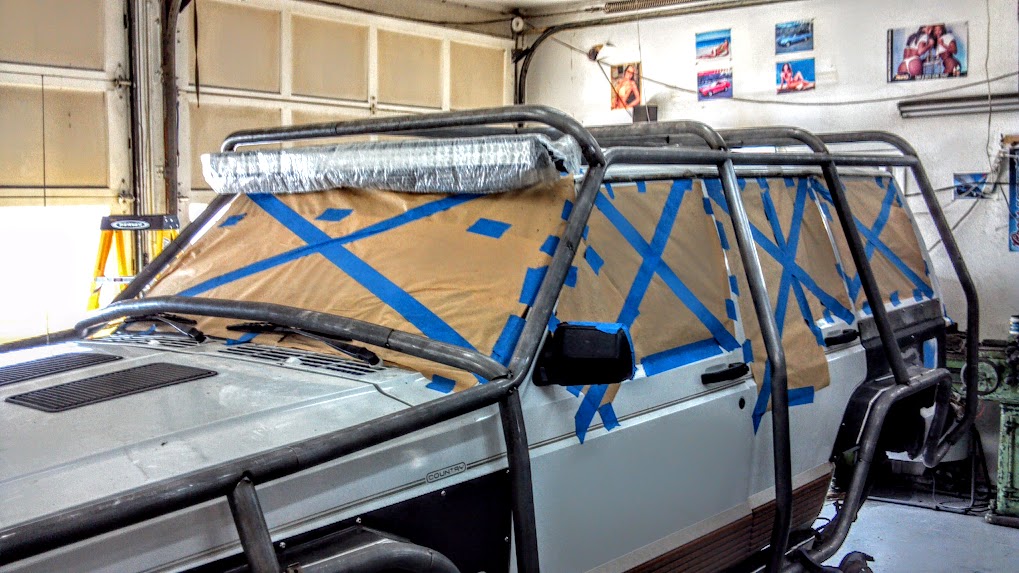
I found it quite interesting that the top was done the way it was. Fabricator wanted to do long tubes because they are stronger but yet the top has a bunch of welds rather than long tubes. He is very good at what he does so I am just trusting him. I am absolutely loving this project getting so close to completion.
07-24-2015, 05:15 PM
#30
Mopar Fanatic
Thread Starter
A little update. Aaron is feeling bad about the length of time my cage is taking him. I am fully understanding and am more concerned about his back then him I think sometimes. He picked me up a gift to say thanks for being patient and managed to get it put on truck. Should help next time we head for a rescue operation.