
I have posted this on BBD and FABO..see my 440 Build


Thread Starter
Super Moderator
Joined: Sep 2010
Posts: 3,609
Likes: 181
From: Houston, Texas
So this is what I did tonight
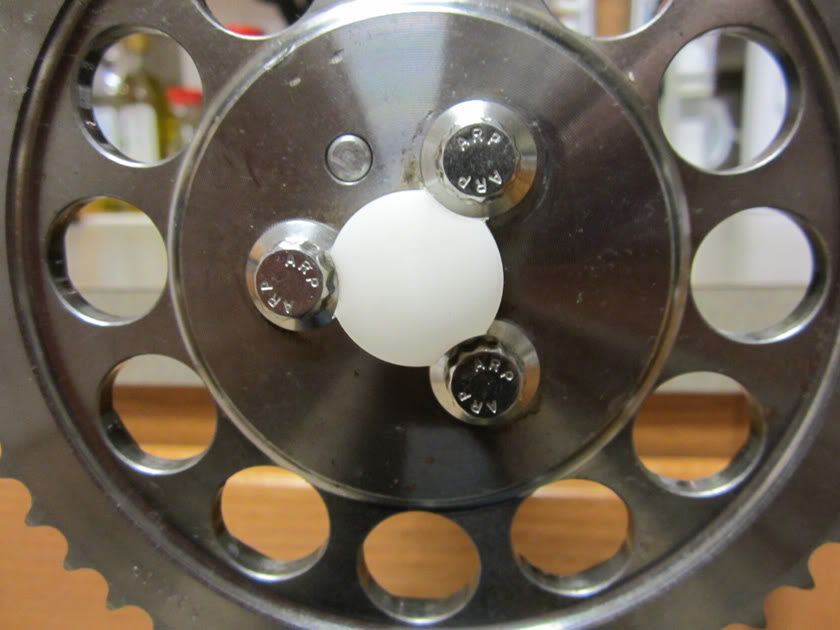
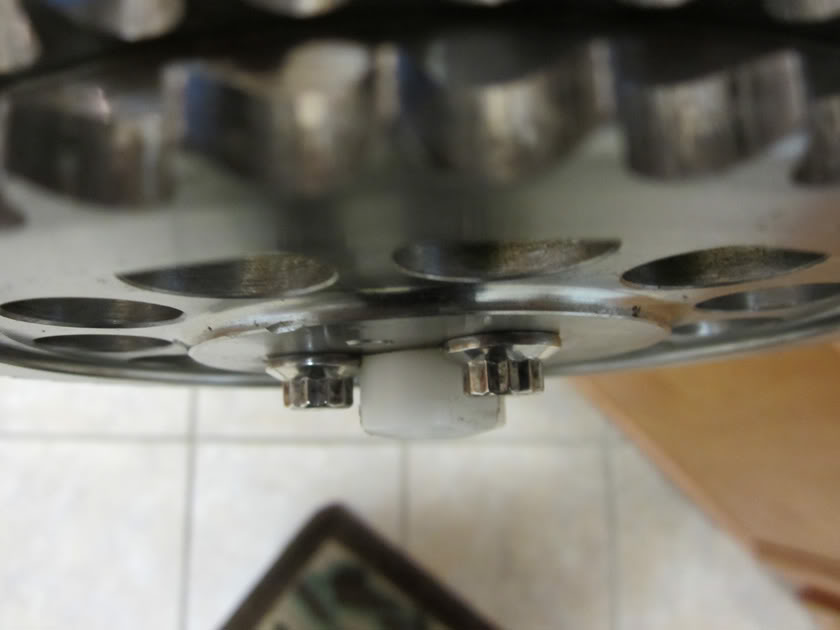
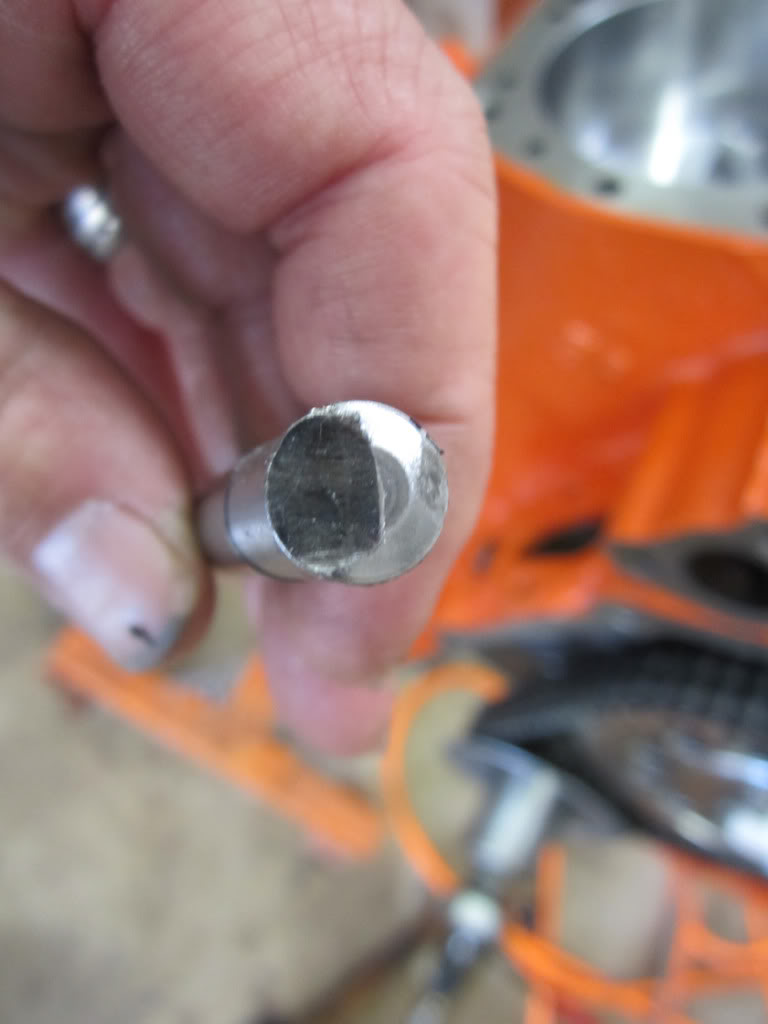
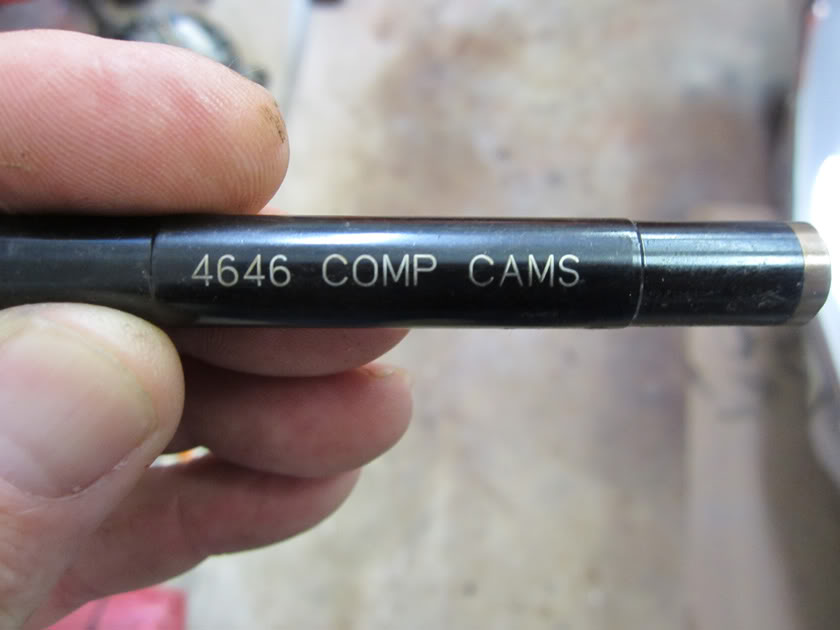
I got my new nylon cam buttom last night and this was Comp Cams offering and maybe not to good but I adapted it. I had to take some notches out of it and loose the socket head bolts I bought today. The ARP's stick out less.
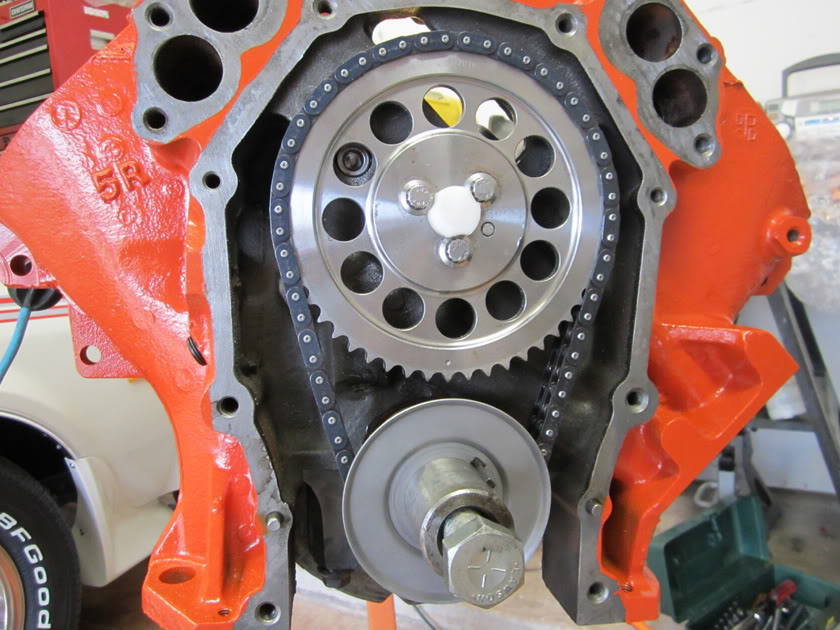
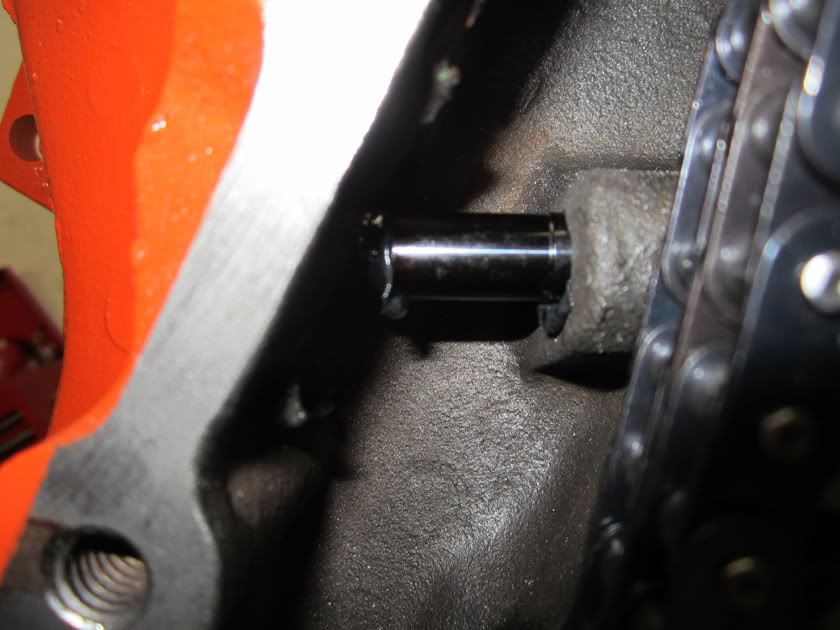
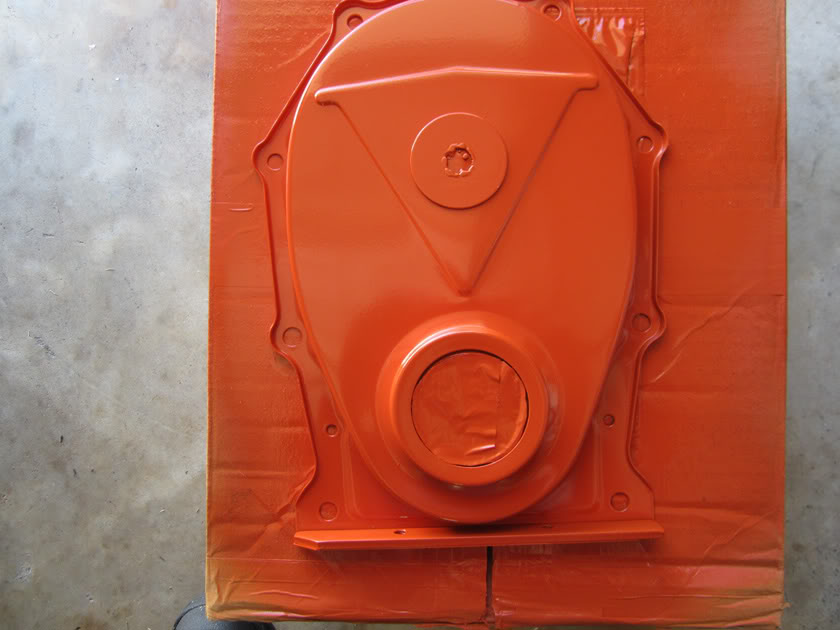
I also got my new timing cover today so I welded a fender washer on the exact spot the old roller button was rubbing and the back of the pump housing was touching. It will go to paint after I clearance the new cam button.
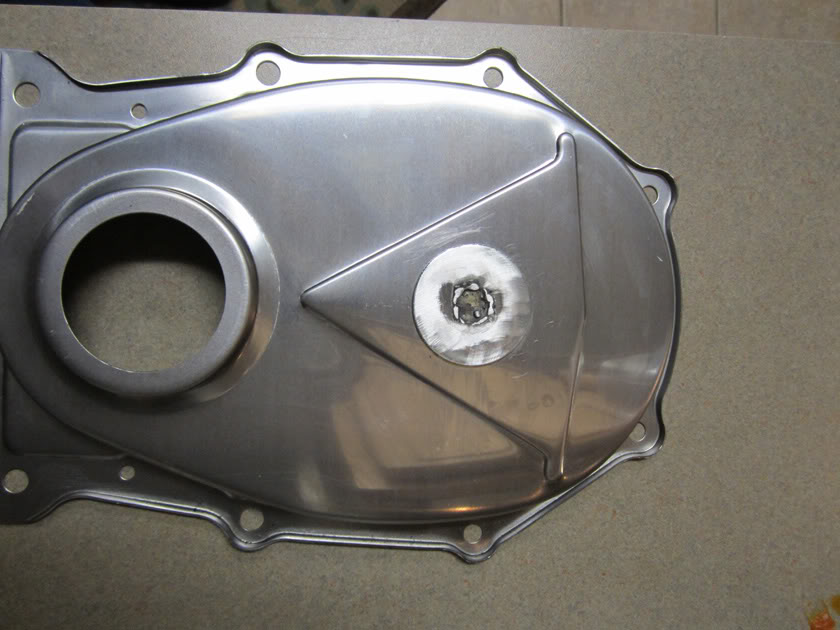
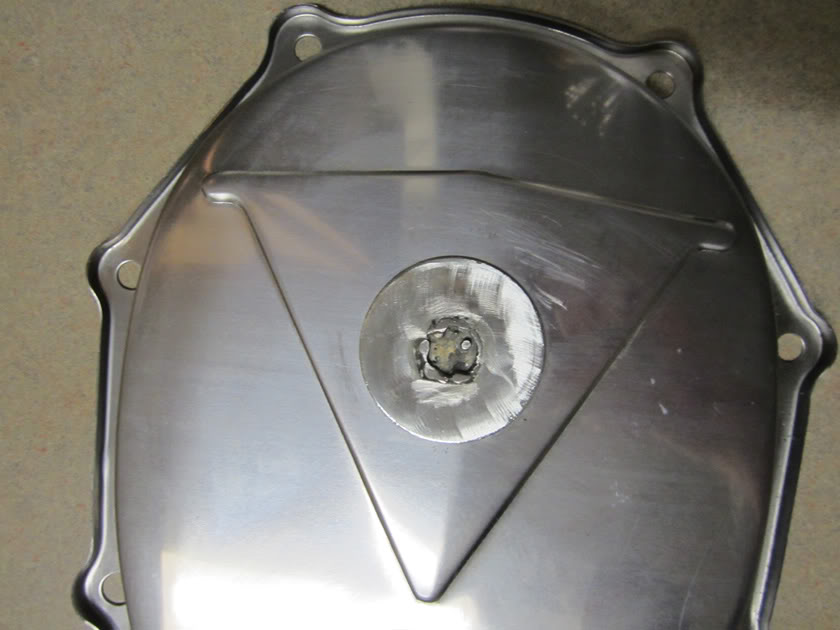
I also got my new timing cover today so I welded a fender washer on the exact spot the old roller button was rubbing and the back of the pump housing was touching. It will go to paint after I clearance the new cam button.
Thread Starter
Super Moderator
Joined: Sep 2010
Posts: 3,609
Likes: 181
From: Houston, Texas
Saturday.
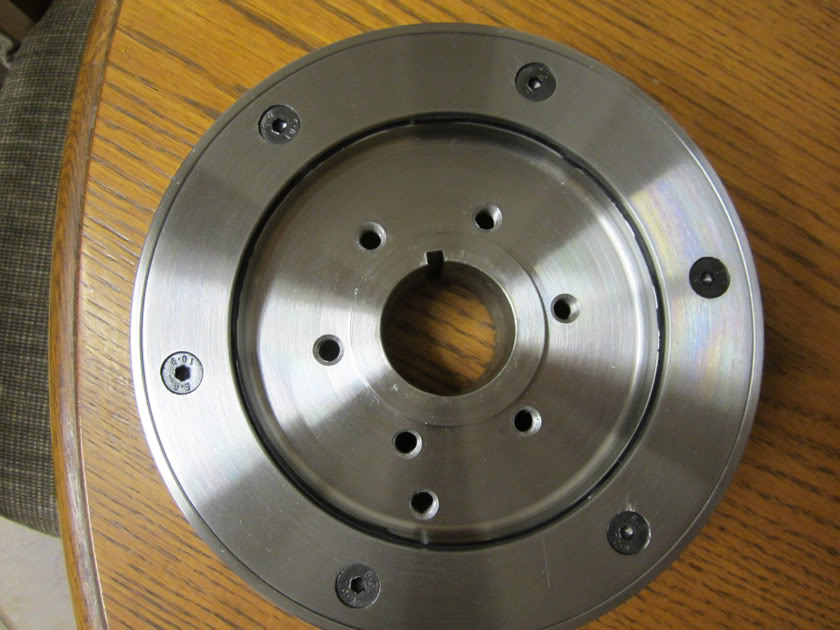
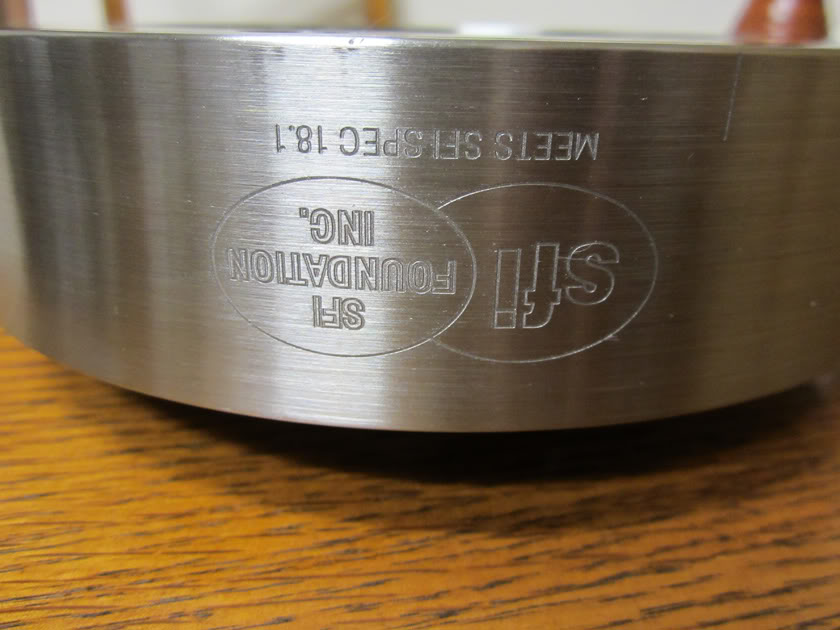
Saturday was the only day I had to work on the car. I got the cam button clearanced okay. I had to grind alot of the front of the cam button because the big fender washer pushed the timing cover back. I also got my SFI approved balancer. I was running a SFI approved flex plate so I might as well be ready for the front. My brass tipped fuel pushrod got trashed by the broken Holley fuel pump so I had to order another. For a minute I thought about going electric then I remembered the noise it makes on my buddies car.
Thread Starter
Super Moderator
Joined: Sep 2010
Posts: 3,609
Likes: 181
From: Houston, Texas
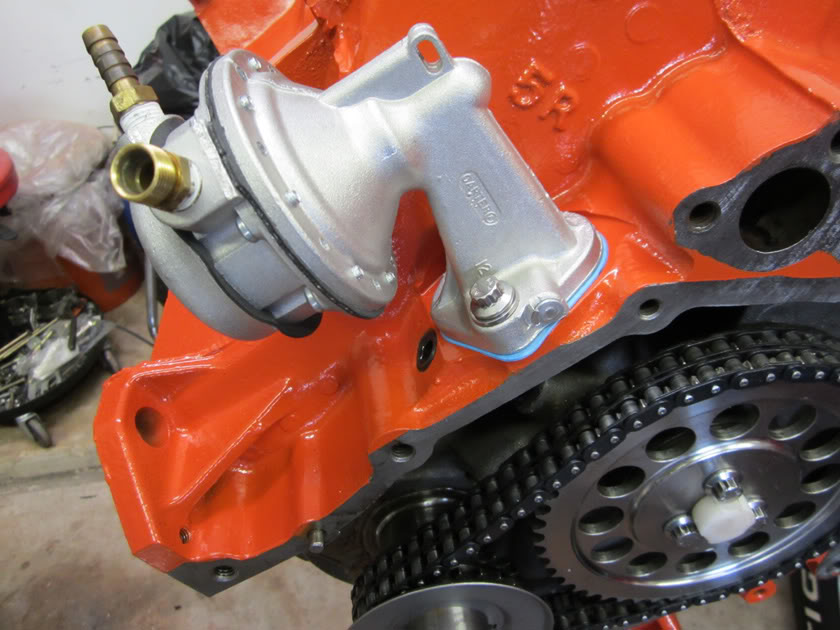
Got my new fuel pump pushrod today so decided to get it and the fuel pump out of the dining room and into/onto the motor. A little assembly lube and it's done. Will be 70 here tomorrow so I am going to paint the timing cover and oil pump. I still have to do some clearencing on the oil pan for the idler arm.
Thread Starter
Super Moderator
Joined: Sep 2010
Posts: 3,609
Likes: 181
From: Houston, Texas
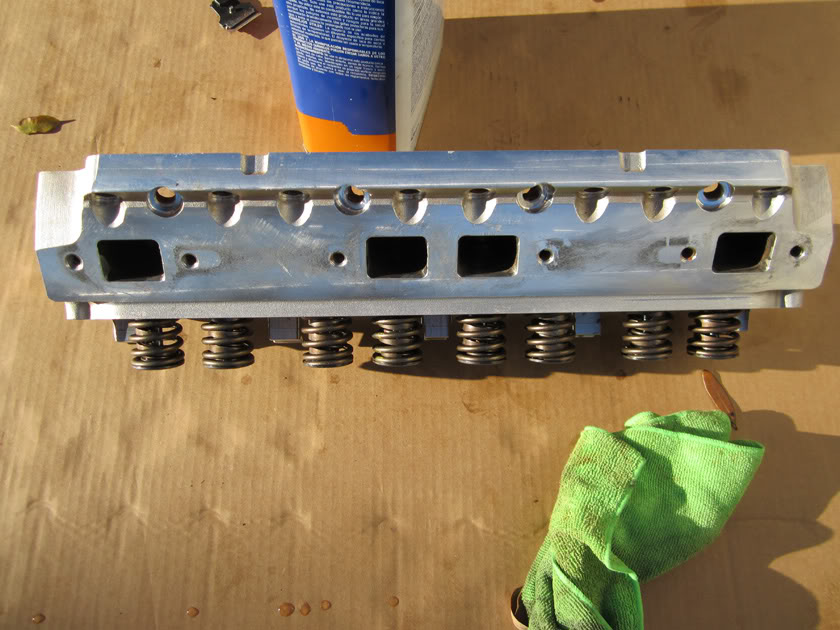
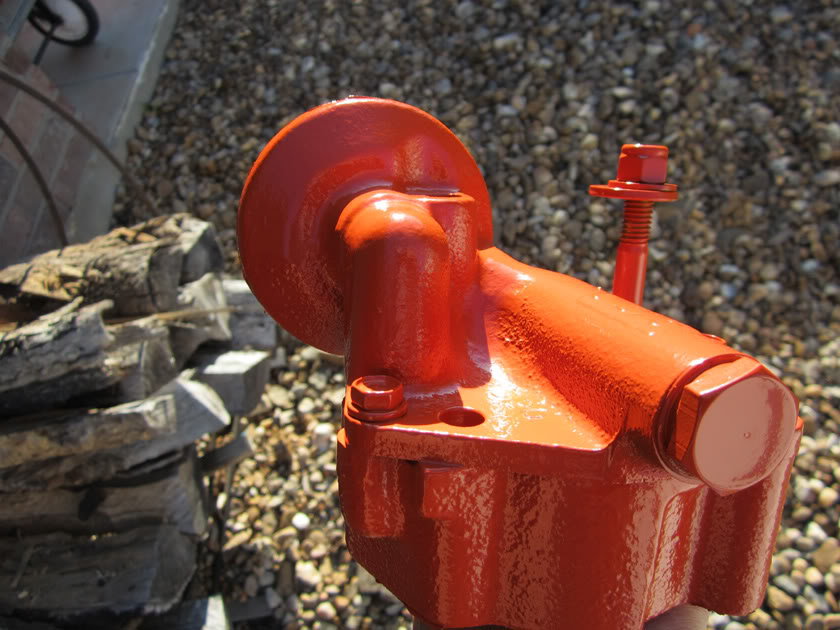
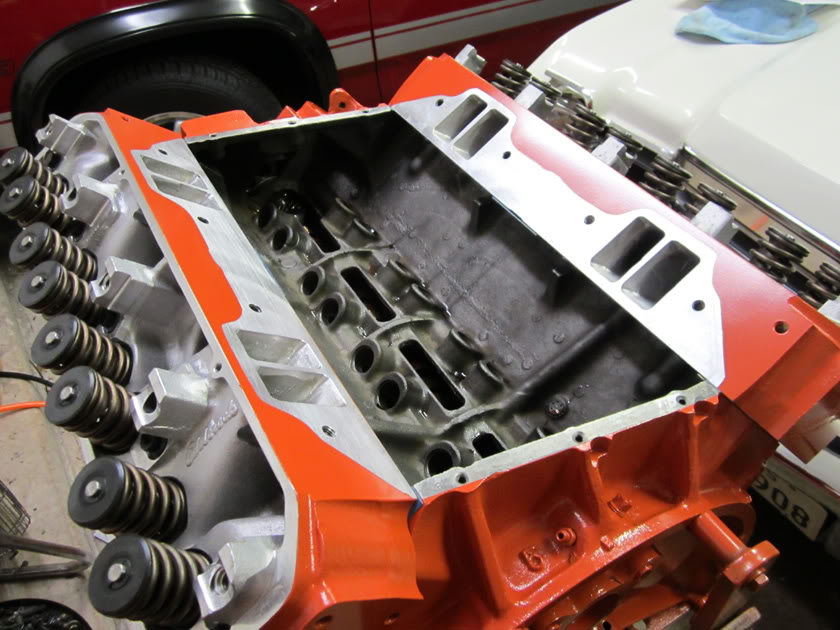
I am working half days for the next two weekends to wash down the system at work. Not much time to do stuff so with 70 degree sunny weather today I got both heads stripped of paint...the intake manifold stripped of paint and then I got the timing cover and oil pump painted. I should be able to do a coupled of more things tomorrow.
Thread Starter
Super Moderator
Joined: Sep 2010
Posts: 3,609
Likes: 181
From: Houston, Texas
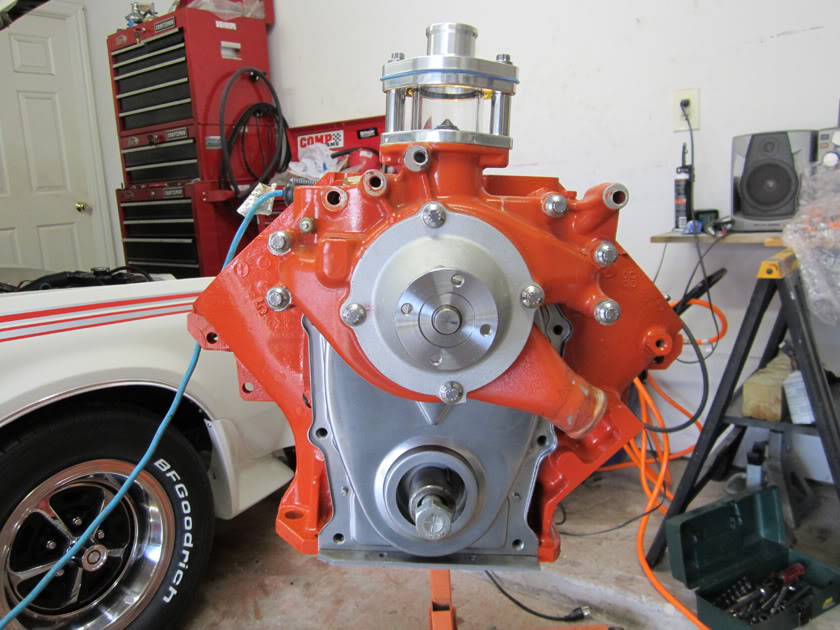
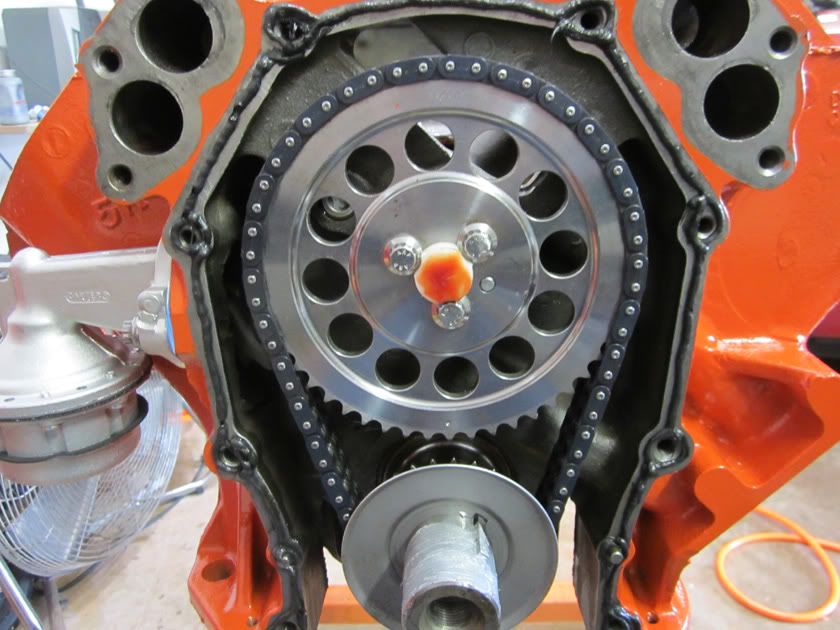
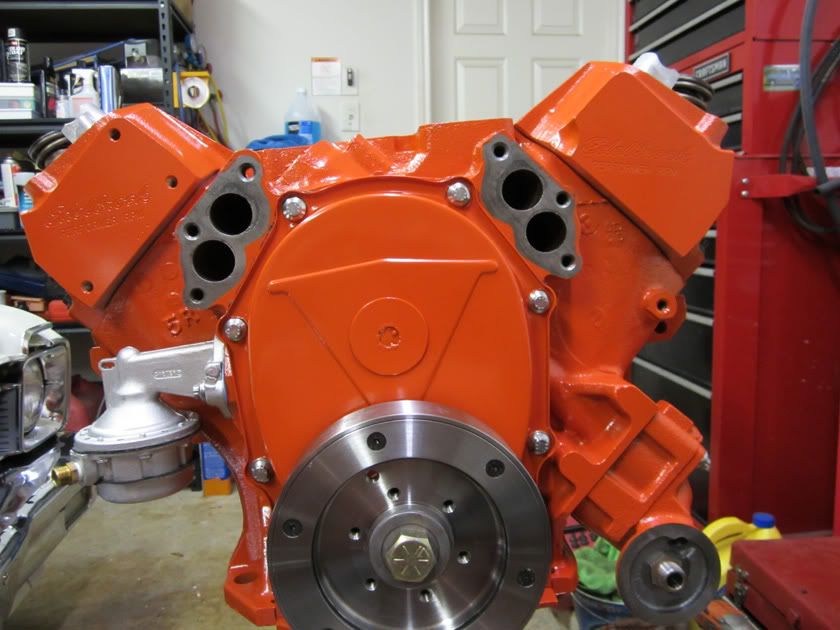
Today I backed the Aspen out and got the timing cover, harmonic balancer and oil pump on the 440. I had to cut the bolts for the oil pump about 3 threads worth. I remember having to do this last time. 440 Source is selling the kit that has them a little bit too long. I made sure to use anti-sieze on the crankshaft again.

Thread Starter
Super Moderator
Joined: Sep 2010
Posts: 3,609
Likes: 181
From: Houston, Texas
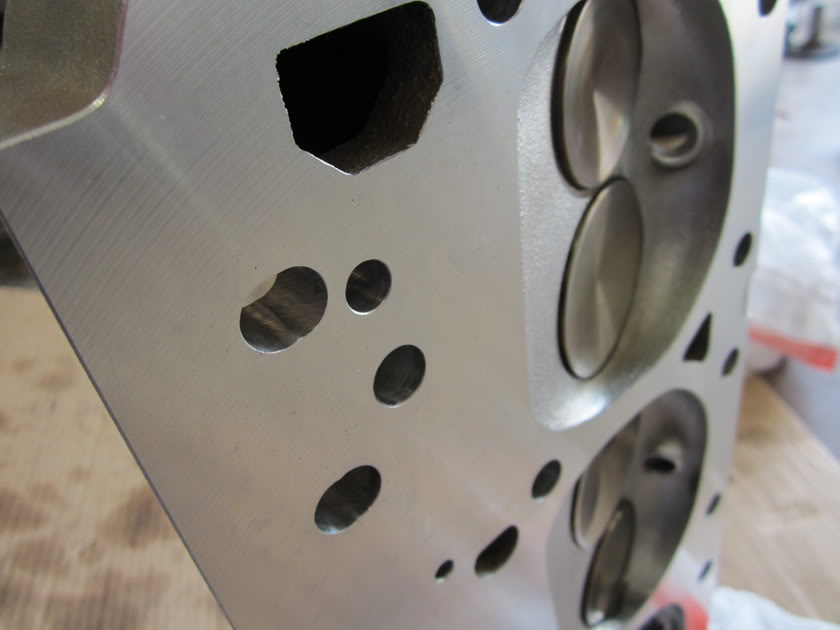
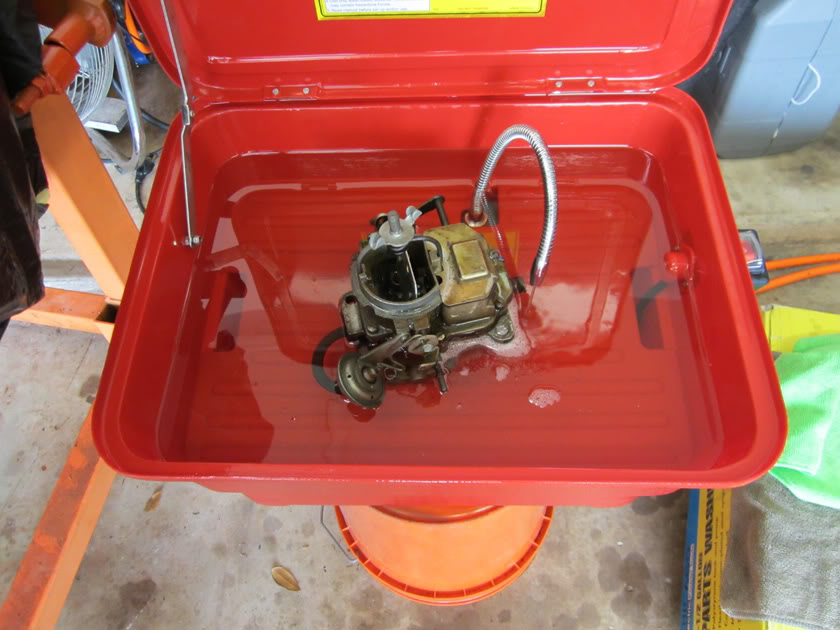
Got my heads back yesterday. Cleaned and cut for 50 bucks. Then I bought a cheapo parts cleaner from HF and loaded it up with some CRC Parts Solvent. I cleaned the lifters, pushrods and rocker arms. I put in a two barrel carb in it to soak it overnight.

Thread Starter
Super Moderator
Joined: Sep 2010
Posts: 3,609
Likes: 181
From: Houston, Texas
Finally starting to look like a big block again.
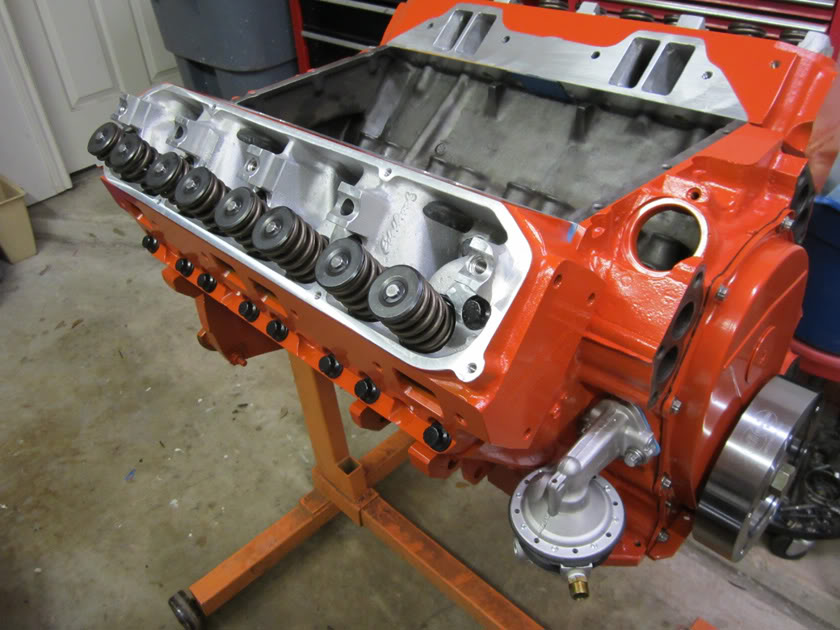
Well I had a great painting day on Sunday so I got them heads on there and torqued down. Hopefully will have the windage tray and oil pan on this weekend so I can set up the valvetrain.
 opcorn:
Thread Starter
Super Moderator
Joined: Sep 2010
Posts: 3,609
Likes: 181
From: Houston, Texas
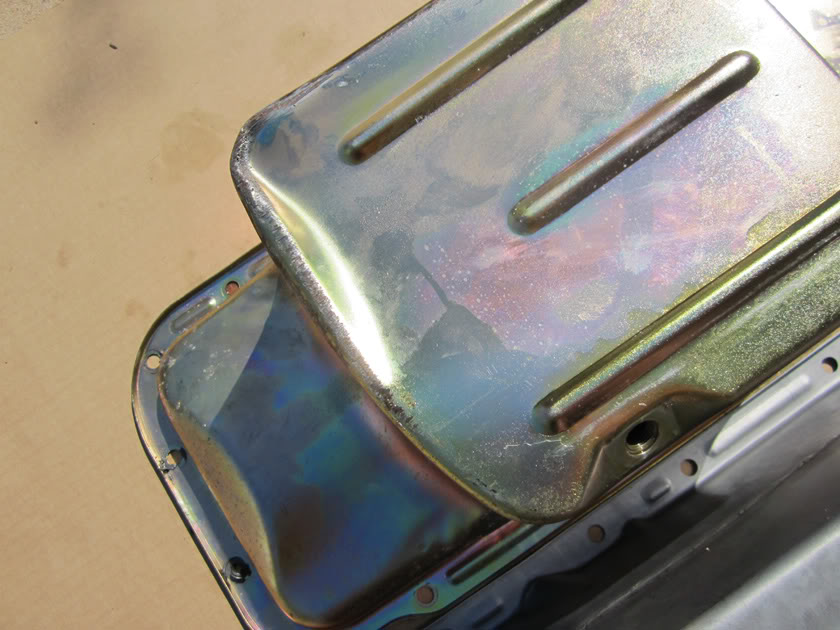
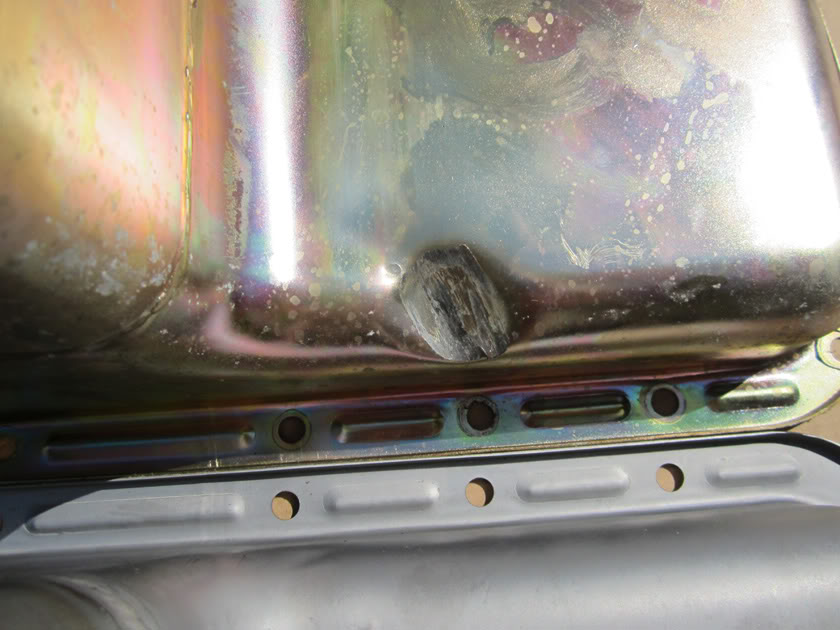
This is a 440 in an A body for ya. Watch out for bumps and tight right hand turns. I dented the new pan where the idler arm will hit. I will show pics of it later on. I have one more thing to do to it.
Thread Starter
Super Moderator
Joined: Sep 2010
Posts: 3,609
Likes: 181
From: Houston, Texas
I stepped up.
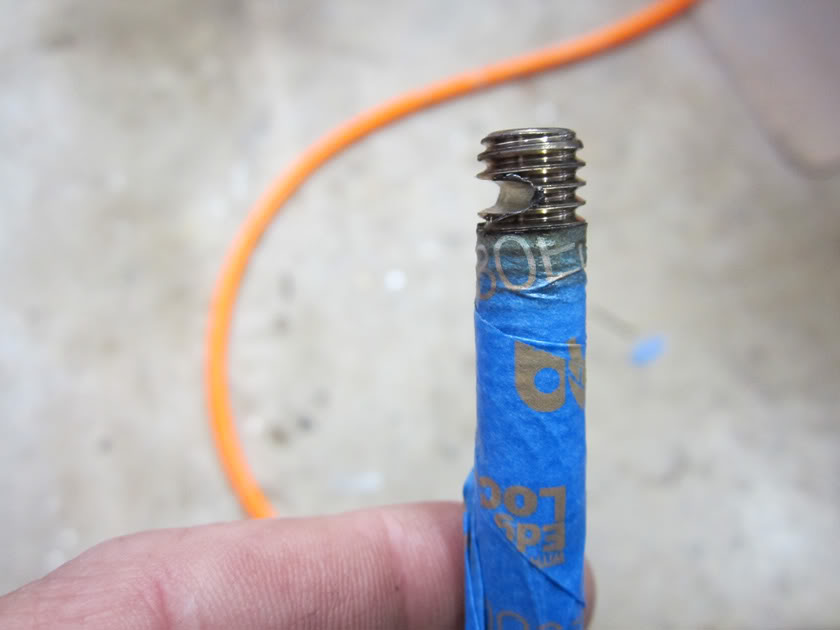
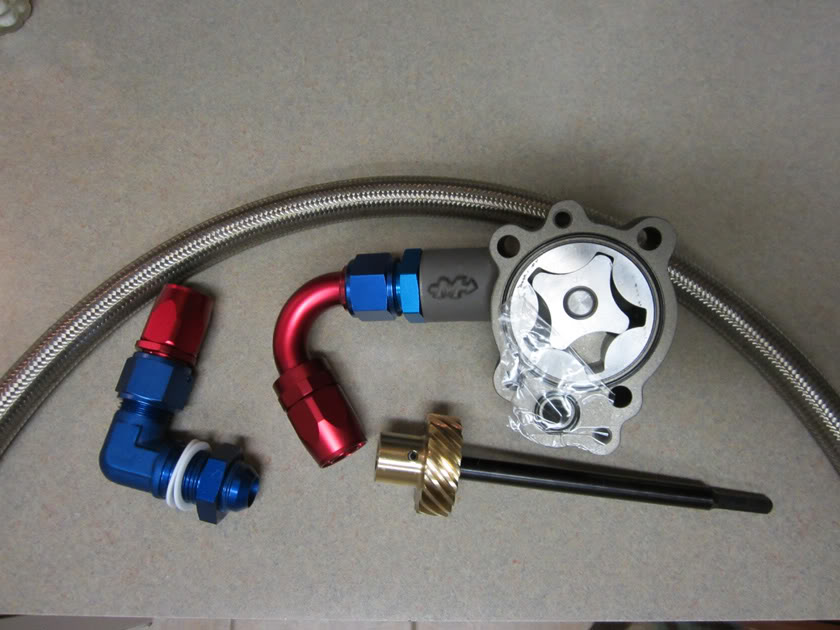
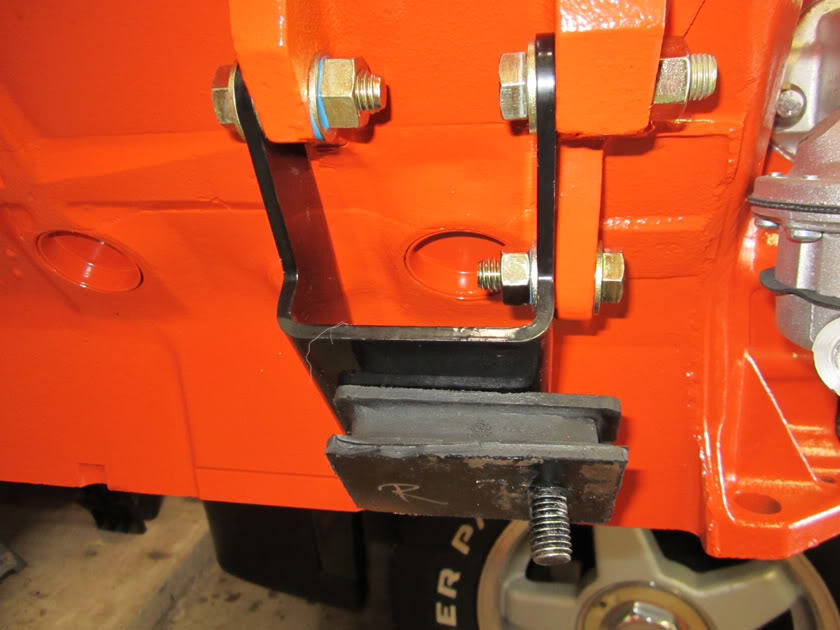
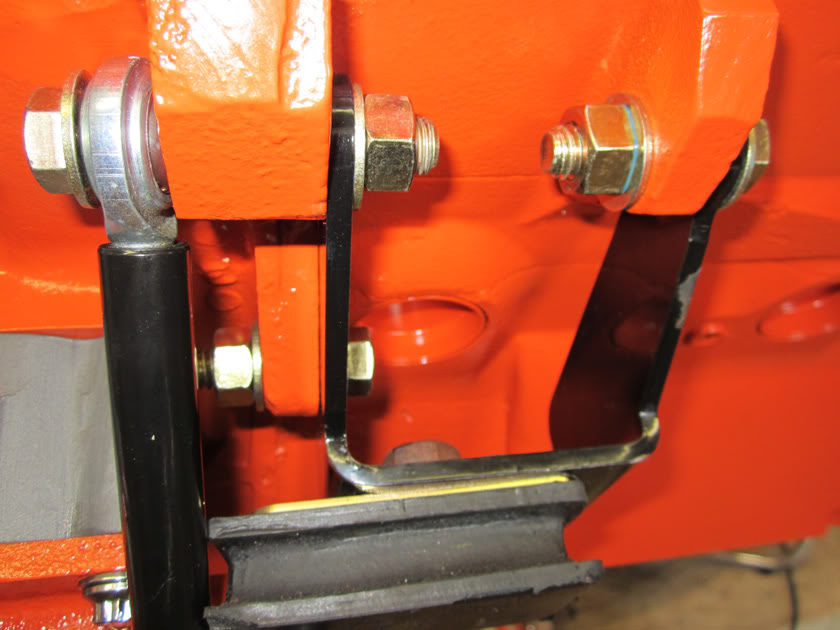
I wish I would have stroked this motor but it will still spin the tires as much as I want to do it. I did step up to the Milodon external oiling setup. This weekend I stepped up a new oil pan also. It will be here on Tuesday. I got the new external pump mounted today along with the motor mounts. Three bolts on each side were loose when I removed the old motor. I used some blue locktite this time.
Thread Starter
Super Moderator
Joined: Sep 2010
Posts: 3,609
Likes: 181
From: Houston, Texas
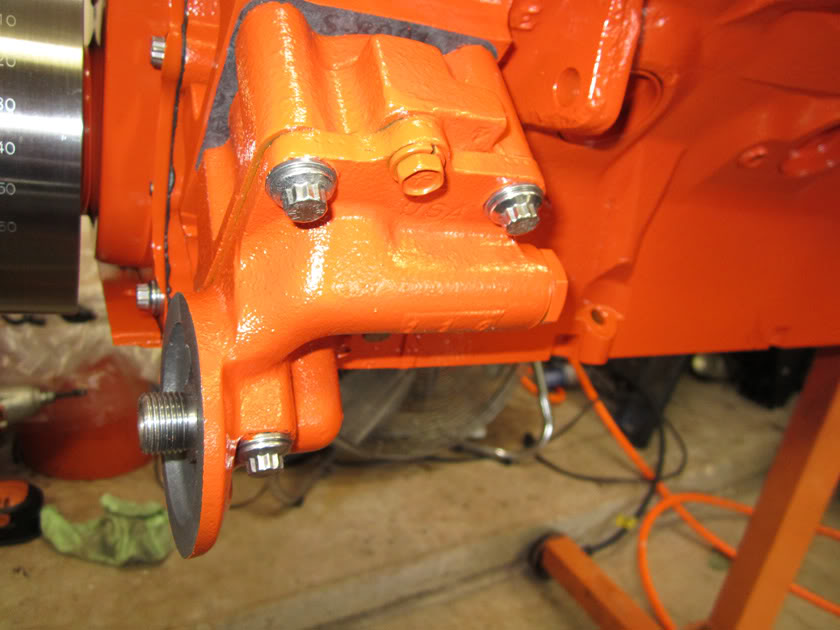
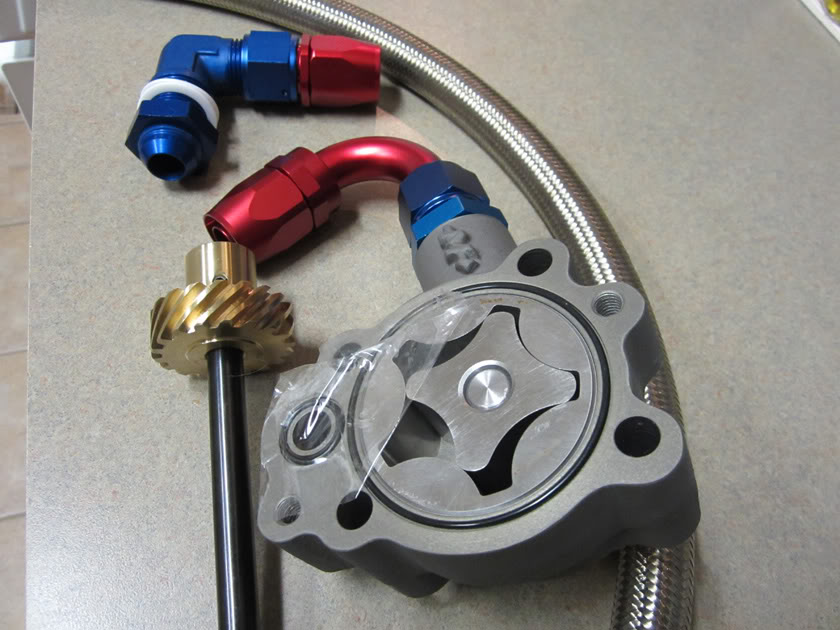
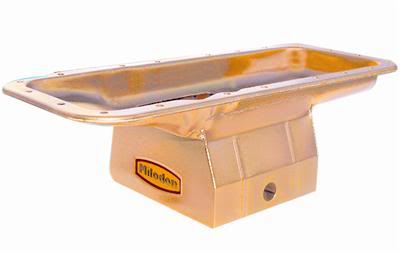
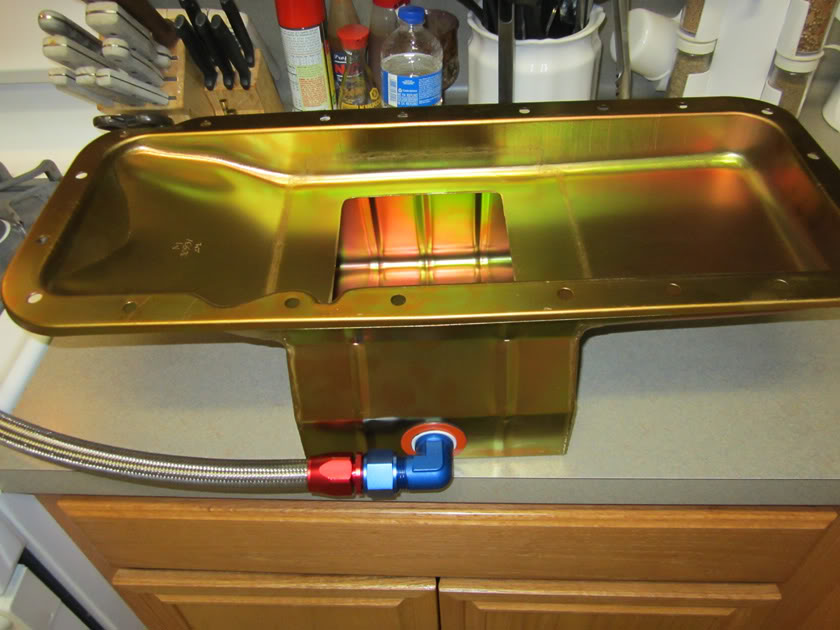
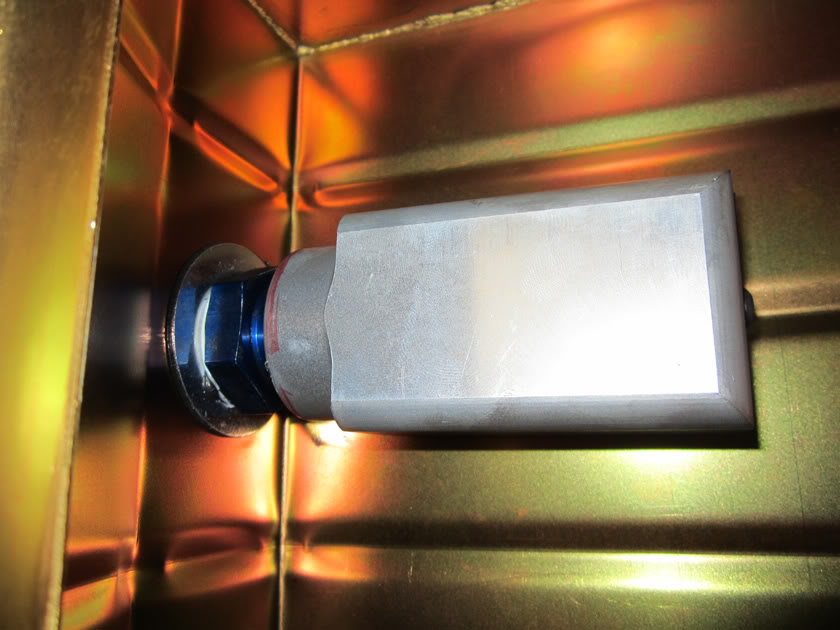
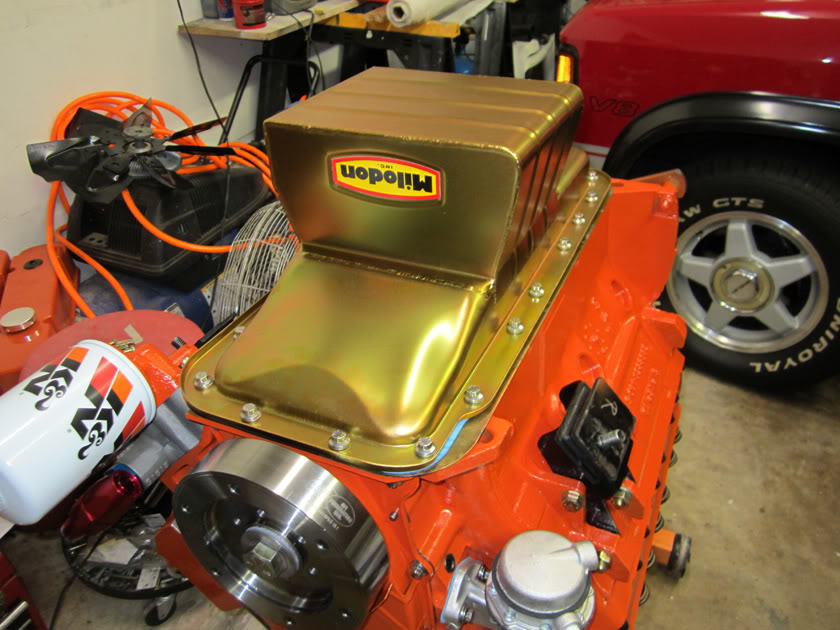
I got my Milodon Oil pan
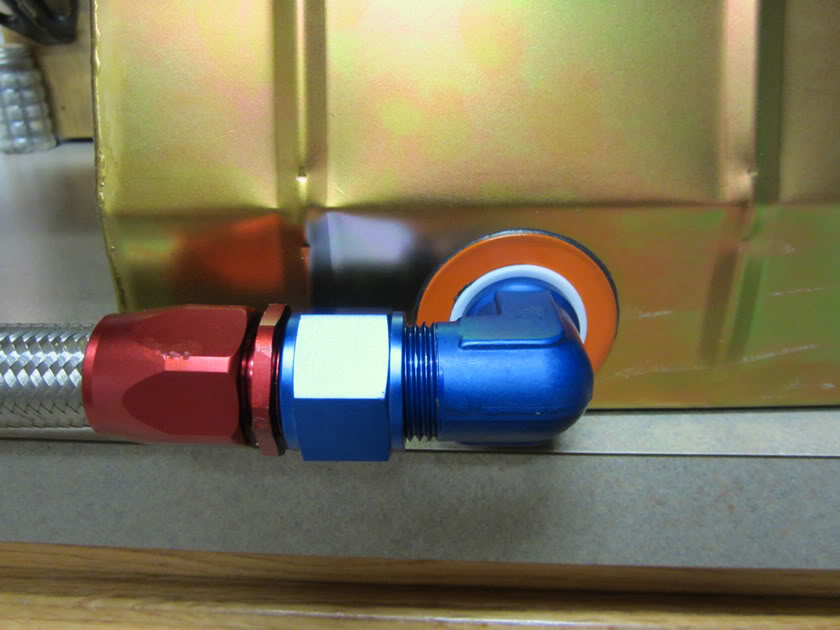
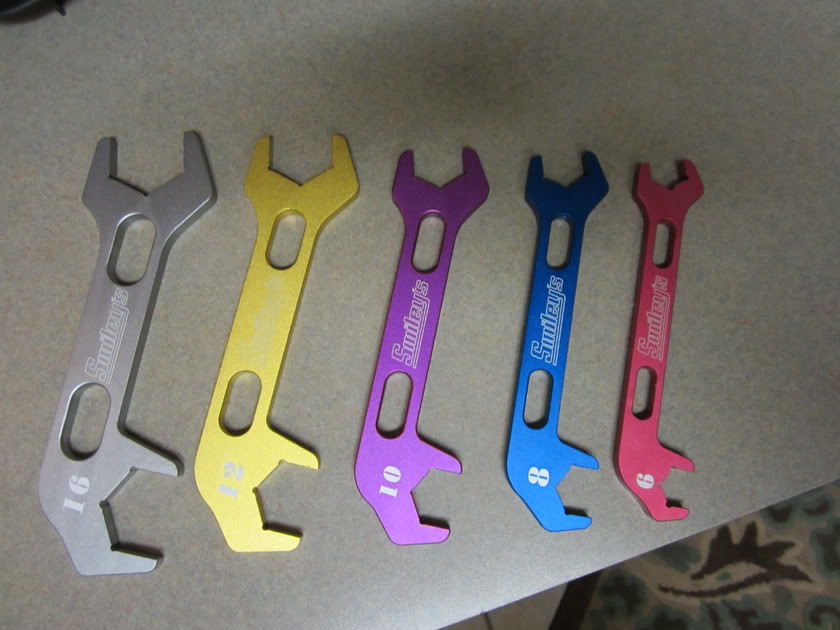
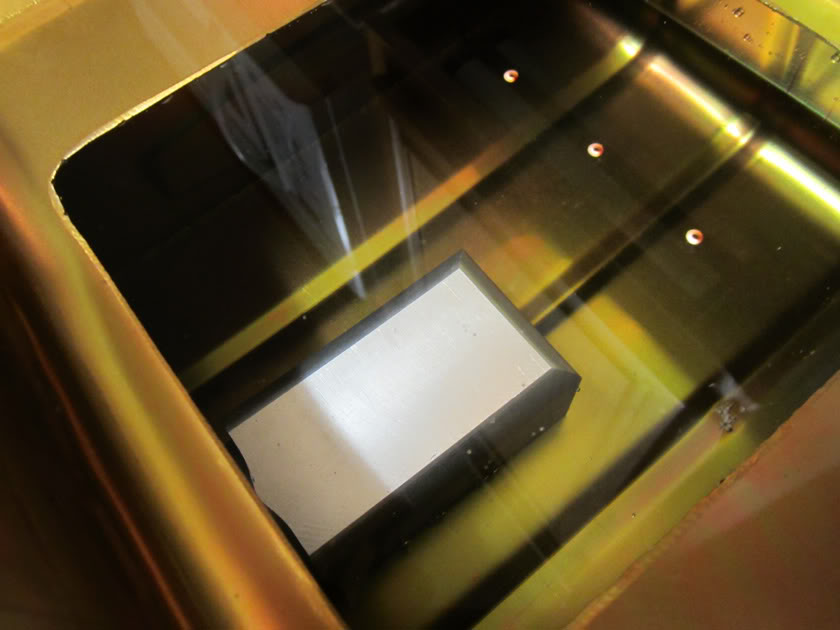
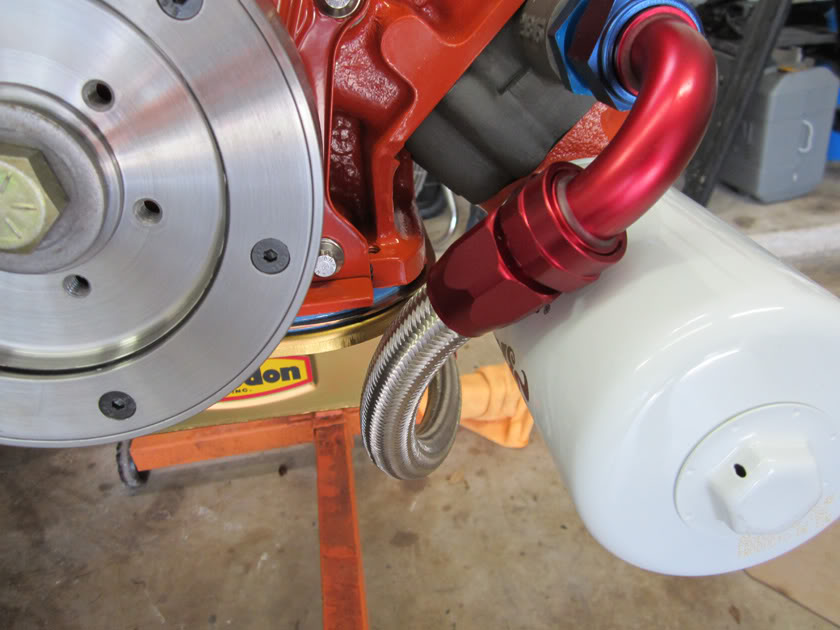
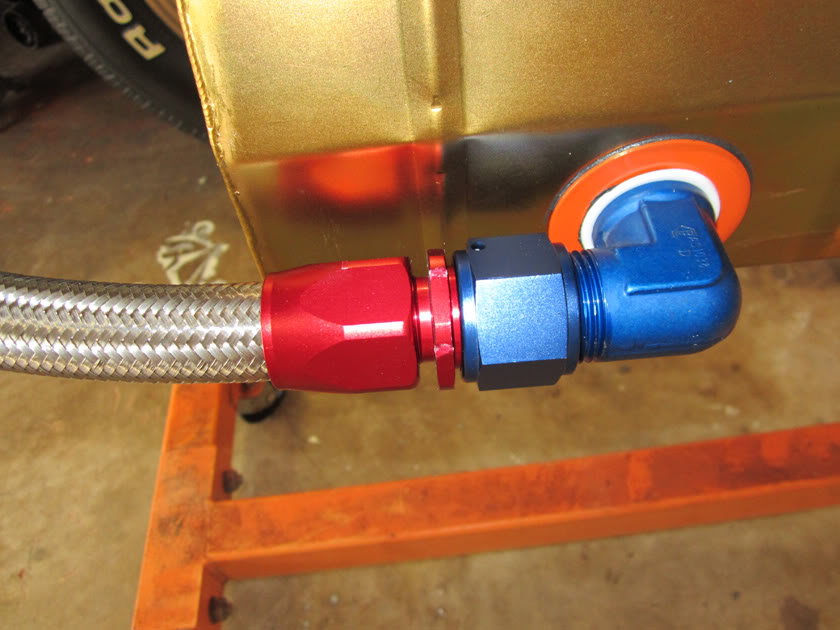
I got my Milodon external oiling Oil pan on Tuesday. The An-12 hole was spot on for the An-12 bulkhead fitting and 440 Source billet static pickup. I took two fender washers and used them to stiffen the pan at the fitting. I got some An fitting wrenches from Smiley Racing which is mostly Chebby stuff but they are close and have fittings and braided hose that I need. I got it all connected and filled up with water tonight. My fat cat want's to drink the water out of it. I have it setting on a large piece of card board tonight to check for leaks.

Thread Starter
Super Moderator
Joined: Sep 2010
Posts: 3,609
Likes: 181
From: Houston, Texas
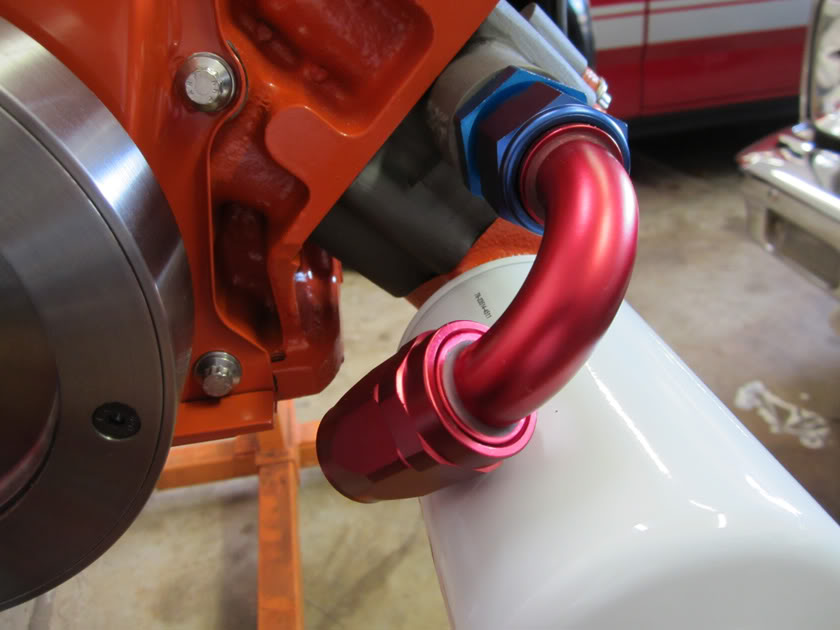
I got the pan on tonight. I have to cut to length that -12 AN hose and make up the other end to the oil pump. Then I will flip it over and install the lifters and valve train. Oil up the lifters and then set the valve lash. Then the intake on and lower it in.
Thread Starter
Super Moderator
Joined: Sep 2010
Posts: 3,609
Likes: 181
From: Houston, Texas
Got the oil pan on tonight. I used the Fel-Pro Performance steel shim pan gaskets. I don't want to have to pry it off if it has to come off when I lower the motor in. These gaskets remind me of the perma-torque gaskets.

Thread Starter
Super Moderator
Joined: Sep 2010
Posts: 3,609
Likes: 181
From: Houston, Texas
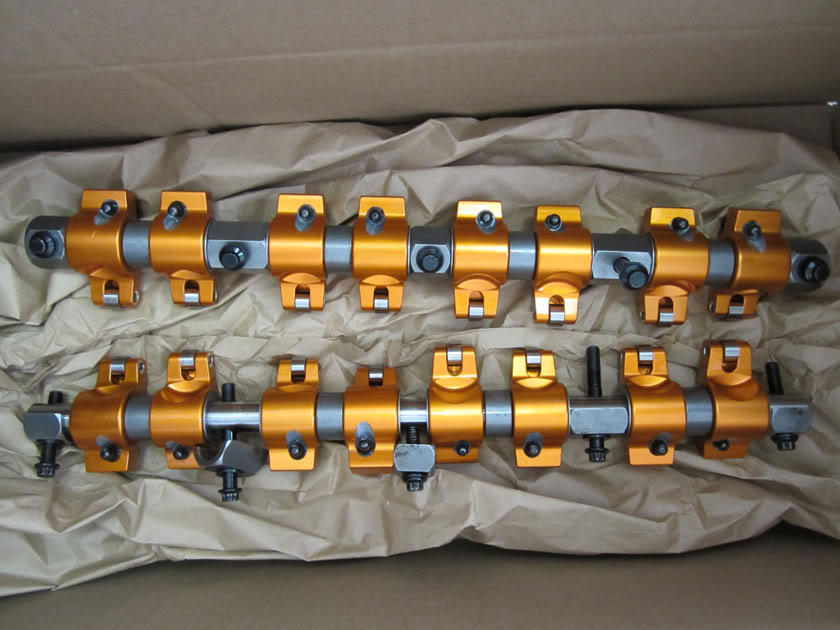
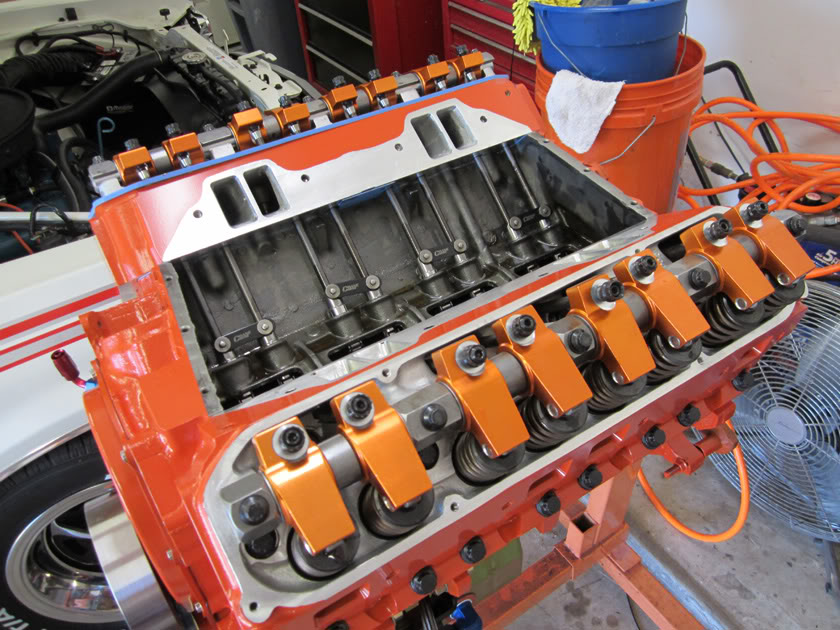
I finally got the valvetrain installed and five quarts of oil with no leaks. But sorry to say that's as far as I got. Next to pump up the lifters and set the pre-load.
Thread Starter
Super Moderator
Joined: Sep 2010
Posts: 3,609
Likes: 181
From: Houston, Texas
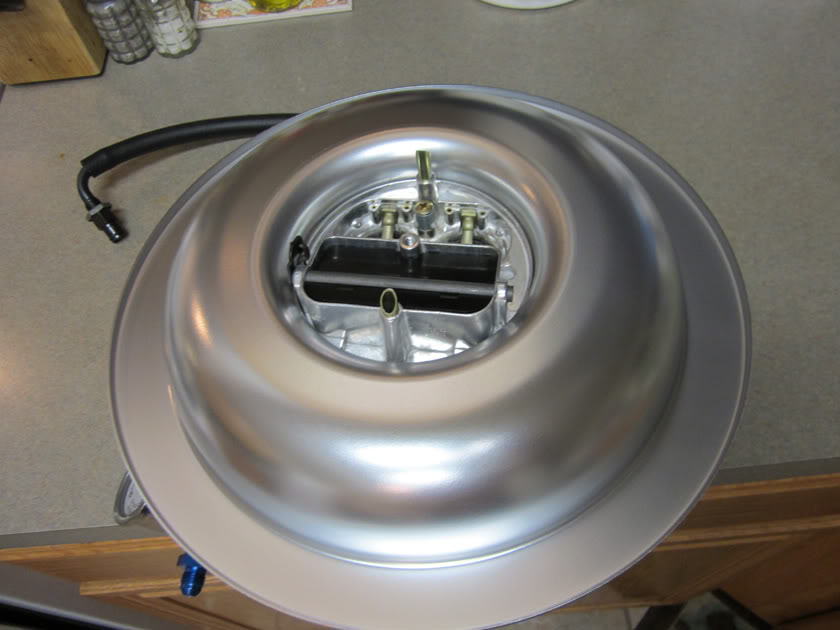
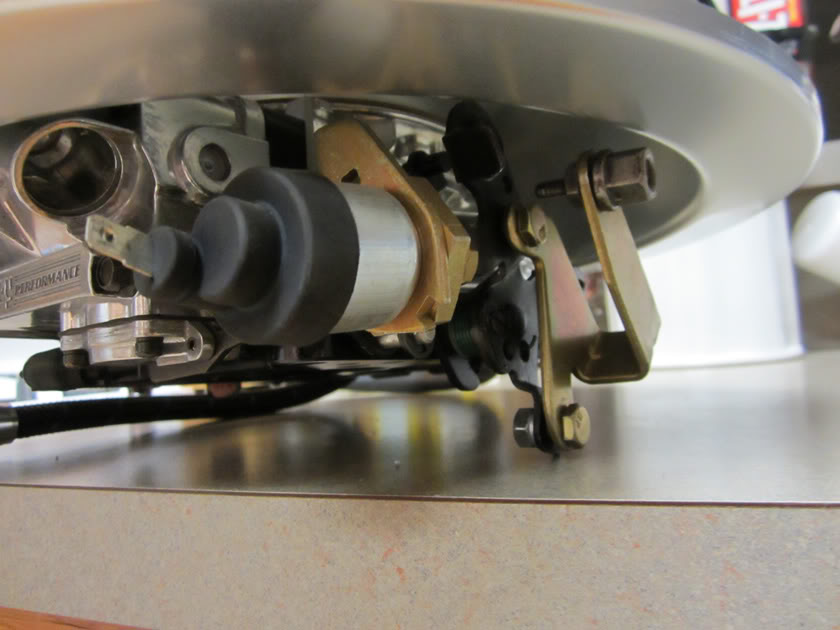
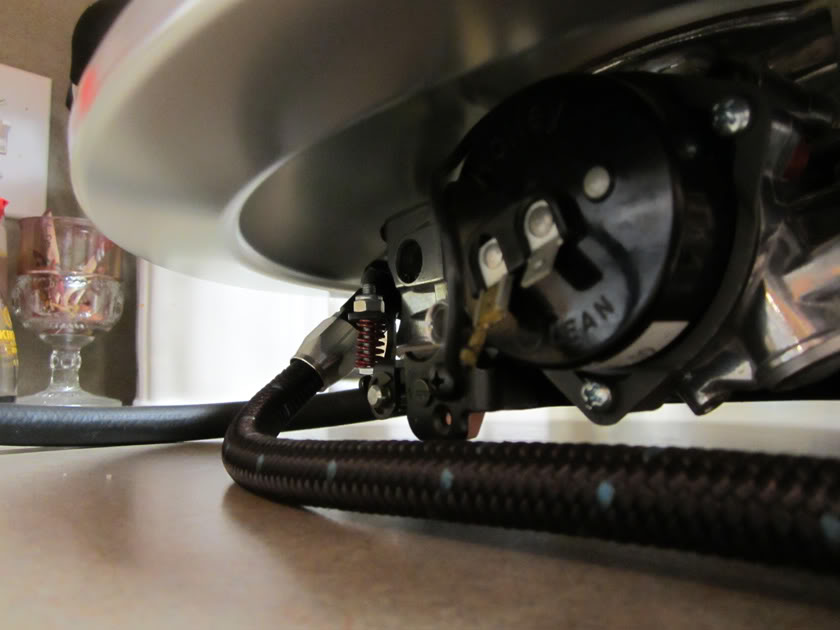
My 18 vdc Dewalt struggled last night so I charged the battery and got the lifters pumped up. I got home late tonight so all I was able to do was try the new dropdown air cleaner base on and snapped a couple of pics. Everything seems to clear. Remember I am going back to my stock hood.
Thread Starter
Super Moderator
Joined: Sep 2010
Posts: 3,609
Likes: 181
From: Houston, Texas
Spent some more time this Sunday
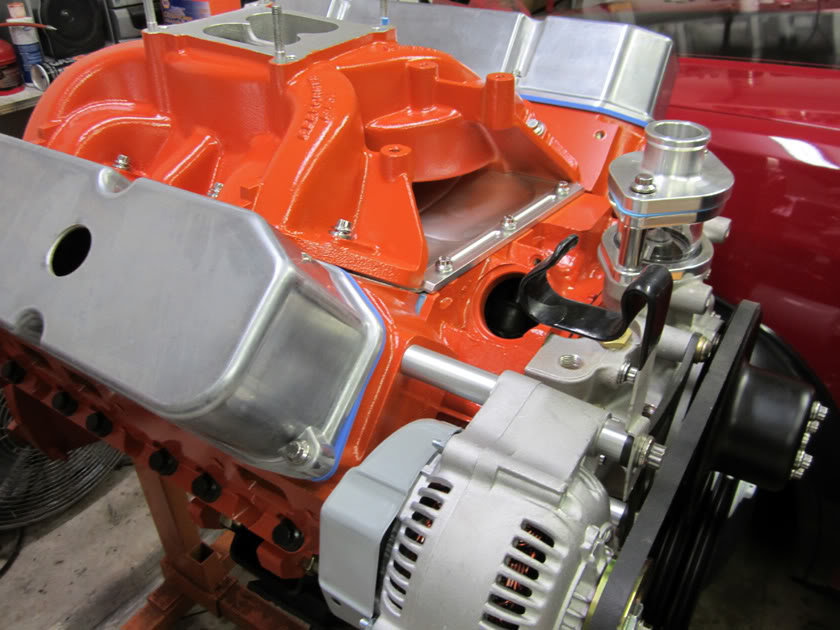
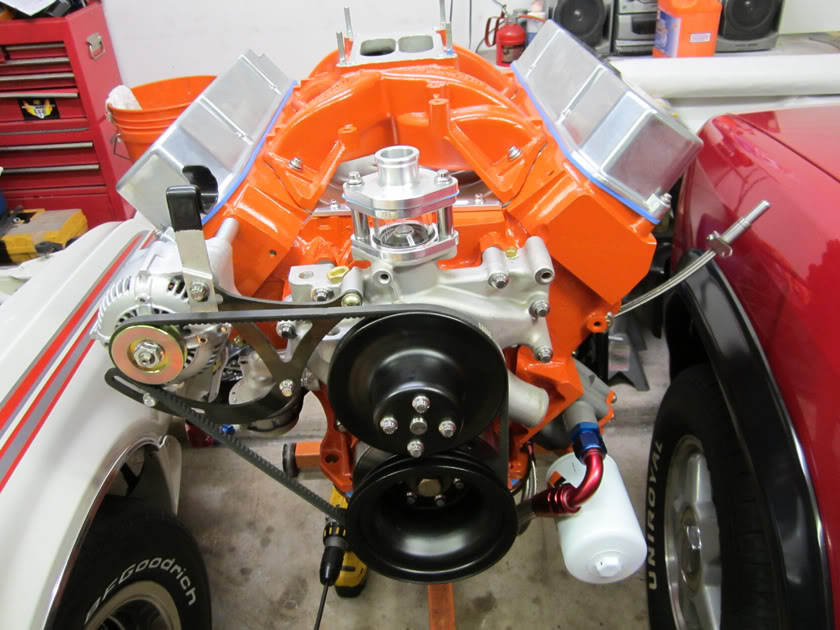
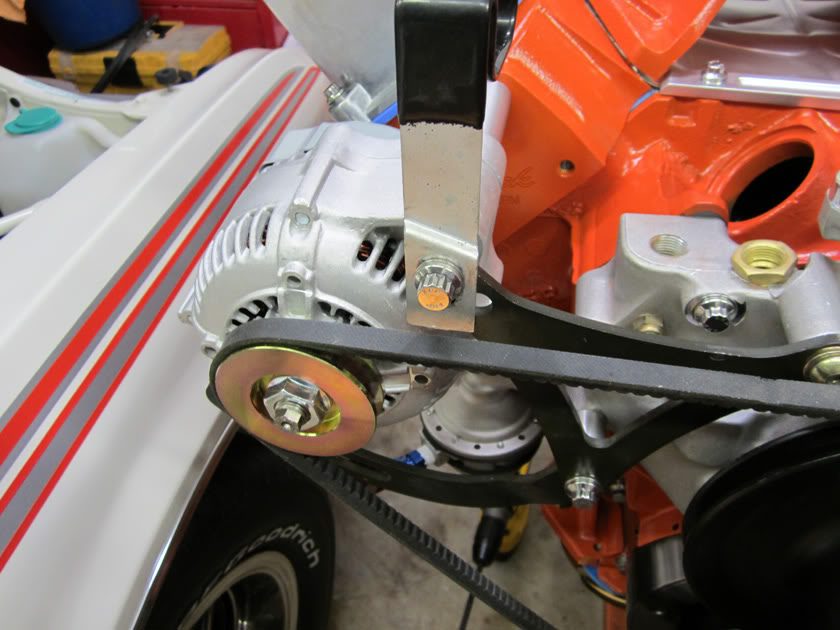
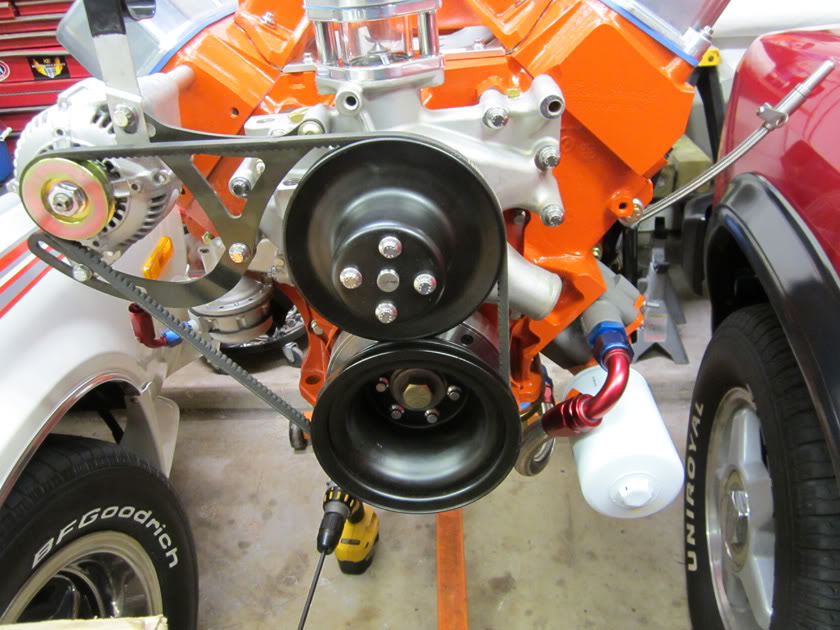
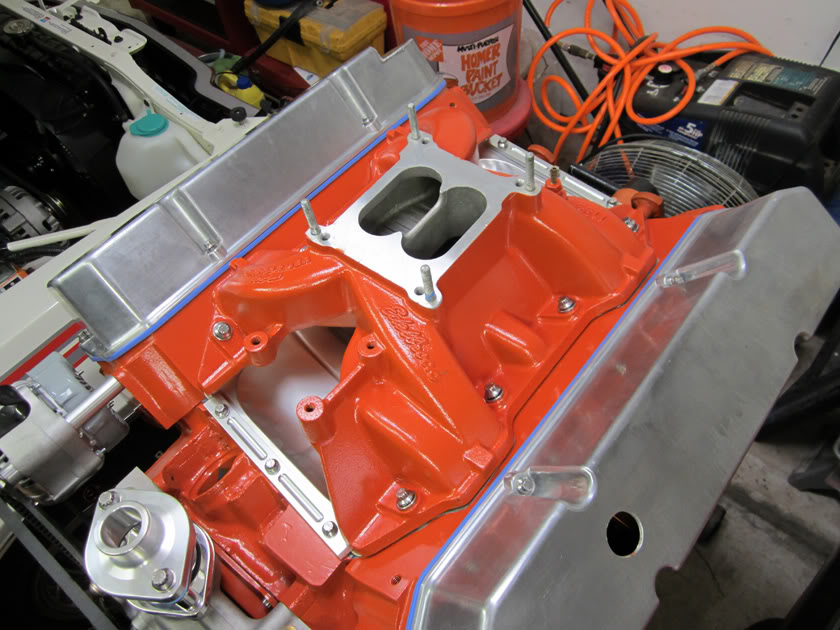
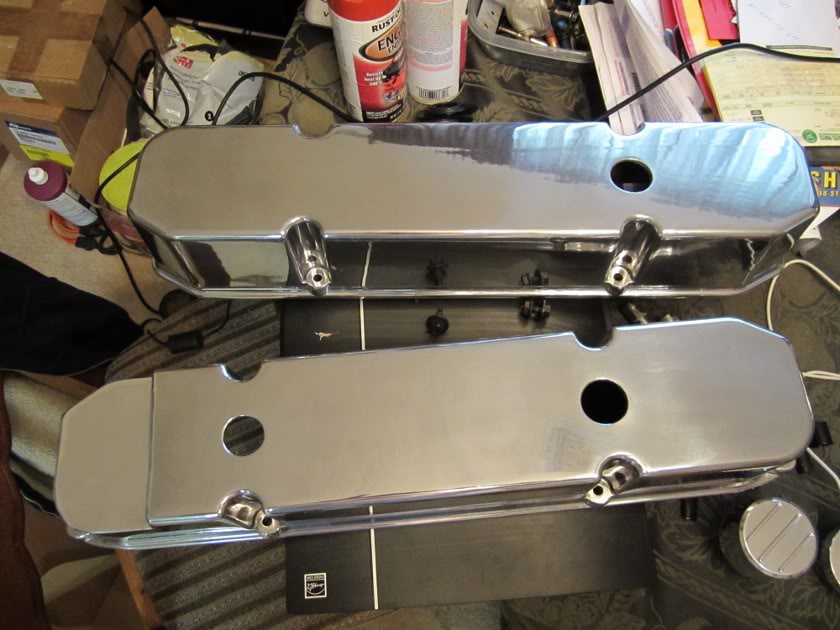
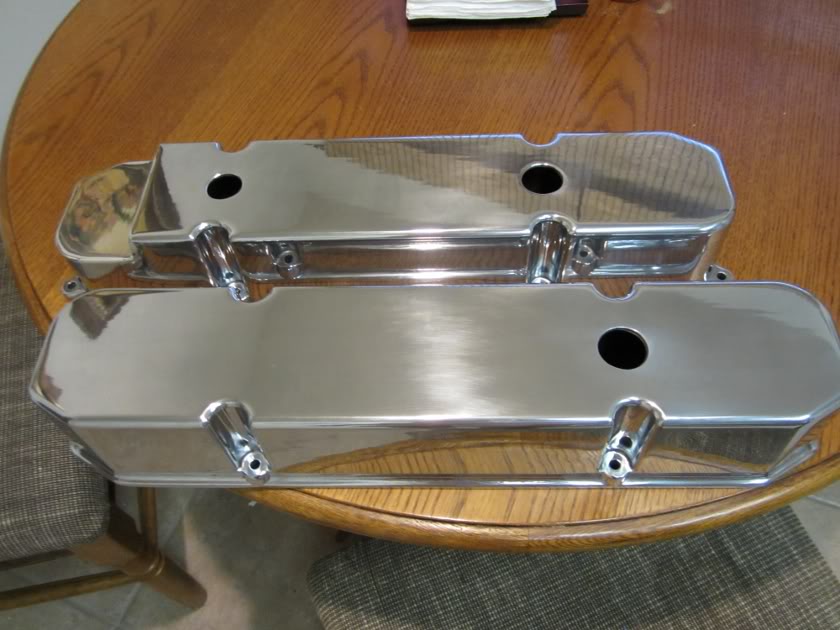
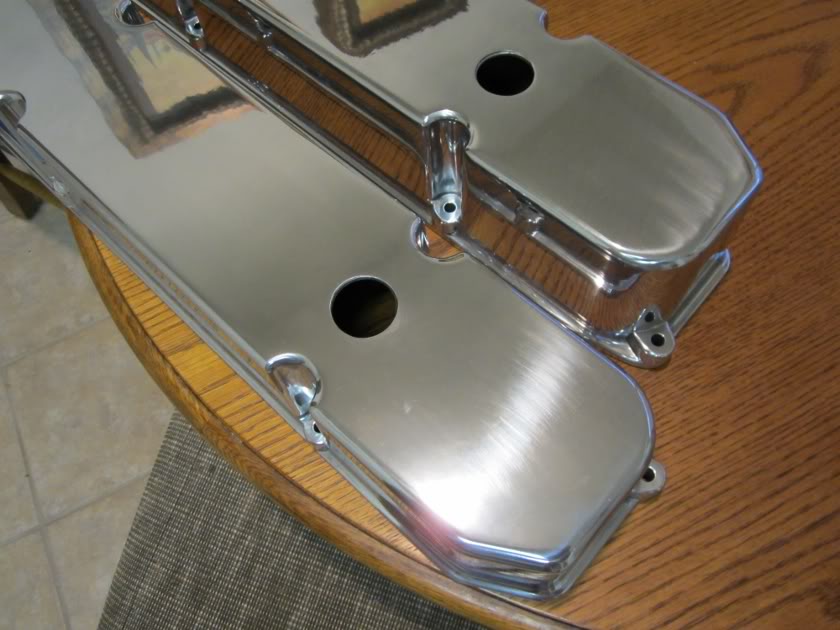
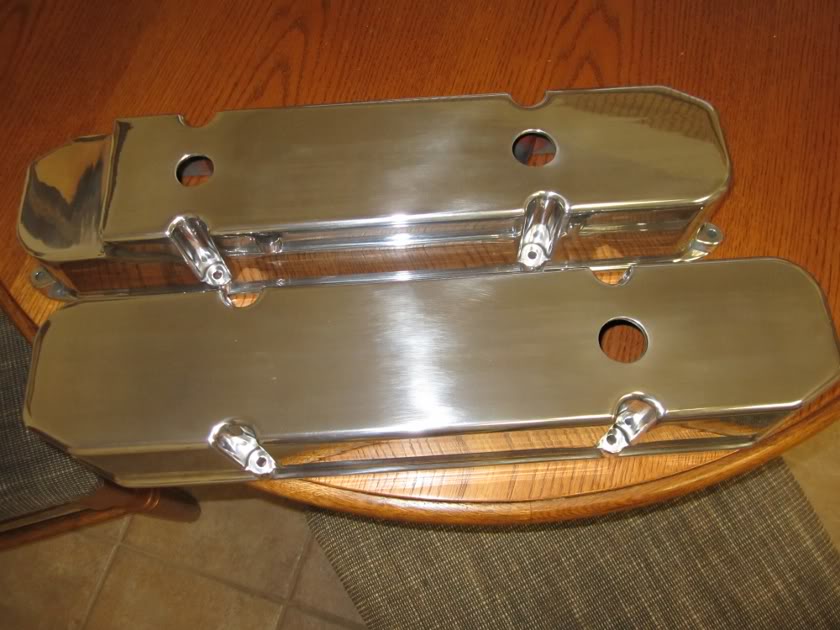
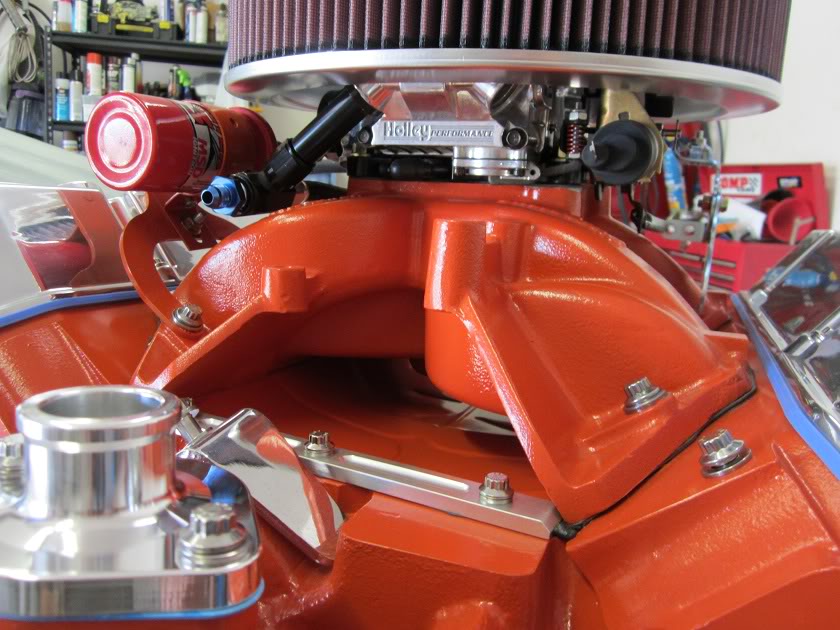
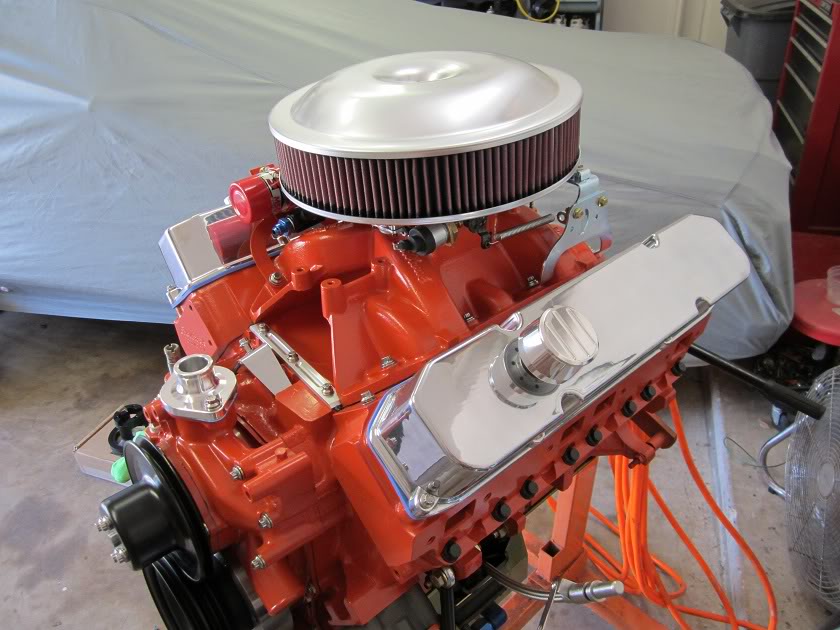
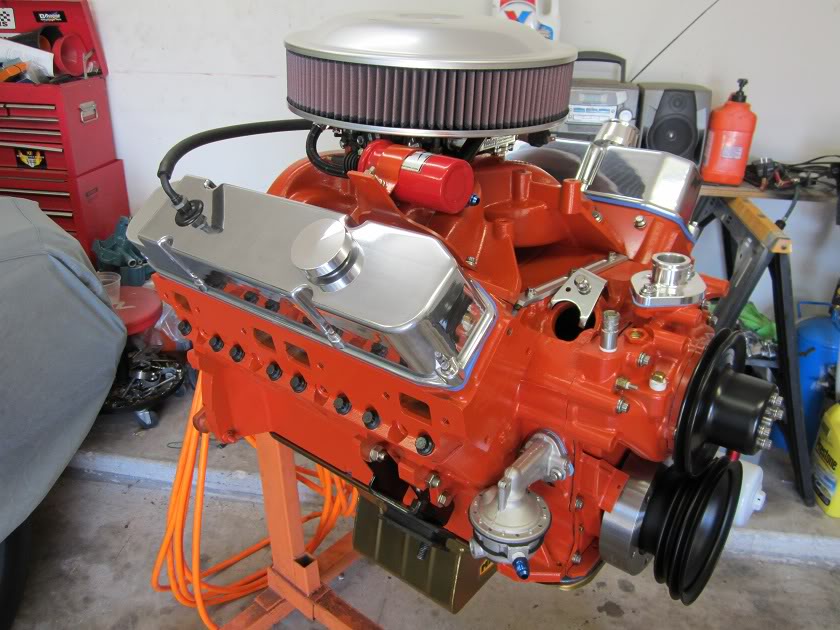
I had the lifters all pumped up so I rotated the motor and did one set of valves at a time on the driver's side then finished the pre-load adjustments on the passenger side. I stripped paint off of the water pump housing and the valve covers. I then mocked just about everything up to make sure the intake manifold was good and all my stainless fasteners were going to work. I also got my 80 amp Nippon Denso alternator mocked up. The valve covers go to my chrome person for the minimum of polishing or the maximum of chrome tomorrow. The valley tray and water pump and housing are still going hemi orange. I am staying with mechanical water pump this time and mechanical fan at first.

Thread Starter
Super Moderator
Joined: Sep 2010
Posts: 3,609
Likes: 181
From: Houston, Texas
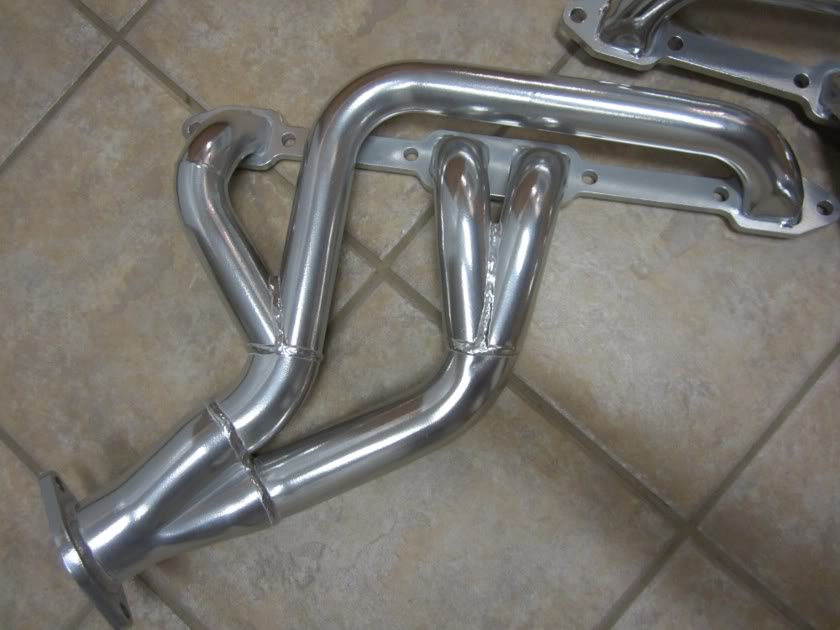
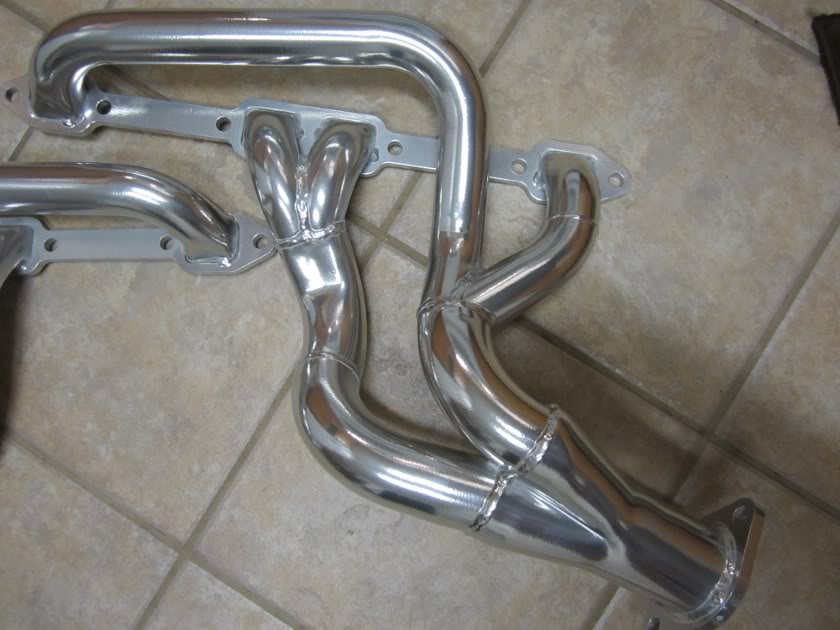
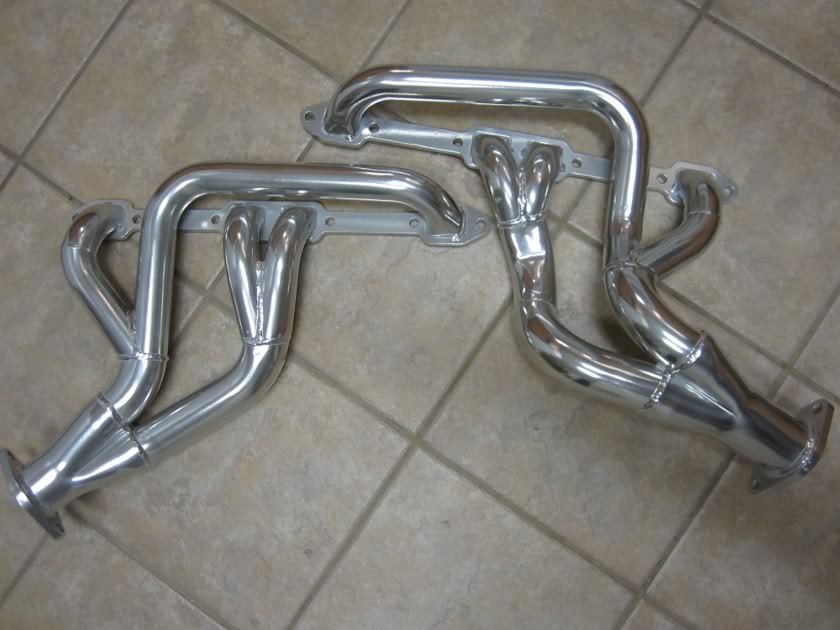
Got my headers back today from Polydyn here in Houston. Real close to my house at Jones Road and FM1960. They do all kinds of neat engine coatings and of course they do headers. http://www.polydyn.com/
Thread Starter
Super Moderator
Joined: Sep 2010
Posts: 3,609
Likes: 181
From: Houston, Texas
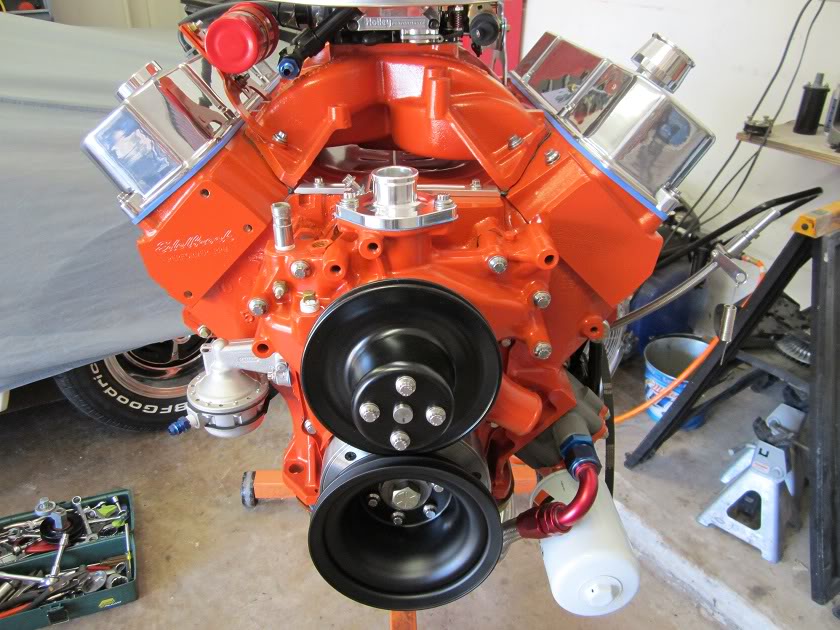
Pretty much done with the motor. I already mocked up the alternator so that's why I didn't add anymore weight to the engine stand. I got the aluminum water neck polished up today. I will work on the new fan module tomorrow and will actually make a trip to where the Dart is. I took a 5 day mini vacation to get some work done on it.

Thread Starter
Super Moderator
Joined: Sep 2010
Posts: 3,609
Likes: 181
From: Houston, Texas
Thread Starter
Super Moderator
Joined: Sep 2010
Posts: 3,609
Likes: 181
From: Houston, Texas
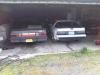
Moving on up to the Eastside.
I got a 14X40 foot storage in the new section where I keep my Dart. So out of the dustbowl and in to the light it goes tomorrow. I will have the wifey tow it with the Dakota and post some pics. I rednecked the tranny so it won't hit the ground. Got the brakes bled with some DOT 5 brake fuild today so I won't smash into my Dakota. Already got the Gran Fury in there last night.


Thread
Thread Starter
Forum
Replies
Last Post
redneck9507
New Members
3
Mar 30, 2011 02:58 AM


