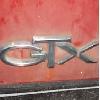
69 GTX restoration
 08-12-2013, 09:47 PM
#1
New Member
Thread Starter
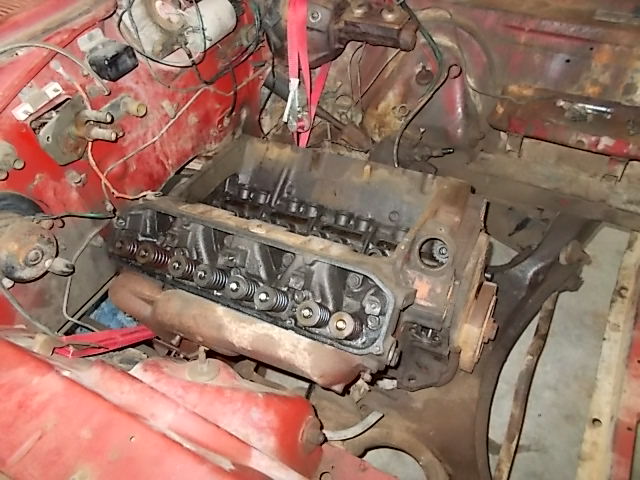
A lot of the photos are bits and pieces of the action. As, I get into removing stuff I forget to pick up the camera. So I get the highlights such as numbers, factory goodies and things that are cleaning up. One of the heads had been removed, I found a freeze plug out on that side and figure someone may have thought they blew a head gasket. The engine would not turn over due to rusty cylinders. So, I had to do some real head scratching to get the torque converter bolts out.
Torque converter bolts out tranny no problem.
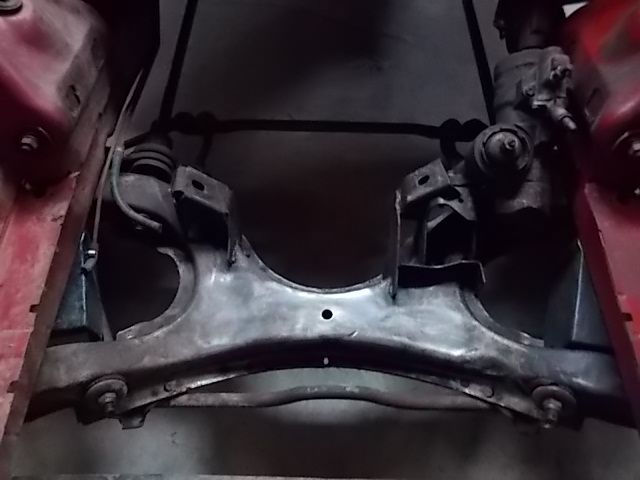
Front suspension will be frame off and rebuilt with new poly parts. K frame will go for powder coat.
Crankshaft is in amazing shape spins freely and end clearance is still in tolerance. Steel shaft internally balanced, crank will go to the machine shop with the block. I once owned a 69 340 dart it also had a steel crank. I pulled the crank out for machine work and had a local turn it for fresh bearings. Got it back bent, man I cried. Took block and crank back to the shop and they got it to accept a center main without the counter weight hitting the block and proper end clearance but the engine picked up a vibration and was never the same. A good shop is hard to find, I'm still looking for one that will guarantee the work. Gotta love the deep set crank in the B/RB engines these babies will take a lot of rpm with out being a 4 bolt main.
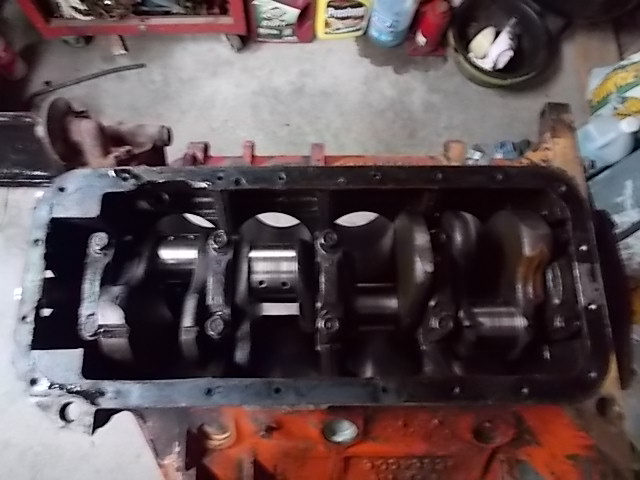
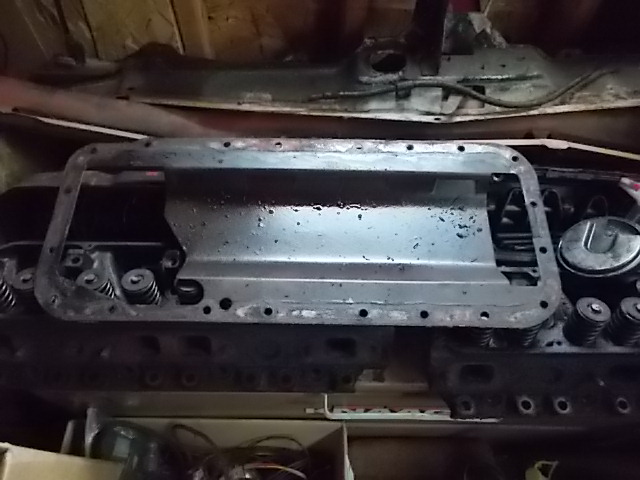
Factory windage tray to keep the oil off the crank. A V8 crankshaft spinning 7000 rpm will hold up to 7 quarts of oil. This is a horse power robber; windtray is a must.

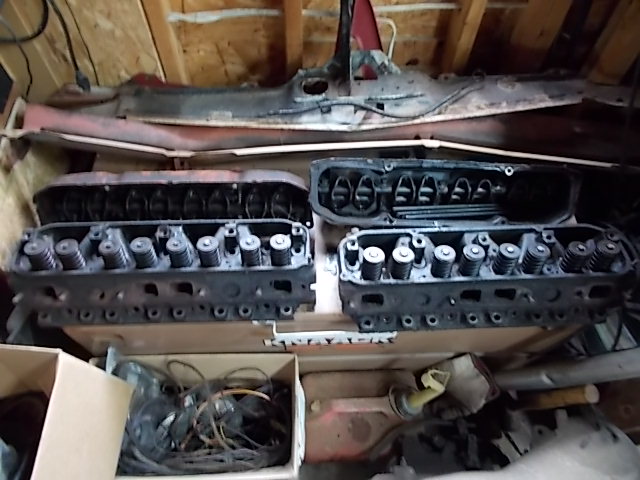
Heads are very rebuildable, The 906 castings were the highest flow open chamber heads for B/RB engines.
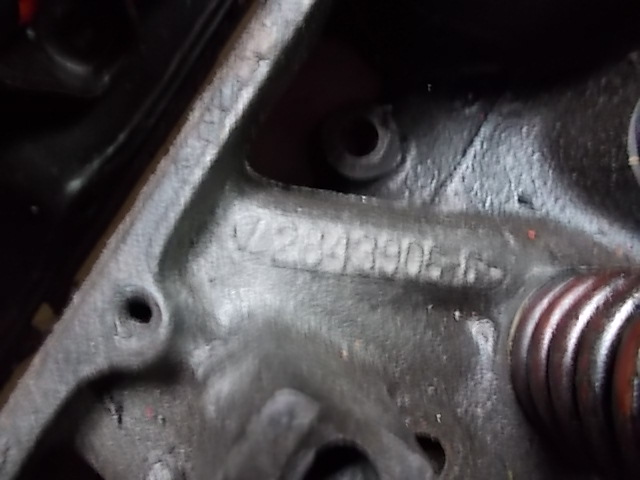
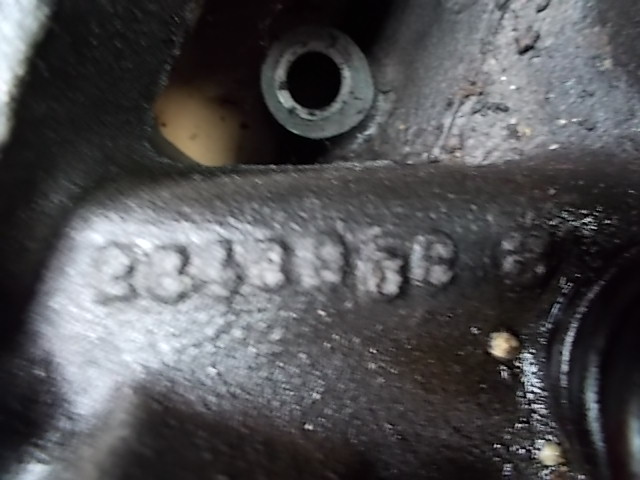
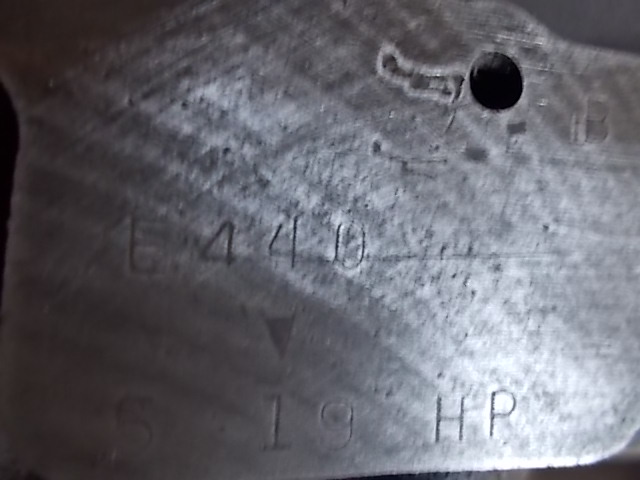
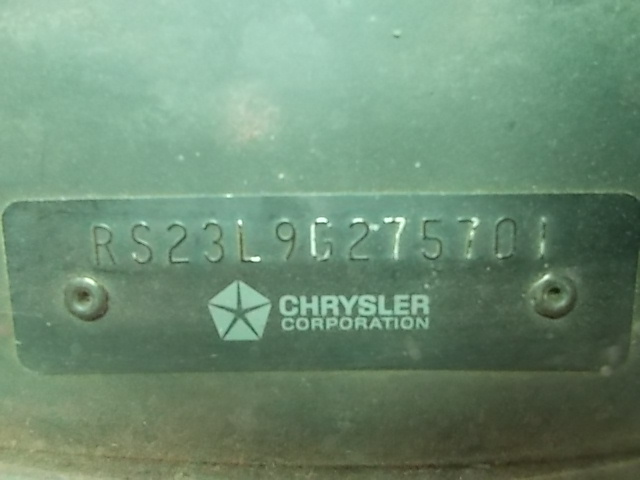
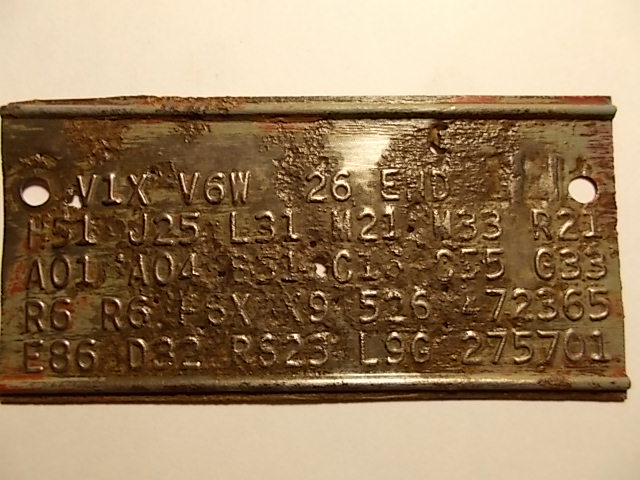
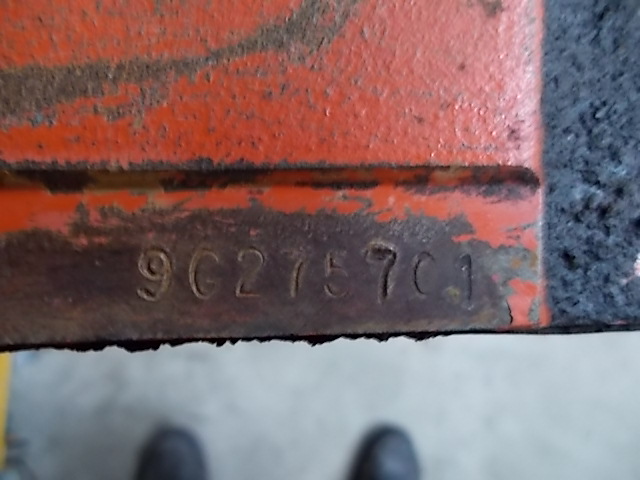
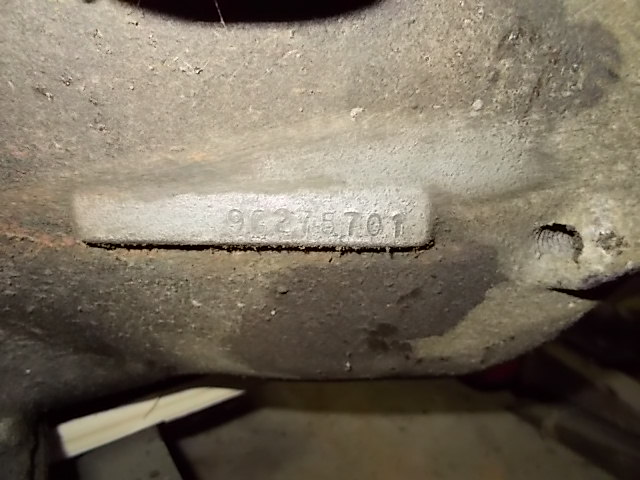
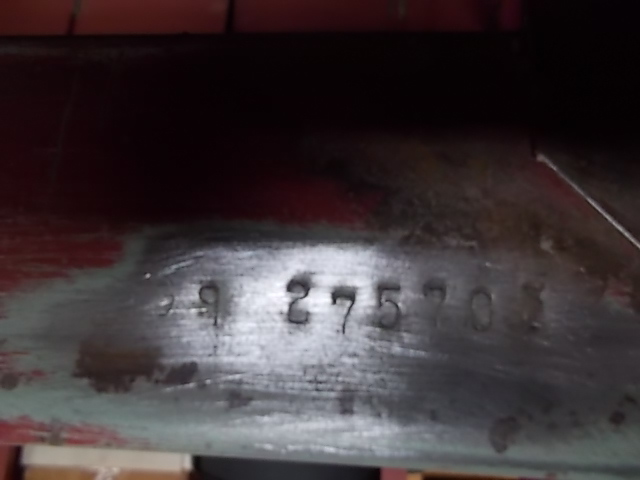
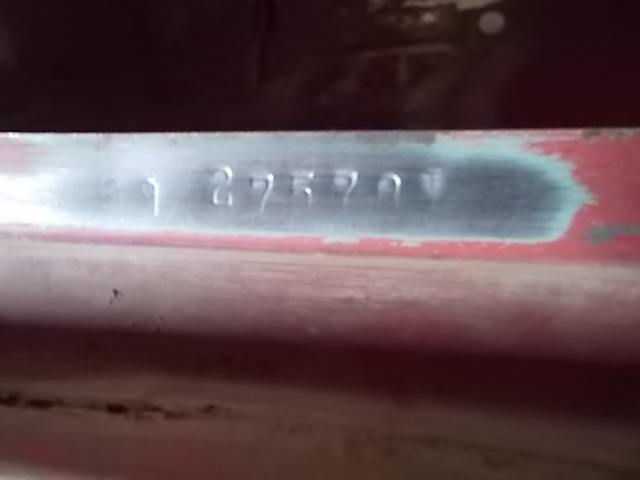
Ok now here is the real rarity, notice the last six digits of the VIN . They are the same as the last six on the bottom right of the fender tag, passenger side of block midway on the bottom, passenger side transmission bell housing, core support just over opening drivers side upside down to the engine bay and drivers side trunk lip midway under weather strip.

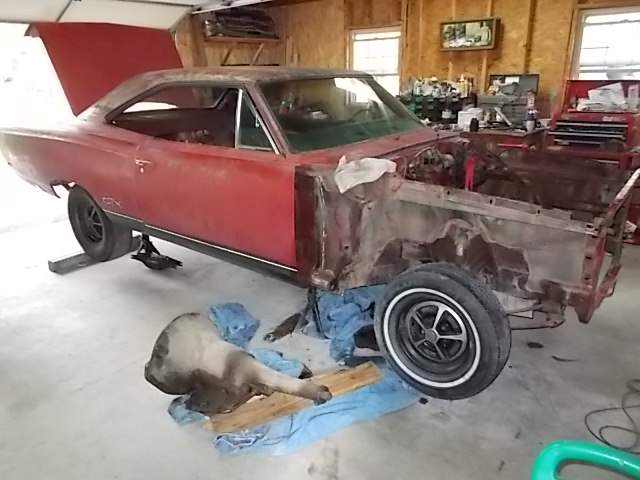
Time to get to work, the fun is just begining and will only get better when the ignition switch is turned. The vinyl split and left the top looking like a rusty zebra. Nothing a 10000 rpm side grinder won't take care of with a heavy wire braid wheel. Once the top is in primer real metal work will start to take place. Typical B body will need rear deck work under the rear window, new trunk pan, trunk extensions and lower rear quarter panel patches.

I am working on getting the above mentioned panels and will give ya'll an update when there is more progress. Oh, and the charger feels like it's in good company.
The engine would not turn over due to rusty cylinders. So, I had to do some real head scratching to get the torque converter bolts out.
Torque converter bolts out tranny no problem.

Front suspension will be frame off and rebuilt with new poly parts. K frame will go for powder coat.

Crankshaft is in amazing shape spins freely and end clearance is still in tolerance. Steel shaft internally balanced, crank will go to the machine shop with the block. I once owned a 69 340 dart it also had a steel crank. I pulled the crank out for machine work and had a local turn it for fresh bearings. Got it back bent, man I cried. Took block and crank back to the shop and they got it to accept a center main without the counter weight hitting the block and proper end clearance but the engine picked up a vibration and was never the same. A good shop is hard to find, I'm still looking for one that will guarantee the work. Gotta love the deep set crank in the B/RB engines these babies will take a lot of rpm with out being a 4 bolt main.

Factory windage tray to keep the oil off the crank. A V8 crankshaft spinning 7000 rpm will hold up to 7 quarts of oil. This is a horse power robber; windtray is a must.


Heads are very rebuildable, The 906 castings were the highest flow open chamber heads for B/RB engines.


Ok now here is the real rarity, notice the last six digits of the VIN . They are the same as the last six on the bottom right of the fender tag, passenger side of block midway on the bottom, passenger side transmission bell housing, core support just over opening drivers side upside down to the engine bay and drivers side trunk lip midway under weather strip.


Time to get to work, the fun is just begining and will only get better when the ignition switch is turned. The vinyl split and left the top looking like a rusty zebra. Nothing a 10000 rpm side grinder won't take care of with a heavy wire braid wheel. Once the top is in primer real metal work will start to take place. Typical B body will need rear deck work under the rear window, new trunk pan, trunk extensions and lower rear quarter panel patches.

I am working on getting the above mentioned panels and will give ya'll an update when there is more progress. Oh, and the charger feels like it's in good company.

Last edited by 69440GTX; 08-17-2013 at 10:17 PM.


 ...Bill
08-13-2013, 04:11 PM
...Bill
08-13-2013, 04:11 PM
#5
New Member
Thread Starter
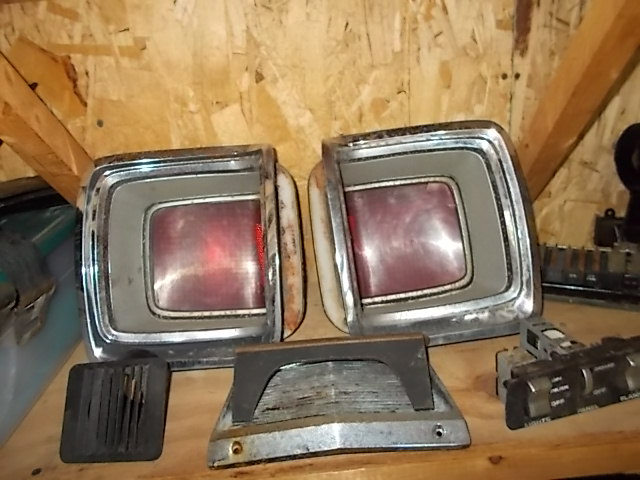
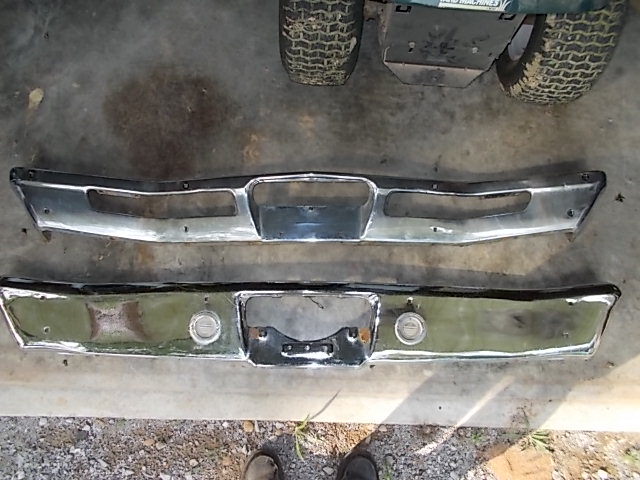
They come apart fast and go together slow. I'm still just in absolute shock to find a numbers car 44 years old thats been sitting for a while.... all there! I KNOW, feel like I hit the Lottery. Anyway still working on rust but putting up a couple of pics. would you polish the pieces and push the era parts even with imperfections, rechrome or replace with reproduction?
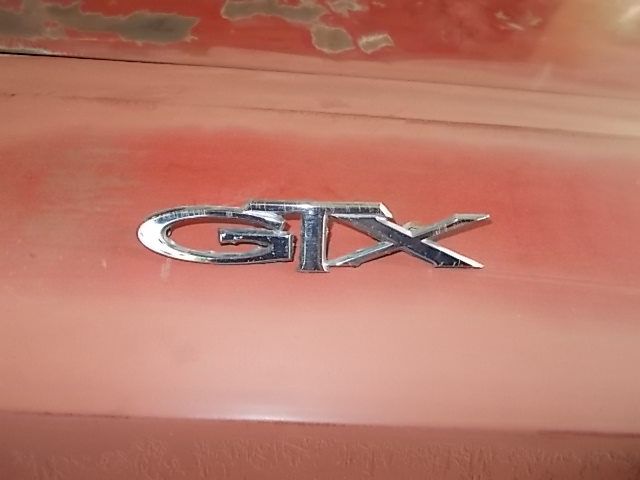
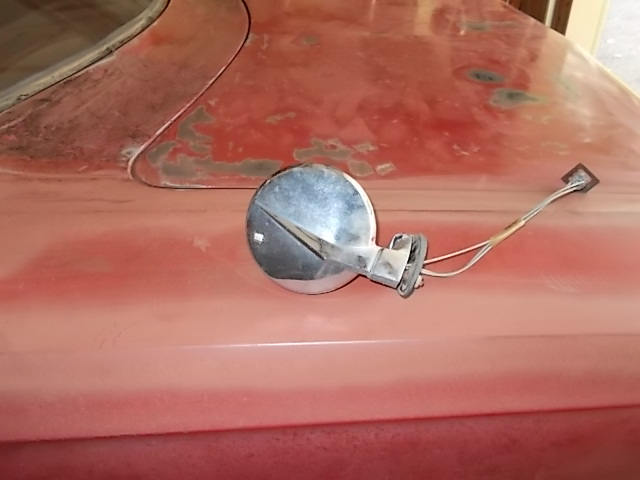
Thanks for looking, also I have a thread in the body and trim https://moparforums.com/forums/f85/g...-panels-15541/ about interior panel emblems, If you have an answer please help.


Thanks for looking, also I have a thread in the body and trim https://moparforums.com/forums/f85/g...-panels-15541/ about interior panel emblems, If you have an answer please help.
Last edited by 69440GTX; 08-20-2013 at 03:14 PM.
 08-20-2013, 03:29 PM
#7
New Member
Thread Starter
#'s edit
I added the body locations since the original post. Man if I only had the  to turn this car quick. It's been a long time since I priced parts for these things. It came apart one piece at a time and it'll definitly go back together one piece at atime. Well I have the entire top stripped of rust finally and I'm off to start popping out glass. I'll post more pics when the top is in primer.
to turn this car quick. It's been a long time since I priced parts for these things. It came apart one piece at a time and it'll definitly go back together one piece at atime. Well I have the entire top stripped of rust finally and I'm off to start popping out glass. I'll post more pics when the top is in primer.
08-25-2013, 02:01 PM
#8
Admin
I'd do the best I could with cleaning/polishing the parts coming off the car. Spend an afternoon watching videos on youtube about how other people did it. You may be surprised as to how simple it is.

Thread
Thread Starter
Forum
Replies
Last Post
65_Sat
B-Body
12
03-08-2007 09:26 PM


