I never would think I would own one of these
 01-12-2011, 08:38 PM
#241
Mopar Fan
Join Date: Dec 2009
Location: Wilmington NC
Posts: 96
Likes: 0
Received 0 Likes
on
0 Posts
That looks dang good! I have been wondering about what tire size i should go with, and this solves the puzzle. Keep up the good work!
After you wear the new tires in, post up a picture of the stripes on the street after you dump that clutch hahahaha
After you wear the new tires in, post up a picture of the stripes on the street after you dump that clutch hahahaha
 01-12-2011, 08:46 PM
#242
Super Moderator
Thread Starter

Did some blasting and cleaning
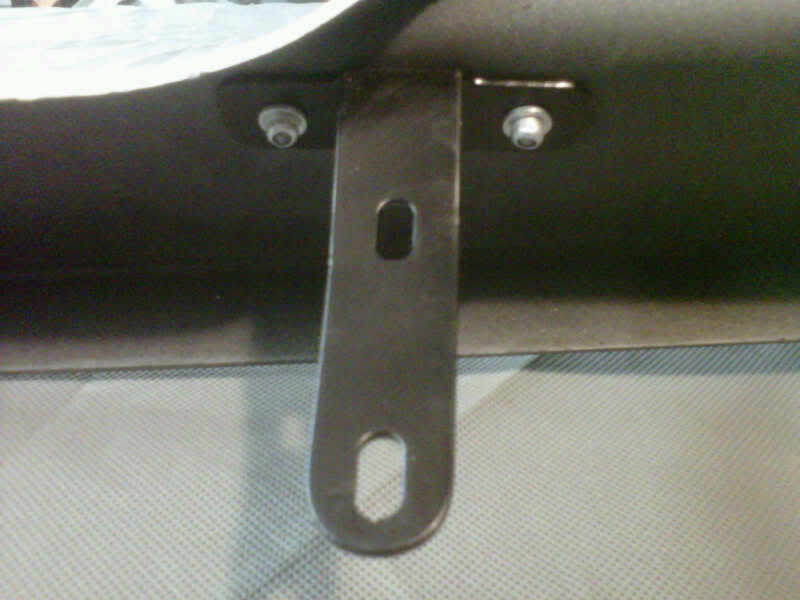
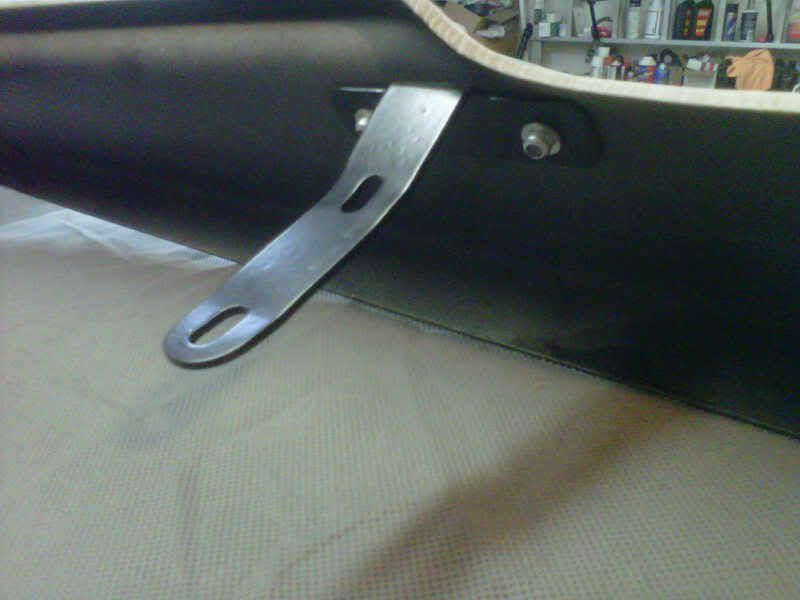
Tonight I took the brackets off of the front spoiler..they were rusty and partway covered with under coating...I drilled out the rivets and used my die grinder and with some 3-M scuff pads to remove the rust...I then blasted my fender tag and then submerged it into the evaporust to remove the rust from the back and one spot in front..I then did some blasting on the other set of louvers I got...man oh man...4 different coats of paint...red then black then white then black again...it will take some time but they will turn out alright..right around the first opening you can see the dull black..that is the base plastic..other tires are in so tomorrow at lunch I will get them mounted and put them on tomorrow night..
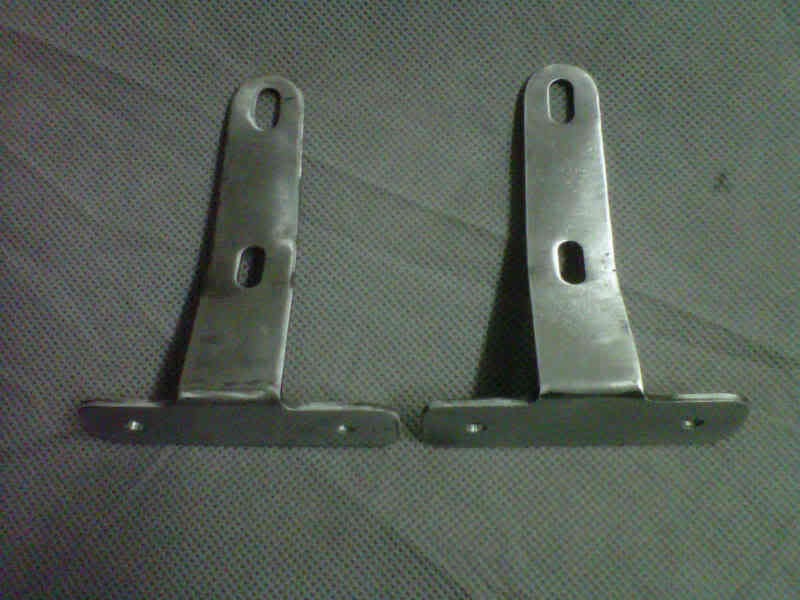
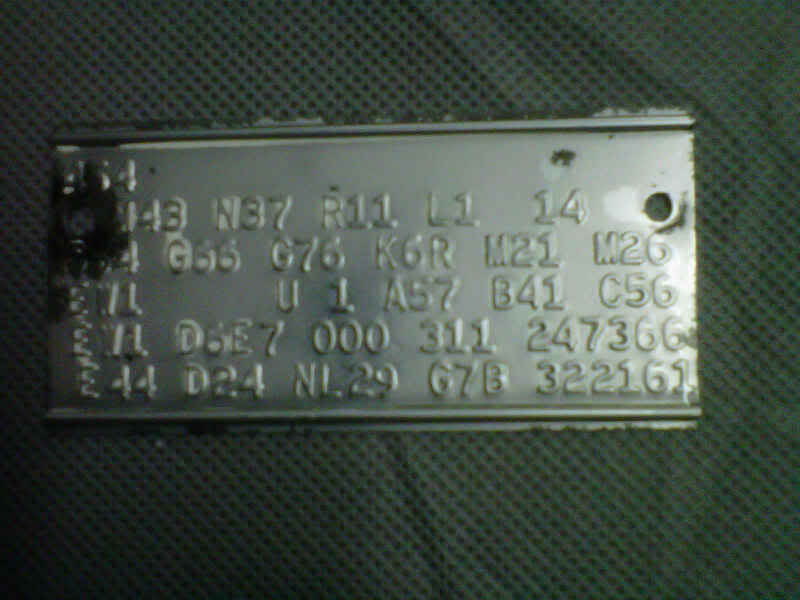
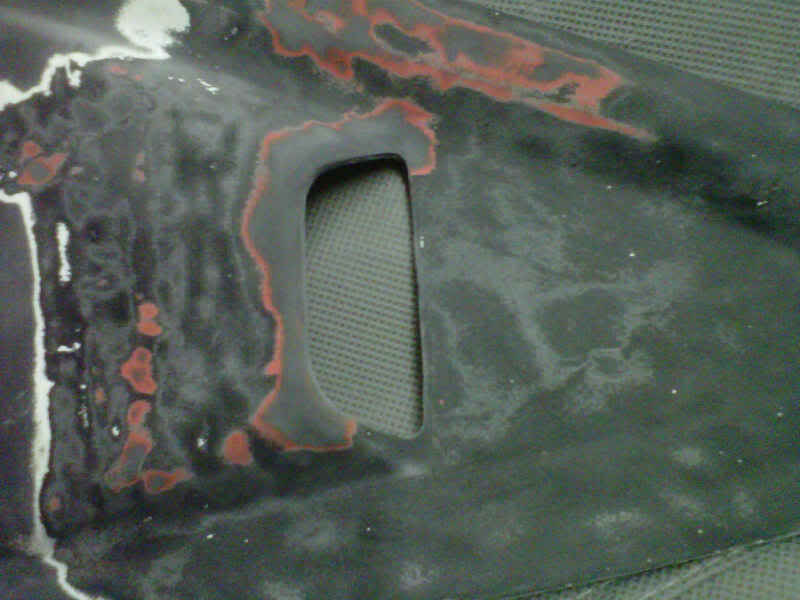
Tonight I took the brackets off of the front spoiler..they were rusty and partway covered with under coating...I drilled out the rivets and used my die grinder and with some 3-M scuff pads to remove the rust...I then blasted my fender tag and then submerged it into the evaporust to remove the rust from the back and one spot in front..I then did some blasting on the other set of louvers I got...man oh man...4 different coats of paint...red then black then white then black again...it will take some time but they will turn out alright..right around the first opening you can see the dull black..that is the base plastic..other tires are in so tomorrow at lunch I will get them mounted and put them on tomorrow night..
01-13-2011, 09:19 PM
#243
Super Moderator
Thread Starter
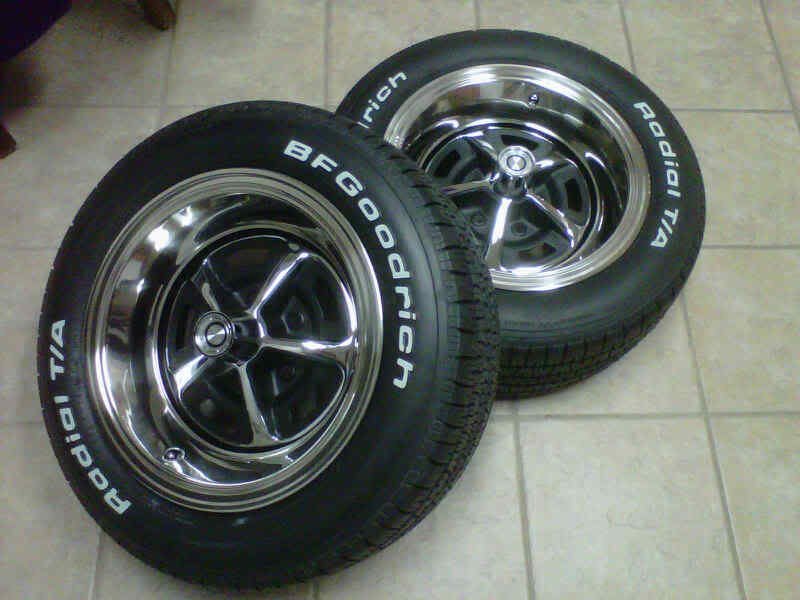
Got the front tires today...and got the brackets painted and put back on
It was only 40 degrees today but the heated painting area was great..I got the front spoiler brackets painted today..I also got the front tires mounted on the rims today but did not install them tonight because I did not have time to do the three car suffle...I got the brackets installed with backup washers...nice and tight...
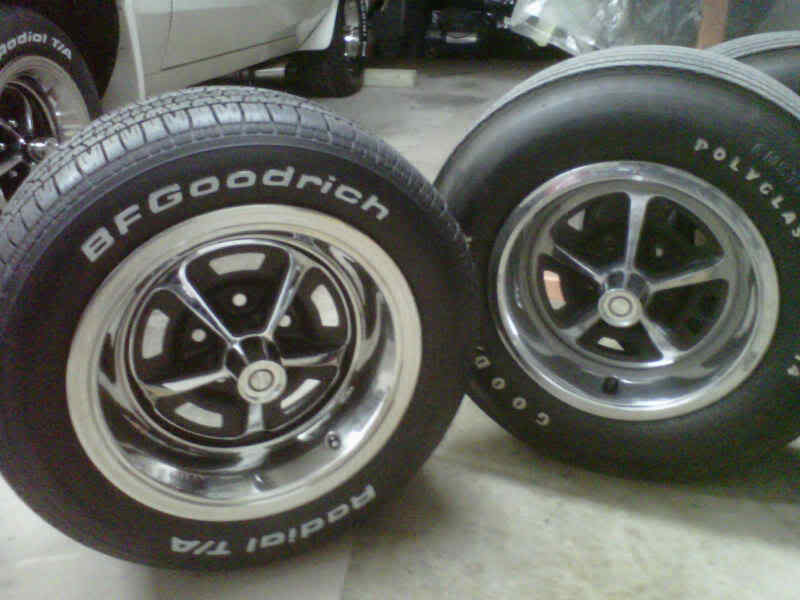
front tires and wheels ready to go on tomorrow...the backs are 26.5" in height and the fronts are 24" in height..this outta keep the rear in the air
It was only 40 degrees today but the heated painting area was great..I got the front spoiler brackets painted today..I also got the front tires mounted on the rims today but did not install them tonight because I did not have time to do the three car suffle...I got the brackets installed with backup washers...nice and tight...
front tires and wheels ready to go on tomorrow...the backs are 26.5" in height and the fronts are 24" in height..this outta keep the rear in the air
Last edited by bremereric; 01-14-2011 at 09:40 AM. Reason: way too small on the front tire 14" to 24"
01-14-2011, 09:37 PM
#244
Super Moderator
Thread Starter
Okay I did the three car shuffle tonight
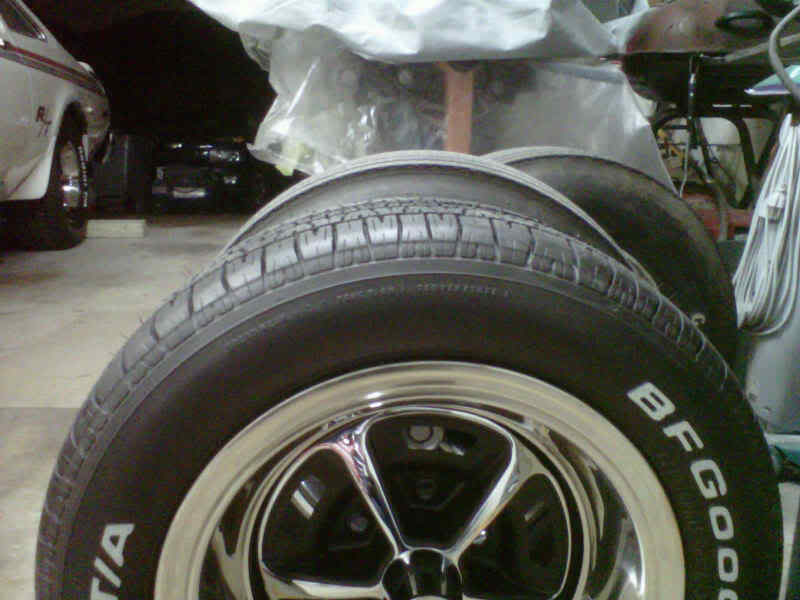
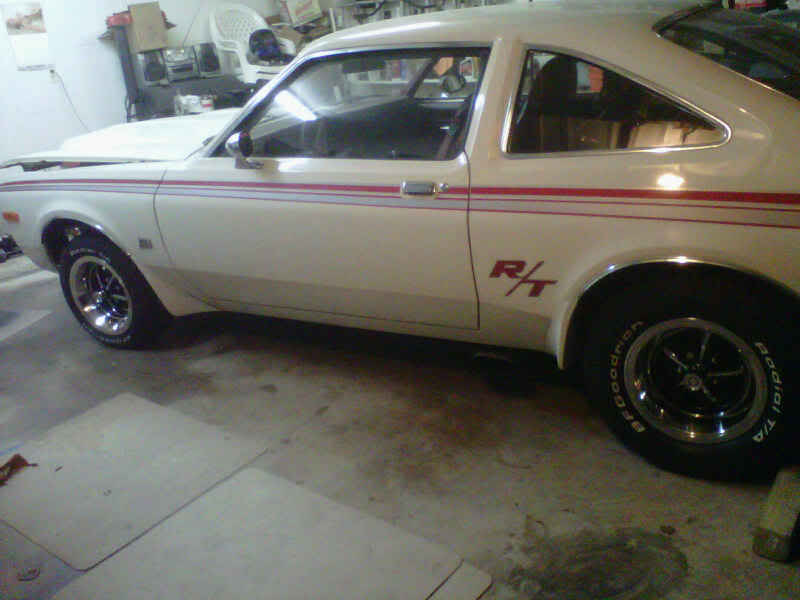
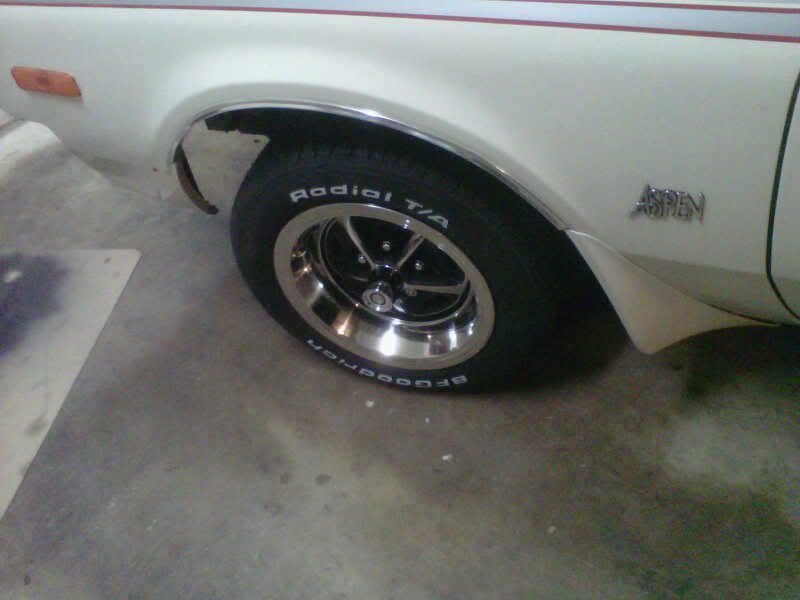
Having two in the garage and two in the driveway makes for fun when serious work is needed on one car...moved wifeys out into the street...fired up the 440 Dart and backed it up...get the chills everytime I hear that beast...start up the Aspen and back it out and pull it into the center of the garage...first two pics are showing the tire size difference between the stock wheel and tire and the new P205/60/15...
now comes some shots of the front and entire car back down on the ground...the smaller tire up front takes some getting used to...
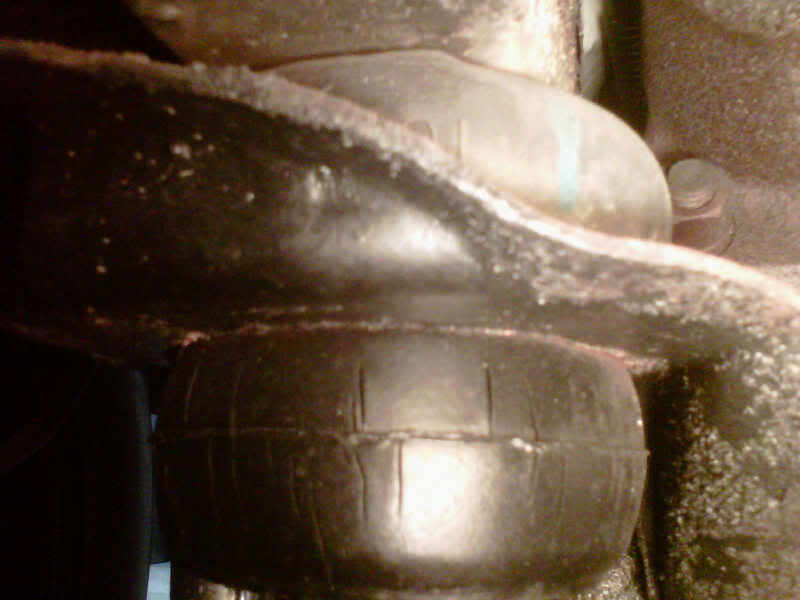
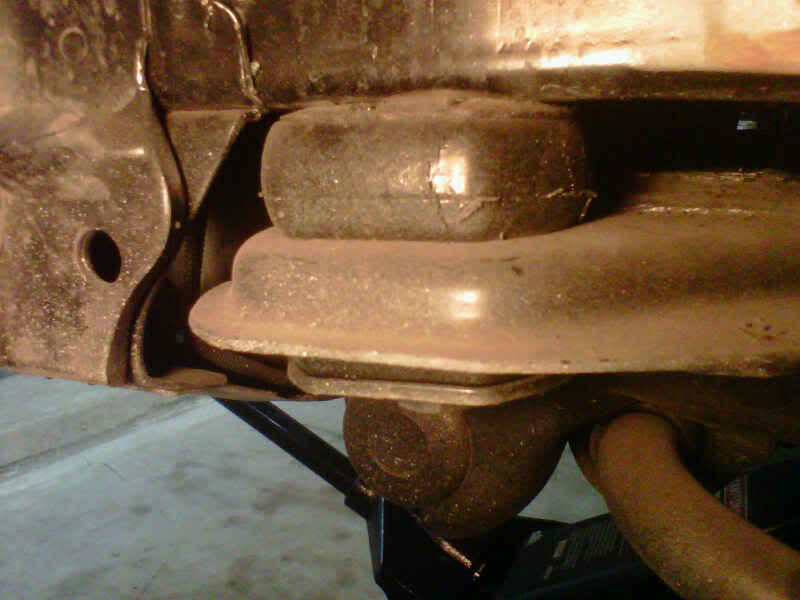
Okay while I had it up in the air I took two pic of the rubber pucks the engineers designed for these cars...feels like a boat cresting a wave and veering to the right or left when you roll over a hump on the freeway...
Having two in the garage and two in the driveway makes for fun when serious work is needed on one car...moved wifeys out into the street...fired up the 440 Dart and backed it up...get the chills everytime I hear that beast...start up the Aspen and back it out and pull it into the center of the garage...first two pics are showing the tire size difference between the stock wheel and tire and the new P205/60/15...
now comes some shots of the front and entire car back down on the ground...the smaller tire up front takes some getting used to...
Okay while I had it up in the air I took two pic of the rubber pucks the engineers designed for these cars...feels like a boat cresting a wave and veering to the right or left when you roll over a hump on the freeway...
01-15-2011, 09:57 AM
#245
Super Moderator
Thread Starter
This is just for shared information
Anyone out there wants a new three piece front spoiler...here ya go....Jim's Auto Parts sell's a similiar one but it's 90 bucks more...
http://fpap.com/catalog.htm

1976-77F-Body Three Piece Front Spoiler FP160 $199.00 ea.
Anyone out there wants a new three piece front spoiler...here ya go....Jim's Auto Parts sell's a similiar one but it's 90 bucks more...
http://fpap.com/catalog.htm
1976-77F-Body Three Piece Front Spoiler FP160 $199.00 ea.
01-15-2011, 08:35 PM
#246
Super Moderator
Thread Starter
Inline Tube
Inline tube has a couple of offerings for F-Bodys...I am going to call them on Monday before ordering the front brake lines to make sure they are right before I order them...I am going to send the ones in from the brake master cylinder to the proportioning valve to have them make new ones for it...
View Part 1976 - 80 Roadrunner / Volare Front Brake Line Set Stainless OEM
PRB7801 Power Disc Front Brake Line Set $110.00 $75.00
http://www.inlinetube.com/
01-15-2011, 08:57 PM
#247
Super Moderator
Thread Starter
Successful paint day
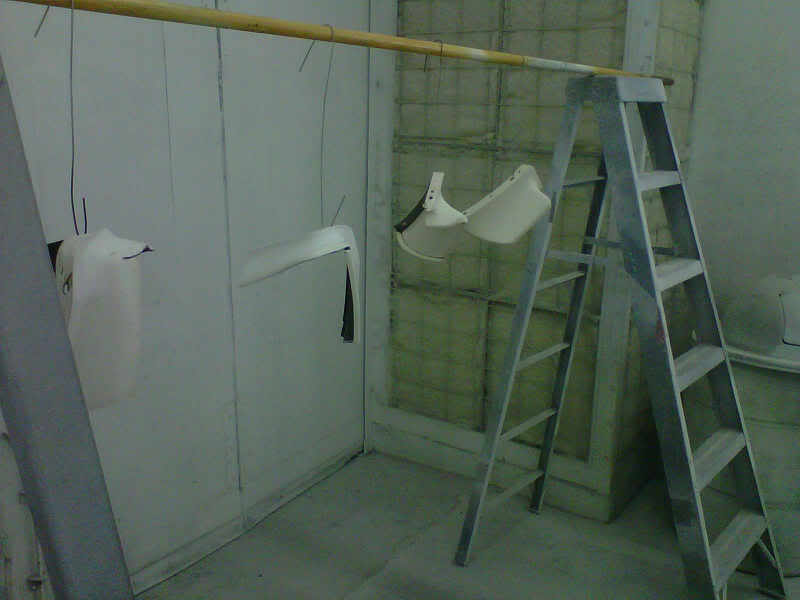
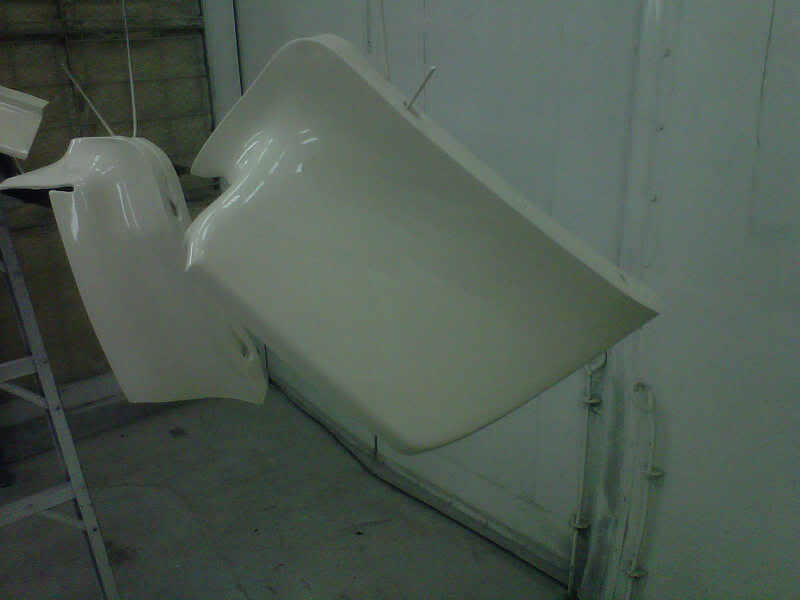
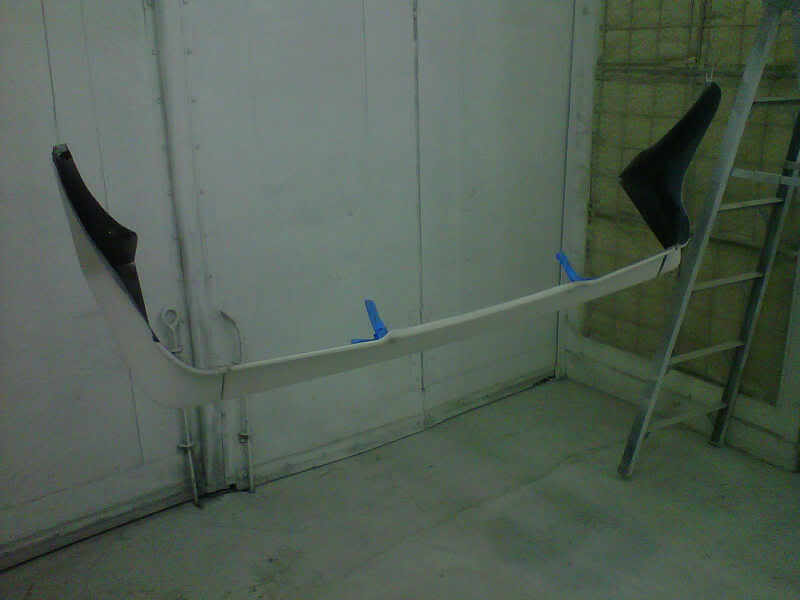
Finally got to use the big paint booth at work...it has a huge exhaust system followed by a dev-a-bliss make up air unit with heater..I heated it up to 80 degrees and was I actually sweated while painting...but boy oh boy did it make a difference....no trash in what I painted today..
hung up and ready for paint...
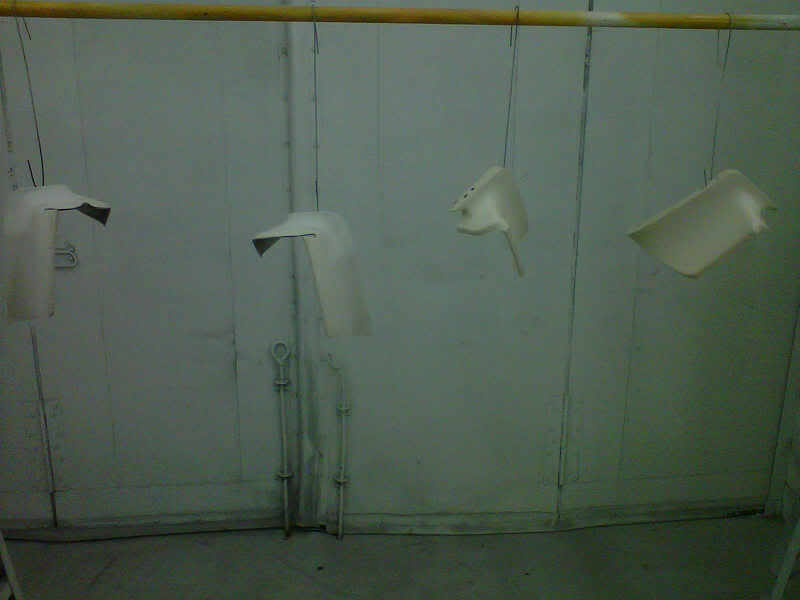
done with the paint and letting them dry...
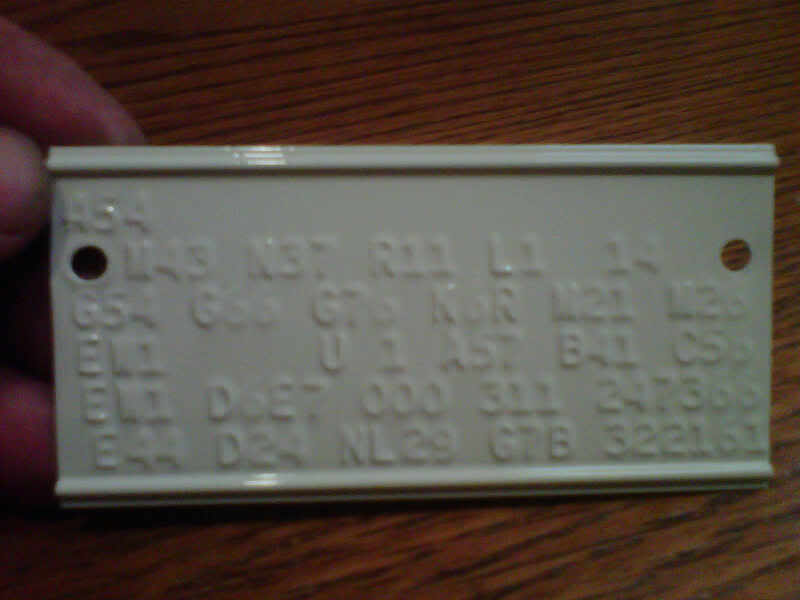
Painted my fender tag...both sides so it will not rust again..
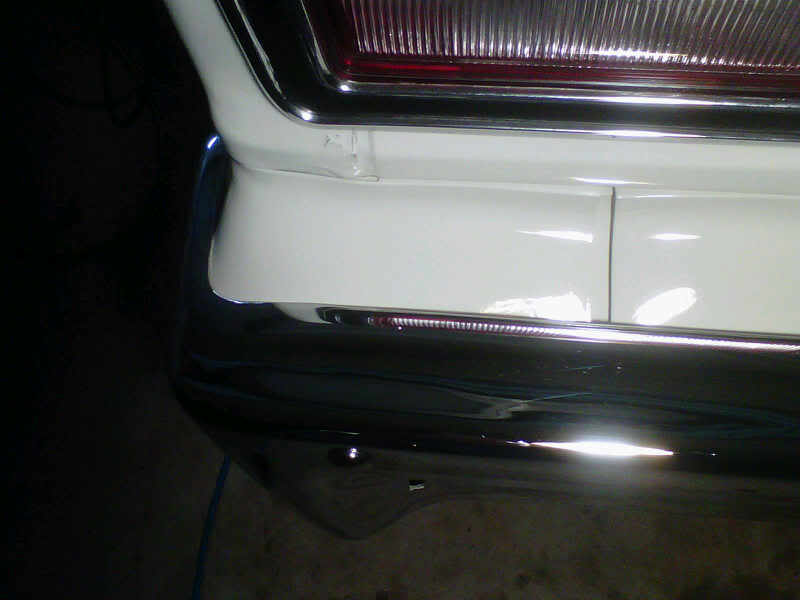
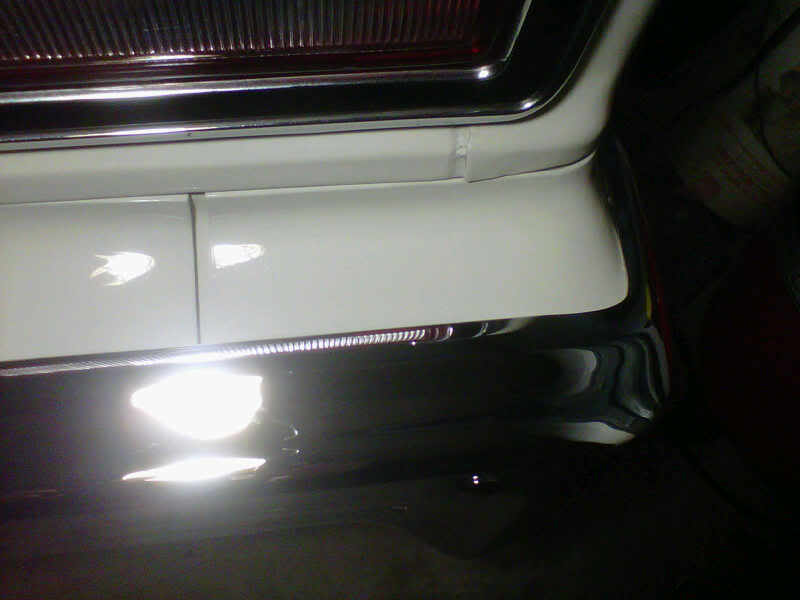
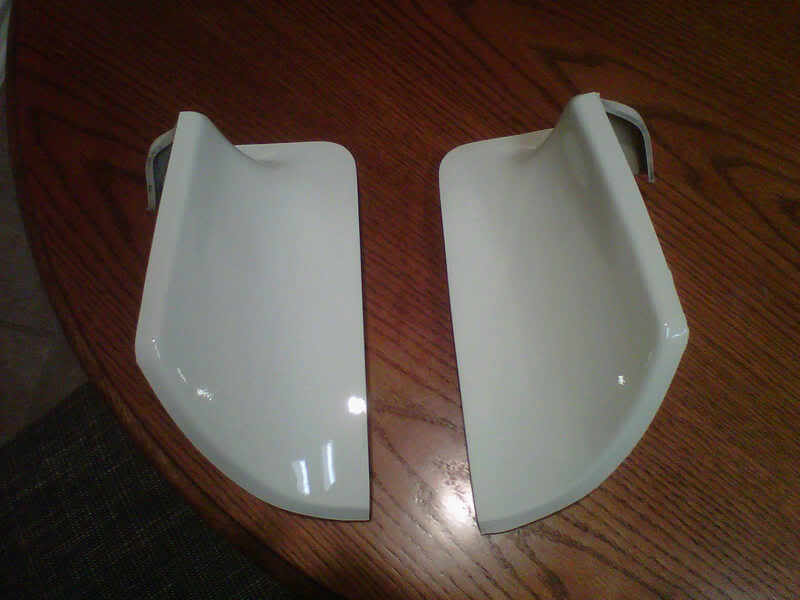
finished product...the rear bumper is complete now....
The two front bumper corner fillers are also done..none of the front will go back on until the engine compartment is painted....motor and tranny out by the end of this month...
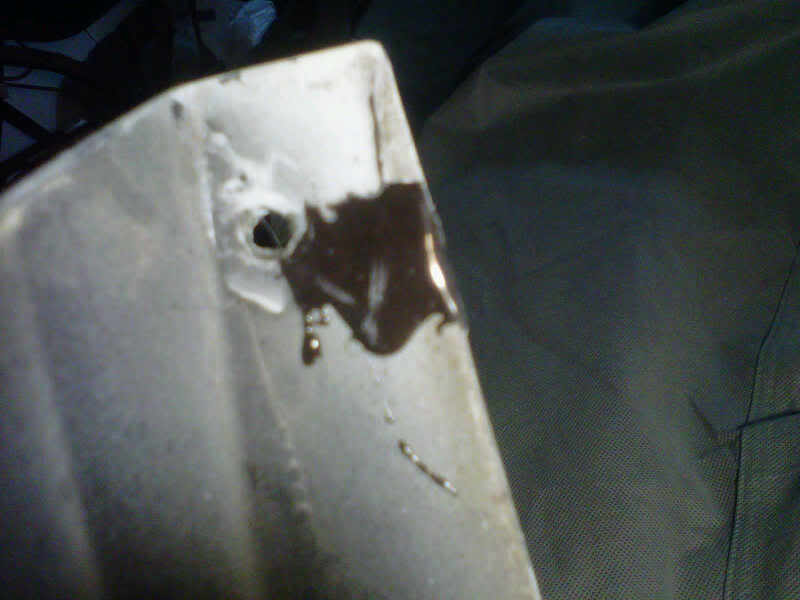
Then after dinner I wet sanded the front spoiler and used to JB Weld to fix a crack on the backside....taped up the brackets and it will go to paint tomorrow...
Finally got to use the big paint booth at work...it has a huge exhaust system followed by a dev-a-bliss make up air unit with heater..I heated it up to 80 degrees and was I actually sweated while painting...but boy oh boy did it make a difference....no trash in what I painted today..
hung up and ready for paint...
done with the paint and letting them dry...
Painted my fender tag...both sides so it will not rust again..
finished product...the rear bumper is complete now....
The two front bumper corner fillers are also done..none of the front will go back on until the engine compartment is painted....motor and tranny out by the end of this month...
Then after dinner I wet sanded the front spoiler and used to JB Weld to fix a crack on the backside....taped up the brackets and it will go to paint tomorrow...
01-16-2011, 08:44 AM
#248
Mopar Fan

Join Date: Jan 2011
Posts: 41
Likes: 0
Received 0 Likes
on
0 Posts
Very cool thread. I have been following all the nice work you have been doing. It`s give me some incentive to work on my 77. I really like how you go into detail on everything you do. NICE JOB! and continue on!
01-16-2011, 12:39 PM
#249
Super Moderator
Thread Starter
 01-16-2011, 01:45 PM
#250
Super Moderator
Thread Starter
Nasty and rainy outside...nice and toasty inside
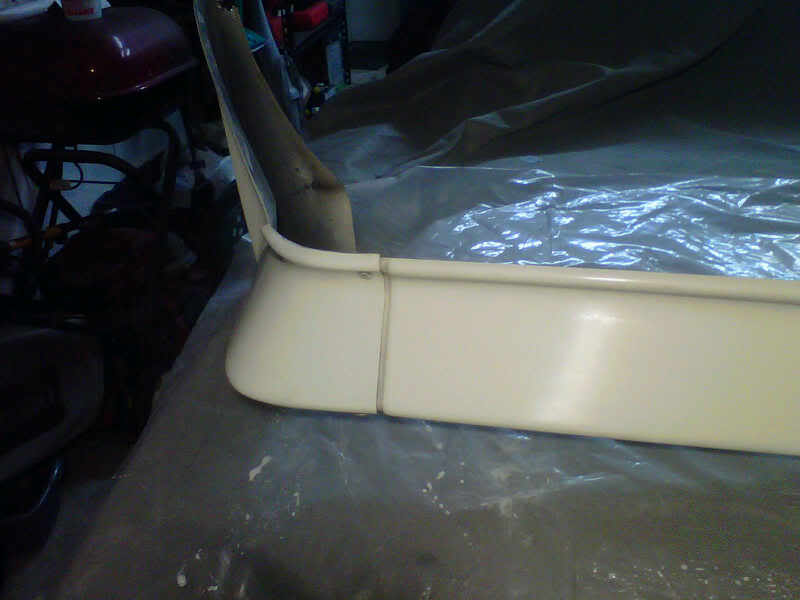
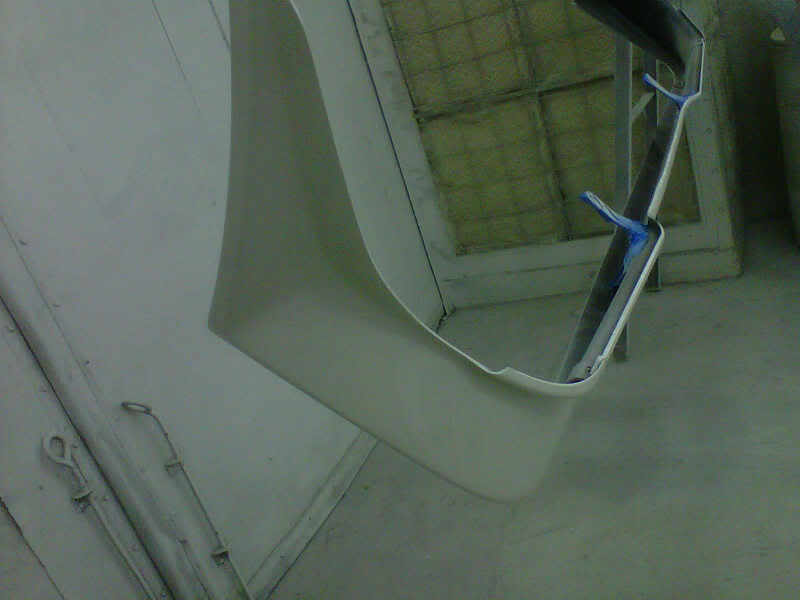
Went to work today and used the big spray booth again...front spoiler is done...
before....
and after....
Went to work today and used the big spray booth again...front spoiler is done...
before....
and after....
01-16-2011, 07:57 PM
#252
Super Moderator
Thread Starter
Mike the original paint came from PPG...M1 on my fender tag is 2033 Eggshell White..all I did was give a good PPG dealer the 2033 code and they mixed it up..
01-17-2011, 08:24 AM
#253
Mopar Fan
Join Date: Jan 2011
Posts: 41
Likes: 0
Received 0 Likes
on
0 Posts
My fender tag is long gone.(previous owner tossed it I guess) I used a 77 paint chart for the color. I mixed in a little black and got it pretty close on the second try.
Last edited by volarerr340; 01-17-2011 at 08:25 AM. Reason: add
01-17-2011, 12:01 PM
#255
Super Moderator
Thread Starter
I ordered one for a 63 - 64 Dodge Dart and it was wider in the rear section..I had my old one as a template...I know I had to trim some off both sides...but it worked...I think I got it off e-bay
Last edited by bremereric; 01-17-2011 at 12:04 PM.
01-17-2011, 08:42 PM
#257
Super Moderator
Thread Starter
You should be able to do it with just measuring...you will have to make two notches....one at the jack mounting point and at the latch...lay it out overnight because it will come rolled up...let it relax...find the center at the very back....measure from fender lip to fender lip and cut equal parts from each side with a straight edge and razor blade...no problem
01-17-2011, 10:02 PM
#258
Super Moderator
Thread Starter
Got some of the front cleaned of the undercoating
Used that ZEP Big Orange....elbow grease...plastic scraper...scuff pad and small wire brush to clean the drivers side of the undercoating...I guess the rough black stuff left over is the stuff the factory sprayed on the front...not sure what to do now....will get the other side cleaned and them make up my mind...
Used that ZEP Big Orange....elbow grease...plastic scraper...scuff pad and small wire brush to clean the drivers side of the undercoating...I guess the rough black stuff left over is the stuff the factory sprayed on the front...not sure what to do now....will get the other side cleaned and them make up my mind...
01-18-2011, 07:30 AM
#259
Mopar Fan
Join Date: Jan 2011
Posts: 41
Likes: 0
Received 0 Likes
on
0 Posts
You should be able to do it with just measuring...you will have to make two notches....one at the jack mounting point and at the latch...lay it out overnight because it will come rolled up...let it relax...find the center at the very back....measure from fender lip to fender lip and cut equal parts from each side with a straight edge and razor blade...no problem __________________
01-18-2011, 07:35 AM
#260
Mopar Fan
Join Date: Jan 2011
Posts: 41
Likes: 0
Received 0 Likes
on
0 Posts
The black painted area on earlier mopars was done from the factory on the lighter paint color cars. I believe it was to keep the paint color from showing thru the grille. I know my 73 Charger was like that. You seem to have two options. Clean it all off and paint it body color or spray it black again. Mike
01-18-2011, 01:38 PM
#261
Super Moderator
Thread Starter
The black painted area on earlier mopars was done from the factory on the lighter paint color cars. I believe it was to keep the paint color from showing thru the grille. I know my 73 Charger was like that. You seem to have two options. Clean it all off and paint it body color or spray it black again. Mike
01-18-2011, 08:57 PM
#262
Super Moderator
Thread Starter
Made up my mind of what to do
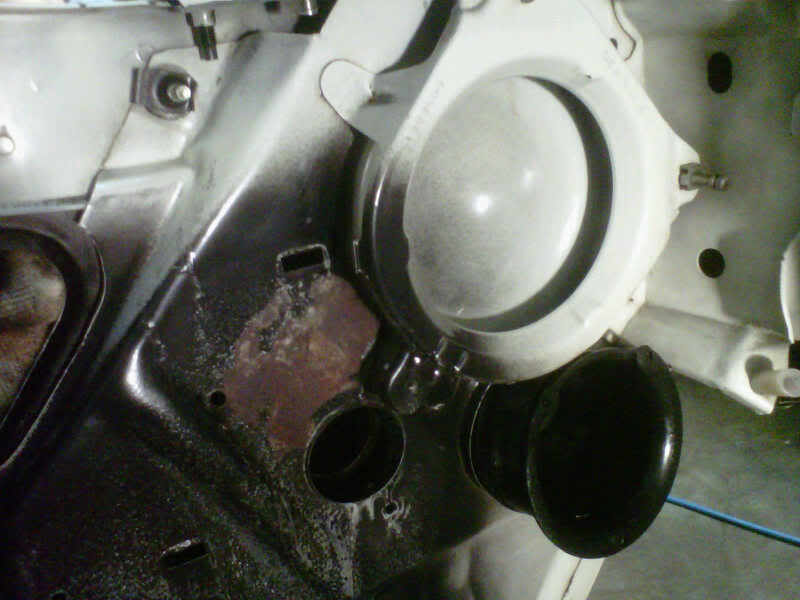
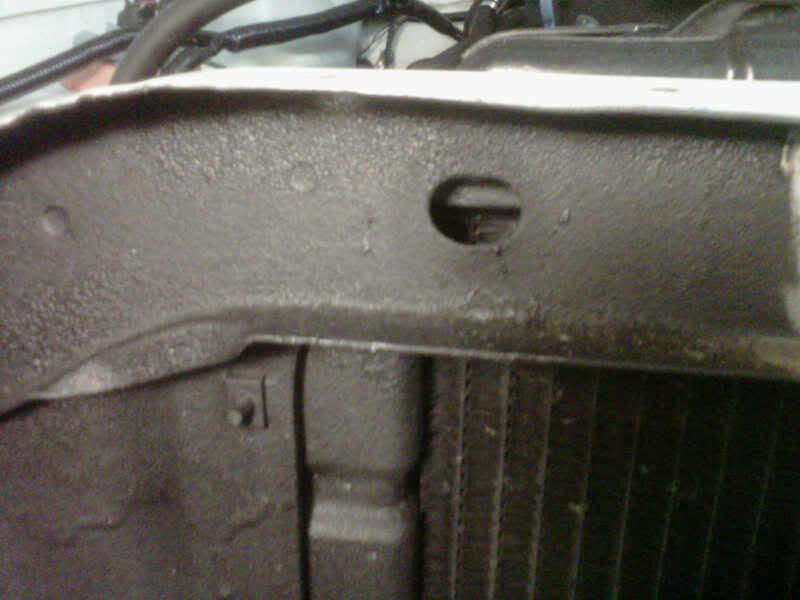
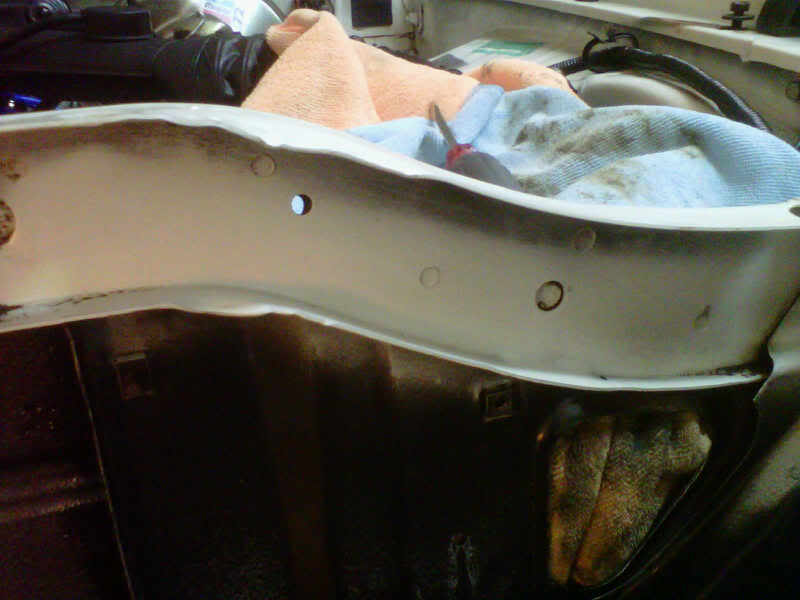
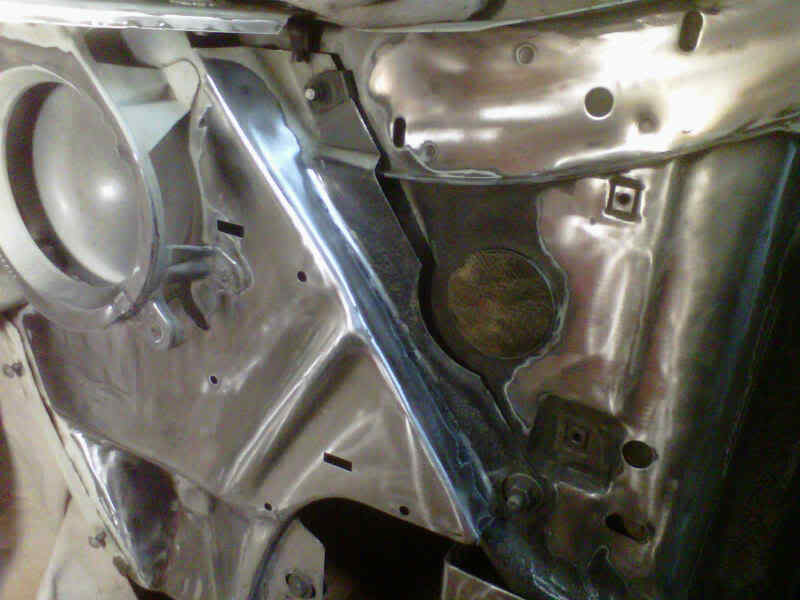
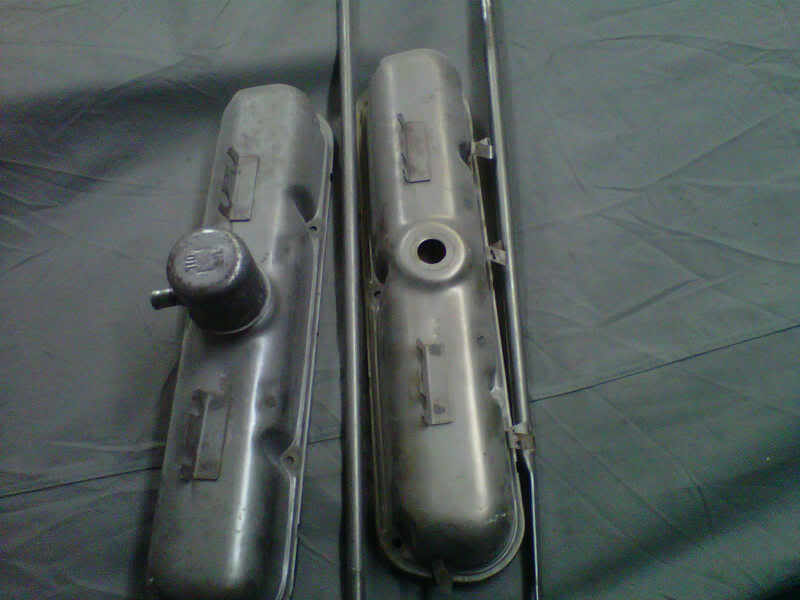
I took the engine compartment brace bars off tonight...they have bad paint runs on them and the undersides are not painted...they along with the valve covers are going to blasting tomorrow...last minute message that something is going to be blasted tomorrow...try to get something in the booth every time they do...I then cleaned some more of the undercoating off the other side but did not get done..I am going to mechanically remove as much paint from the front and then soda blast the rest...I will then prime the whole front with white primer and then paint it white when I do the engine compartment...after that I will tape off a section and do the grill blackout with satin epoxy...
heres the crap I am removing...just in case you forgot...
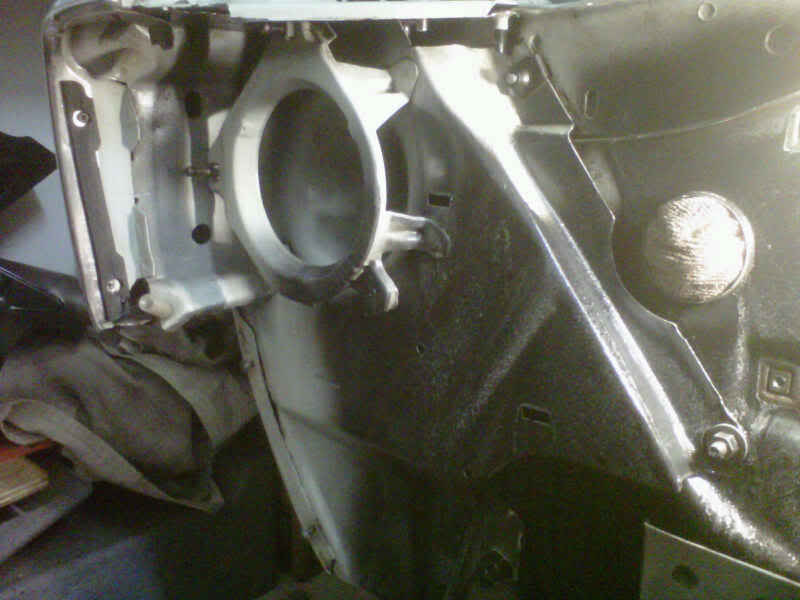
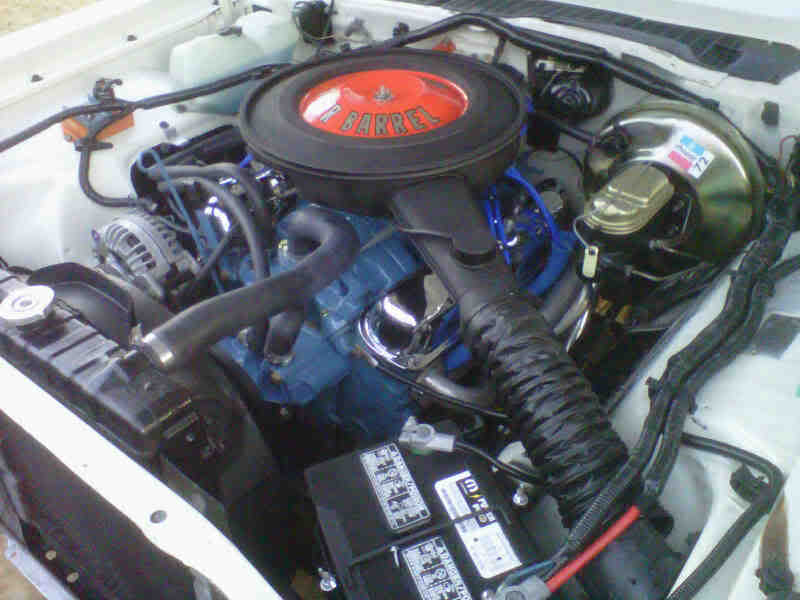
this is what it should look like
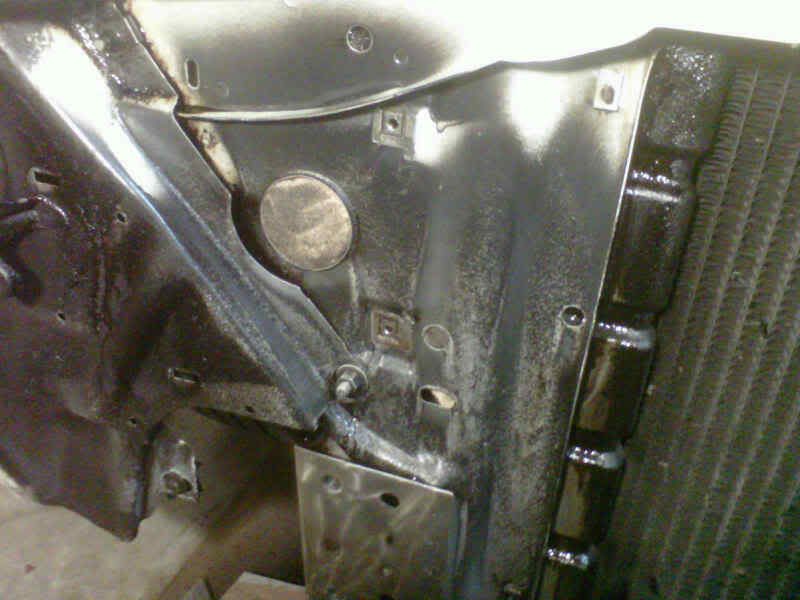
and this is what I got done tonight..still have to finish the very left side
and this is what is going to blasting tomorrow

I took the engine compartment brace bars off tonight...they have bad paint runs on them and the undersides are not painted...they along with the valve covers are going to blasting tomorrow...last minute message that something is going to be blasted tomorrow...try to get something in the booth every time they do...I then cleaned some more of the undercoating off the other side but did not get done..I am going to mechanically remove as much paint from the front and then soda blast the rest...I will then prime the whole front with white primer and then paint it white when I do the engine compartment...after that I will tape off a section and do the grill blackout with satin epoxy...
heres the crap I am removing...just in case you forgot...
this is what it should look like
and this is what I got done tonight..still have to finish the very left side
and this is what is going to blasting tomorrow
01-19-2011, 08:58 PM
#263
Super Moderator
Thread Starter
It's all gone
Finished getting the undercoating off the other side and did some house cleaning in the garage...got rid of the plastic and cardboard I had underneath the front end...got tired of the orange smell..
Finished getting the undercoating off the other side and did some house cleaning in the garage...got rid of the plastic and cardboard I had underneath the front end...got tired of the orange smell..
01-20-2011, 09:22 PM
#265
Super Moderator
Thread Starter
See some clean metal up front
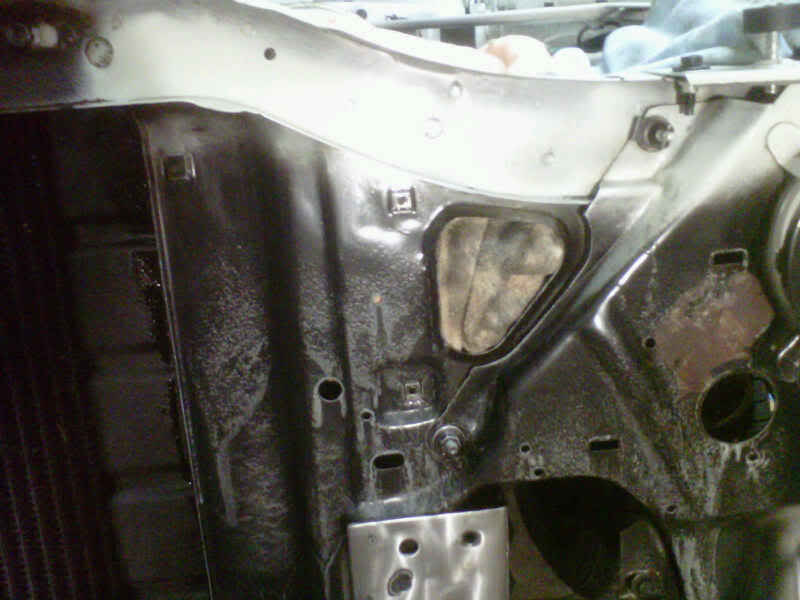
Used about 10 of those Ryloc twist on pads to strip paint and such off the front of the radiator support...got all the flat surfaces done on the driver's side...all the places I didn't get or attempt to get will be candidates for the soda blaster...hoping to finish up the other side tomorrow night and blast on Saturday..it's going to be sunny and 60 degrees...nice
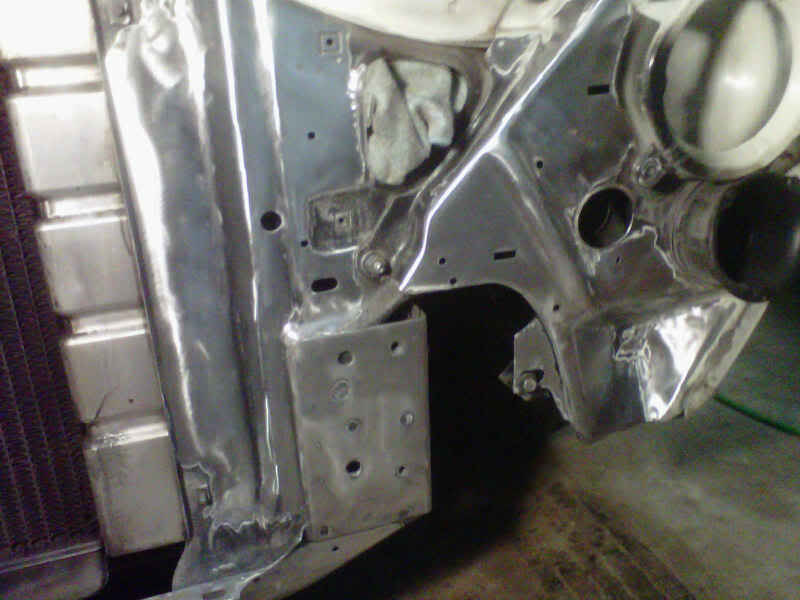
Used about 10 of those Ryloc twist on pads to strip paint and such off the front of the radiator support...got all the flat surfaces done on the driver's side...all the places I didn't get or attempt to get will be candidates for the soda blaster...hoping to finish up the other side tomorrow night and blast on Saturday..it's going to be sunny and 60 degrees...nice
01-21-2011, 09:56 PM
#266
Super Moderator
Thread Starter
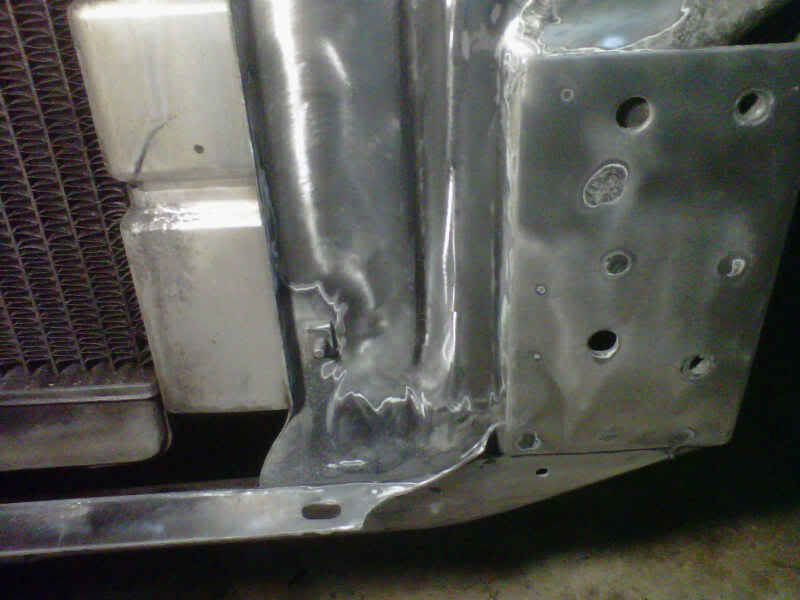
About 12 more of those Ryloc discs and the other side and the top right and left sides are done...tomorrow it is going to be 60 degrees and sunny...I will do a tape line and tape off alot of holes leading into the engine compartment before I blast the front with my soda blaster..
I also got my parts back from blasting today...whenever they blast sometihng at work I always try to get something for them to do...I will have to sand down a couple spots with 400 grit before painting...
I also got my parts back from blasting today...whenever they blast sometihng at work I always try to get something for them to do...I will have to sand down a couple spots with 400 grit before painting...
01-22-2011, 05:34 PM
#267
Super Moderator
Thread Starter
Before lunch...
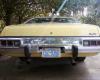
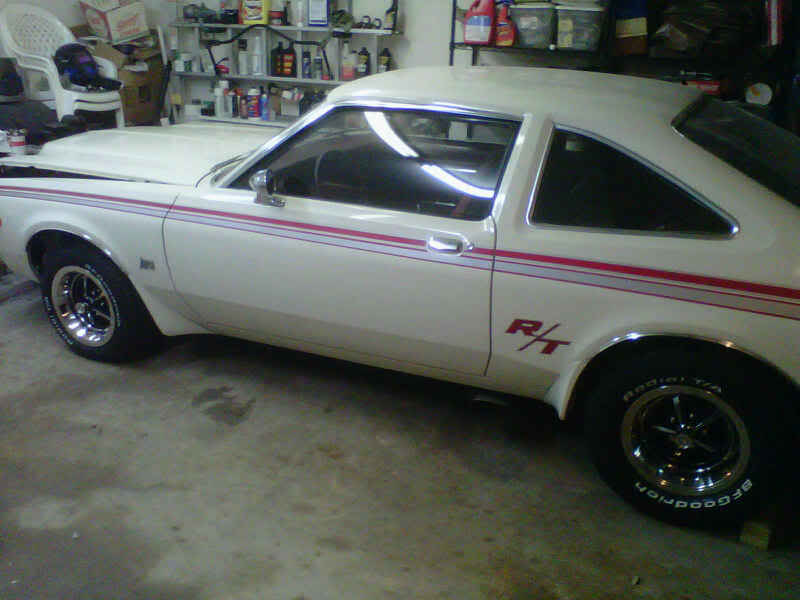
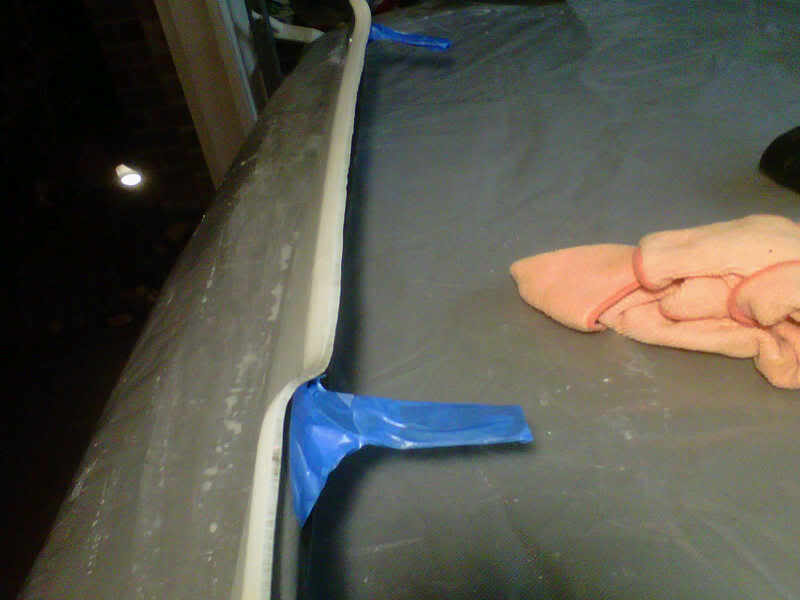
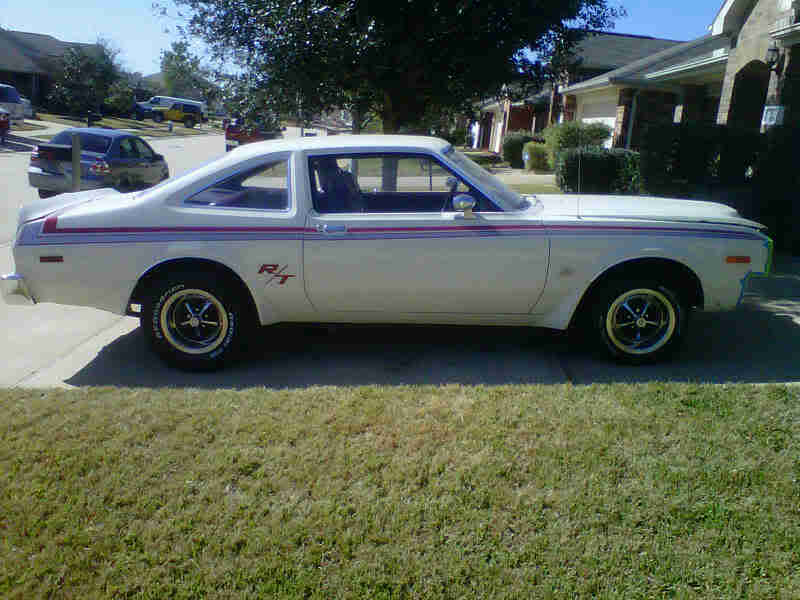
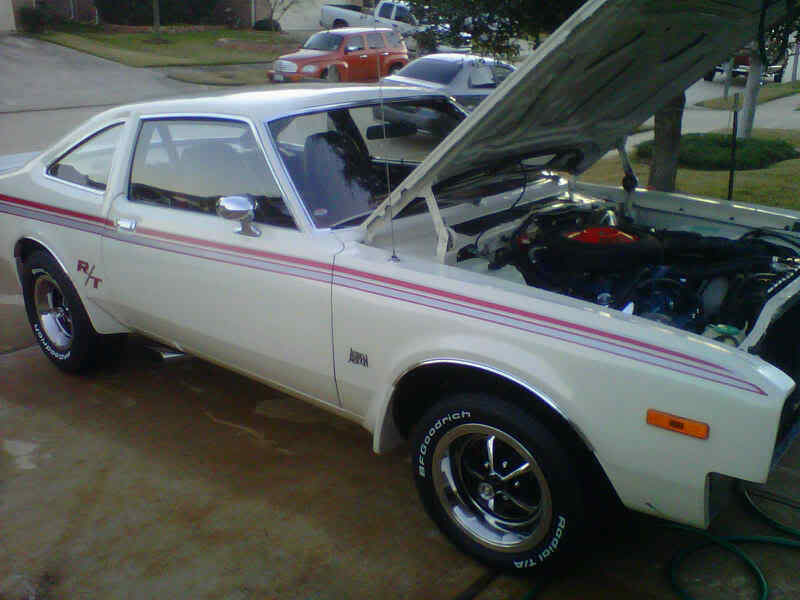
Before lunch I cleaned aroung all masking areas with mineral spirits and then ran my tape line...I then ran the thicker green tape on top of the blue for further protection...out in the sun with one far off picture of the car and new wheels..
The front tire look small in comparision to the rear tire..with the front spoiler back on it will help with the look...
Taped up and ready to go
01-22-2011, 05:35 PM
#268
Super Moderator
Thread Starter
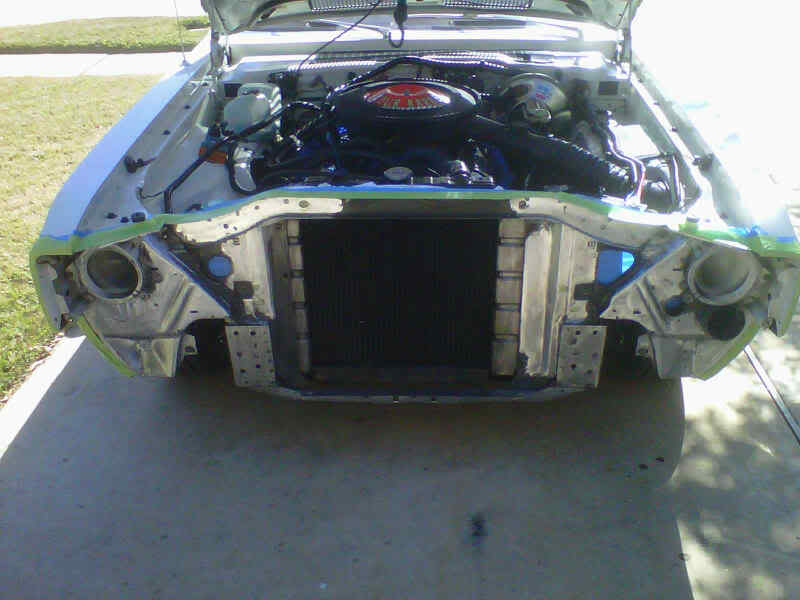
Okay here's the rest of the work I did today
One side done blasting by 2:30...I did not start until 1:30 so I figure I didn't do to bad...

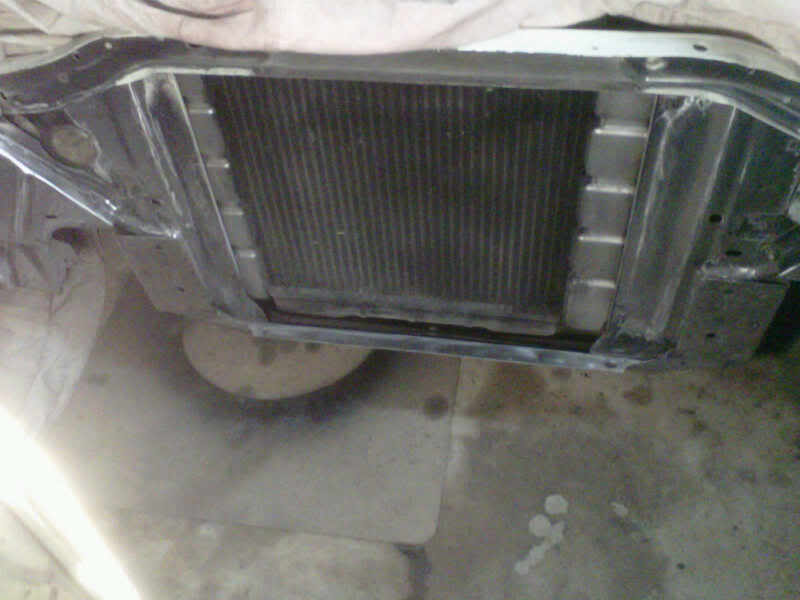
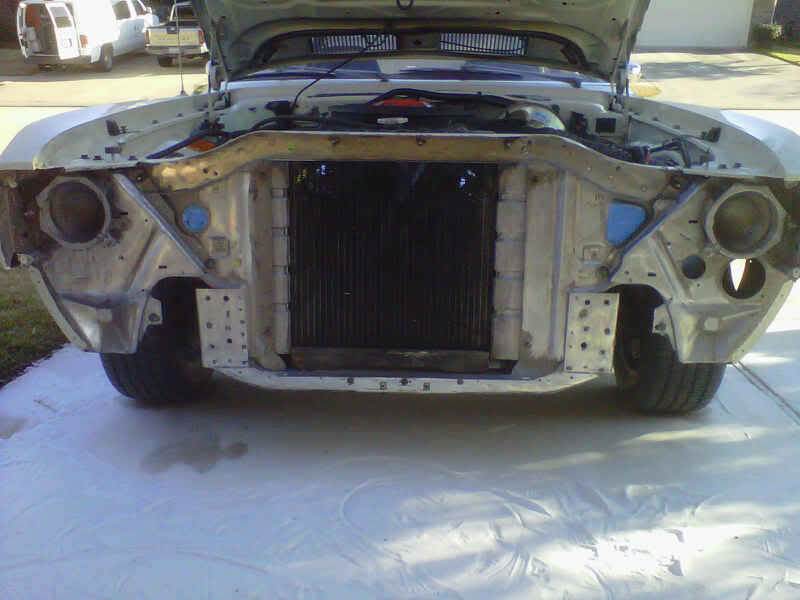
The whole front done...there are some dark areas behind the paint that was blasted off...soda doesn't clean as well as mechanical means...notice the snow in front of the car...
I figure by weight 35 pounds of soda...
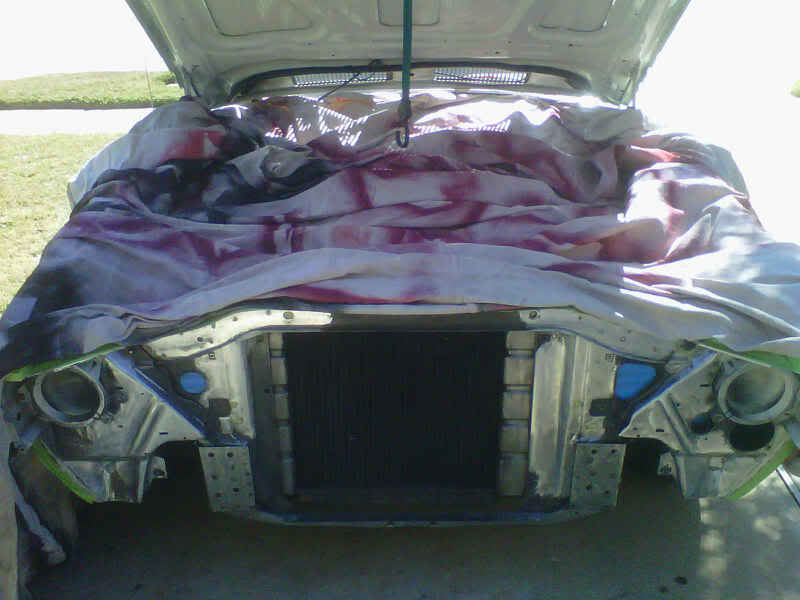
Had to wash down everything including the engine compartment...
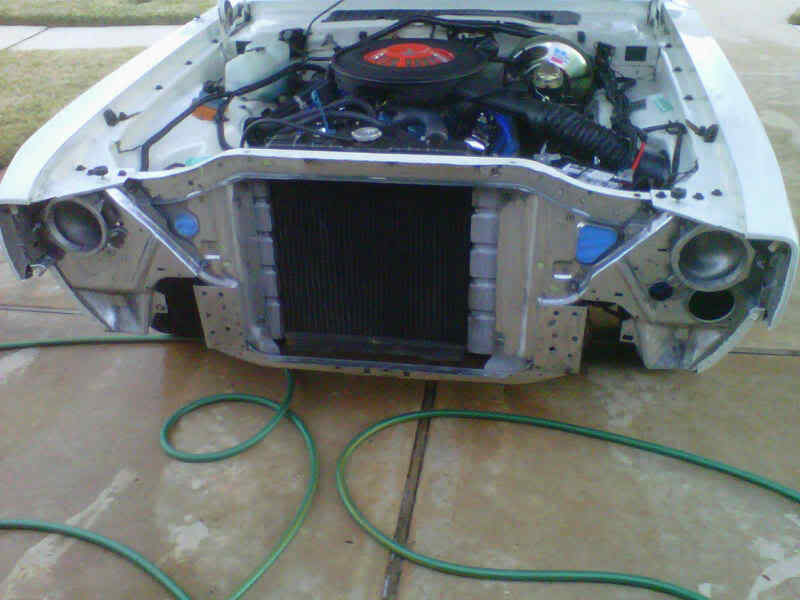
I am going to Home Depot tonight to get some 220 and 400 grit sand paper...there are a couple of surface rust spots I need to hit before primer...
One side done blasting by 2:30...I did not start until 1:30 so I figure I didn't do to bad...
The whole front done...there are some dark areas behind the paint that was blasted off...soda doesn't clean as well as mechanical means...notice the snow in front of the car...
I figure by weight 35 pounds of soda...
Had to wash down everything including the engine compartment...
I am going to Home Depot tonight to get some 220 and 400 grit sand paper...there are a couple of surface rust spots I need to hit before primer...
01-23-2011, 08:25 AM
#270
Super Moderator
Thread Starter
Rattle can rust-oleum clean metal primer....it's white to...if I were to blast and repaint the whole car...then I would shoot it with epoxy....today I back the 440 Dart out and then mask off and spray inside the garage...this will help eliminate overspray carried by the wind.


