When you click on links to various merchants on this site and make a purchase, this can result in this site earning a commission. Affiliate programs and affiliations include, but are not limited to, the eBay Partner Network.
67 Charger restoration to begin-remove vinyl top adhesive from roof
I am starting my restoration on my 67 Charger. The original Owner had the dealer install a vinyl roof onto the car. When I purchased the car, the prior Owner had removed the vinyl top and did not remove the adhesive.
I have tried a few products from East wood with no luck. Has anyone used any product or tool
(adhesive wheel?) to remove 53 year old adhesive?
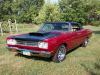
Thanks Bob, I will start with that and see how it goes. I just bought this Hemi Charger and am starting the restoration. I am dusting off all of my tools as I haven't done a restoration in years but I am ready to dive into it. I have confirmed with Galen that all the numbers are matching for this 67 Hemi 4 speed, car is 1 of 58 made in 67. Also the Gold/Gold non- console interior, with the "buddy seat" , could be one of one. Engine is rebuilt, sitting on a stand, and I plan to start with rebuilding the front end, brakes, then the body and finally the interior. I am sure I will be back on the Forum many times before it is completed. I have been assembling parts for two months and am close to having what I need, I think.
Anyway, as always thanks for your comments, support and knowledge to this website.
Your welcome... Thanks for letting me be apart of your restoration process... Hope I can help more down the road....
I like the blow it apart and paint all the parts and then put it back together... Sounds like it will be a very nice car when your all done with it.... Cheers to forward progress !!!!
While I was thinking while on another site...lol
I thought I would come back to this and offer a few other resources that you might need before you get really going on this thing...
Thanks Bob, I am starting the project myself and have help from a freind who is more experienced than me. My Mopar experience has only been with 1969 Roadrunner. BUt I am gathering as much information as I can before I get into the project. I am sure your help will be in my future.
Yes I used a wire wheel but that was too severe, so I stopped. I am using my DA sander with 80 grit and just taking it slow. It is coming off day by day. Then I will keep taking it down with 120, 220 to get it finished for primer, sanding, etc.
Good morning Bob, Thought I'd post a few photos of the progress I have made with my DA sander on the roof. Removed all of the surface rust and old adhesive from the vinyl roof. Check it out
Looks great... And the roof dont look to bad ether !!! Dont for get to clean out the old sealer in the drip rails... Coming along very Nice.. Good Work !!!
Hi Bob, thanks for your comments and yes I am going to work on the drip rail sealer. I also am working on the engine bay. Finished the top of the core support this weekend.