
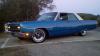
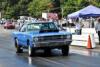
I never would think I would own one of these


Thread Starter
Super Moderator
Joined: Sep 2010
Posts: 3,609
Likes: 181
From: Houston, Texas


Thread Starter
Super Moderator
Joined: Sep 2010
Posts: 3,609
Likes: 181
From: Houston, Texas
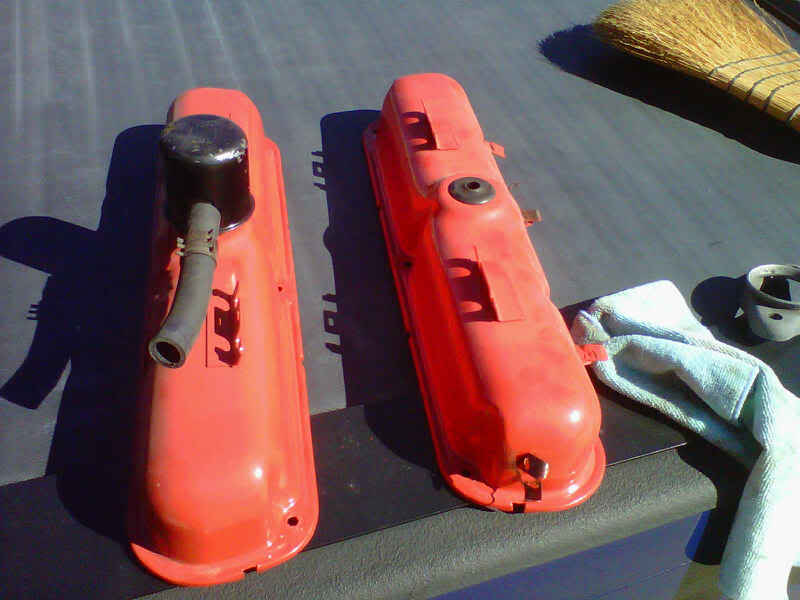
Cool wait till you see the valve covers I am going to use...they won't be from 77 either more like 68...but hey are stock and the dumb chevy judges won't know the differance...
Thread Starter
Super Moderator
Joined: Sep 2010
Posts: 3,609
Likes: 181
From: Houston, Texas
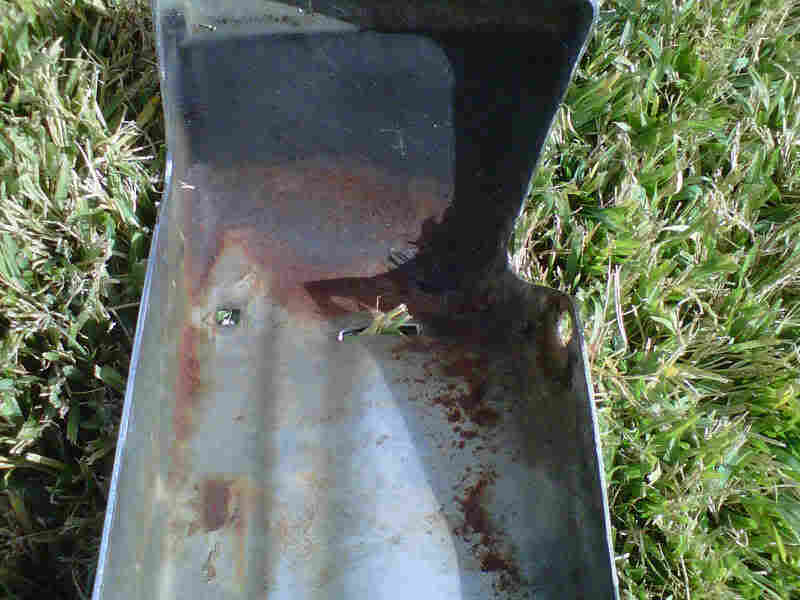
Just so you would know...all things are not as they seem...
Okay, here two pics of the backside of the rear bumper....although the front looks great the backsides of both bumpers were rusty...you can't have that here in Houston...they would rust through in a couple of years...that's why they are getting chromed...
Thread Starter
Super Moderator
Joined: Sep 2010
Posts: 3,609
Likes: 181
From: Houston, Texas
I didn't get a chance to do alot today...had to clean house for a party
My youngest daughter is having a birthday party with her friends tomorow...had to move my parts..vacuum and help clean up alot of stuff around the house..I did get closer to making the front covers for the 5 mph bumper shocks...still have to make two more holes at top...will look for a leather hole puncher at Hobby Lobby tomorrow..
got some of the parts in from Firm Feel...the front aluminun spacers and some of the parts are still on order for the rear insulator eliminating at the leaf springs...
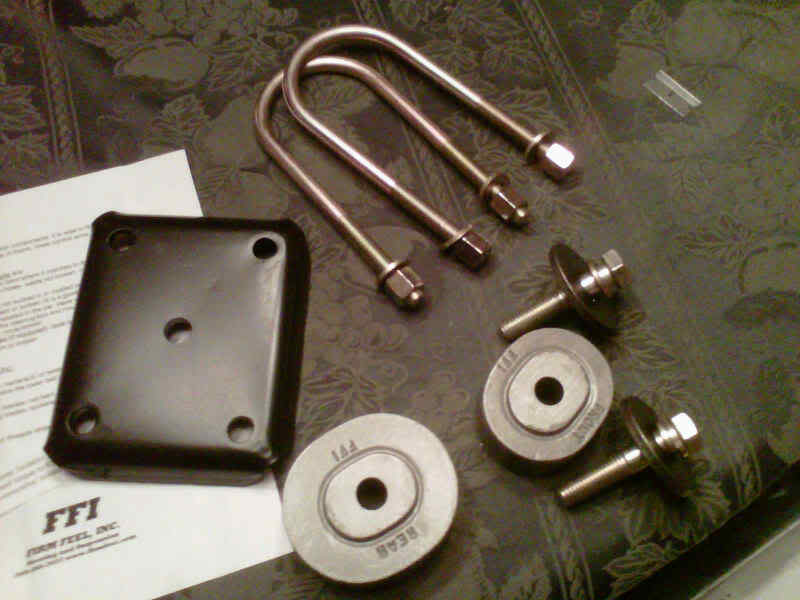
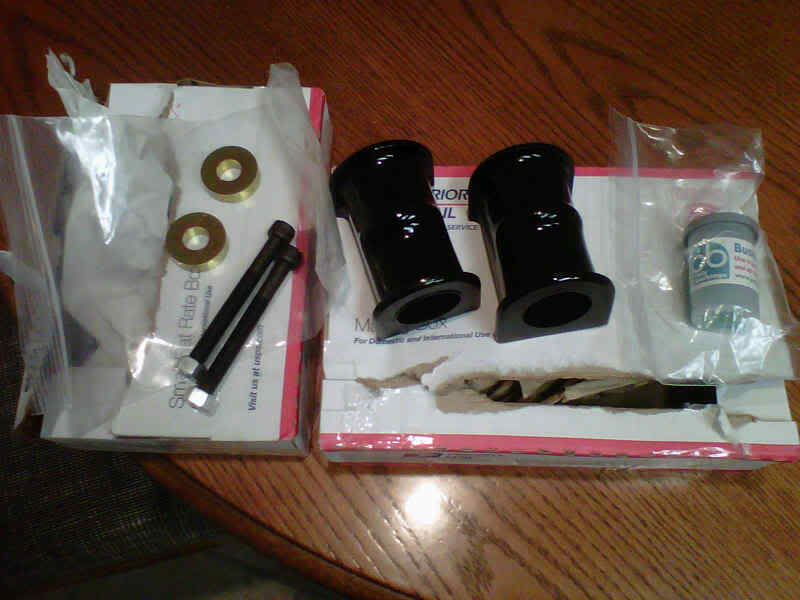
I ordered these bushing for the center torsion bar bushing...no one repops these except in poly they are 49.00 bucks and you re-use the metal parts

got some of the parts in from Firm Feel...the front aluminun spacers and some of the parts are still on order for the rear insulator eliminating at the leaf springs...
I ordered these bushing for the center torsion bar bushing...no one repops these except in poly they are 49.00 bucks and you re-use the metal parts
Thread Starter
Super Moderator
Joined: Sep 2010
Posts: 3,609
Likes: 181
From: Houston, Texas
Got a few more things done today....
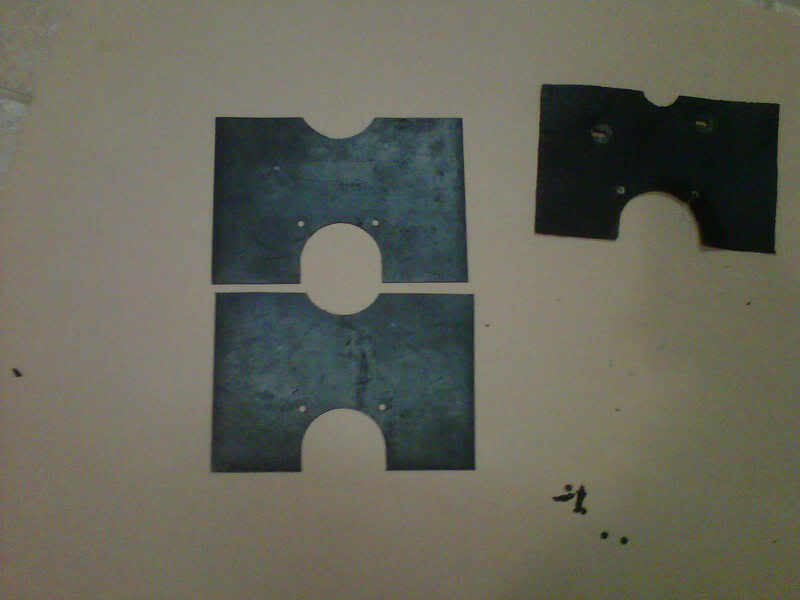
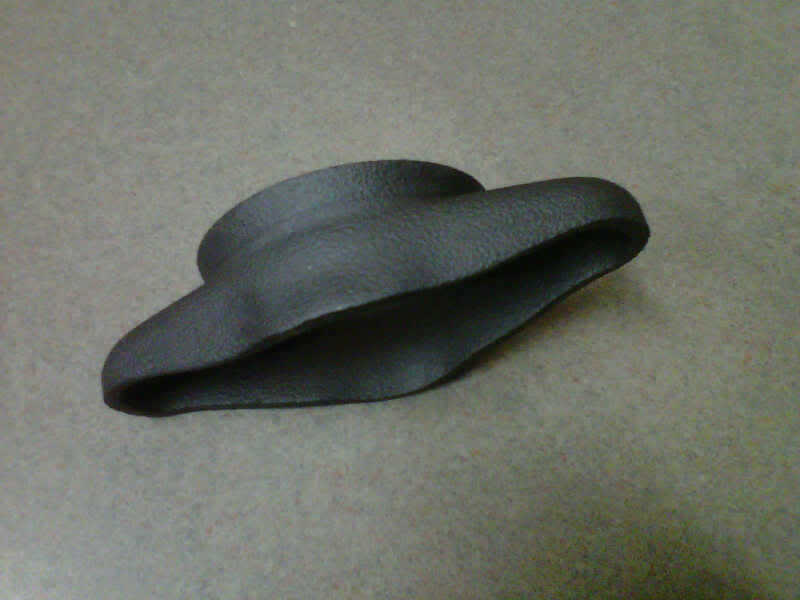
Removed the front 5 mph bumper shocks for blasting...first pic is the rubber piece I am making for them...got a 6 buck punch at Hobby Lobby today and made the last two top offset holes....


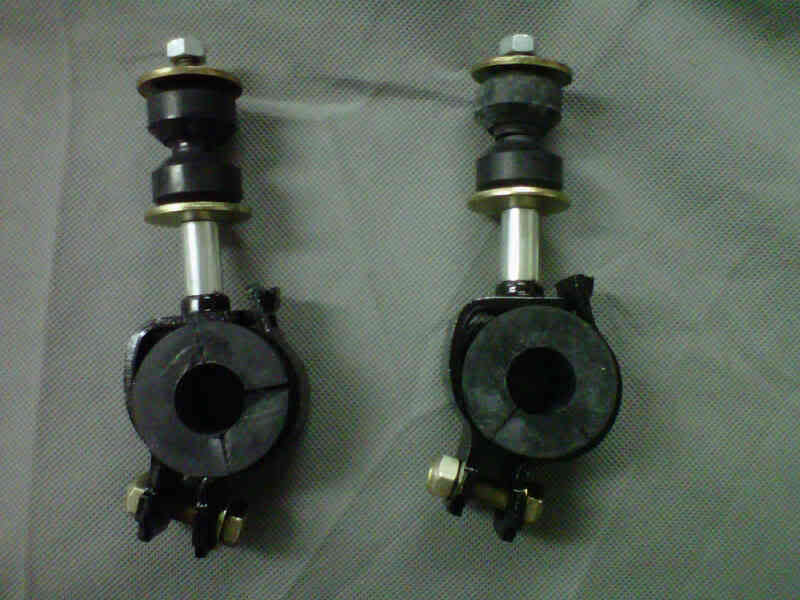
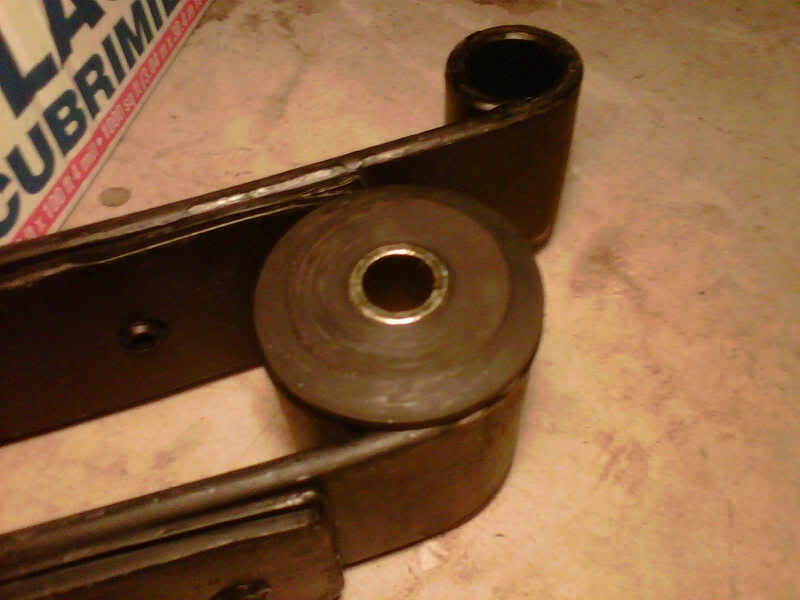
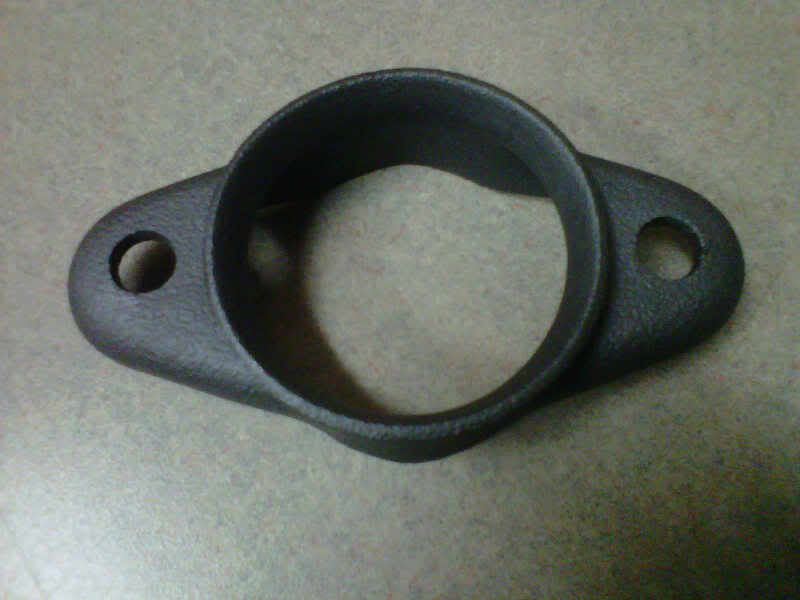
Got the sway bar bushing center link out of paint today and pre-assembled...ready to go...
Removed the front 5 mph bumper shocks for blasting...first pic is the rubber piece I am making for them...got a 6 buck punch at Hobby Lobby today and made the last two top offset holes....
Got the sway bar bushing center link out of paint today and pre-assembled...ready to go...
Thread Starter
Super Moderator
Joined: Sep 2010
Posts: 3,609
Likes: 181
From: Houston, Texas
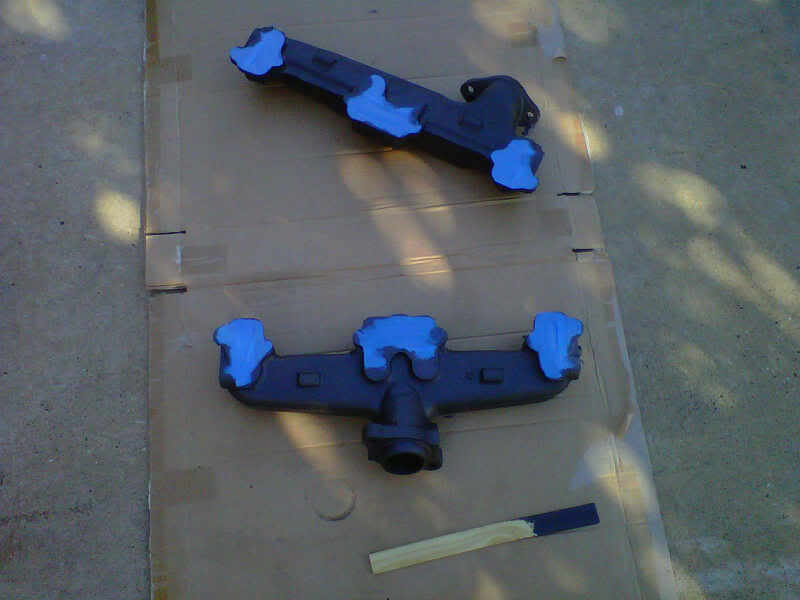
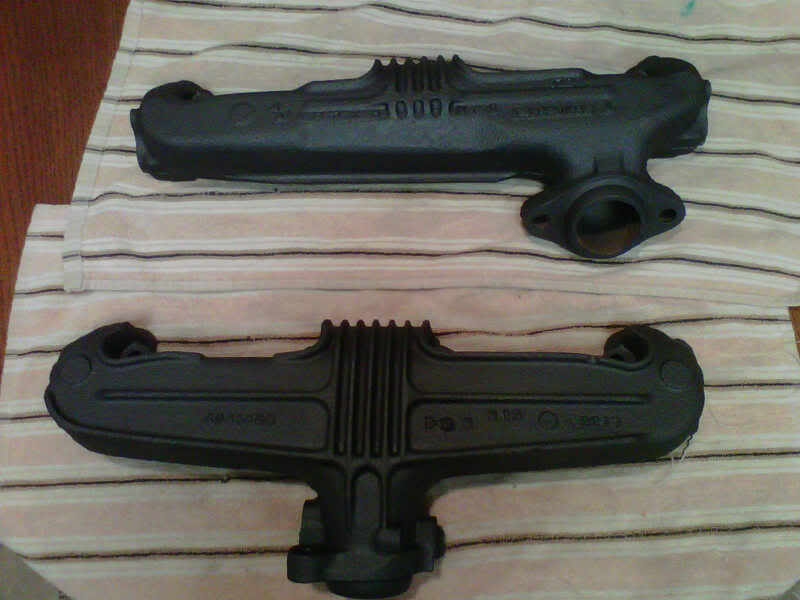
Went by my storage today...loaded up the truck with a bunch of crap I needed to get rid of...picked up the valve covers I am going to use..I have the new spark plug white plastic separators from year one...I got the manifolds painted today and they called me from work and my other stuff is blasted...I am going to pick some of it up after dinner...

Thread Starter
Super Moderator
Joined: Sep 2010
Posts: 3,609
Likes: 181
From: Houston, Texas
Rockauto.com...for some of the suspension parts....firmfeel.com for the aluminum biscuits and the rear leaf spring kit....JC Whitney for the leaf springs and justmopar.com or fran bishop racing for the roof and door seals..also some e-baying...thanks also new wheels will be coming from Specialty Wheels
Thread Starter
Super Moderator
Joined: Sep 2010
Posts: 3,609
Likes: 181
From: Houston, Texas
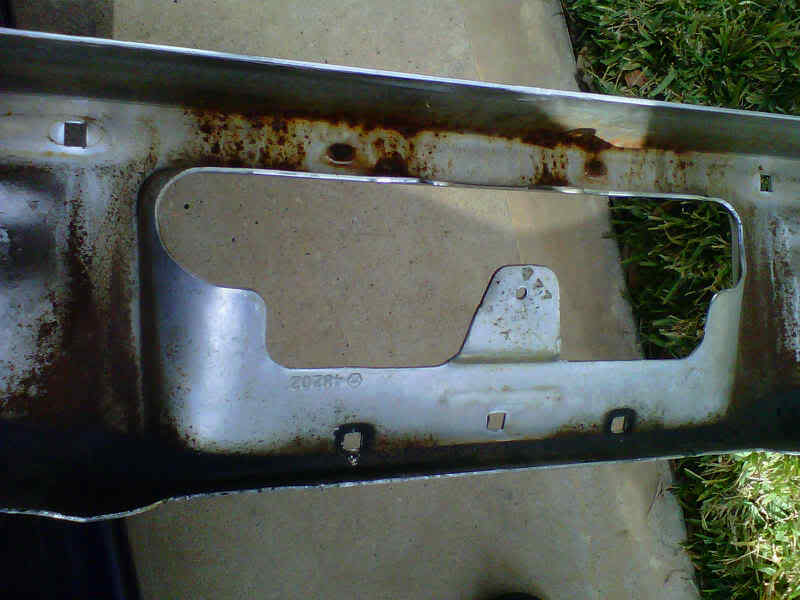
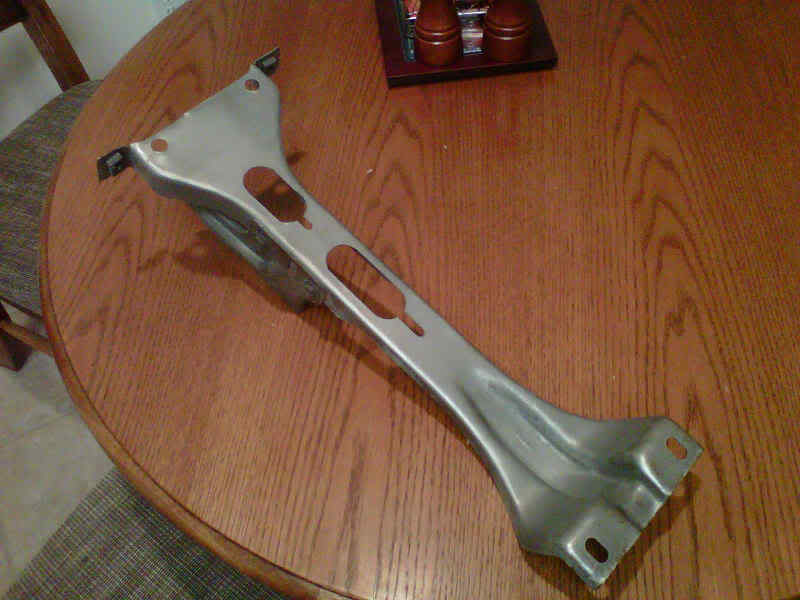
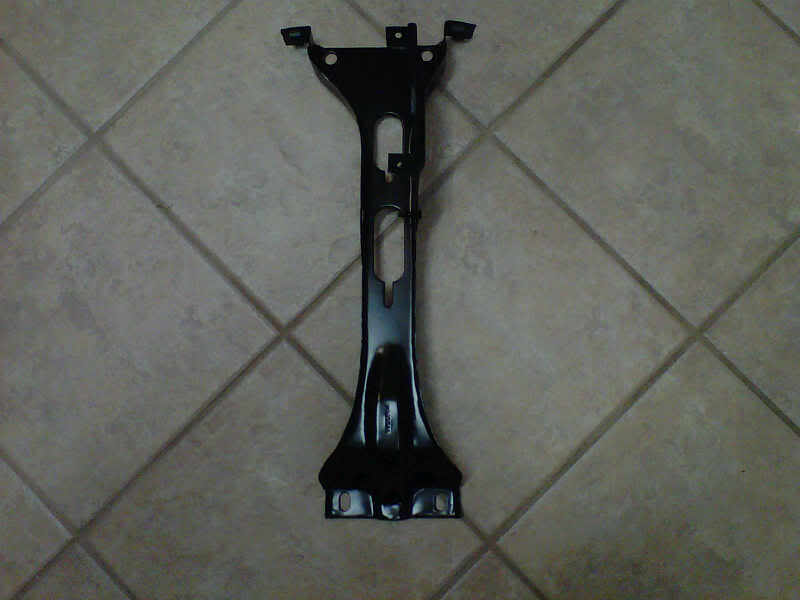
Okay...picked up all of the media blasted components...radiator latch support turned out the best...the rest still have some rust that I will have to bust with some mechanical method...the plastic media we use at work won't remove rust and I knew that...
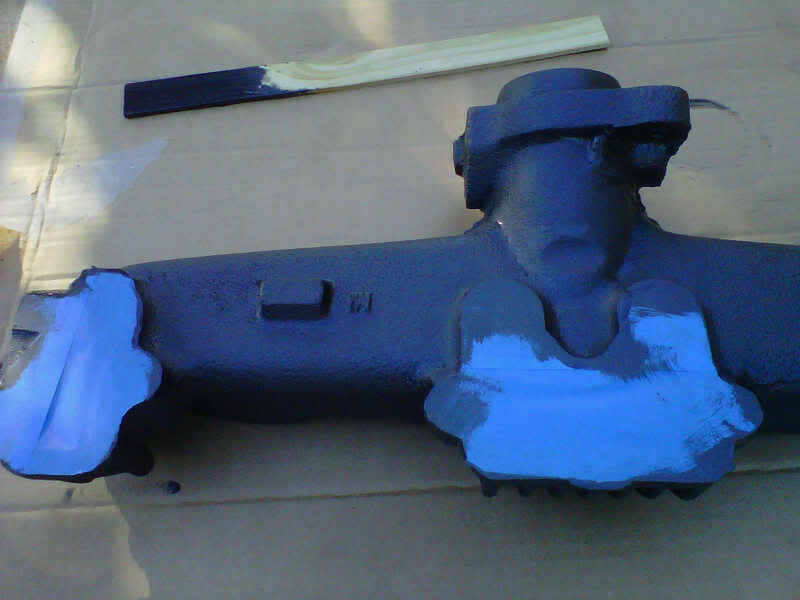
baked the manifolds in the oven till they reached 300 degrees..one more or two more coats and then baked again...they are dark grey...
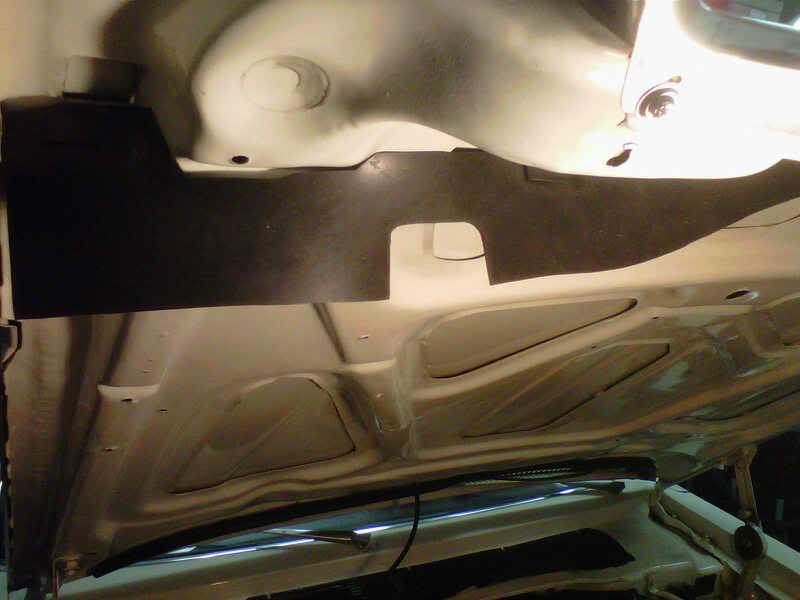
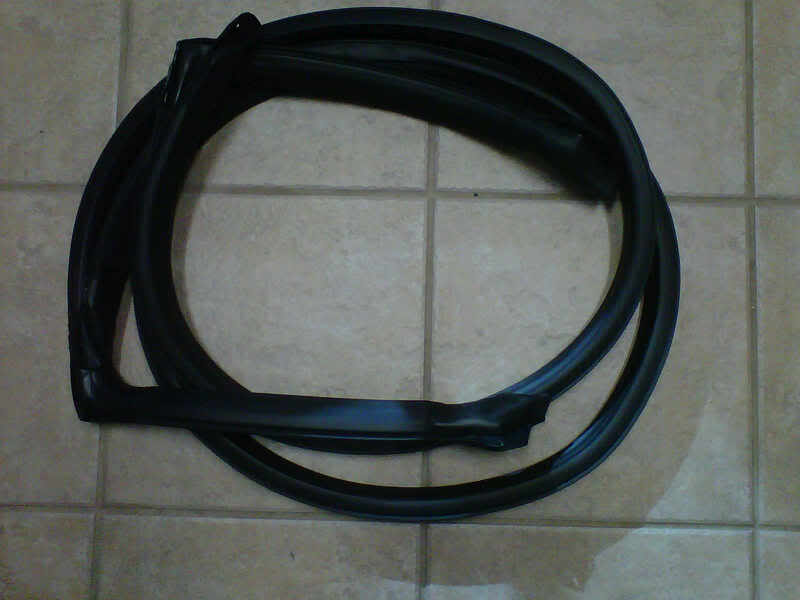
I got brave and cut the radiator support seal...not sure what the two round holes serve purpose...check on that tomorrow and finish knocking the holes in it..


baked the manifolds in the oven till they reached 300 degrees..one more or two more coats and then baked again...they are dark grey...
I got brave and cut the radiator support seal...not sure what the two round holes serve purpose...check on that tomorrow and finish knocking the holes in it..
Thread Starter
Super Moderator
Joined: Sep 2010
Posts: 3,609
Likes: 181
From: Houston, Texas
Okay here what I got done today
First of all...for all of those freezing their off..today it was brezzy but 70 degrees...I wore a teashirt and jeans...went to three different O'Rielly's to score one gallon of Evaporust from each..I had a half gallon so 3 and 1/2 galllons in a homer bucket then three of the bumper shocks and one set of Proto impact sockets in for soaking...by late this afternoon I took a couple out to show you the results..you should be able to see them very easy...

that sh*t works auesome...be right back for some more..okay broke the sode blaster out to touch up the front latch support...then second coat on the exhaust manifolds and then baked them....worked on the sway bar for 2 hours with scuff pads on the die grinder to get it as smooth as a babies then punched hole in the radiator support seal and hung it on the hood...had to bend a couple of the tabs back and then got it to close and seal like a charm....

front latch support and sway bar are going fot paint tomorrow...
First of all...for all of those freezing their
off..today it was brezzy but 70 degrees...I wore a teashirt and jeans...went to three different O'Rielly's to score one gallon of Evaporust from each..I had a half gallon so 3 and 1/2 galllons in a homer bucket then three of the bumper shocks and one set of Proto impact sockets in for soaking...by late this afternoon I took a couple out to show you the results..you should be able to see them very easy...that sh*t works auesome...be right back for some more..okay broke the sode blaster out to touch up the front latch support...then second coat on the exhaust manifolds and then baked them....worked on the sway bar for 2 hours with scuff pads on the die grinder to get it as smooth as a babies
then punched hole in the radiator support seal and hung it on the hood...had to bend a couple of the tabs back and then got it to close and seal like a charm....front latch support and sway bar are going fot paint tomorrow...

Thread Starter
Super Moderator
Joined: Sep 2010
Posts: 3,609
Likes: 181
From: Houston, Texas
okay heres some more
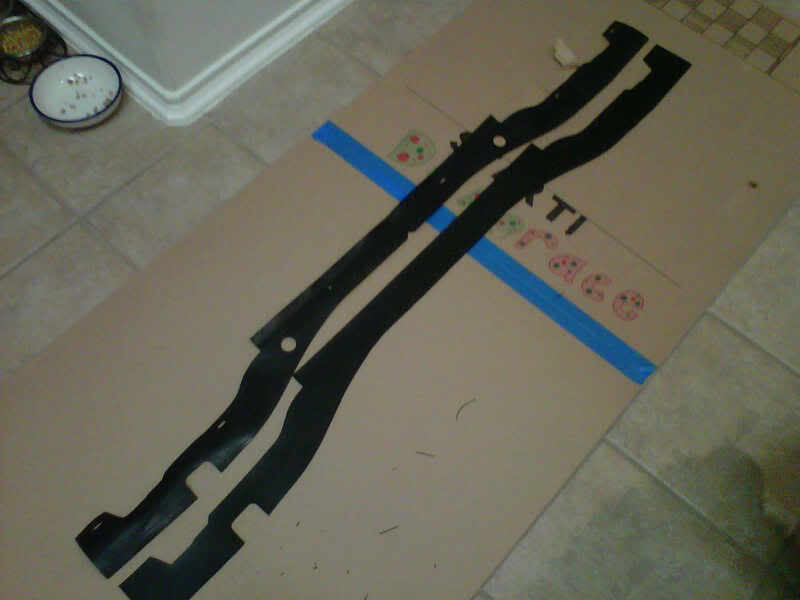
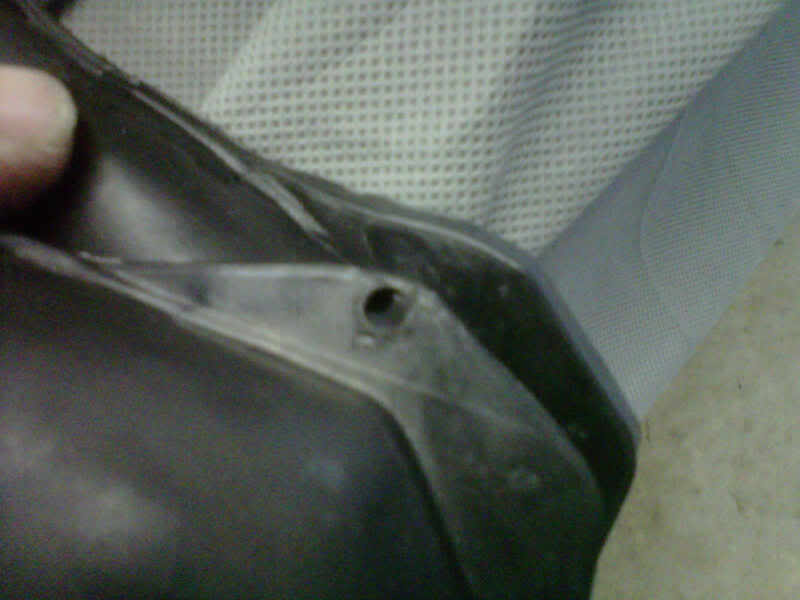
Got a call this afternoon that the front bumper is done...going tomorrow to pick it up...I put the roof rail seals in this afternoon...Metro supersoft has an issue with it..they need holes in the end section and they should have supplied two new plastic pins that are needed at each end...
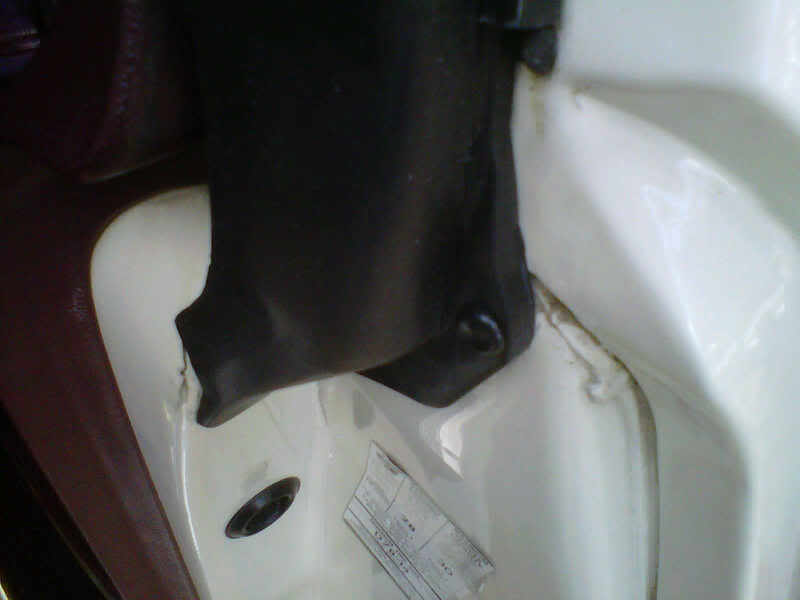
they were the easiest roof rail seals ever to install...I have two supple still in good shape ones to sell for 20 bucks plus shipping..
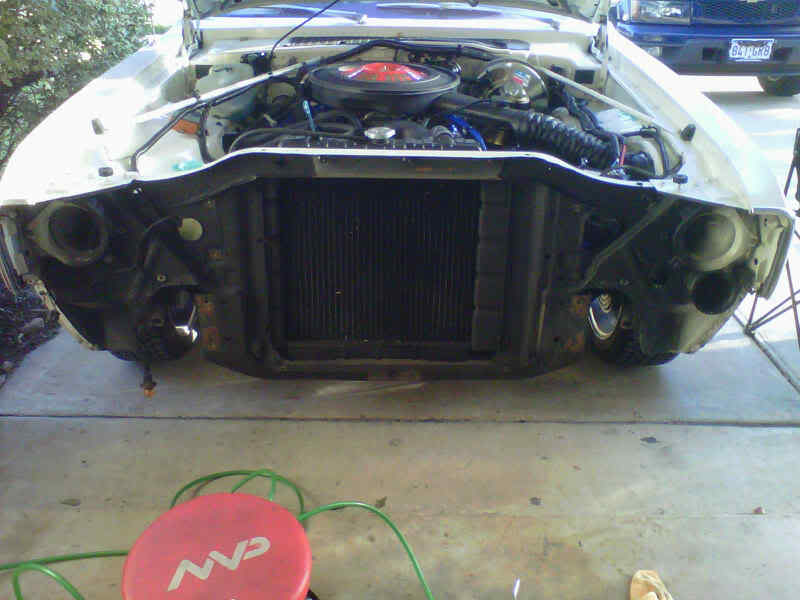
got the whole front end off the car now...Eastwoods undergone did not touch the undercoating...I cleaned up one of the bumper corner fillers with mineral spirits and it did the job..even took off some of the undercoating overspray..
they were the easiest roof rail seals ever to install...I have two supple still in good shape ones to sell for 20 bucks plus shipping..
got the whole front end off the car now...Eastwoods undergone did not touch the undercoating...I cleaned up one of the bumper corner fillers with mineral spirits and it did the job..even took off some of the undercoating overspray..
Thread Starter
Super Moderator
Joined: Sep 2010
Posts: 3,609
Likes: 181
From: Houston, Texas
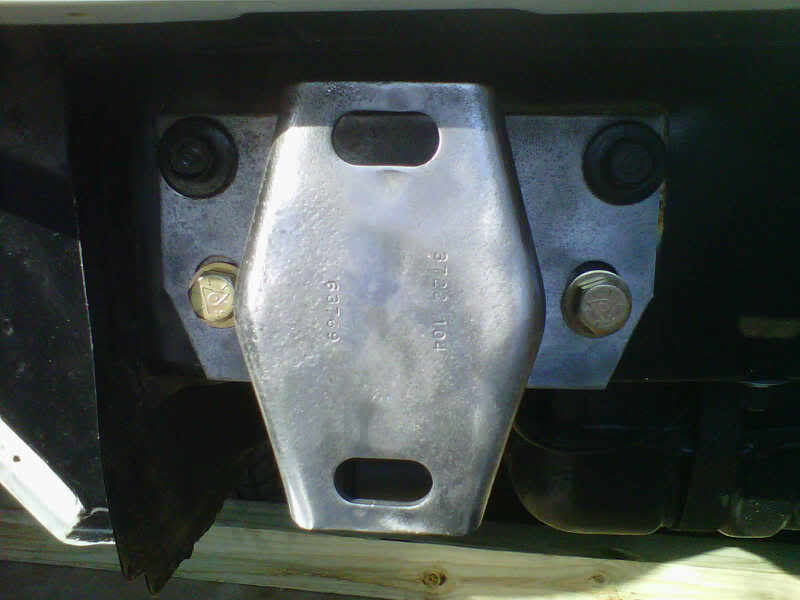
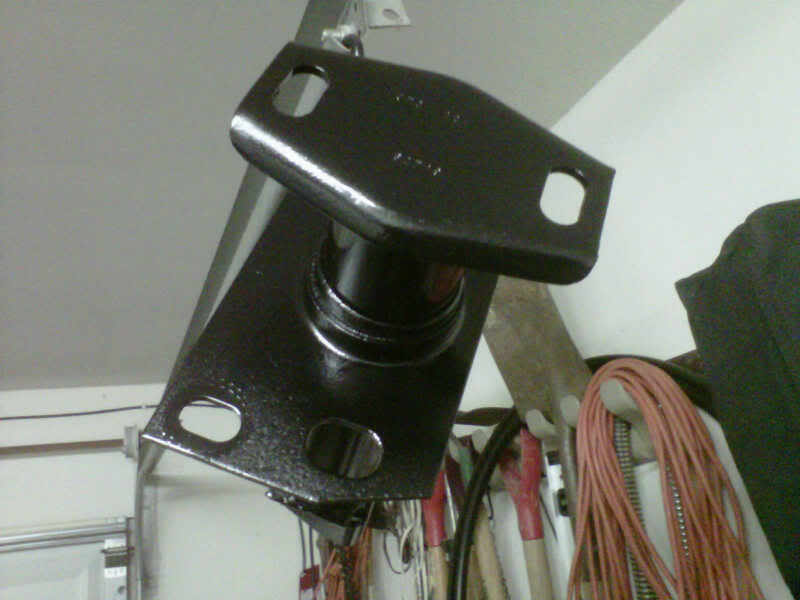
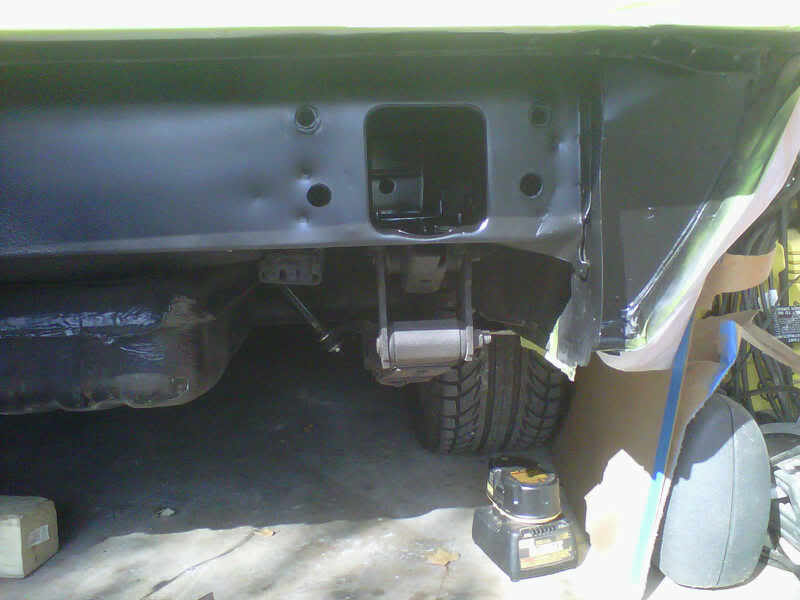
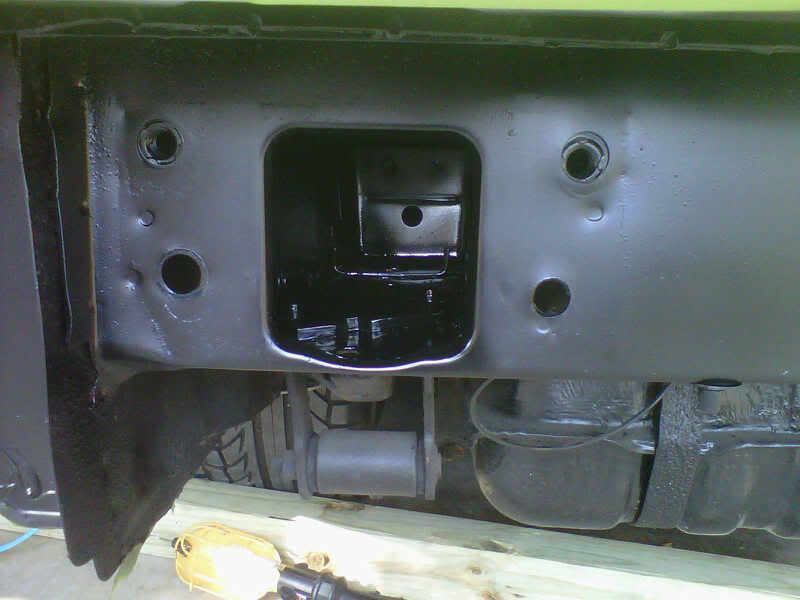
Got the call yesterday about the front bumper....went there to find out the other one was done to...they were wrapped up in white foam and I took them home after stopping by Harbor Freight..I took the 5 mph bumper shocks out the Evaporust solution and had to strip some paint and undercoating off of them..got one of them painted but before I did I mounted it...why would you have 4 holes and only two bolts..you can see the two new grade 8 bolts...the one on the left already had a hole and the one on the right I had to drill through the frame..
I then got it painted...remember that it had rust all over it...so there are still pits where the rust was removed...I put 4 coats of the VHT epoxy paint on it so I am pretty sure it won't start rusting again..
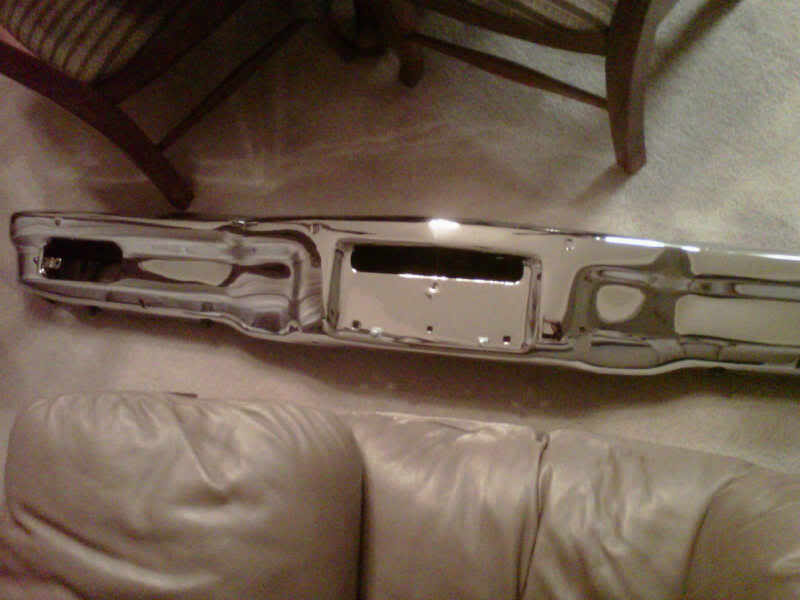
Okay the rear bumper is okay but has a couple pieces of trash in it...now for 400.00 bucks it should be better than that..the front had some brown patches on top and some scratches and something that looks like water marks...that is no way acceptable to me by any means...it goes back tomorrow and I will look at the rear one again in the daylight..it may go back to...
here is two shots from the bottom showing two bolt attaching points that were not even cleaned up prior to chroming and still look like crap
I then got it painted...remember that it had rust all over it...so there are still pits where the rust was removed...I put 4 coats of the VHT epoxy paint on it so I am pretty sure it won't start rusting again..
Okay the rear bumper is okay but has a couple pieces of trash in it...now for 400.00 bucks it should be better than that..the front had some brown patches on top and some scratches and something that looks like water marks...that is no way acceptable to me by any means...it goes back tomorrow and I will look at the rear one again in the daylight..it may go back to...
here is two shots from the bottom showing two bolt attaching points that were not even cleaned up prior to chroming and still look like crap
Thread Starter
Super Moderator
Joined: Sep 2010
Posts: 3,609
Likes: 181
From: Houston, Texas
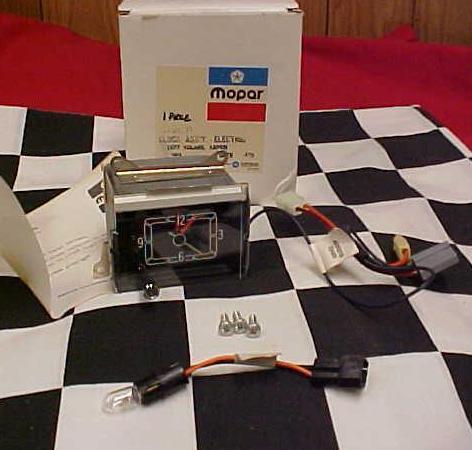
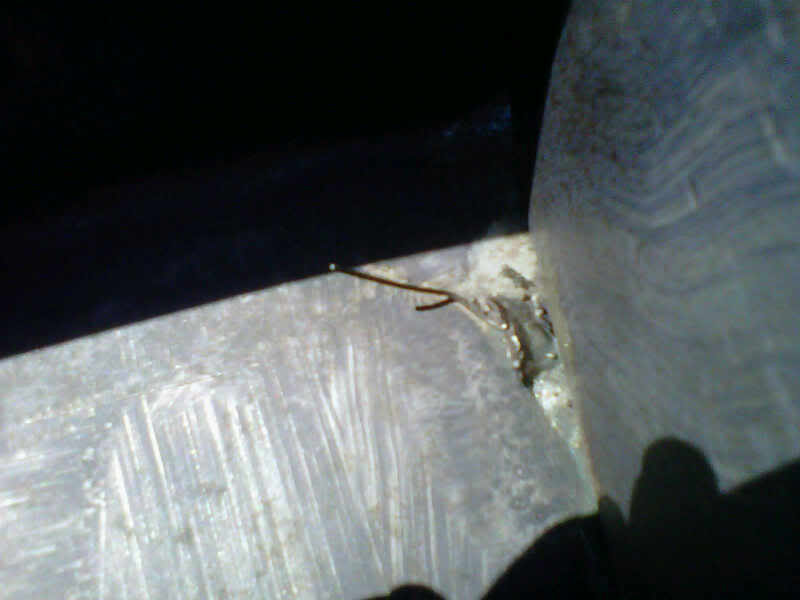
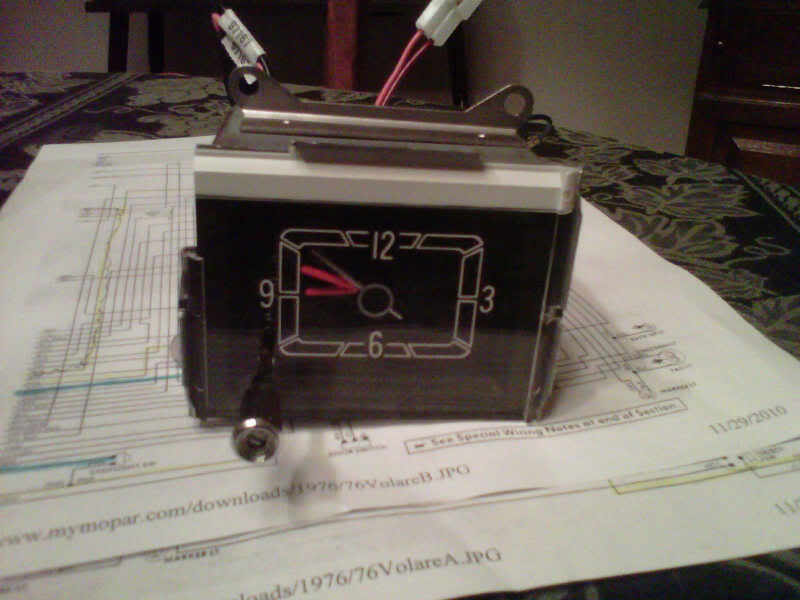
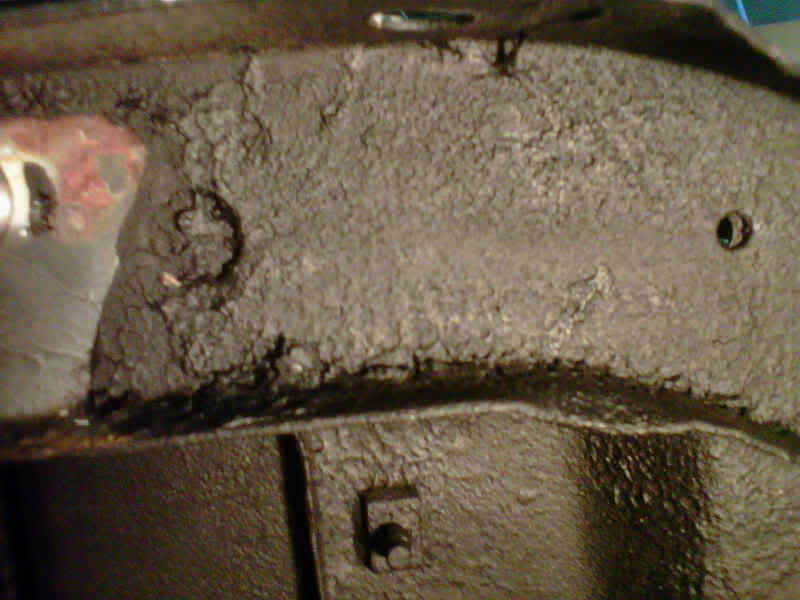
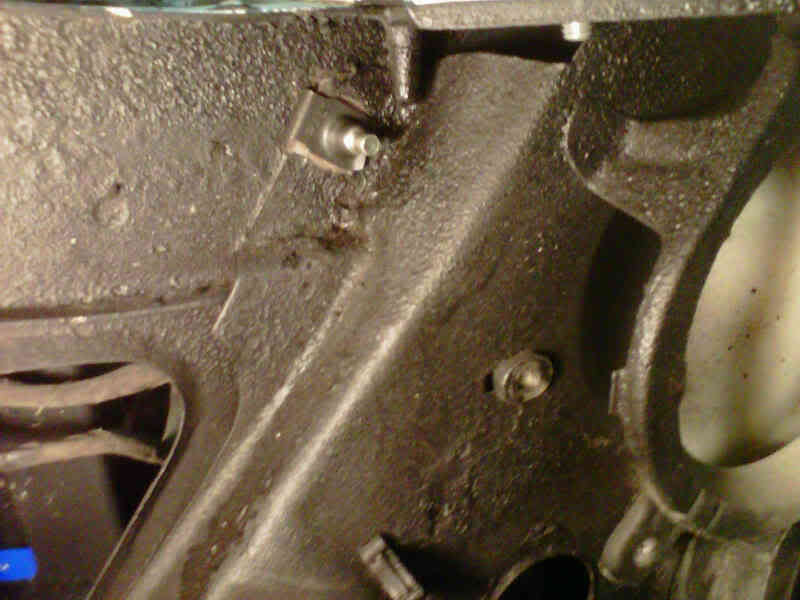
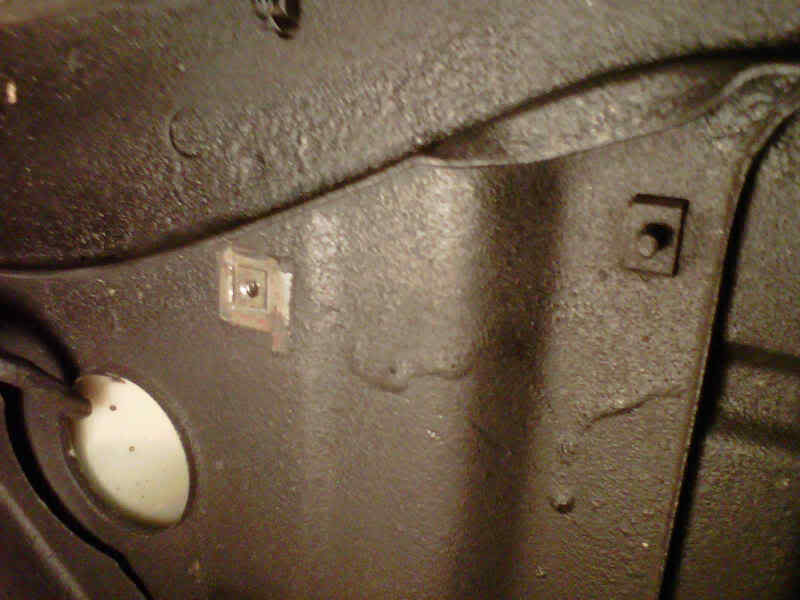
My clock arrived today while I was painting
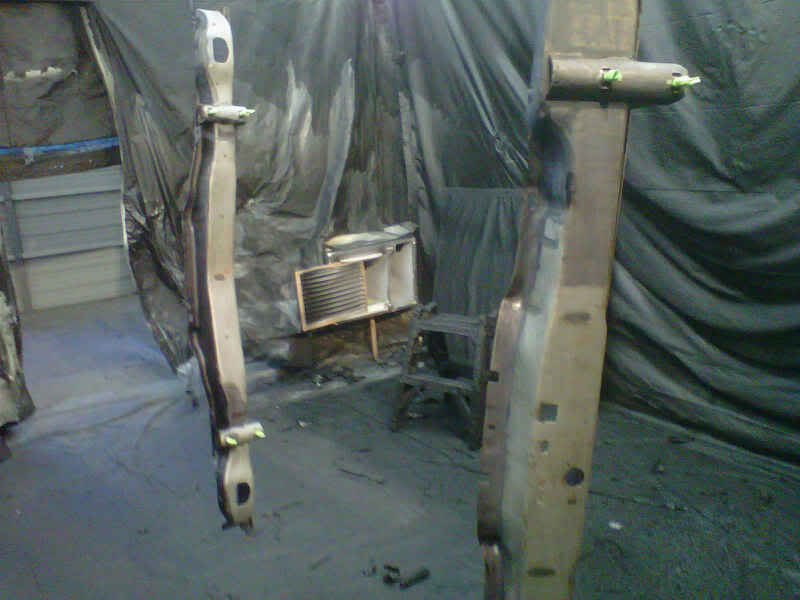
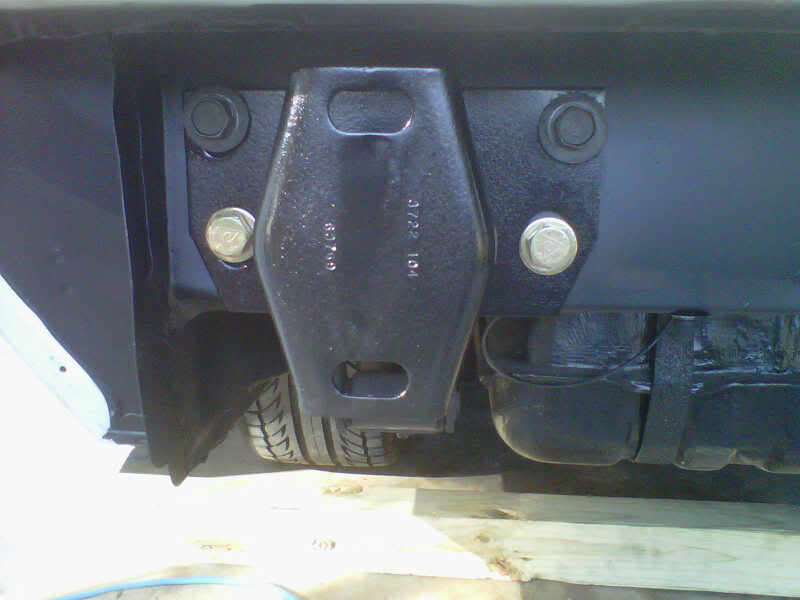
I worked on the front and rear bumper supports for the last two days..whatever I could not mechanically remove with scuff pads on my die grinder I painted with Eastwoods rust converter...check out the piece of mig wire left on the front one...the factory left it stuck on there and I did to...
got um hung in our Rhino spraying booth at my work...the air is filtered and then moisture is removed with a refrigerated dryer..
then shot them with Eastwoods chassis primer...will be back to spray their extreme chassis black in the morning..
then my clock showed up via Priority mail today....
Thread Starter
Super Moderator
Joined: Sep 2010
Posts: 3,609
Likes: 181
From: Houston, Texas
Hope you all are freezin your
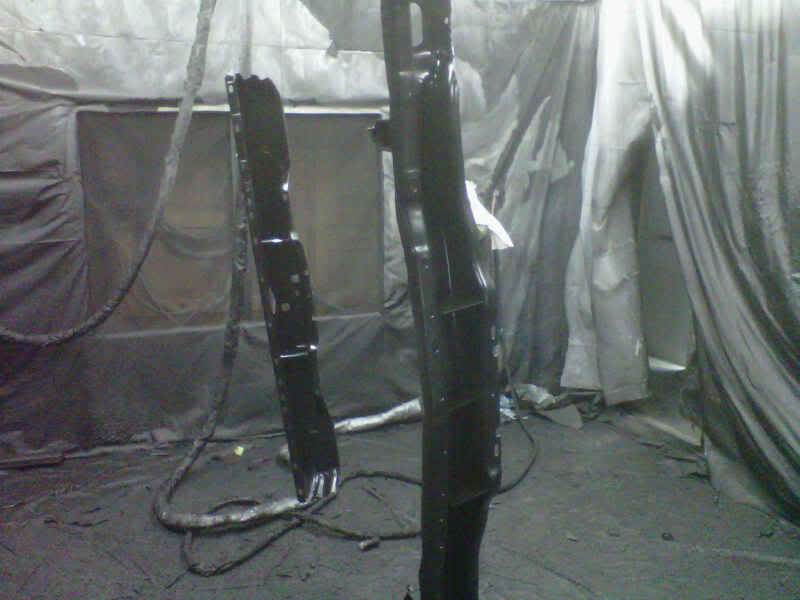
off...it will be 75 degrees here on Christmas and was 68 degree here today...I went to work and sprayed the bumper supports with that Eastwood extreme chassis black...it sure turned glossy...my 16 daughter drove me to work to pick them up tonight....

taped off the rear of the car and sprayed three coats of Eastwood's rust encapsulator and made sure I got it in the bumper shock pockets...loosely mounted the rigtht bumper shock and finished painting the other...
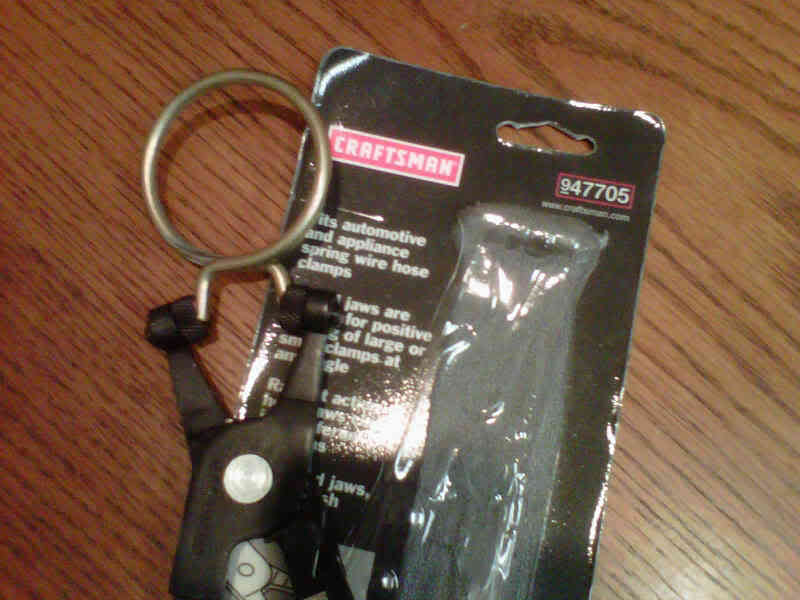
Went to Sears for a gift card and scored these pliers for the ring clamps...
Thread Starter
Super Moderator
Joined: Sep 2010
Posts: 3,609
Likes: 181
From: Houston, Texas
Thanks I trying my best...have to move the Dart for 3 months so I can finish up...I only have nights and weekends now to get her done...going to apply for Keels and Wheels high end show in May...wish me luck in getting her done..
Last edited by bremereric; Dec 21, 2010 at 08:59 PM.
Thread Starter
Super Moderator
Joined: Sep 2010
Posts: 3,609
Likes: 181
From: Houston, Texas
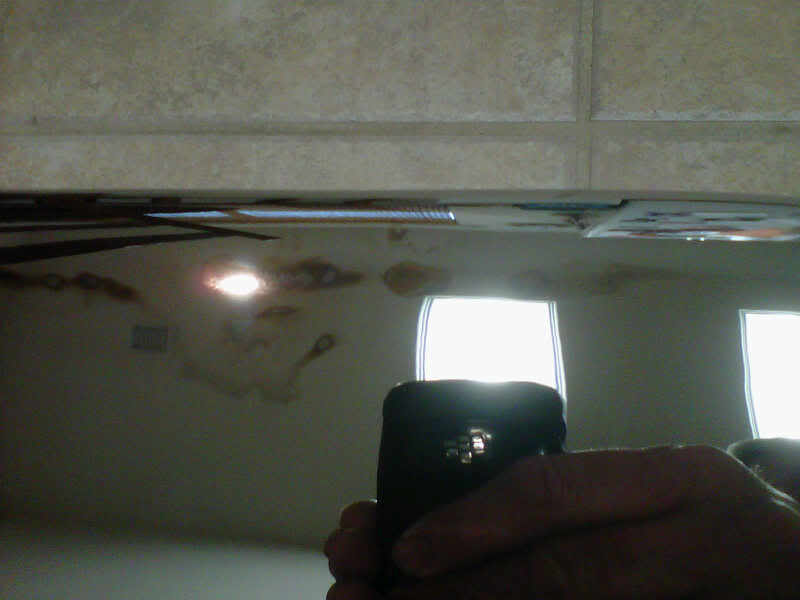
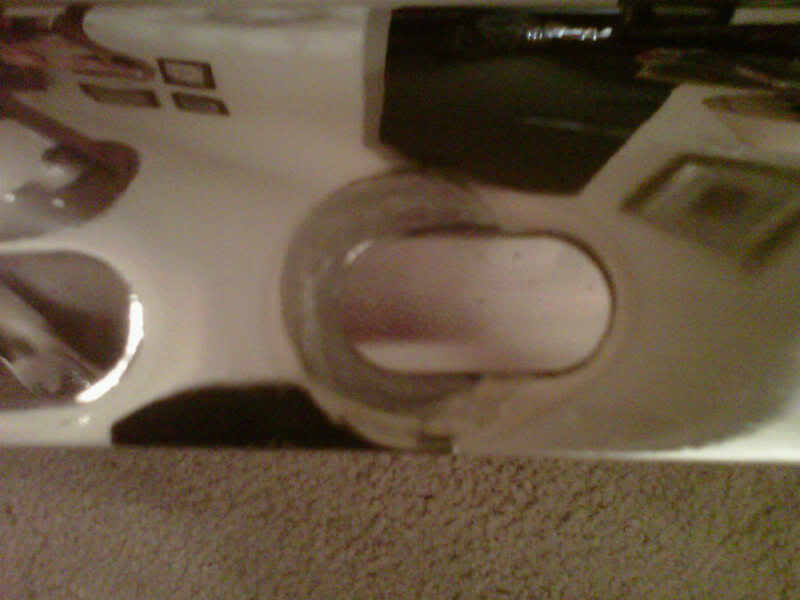
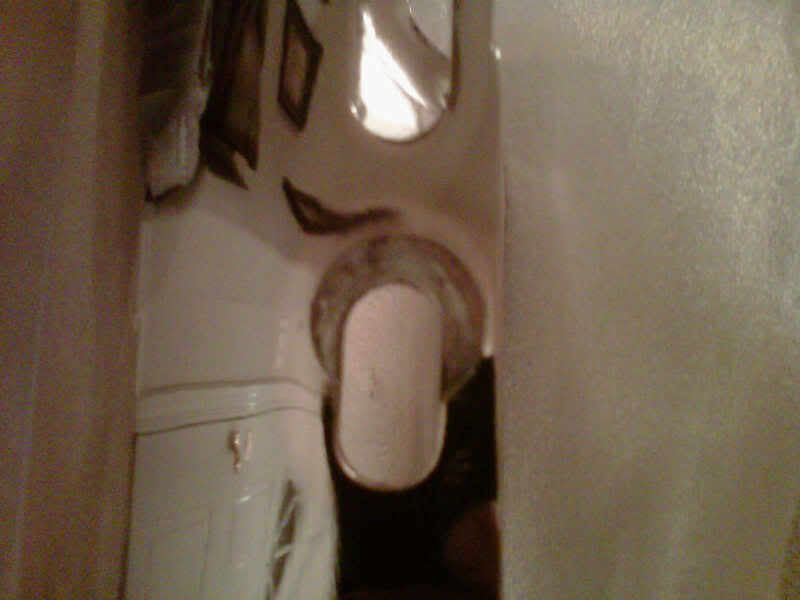
Anyone got a clock...I have an Analog one now
Got my Christmas present to myself installed tonight...to the top and to the left of the instrument cluster...the power connector was sitting right there waiting for it and the ground connection was waiting on the back of the lightswitch and wiper control module....
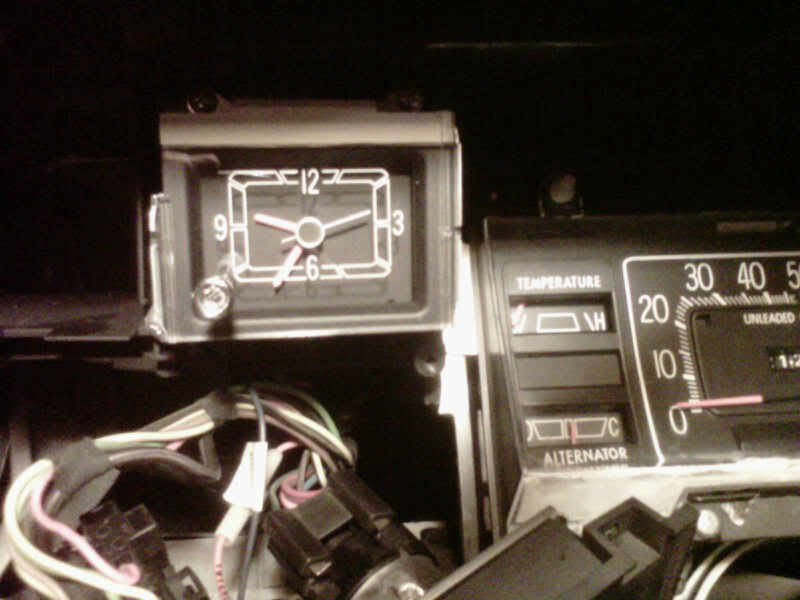
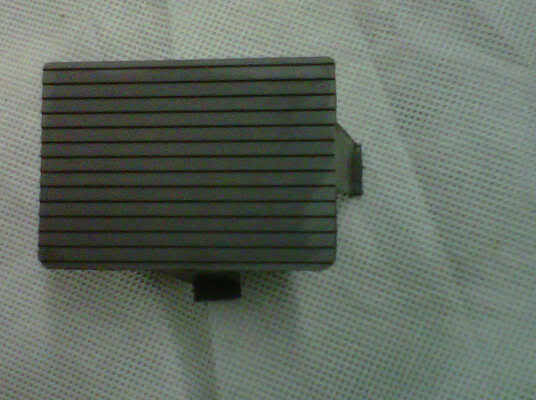
I had to cut this piece out with a hacksaw blade it was blocking the hole for the clock...
this is what it looks like finished and then in the dark with the back light on...the second hand even ticks very softly....
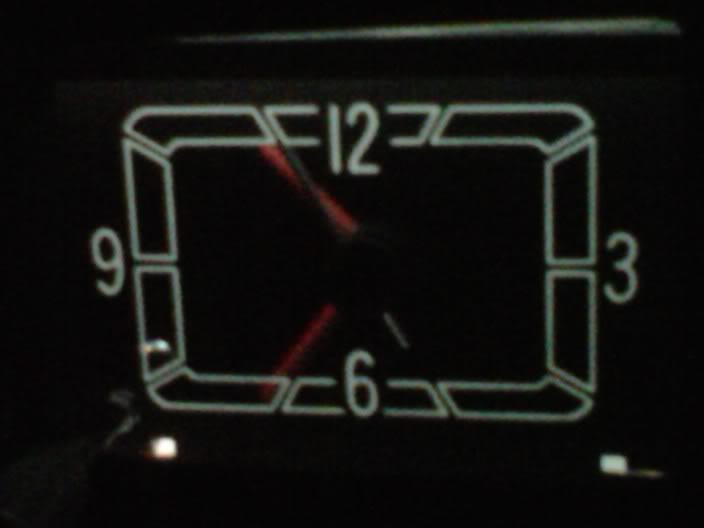
Got my Christmas present to myself installed tonight...to the top and to the left of the instrument cluster...the power connector was sitting right there waiting for it and the ground connection was waiting on the back of the lightswitch and wiper control module....
I had to cut this piece out with a hacksaw blade it was blocking the hole for the clock...
this is what it looks like finished and then in the dark with the back light on...the second hand even ticks very softly....
Thread Starter
Super Moderator
Joined: Sep 2010
Posts: 3,609
Likes: 181
From: Houston, Texas
Thinking about getting that black crap off of the front
This is how it looks...
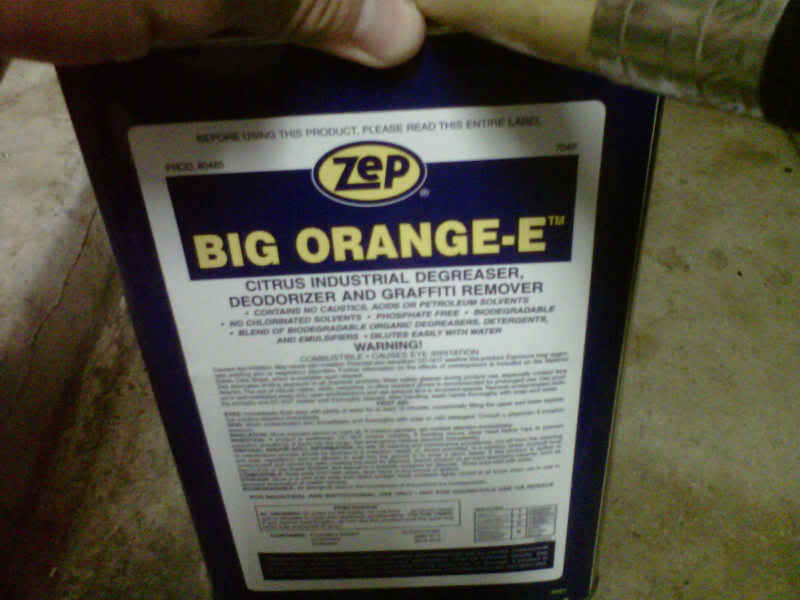
I don't mind the black I just don't like the texture...I have tried some of Eastwoods Undergone...no luck...some mineral spirits...no luck...and tonight I tried some orange degreaser...no luck...I am really not trying to destroy the paint underneath but my have to...tomorrow I will try some commercial big orange degreaser...then a pressurer washer then my soda blaster...open to your ideas
I don't mind the black I just don't like the texture...I have tried some of Eastwoods Undergone...no luck...some mineral spirits...no luck...and tonight I tried some orange degreaser...no luck...I am really not trying to destroy the paint underneath but my have to...tomorrow I will try some commercial big orange degreaser...then a pressurer washer then my soda blaster...open to your ideas
Thread Starter
Super Moderator
Joined: Sep 2010
Posts: 3,609
Likes: 181
From: Houston, Texas
Nope the factory did patches and sploches of another type of substance...it was told to me before....this is undercoating that the last owner sprayed to do the black out effect...I would like to spray the same material the factory used..this looks worst than in the picture...there are parts of it peeling off
Mopar Lover
Joined: Apr 2008
Posts: 1,074
Likes: 1
I agree then if that was not factory undercoating, get rid of it. My bad I thought that you might be over restoring it. My approach might be a heat gun and scrapers. Get some cheap scrapers and grind them to angles that will fit and clean anywhere. Final residue with a wire wheel then re-paint. You have done a good job with the paint so far.
Thread Starter
Super Moderator
Joined: Sep 2010
Posts: 3,609
Likes: 181
From: Houston, Texas
The big orange worked with a scuff pad...
Brought some of the industrial Zep big orange home tonight and tried a couple of tests spots...found out that there is some black paint behind some of the undercoating? Will call Mike Gale about that tomorrow..it works and probably will do better with spraying it and letting it set for a while..it does not hurt the paint below the undercoating....
used our 20,000 pound press at work and pressed out the rubber leafspring bushings and pressed in the polyurethane ones...they went in easy...
used our 20,000 pound press at work and pressed out the rubber leafspring bushings and pressed in the polyurethane ones...they went in easy...
Thread Starter
Super Moderator
Joined: Sep 2010
Posts: 3,609
Likes: 181
From: Houston, Texas
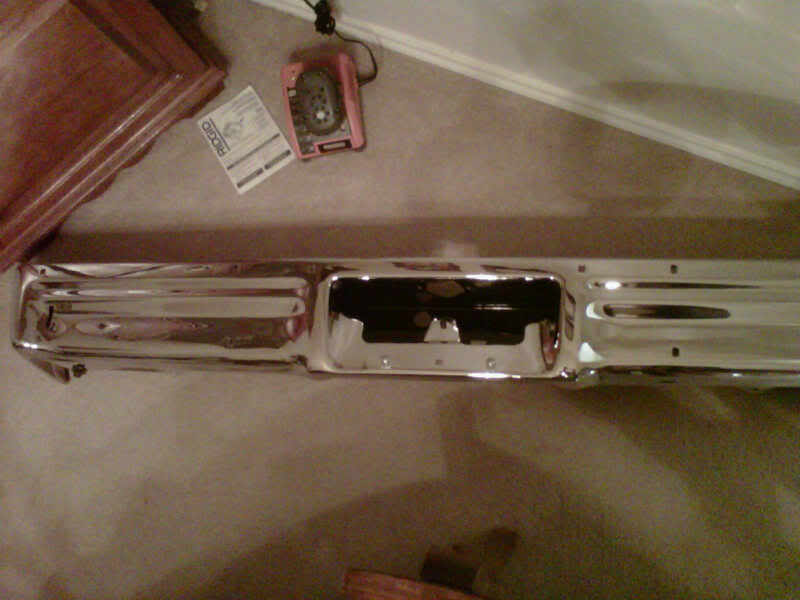
Got my bumpers back today
I went to Superior Chrome today and okayed my bumpers....back home and lightly bolted to the black bumper supports..now have to work on polishing the new bumper bolts...
Thread Starter
Super Moderator
Joined: Sep 2010
Posts: 3,609
Likes: 181
From: Houston, Texas
Smoking that brisket on the back porch...it's raining
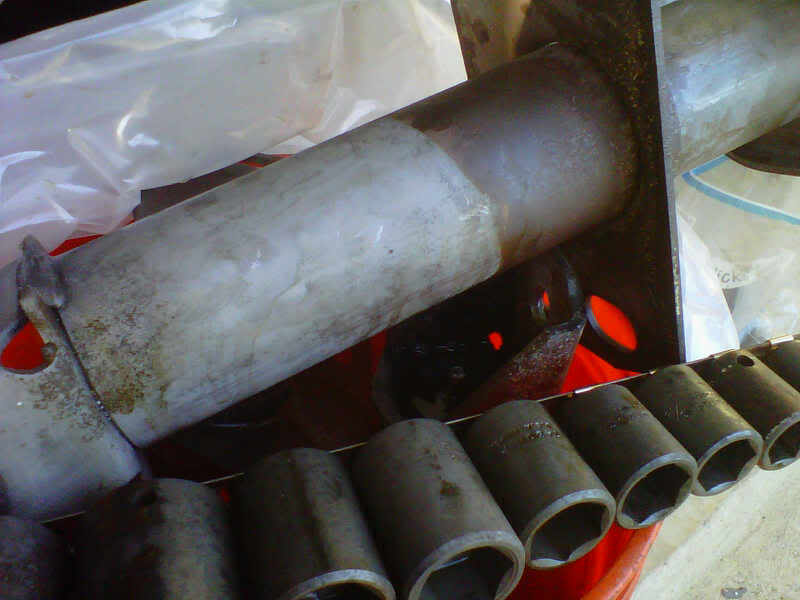
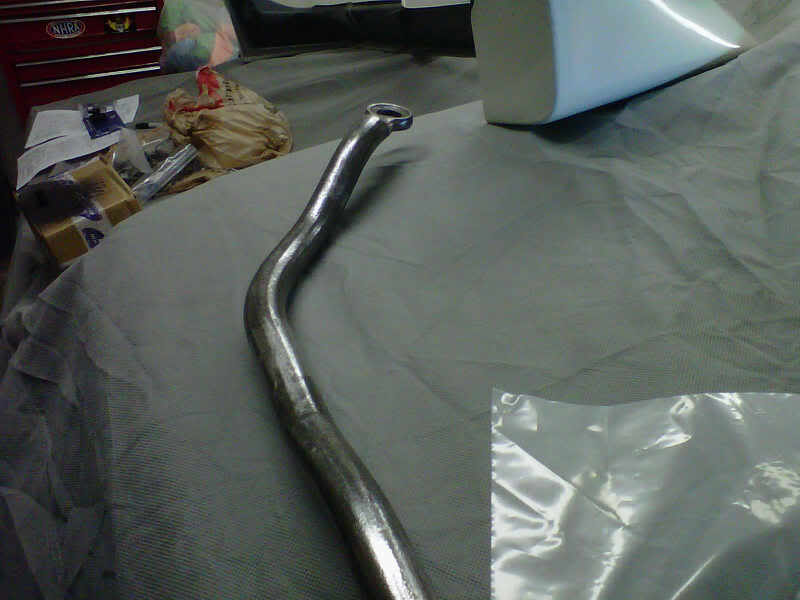
No work on the cars tonight have to pay attention to that brisket...a cold front is pushing through and this is the first rain we had in quite some time...I am in need of one of the exhaust couplers that match the exhaust pipe to the stock exhaust manifolds..I took a pic of it for ya...if anyone has one for a 77 Aspen and it looks like the picture PM me...thanks in advance..
No work on the cars tonight have to pay attention to that brisket...a cold front is pushing through and this is the first rain we had in quite some time...I am in need of one of the exhaust couplers that match the exhaust pipe to the stock exhaust manifolds..I took a pic of it for ya...if anyone has one for a 77 Aspen and it looks like the picture PM me...thanks in advance..
Thread Starter
Super Moderator
Joined: Sep 2010
Posts: 3,609
Likes: 181
From: Houston, Texas
Christmas came twice today
First of all Merry Christmas to everyone....I opened presents at 9:00 AM and that fricken cold I have woke me up at 6:00 but good news...my wife checked the mailbox and I got my torsion bar poly bushing and I am sure glad they showed up in black instead of the blue...I also finally got my studs and spacers from FFI...so if I feel better tomorrow I will do some work on the leafsprings...
First of all Merry Christmas to everyone....I opened presents at 9:00 AM and that fricken cold I have woke me up at 6:00 but good news...my wife checked the mailbox and I got my torsion bar poly bushing and I am sure glad they showed up in black instead of the blue...I also finally got my studs and spacers from FFI...so if I feel better tomorrow I will do some work on the leafsprings...


