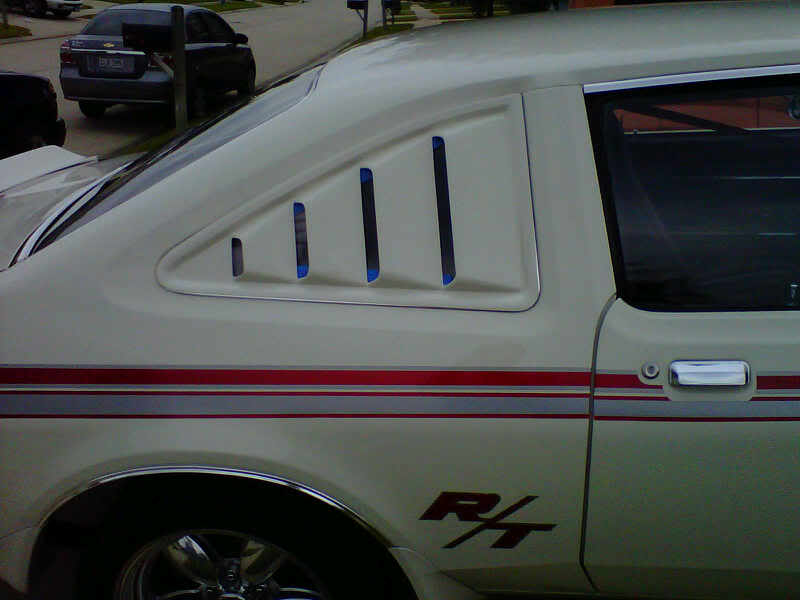
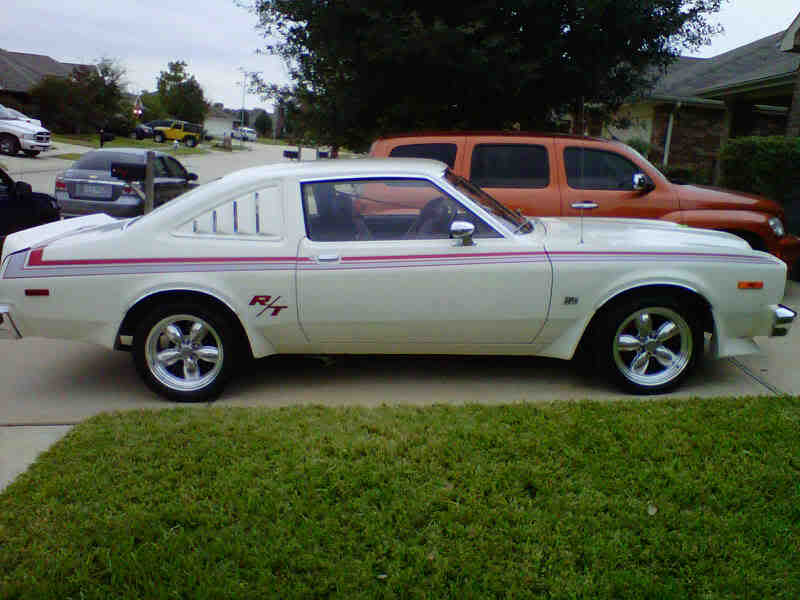
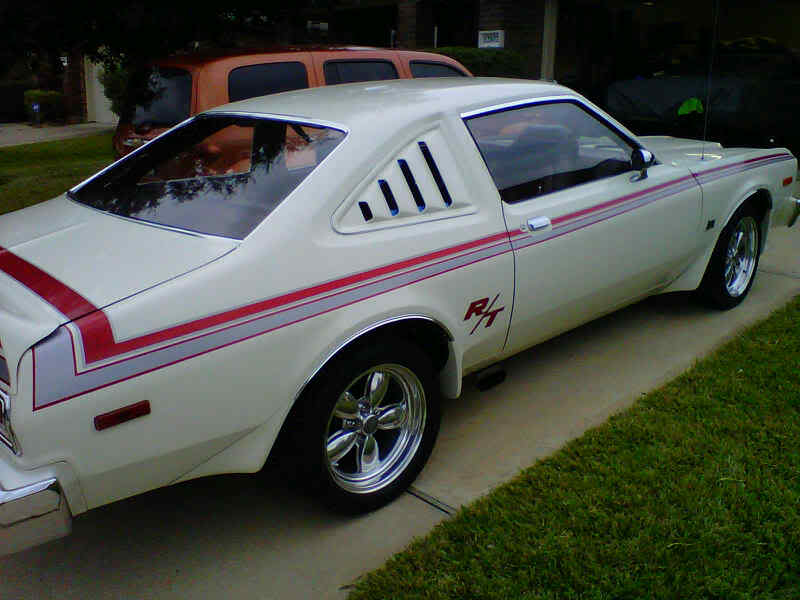
I never would think I would own one of these
 11-03-2010, 09:15 PM
#121
Super Moderator
Thread Starter

Got some more done
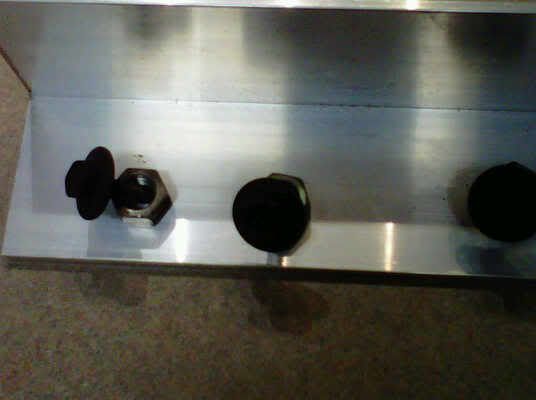
This is my little jig to bake the bolts..they are done and installed...
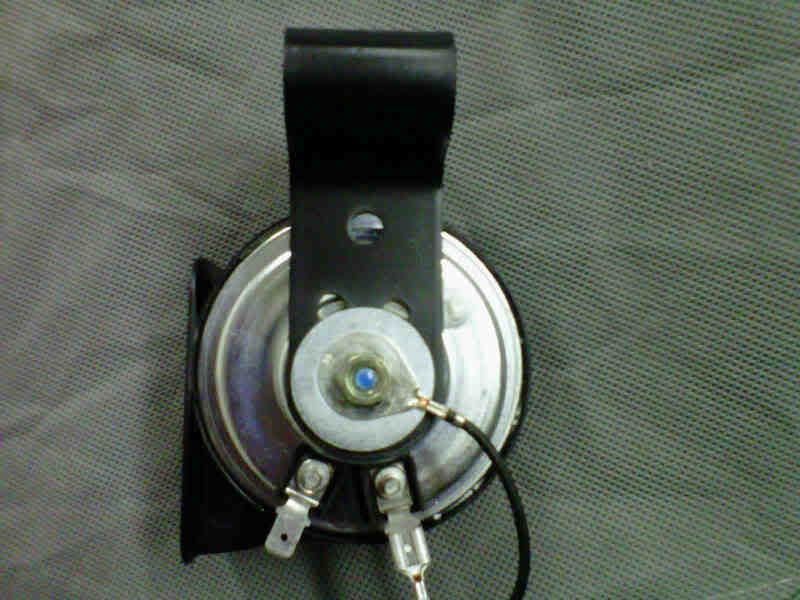
I painted the horn bracket this morning and it is mounted with a little blue lock tite...
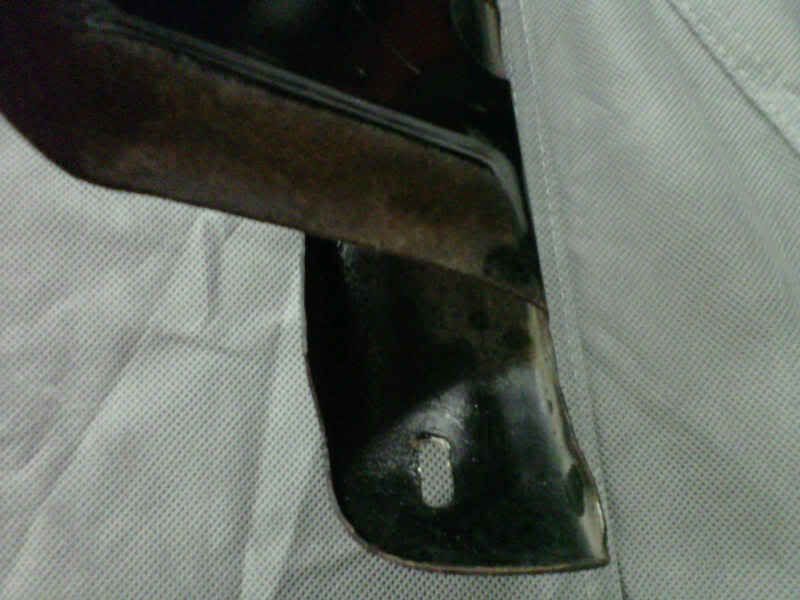
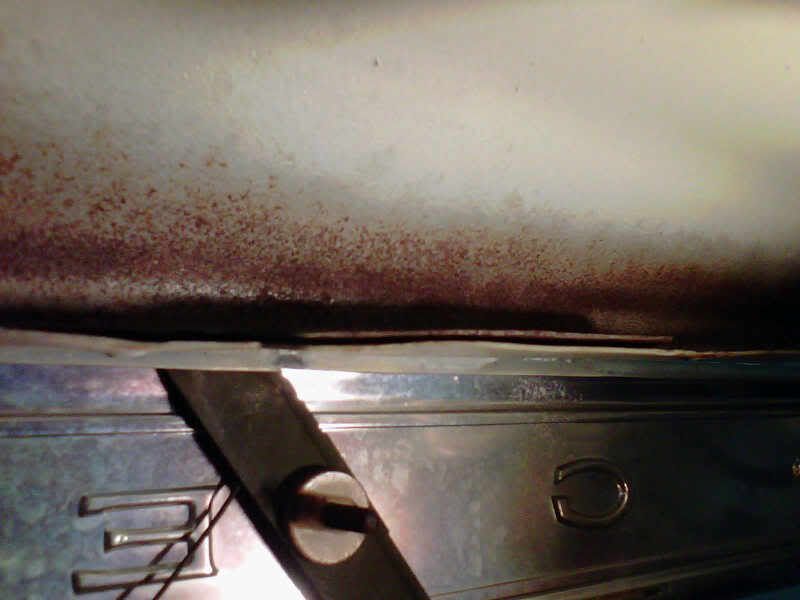
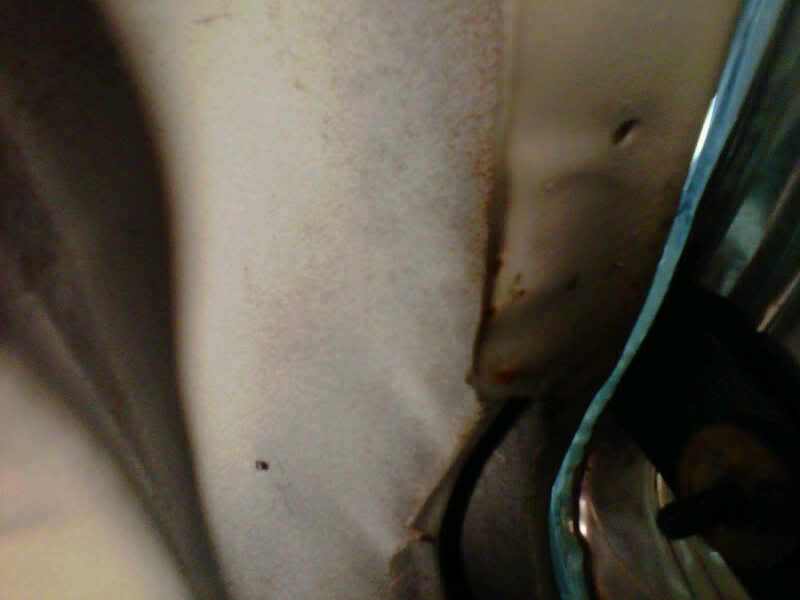
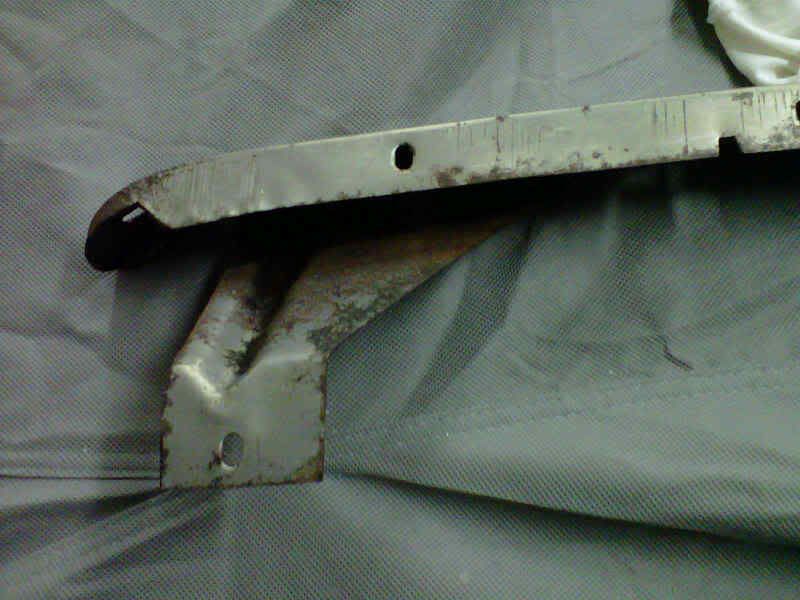
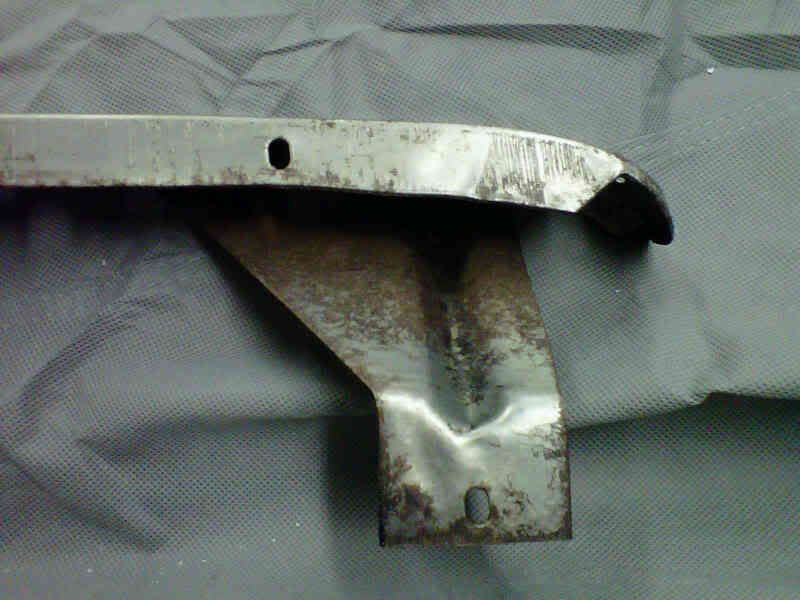
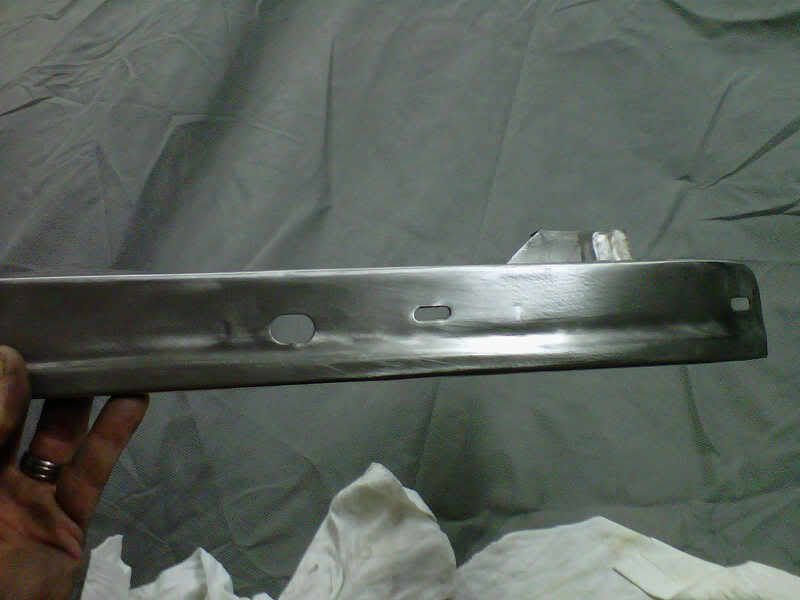
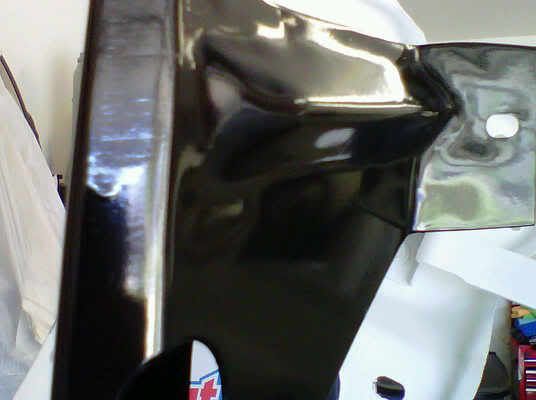
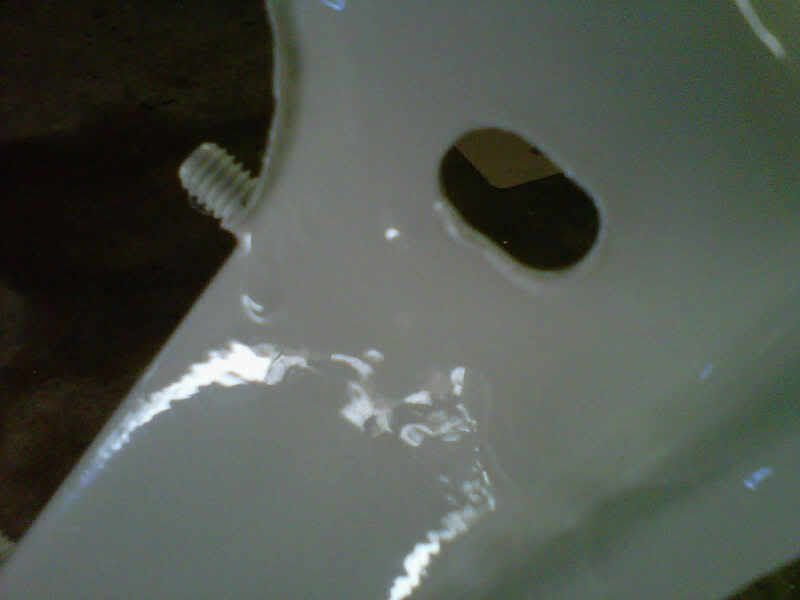
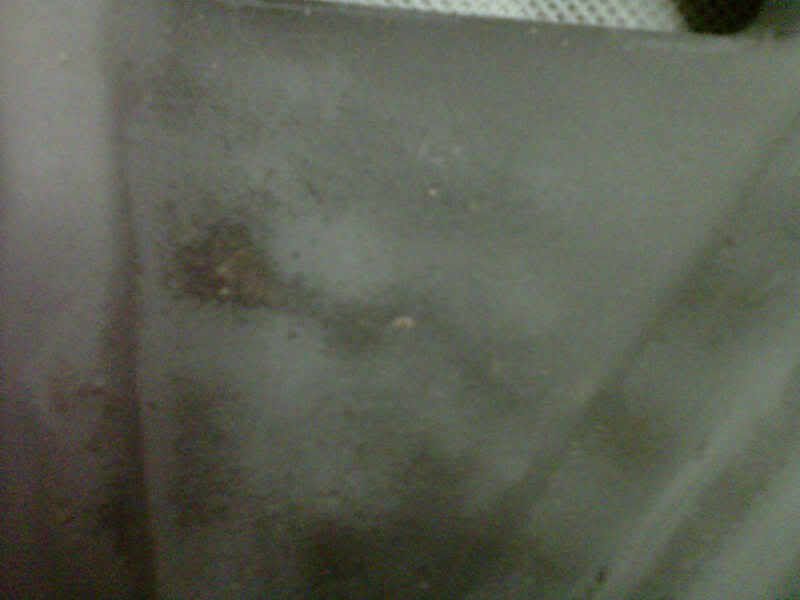
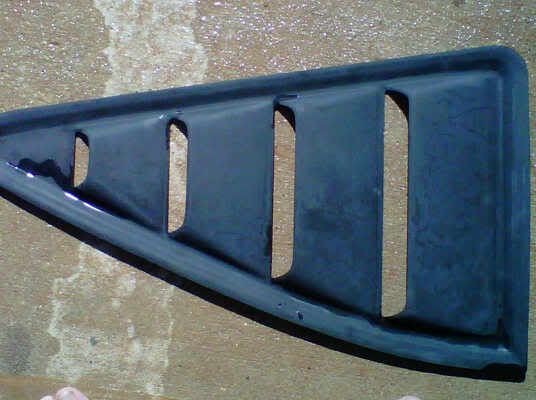
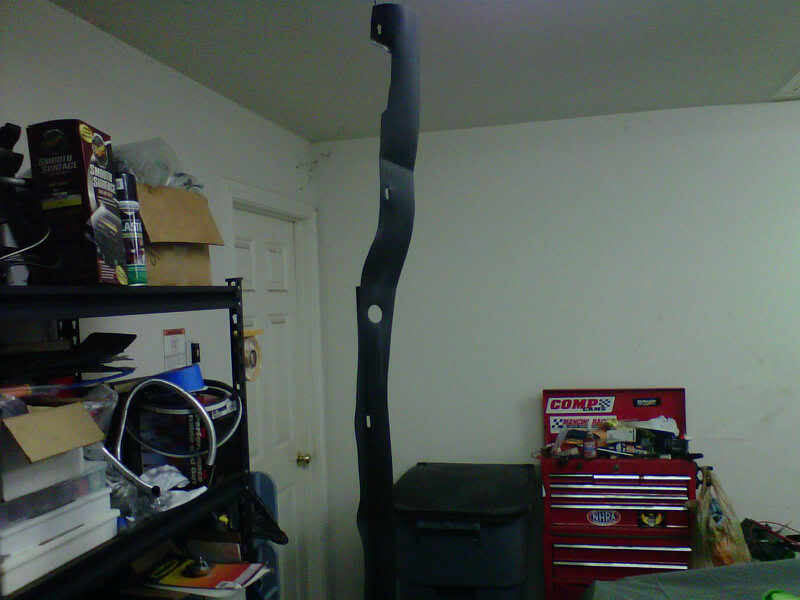
I removed the bracket that supports the Dodge Trim piece that runs along the front of the hood...this bracket is rusty and there is surface rust on the hood underneath where the bracket was..this is only light surface rust that attacked an area where the paint was very thin..for now I will treat it with Eastwoods rust convertor to stop it in it's tracks until I remove the hood and paint the underside..

this is the surface rust under the hood...then the second is of how thin the paint is in this area...
this is the bracket after I stripped the paint off of it..I will clean it up tomorrow and sand the rust off..
This is my little jig to bake the bolts..they are done and installed...
I painted the horn bracket this morning and it is mounted with a little blue lock tite...
I removed the bracket that supports the Dodge Trim piece that runs along the front of the hood...this bracket is rusty and there is surface rust on the hood underneath where the bracket was..this is only light surface rust that attacked an area where the paint was very thin..for now I will treat it with Eastwoods rust convertor to stop it in it's tracks until I remove the hood and paint the underside..
this is the surface rust under the hood...then the second is of how thin the paint is in this area...
this is the bracket after I stripped the paint off of it..I will clean it up tomorrow and sand the rust off..
 11-04-2010, 10:02 PM
#122
Super Moderator
Thread Starter
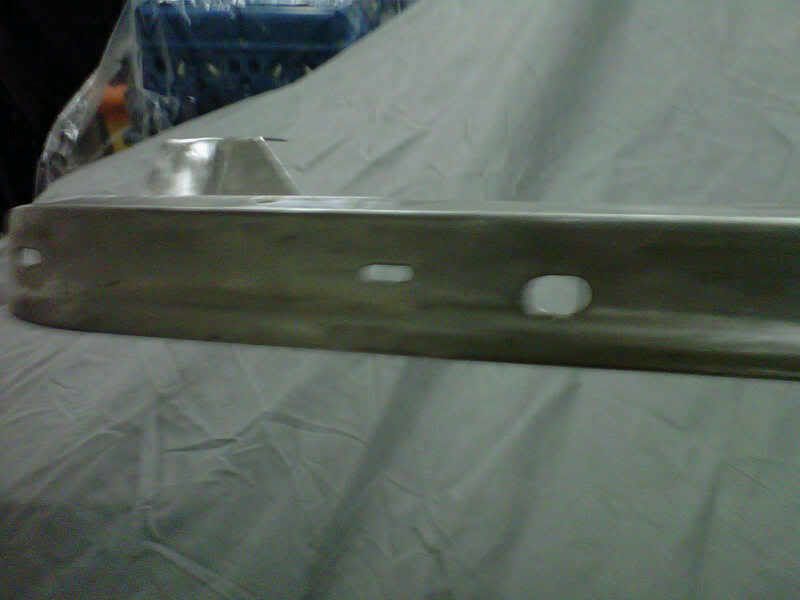
Did some air compressor repair then some cleaning
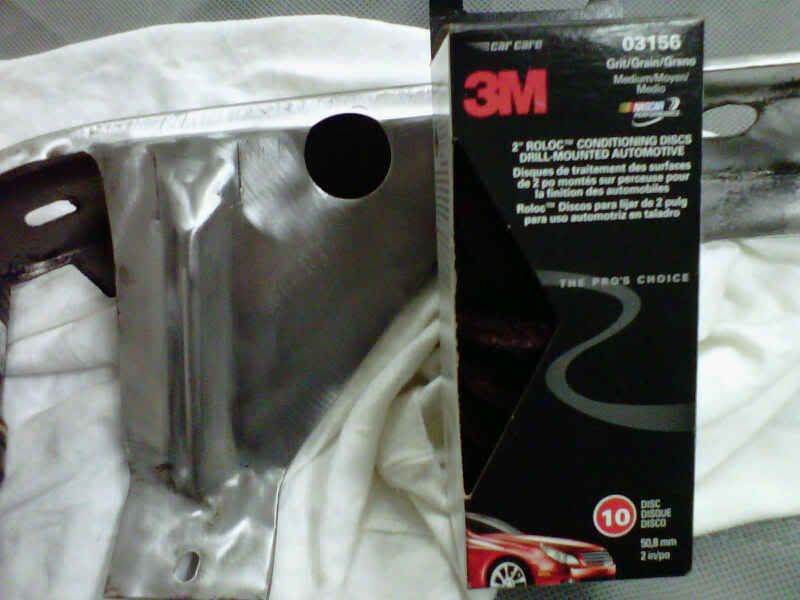
My piece of crap air compressor had a cheap hecho in china regulator on it...it broke recently and I had to use my smaller one...I got a new regulator and some 1/4 pipe pieces today and fixed it...It works good now and I was able to make a little progress cleaned the rust off of the trim bracket...I use my right angle die grinder with some 3-M scuff pads..they work good but get used up fast..I already went through two of them...they do work though...

I brought it back inside tonight to minimize the chances on new surface rust..I will hit it again tomorrow morning and night..want to paint it on Saturday along with the latch support piece
My piece of crap air compressor had a cheap hecho in china regulator on it...it broke recently and I had to use my smaller one...I got a new regulator and some 1/4 pipe pieces today and fixed it...It works good now and I was able to make a little progress cleaned the rust off of the trim bracket...I use my right angle die grinder with some 3-M scuff pads..they work good but get used up fast..I already went through two of them...they do work though...
I brought it back inside tonight to minimize the chances on new surface rust..I will hit it again tomorrow morning and night..want to paint it on Saturday along with the latch support piece
11-05-2010, 09:20 PM
#123
Super Moderator
Thread Starter
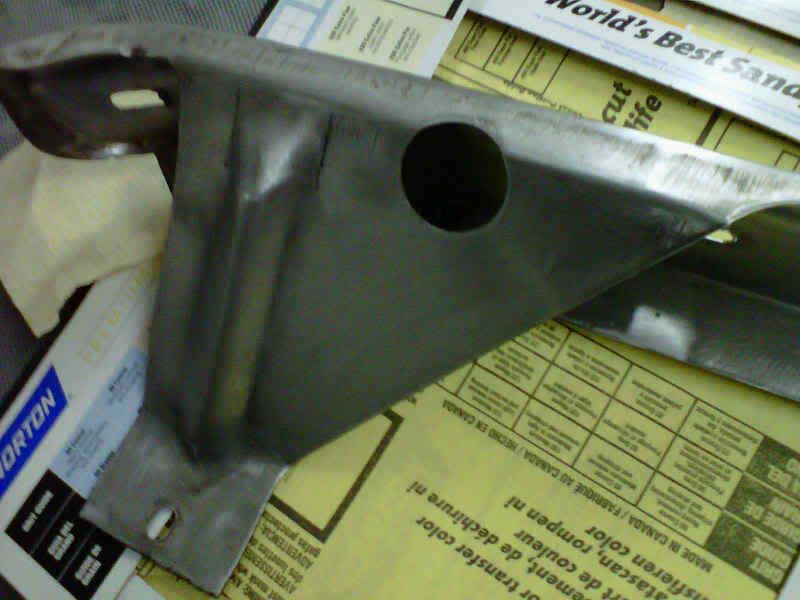
Done sanding and ready for paint
Man what a bunch of sanding and grinding and sanding and grinding but it's finally ready for paint tomorrow..I also go my rear shackles in from RockAuto...36 bucks to the door for both...they are the same size as the old B bodies..

11-06-2010, 11:19 AM
#124
Super Moderator
Thread Starter
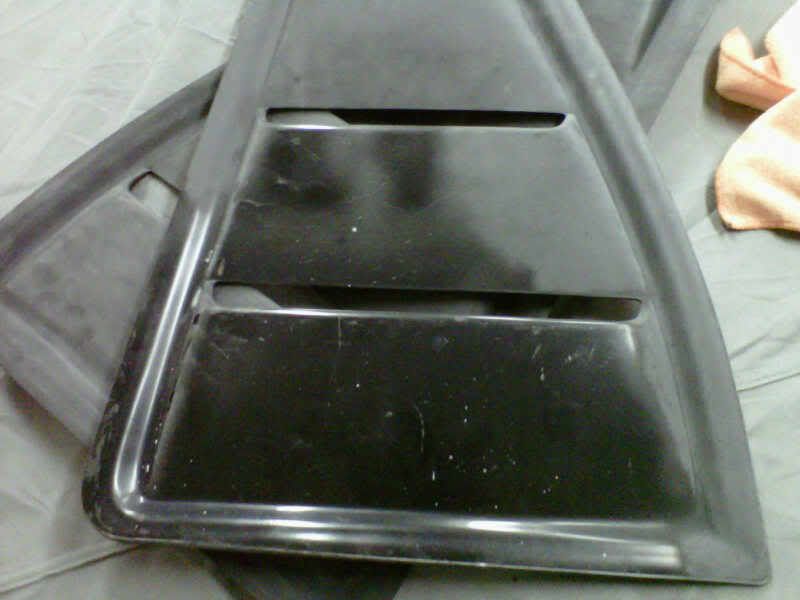
Nice and shiney black again...two small drips
Got it painted this morning...it looks like new...hard to tell with pictures...two small drips but the factory couldn't have done better...will pull both cars out tomorrow and paint the latch support white with PPG single stage...
11-06-2010, 07:34 PM
#125
Super Moderator
Thread Starter
Found one more easy thing to paint today
The oil dipstick tube is blue but the dipstick handle was rusty brown...so I sanded it bare and sprayed it blue with 500 degree ceramic paint...
11-06-2010, 08:27 PM
#126
Super Moderator
Thread Starter
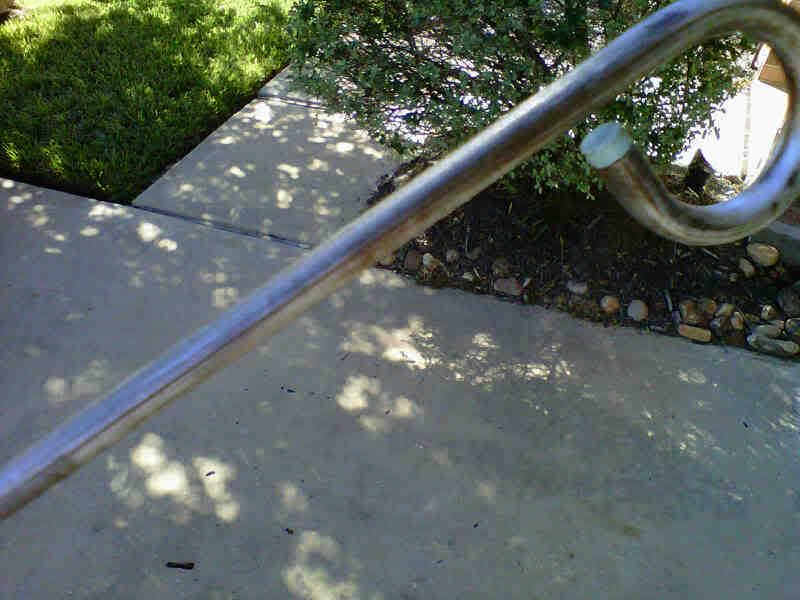
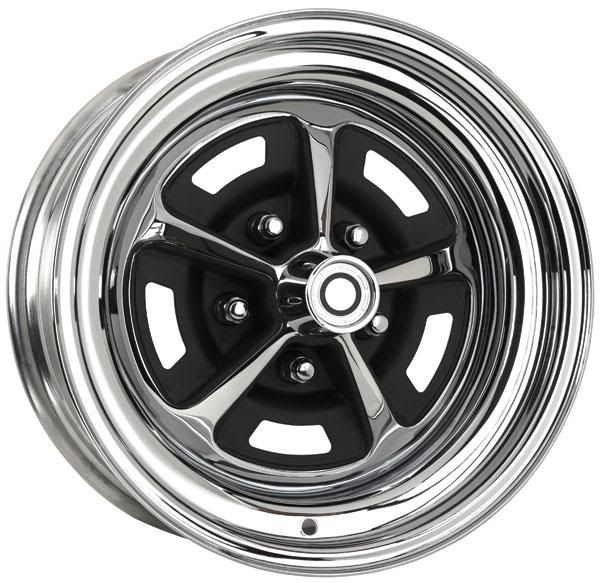
On FABO a couple of guys suggested that I role back to the stock Magnum 500 wheels...mine are 14 inch ones with much needed attention..I like the larger wheels and tires...with help of one of the members there I found this one that's available in 16 and 17 inch wheels with 4.5 inch backspacing...what do you guys think..always open to suggestions?
11-07-2010, 06:11 PM
#127
Super Moderator
Thread Starter
Today was my first single stage paint experience
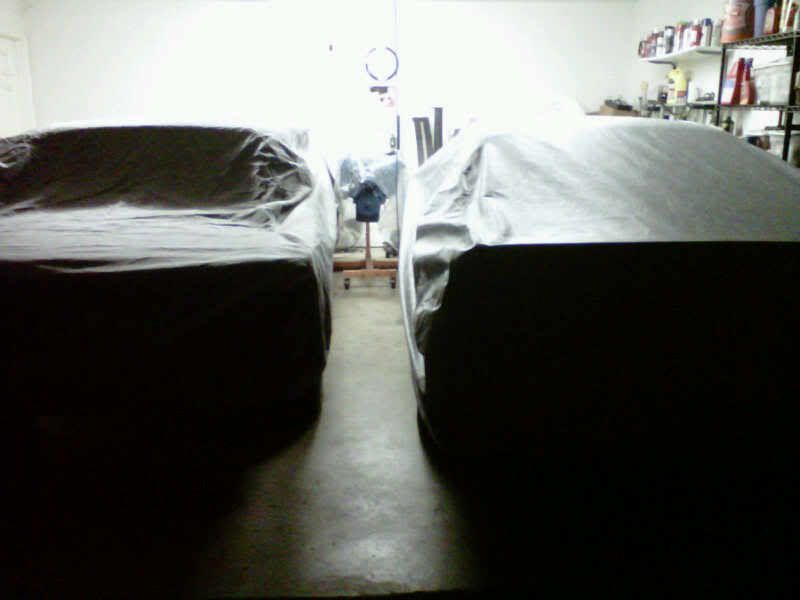
Got both cars out of the garage...used my blower to clean it out the best I could...closed the garage door most of the way with the fan blowing out at the door...mixed up the paint in a Preval sprayer...4 parts paint...2 parts thinner and 1 part hardner...all PPG paint products..

I got it done with one light coat and then a medium and then a heavy coat...got a few pieces of trash even though I used a tack cloth over the whole piece before I started..have a couple of runs also...oh well it was hanging in the air and it was my garage...will strip it and repaint it when I do the engine compartment...

I got it done with one light coat and then a medium and then a heavy coat...got a few pieces of trash even though I used a tack cloth over the whole piece before I started..have a couple of runs also...oh well it was hanging in the air and it was my garage...will strip it and repaint it when I do the engine compartment...
11-07-2010, 07:44 PM
#128
Super Moderator
Thread Starter
Couldn't sit still
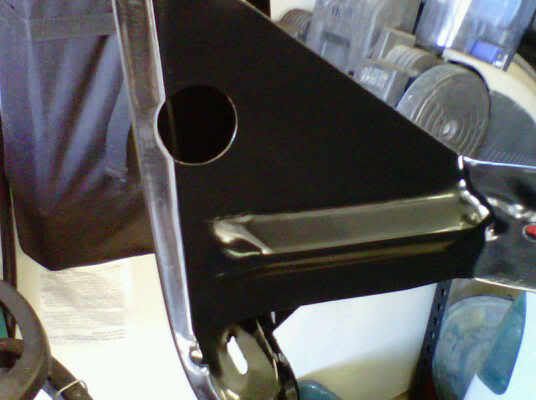
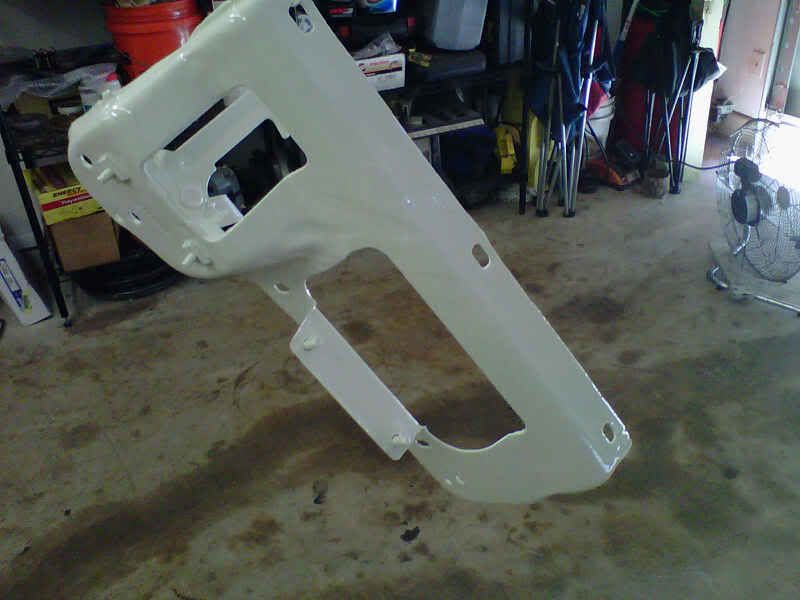
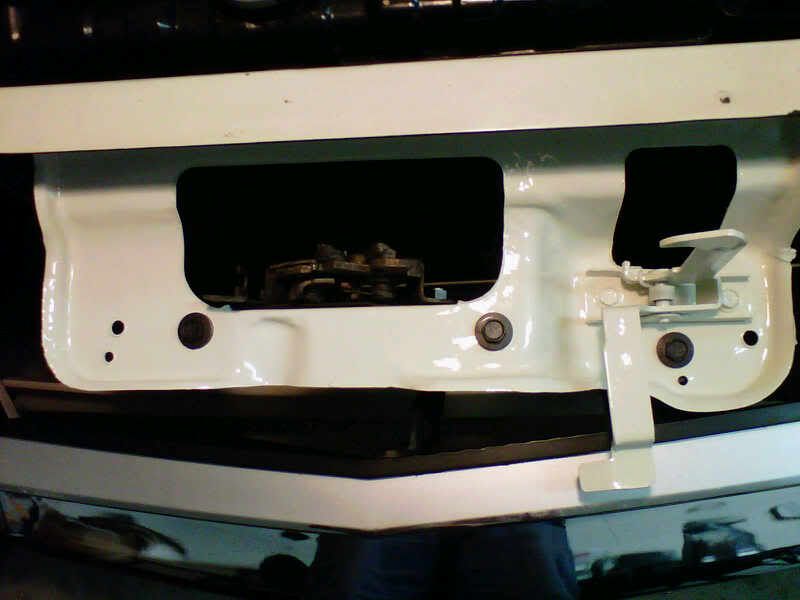
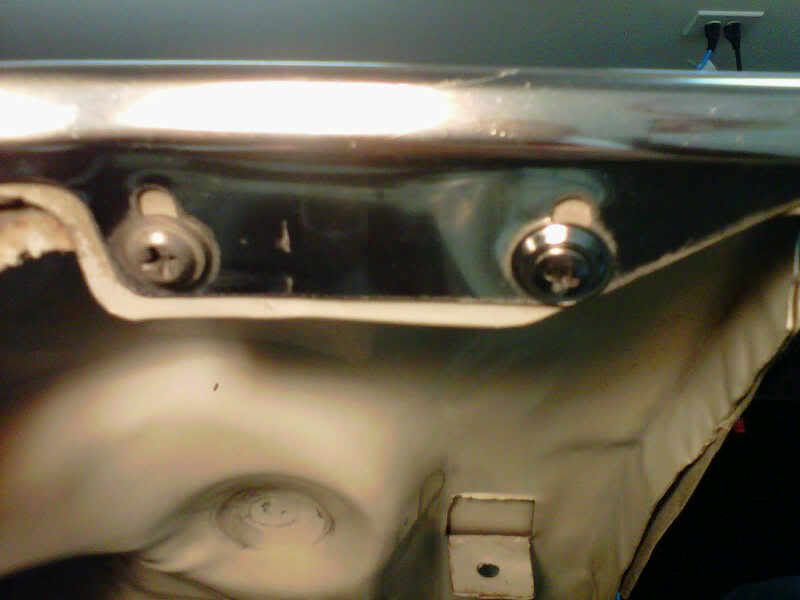
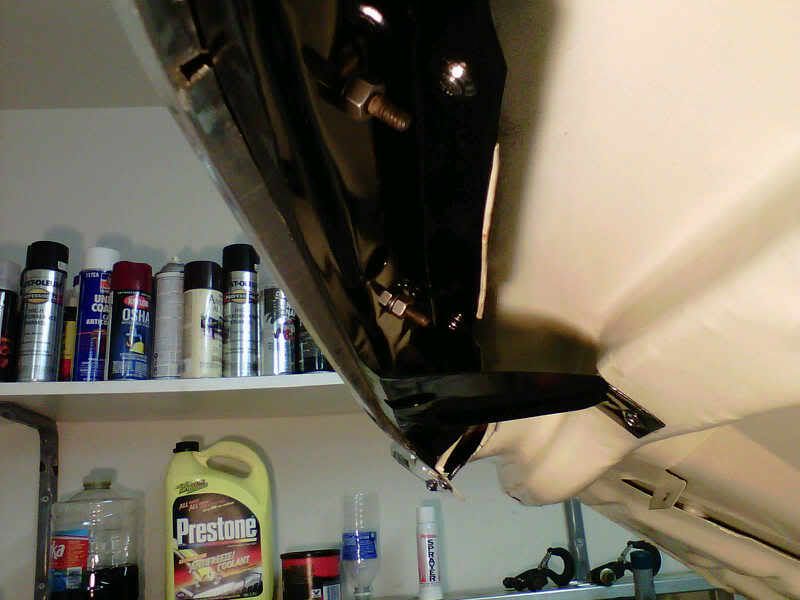
Got the latch support bracket installed with the latch and the horn in place...the horn is underneath the bracket and is held on by the third bolt from the left...you know what "F" it my paint job still looks better than the factory paint job..maybe I am just too picky on myself...I think it looks 3000% better than before and I can hardly wait to do the engine compartment...she will look sweet then...put both girls up for the night..
11-08-2010, 09:46 PM
#129
Super Moderator
Thread Starter
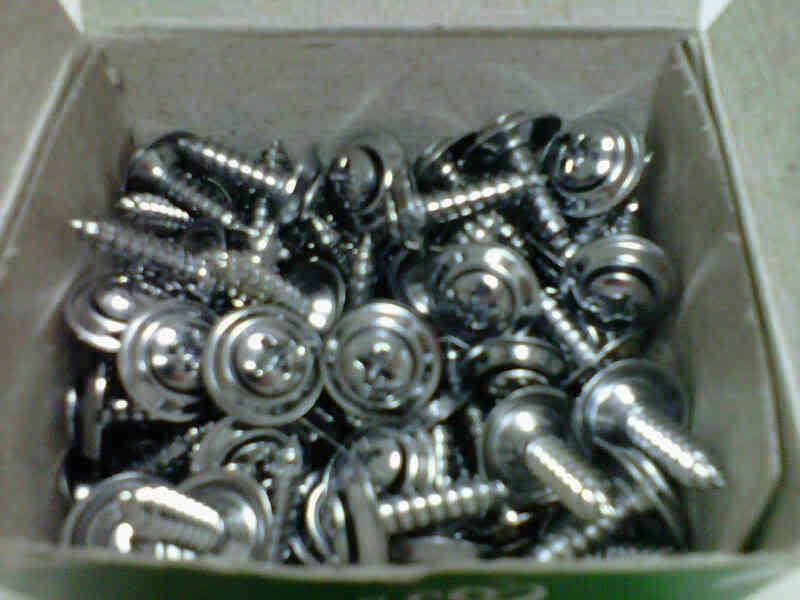
I am a car addict..I have to work on one or the other every night or I have withdrawel symtoms...well today I scored a box of 100 chrome screws with washers at Fastenal..for 26 bucks..that's 26 cents a piece..I am no cheap *** but they served several purposes...trim on the front hood and sill plate replacements...
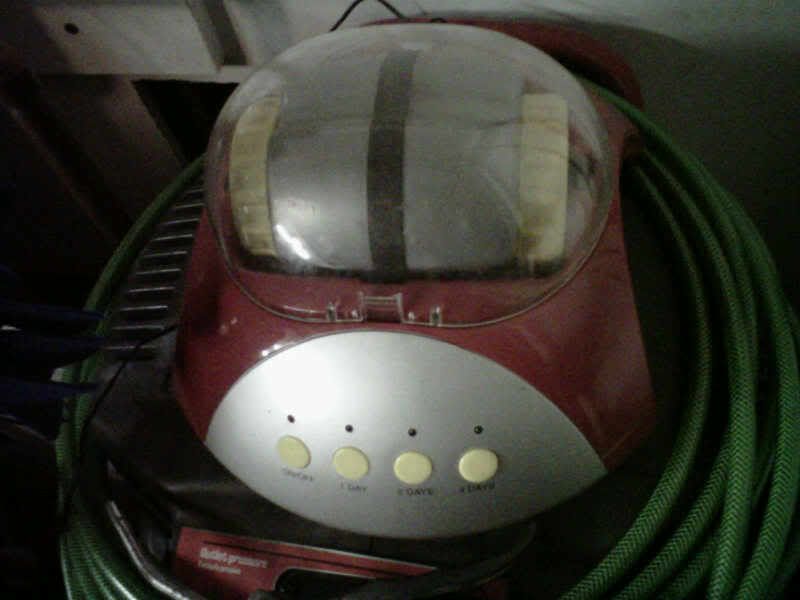
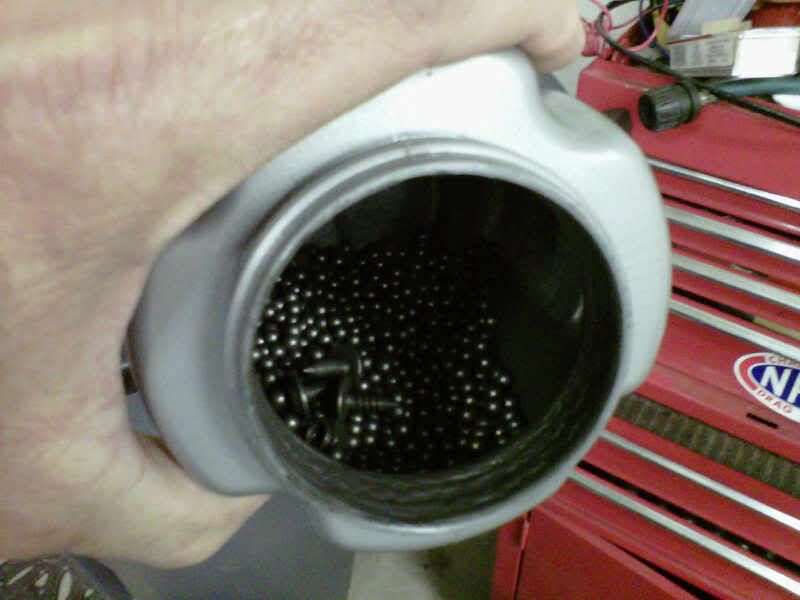
some may laff but the best ten dollar rock tumbler I found at Hobby Lobby..rusted bolts..nuts whatever in....24 hours of run time and clean come out...I use steel bebe's to clean them

I got the front chrome support installed tonight and the hood latched back down...I don't like the gap of the hood and passenger fender but it's been like that for a long time...the fender has to be moved out at the front..I will do this when I paint the engine compartment...

and my Cali duster and mini Cali duster showed up today both 24.99 on e-bay...
some may laff but the best ten dollar rock tumbler I found at Hobby Lobby..rusted bolts..nuts whatever in....24 hours of run time and clean come out...I use steel bebe's to clean them
I got the front chrome support installed tonight and the hood latched back down...I don't like the gap of the hood and passenger fender but it's been like that for a long time...the fender has to be moved out at the front..I will do this when I paint the engine compartment...
and my Cali duster and mini Cali duster showed up today both 24.99 on e-bay...
11-09-2010, 10:45 AM
#130
Super Moderator
Thread Starter
Just because it only has 21,000 miles doesn't mean it doesn't need some help
Help with the suspension that is...I already have some heavy duty five leaf leafsprings and new shackles...I have to source some new u-bolts yet and what gives with that piece of rubber sandwhiched in between the leafspring and the leafspring mounting plate?
oh well I found this front end kit at PST and would like to know if anyone has used it..
 previous | up | next
DODGE - Aspen 1976-79
 E-mail this product to a friend
Polygraphite� Performance Front End Kit 1976-79SKU:PFEK00740Description:Most Kits Contain:
* 2 Upper Ball Joints
* 2 Lower Ball Joints
* 2 Outer Tie Rod Ends
* Control Arm Bumpers (for most models)
* 4 Polygraphite� Upper Inner Control Arm Bushings
* 2 or 4 Polygraphite� or OE type Lower Control Arm Bushings
* 2 Polygraphite� Strut Rod Bushings
* 2 Polygraphite� Stabilizer Links (bolt and sleeve type links only)
* 2 Polygraphite� Sway Bar Bushings (for most cars)
NOTE: Bushings come with inner sleeves, must reuse existing outer metal shells. YOU MUST specify in the order notes manual or power steering, drum or disc brake, and engine size. When ordering Polygraphite� Front End Kits, YOU MUST measure the diameter of the front sway bar on your car and specify it in order notes.
Price:$269.00
Help with the suspension that is...I already have some heavy duty five leaf leafsprings and new shackles...I have to source some new u-bolts yet and what gives with that piece of rubber sandwhiched in between the leafspring and the leafspring mounting plate?
oh well I found this front end kit at PST and would like to know if anyone has used it..
previous | up | nextDODGE - Aspen 1976-79
E-mail this product to a friendPOLYGRAPHITE� FRONT END KITS5 75 1976 76 1977 77 1978 78 1979 79 1980 80 1981 81 1982 82 1983 83
Improve the driving and handling qualities of your Dodge with a PSTperformance Polygraphite� Front End Kit featuring Polygraphite� suspension bushings! You'll benefit from better road handling performance and the self lubricating action of graphite and our Lifetime Limited Warranty. Order a performance Polygraphite� Front End Kit for your car today! We ship it free to 48 states!
To enhance the performance of your original suspension system, see our exclusive Polygraphite� Super Front End Kits, G-Max� Sway Bars and KYB Gas-A-Just Shocks.
SAVE! Add a centerlink or pitman arm, rear control arm bushing set, torsion bars or rear leaf springs to your Super Front End Kit order and SAVE!
NOTE: YOU MUST specify in the order notes manual or power steering, drum or disc brake, and engine size. Bushings come with inner sleeves, must reuse existing outer metal shells. When ordering Polygraphite� Front End Kits, YOU MUST measure the diameter of the front sway bar on your car and specify it in order notes.
Year: 1976-79
* 2 Upper Ball Joints
* 2 Lower Ball Joints
* 2 Outer Tie Rod Ends
* Control Arm Bumpers (for most models)
* 4 Polygraphite� Upper Inner Control Arm Bushings
* 2 or 4 Polygraphite� or OE type Lower Control Arm Bushings
* 2 Polygraphite� Strut Rod Bushings
* 2 Polygraphite� Stabilizer Links (bolt and sleeve type links only)
* 2 Polygraphite� Sway Bar Bushings (for most cars)
NOTE: Bushings come with inner sleeves, must reuse existing outer metal shells. YOU MUST specify in the order notes manual or power steering, drum or disc brake, and engine size. When ordering Polygraphite� Front End Kits, YOU MUST measure the diameter of the front sway bar on your car and specify it in order notes.
Price:$269.00
11-09-2010, 01:38 PM
#131
Super Moderator
Thread Starter
Okay I found the k-frame insolators
Firm Feel...
F, M, J BODY
ALUMINUM, BODY TO K FRAME MOUNTS
Rick Ehrenberg, Tech Editor of Mopar Action Magazine, installed a set of these on his A-38 (cop package) 1978 Monaco. His report:
"Amazing! Since this setup ties the frame 'prongs' (longitudinal's) together, instead of allowing them to virtually flap in the breeze, the entire car feels - and IS - much more rigid. Now the K-member can do what it was originally designed to do - cross-brace the entire front end of the car. Not only is handling markedly better, road feel and wander incredibly improved, even squeaks and rattles are way down. Now it feels like a well set-up A-body sedan on steroids. Highly recommended. And, if you can believe this, this setup works even better on F, J, and M-bodies. If you've got one of those creatures, be it an Aspen R/T, Mirada CMX, or Dippy cop car, etc., don't even think about tackling the twisties without one of Firm Feel's setups." Aluminum Sub frame Isolators, for F.M.J.
Kit includes, 4 isolators, bolts washers and weighs 7 1/2 lbs.
$225.00 per set.
This might fix some of the boat rolling action I get on the highway..
11-09-2010, 01:40 PM
#132
Super Moderator
Thread Starter
Quote:
Originally Posted by bremereric
Firm Feel...
F, M, J BODY
ALUMINUM, BODY TO K FRAME MOUNTS
Rick Ehrenberg, Tech Editor of Mopar Action Magazine, installed a set of these on his A-38 (cop package) 1978 Monaco. His report:
"Amazing! Since this setup ties the frame 'prongs' (longitudinal's) together, instead of allowing them to virtually flap in the breeze, the entire car feels - and IS - much more rigid. Now the K-member can do what it was originally designed to do - cross-brace the entire front end of the car. Not only is handling markedly better, road feel and wander incredibly improved, even squeaks and rattles are way down. Now it feels like a well set-up A-body sedan on steroids. Highly recommended. And, if you can believe this, this setup works even better on F, J, and M-bodies. If you've got one of those creatures, be it an Aspen R/T, Mirada CMX, or Dippy cop car, etc., don't even think about tackling the twisties without one of Firm Feel's setups." Aluminum Sub frame Isolators, for F.M.J.
Kit includes, 4 isolators, bolts washers and weighs 7 1/2 lbs.
$225.00 per set.
This might fix some of the boat rolling action I get on the highway..
I ordered them today after taking to their tech also got their leafspring kit that gets rid or the rubber isolating pad and gives you new u-bolts
11-09-2010, 05:17 PM
#133
New Member

Join Date: Oct 2010
Location: Kleeme IA
Posts: 4
Likes: 0
Received 0 Likes
on
0 Posts
You have a sweet ride!. I don't have the show but i (Never) lost a race!!! My brother bought the Duster and I built it. He had the money I had the knowlage. Chevy,Ford,and Dodge. He's past on so I have to do this for him. But the prob. is that I dont take the (beaster) out unless anyone can beat my 4 banger grand am. Yes it's fuel injected but thats the secret. My 340 is not fuel injected but workes the same. I put a fine window screen between the head and block. Changes fuel from dump to mist like the injection. (Big *** diferance- 40HP). The gears wooo! 1st gear takes up to 58- then second takes me up to 102- then third takes me to 156. If your engine can do it than up your gears. It's all about teasting. I found mine. (Notice that I never mentioned how fast my car can go from 0 to 60 on just regular unleaded fuel)! WOW? Do the change.
 11-09-2010, 09:41 PM
#134
Super Moderator
Thread Starter
You have a sweet ride!. I don't have the show but i (Never) lost a race!!! My brother bought the Duster and I built it. He had the money I had the knowlage. Chevy,Ford,and Dodge. He's past on so I have to do this for him. But the prob. is that I dont take the (beaster) out unless anyone can beat my 4 banger grand am. Yes it's fuel injected but thats the secret. My 340 is not fuel injected but workes the same. I put a fine window screen between the head and block. Changes fuel from dump to mist like the injection. (Big *** diferance- 40HP). The gears wooo! 1st gear takes up to 58- then second takes me up to 102- then third takes me to 156. If your engine can do it than up your gears. It's all about teasting. I found mine. (Notice that I never mentioned how fast my car can go from 0 to 60 on just regular unleaded fuel)! WOW? Do the change.
11-09-2010, 09:42 PM
#135
Super Moderator
Thread Starter
Harbor Freight soda blaster works...WTF..
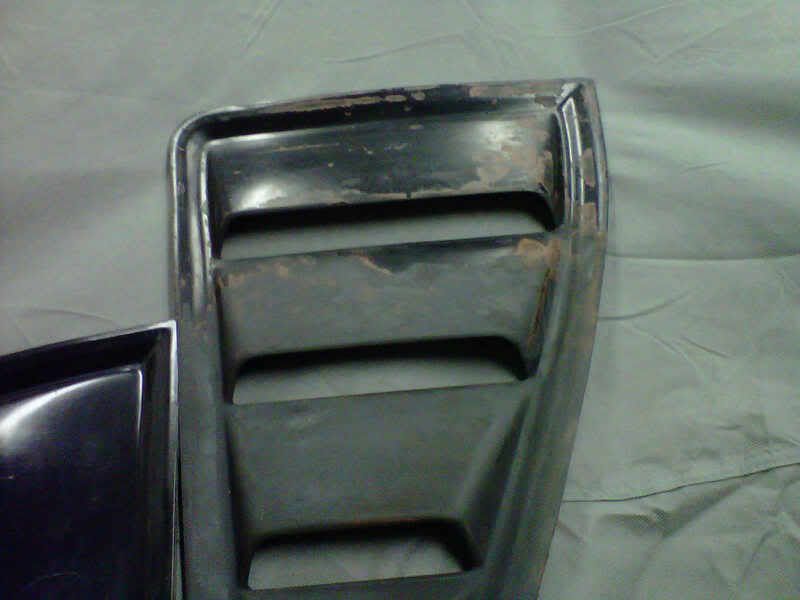
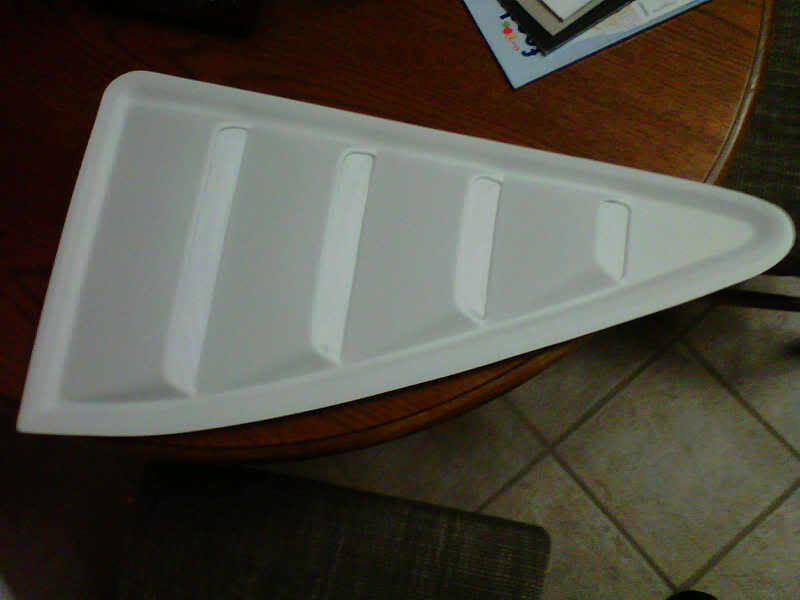
It was dark and I was at home but I did a half *** good job in ten minutes..I had about 5 to 8 pounds of soda left in the tank and finished 3/4 of one louver..I missed several spots but up early in the morning for some more blasting..I couldn't believe my compressor kept up but it stayed at about 80 psi and it was perfect..I could stay about 8 inches away and it worked better...as removing more paint with wider coverage..
3/4 of the paint removed...
it was dark and I missed some spots....
I almost forgot...clean up was a snap...my driveway is about 35 degree angle to the street...water hose and washed it down the street...eco friendly...
11-10-2010, 10:46 AM
#136
Super Moderator
Thread Starter
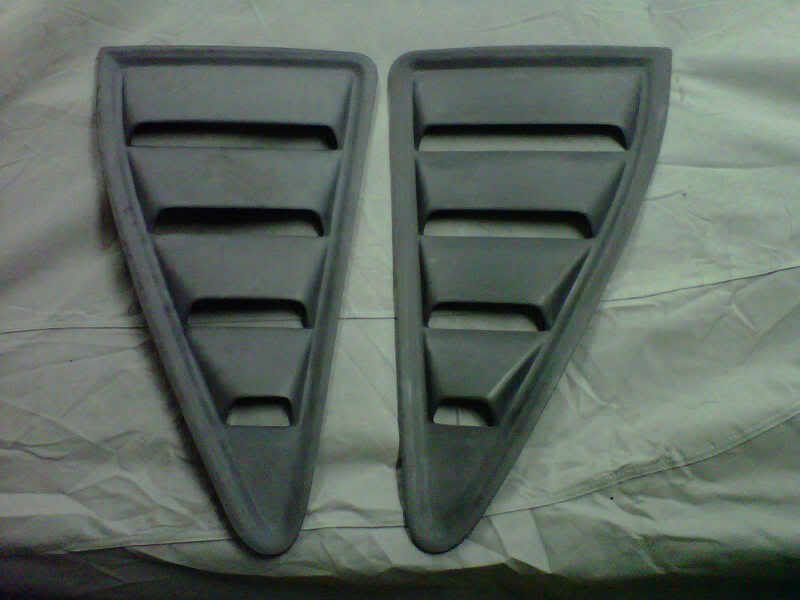
One done blasting and one to go...
Got one totally done with the blasting..have to pull the butyl tape off the back tonight and clean it up...mineral spirits helps remove the left over sticky residue...much easier to blast during the day light...a little bit of water still on it...
Got one totally done with the blasting..have to pull the butyl tape off the back tonight and clean it up...mineral spirits helps remove the left over sticky residue...much easier to blast during the day light...a little bit of water still on it...
11-11-2010, 08:52 PM
#137
Super Moderator
Thread Starter
The last two nights...
I have been dealing with the Houston humidity again...can't seem to get the second one blasted...got it 3/4 of the way done but gave up as the center pick up tube for the soda kept on getting clogged up..may try at work again tomorrow with the industrial air compressor..
11-12-2010, 07:38 PM
#138
Super Moderator
Thread Starter
Industrial Air compressors....and such
This is why they work right...better setup than I will ever have..two Atlas Copco compressors that flow into a wet tank then through a refrigerated drier and then to a dry tank and out to the system...
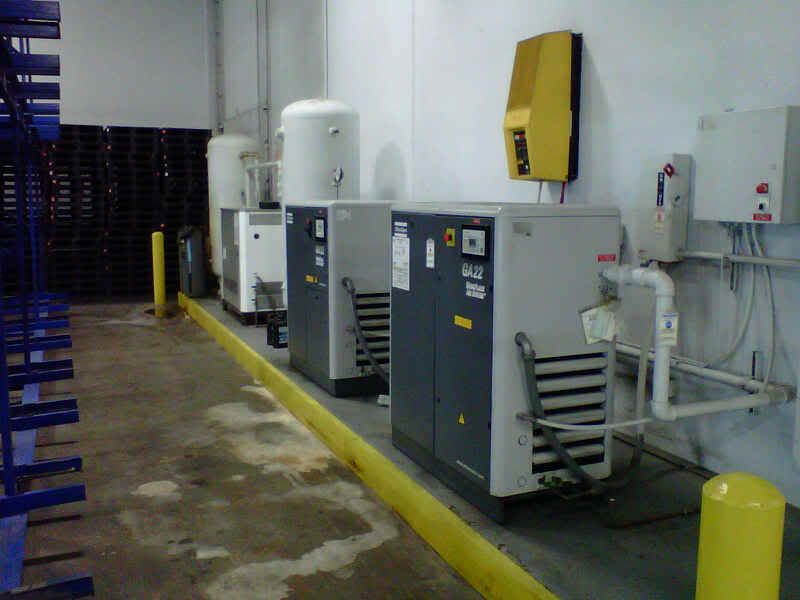
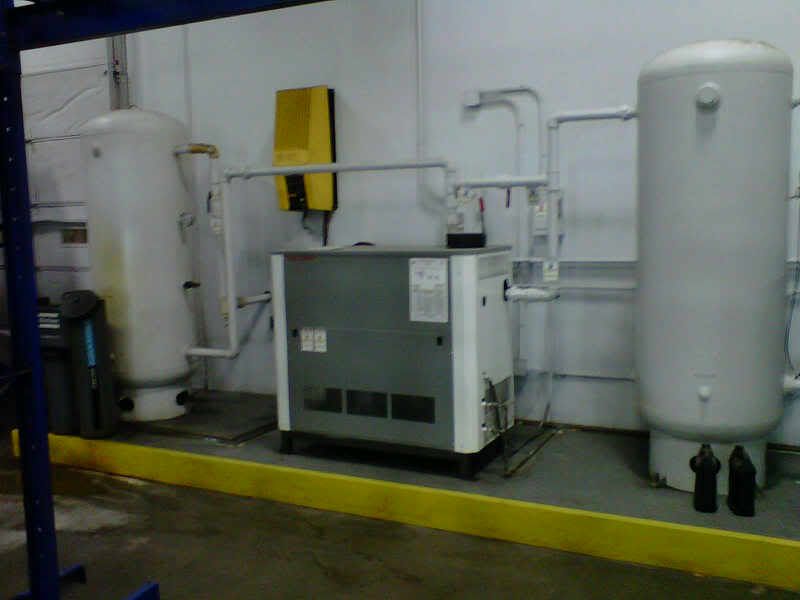
Tonight out in the parking lot I blasted the last one and got done with it in three minutes...there is not comparision at home and at work...dream house 230 volt compressor...they are all ready for paint..tomorrow is going to be 62 degrees after a front comes through..I am meeting a friend a work who needs to paint a tail panel for his Corronet..we are using my work's paint booth to paint his tail panel and my louvers..wish me luck...
This is why they work right...better setup than I will ever have..two Atlas Copco compressors that flow into a wet tank then through a refrigerated drier and then to a dry tank and out to the system...
Tonight out in the parking lot I blasted the last one and got done with it in three minutes...there is not comparision at home and at work...dream house 230 volt compressor...they are all ready for paint..tomorrow is going to be 62 degrees after a front comes through..I am meeting a friend a work who needs to paint a tail panel for his Corronet..we are using my work's paint booth to paint his tail panel and my louvers..wish me luck...
11-13-2010, 09:20 PM
#139
Super Moderator
Thread Starter
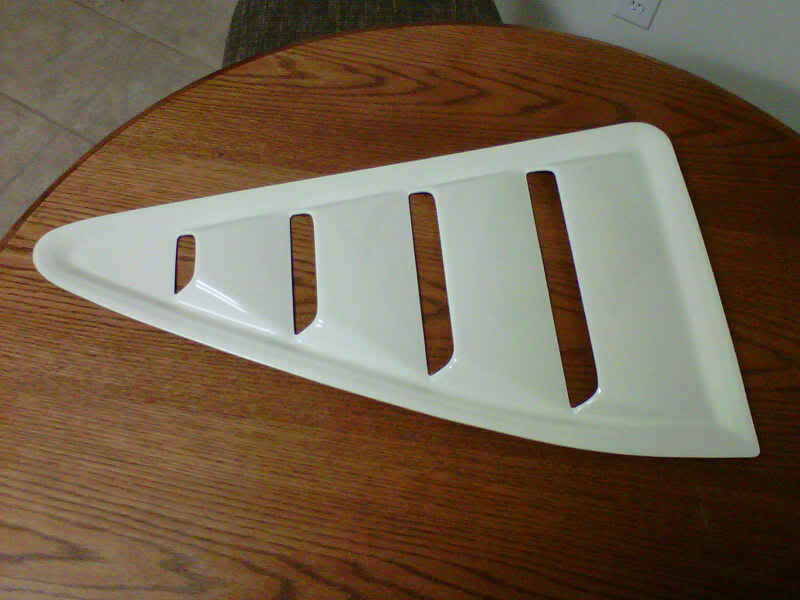
Okay today was a long day...
Got painting started at 9:30...my friend James wiped my louvers down with so called paper lint free clothes before I could stop him..at that time I noticed a lot of trash on one of them..we blew it off and wiped it down again...thought it was clean...one turned out okay but the other had so much trash in the paint that I had to blast it again after it dried...ran out of soda and the bag was at the house so I will do it tomorrow...here is the one that is good for now...
11-13-2010, 09:30 PM
#140
Super Moderator
Thread Starter
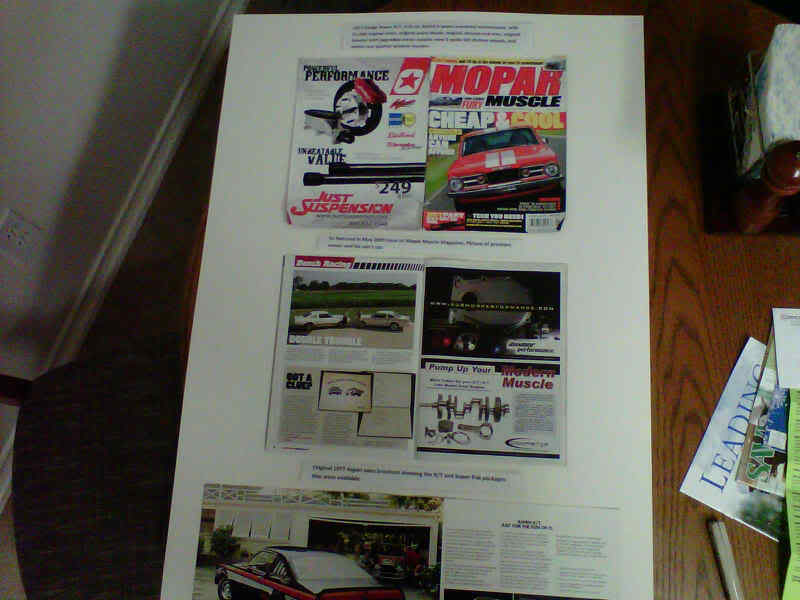
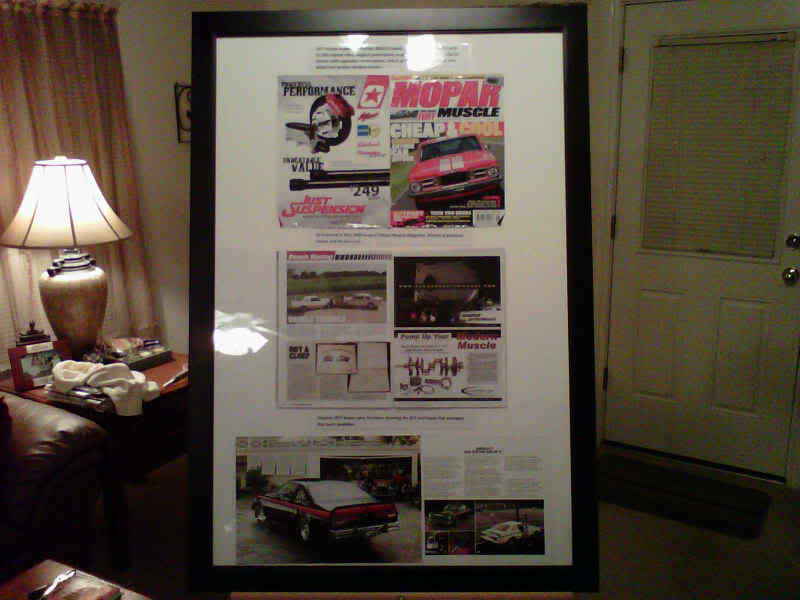
Got the wall of fame done..also got my acceptance letter
Today when I go back home from painting I rushed to Hobby Lobby to get a 24X36 inch matboard for the backing of the magazine and sales brouchere..when I got home from the car show I put it together and then put it on the easel...
11-13-2010, 09:56 PM
#141
Super Moderator
Thread Starter
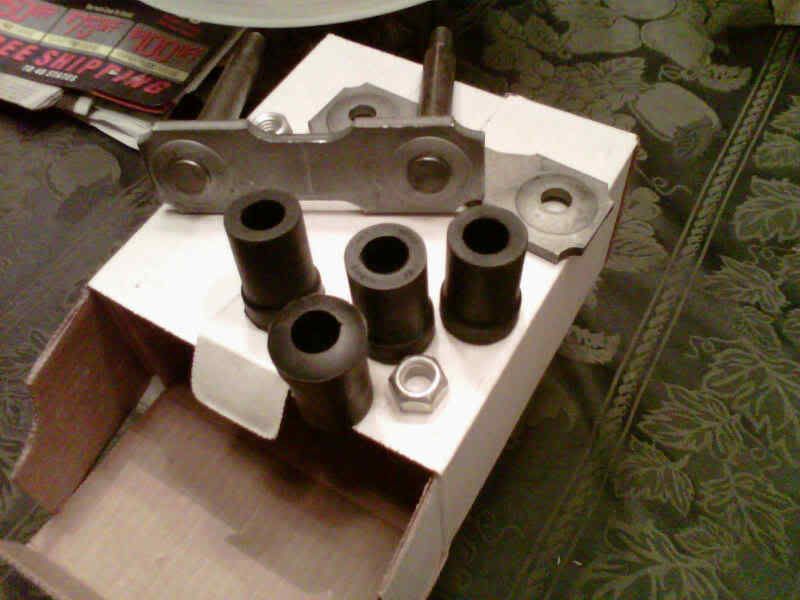
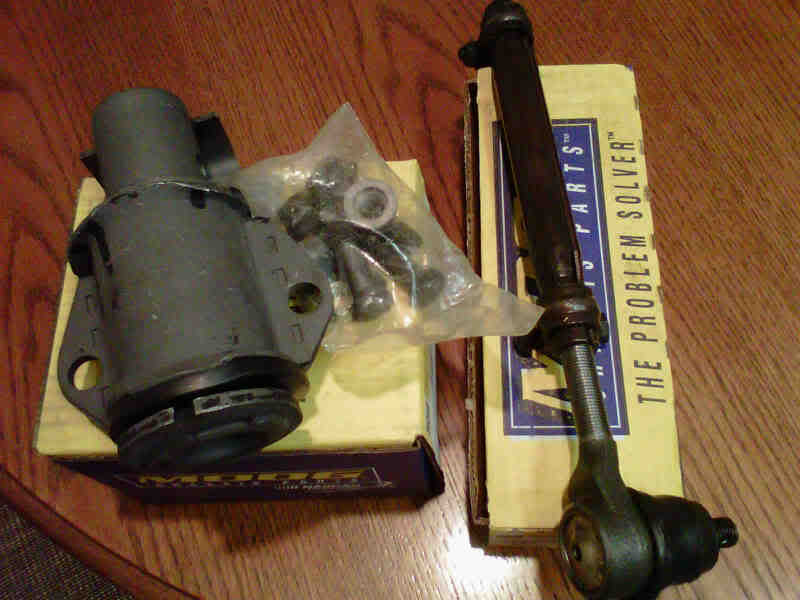
Some front end parts showed up today...Moog to the rescue
Got the torsion bar bushings...they look very wierd and I will have to study this real good before removing them...inner tie rod ends and adjusting sleeves...the rest will come from PST with the poly bushing and them some more from Feel Firm...
11-14-2010, 03:27 PM
#142
Super Moderator
Thread Starter
Got the book
Bought this for the 1981 Gran Fury several years ago....never thought I would have another that fell into this catagory...oh well it was an interesting read on the torsion bar removel...you could screw it up by just removing them with out setting the lower control arm at a certain height and leaving it there until you put it back in...
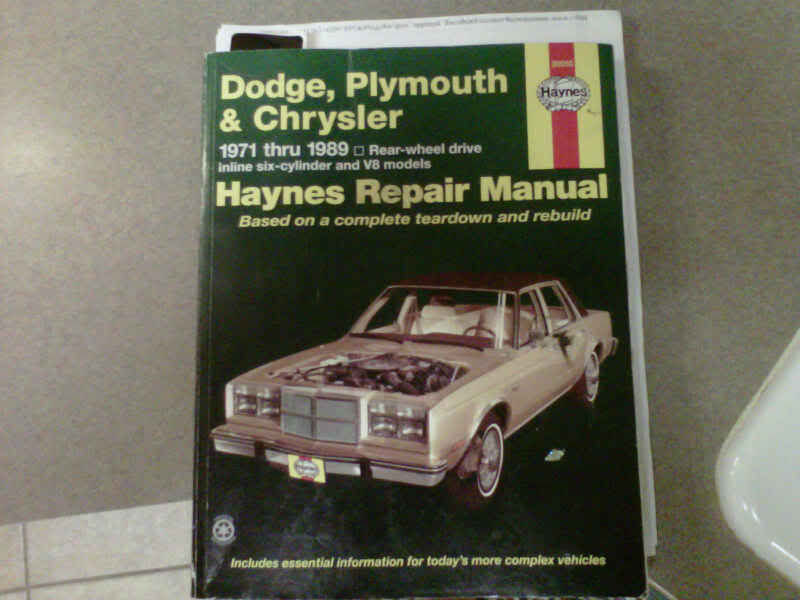
Bought this for the 1981 Gran Fury several years ago....never thought I would have another that fell into this catagory...oh well it was an interesting read on the torsion bar removel...you could screw it up by just removing them with out setting the lower control arm at a certain height and leaving it there until you put it back in...
11-14-2010, 03:27 PM
#143
Super Moderator
Thread Starter
I knew I had some some where in the garage..
When I did the 440 Dart's front suspension I bought a complete Energy Suspension poly kit...it had extra parts and I ordered some too many and found me some poly bushings for the leaf spring eyelet holes...who would have guess that...I have another pile of stuff that I will let go for 30 bucks plus shipping..PM me if your interested...
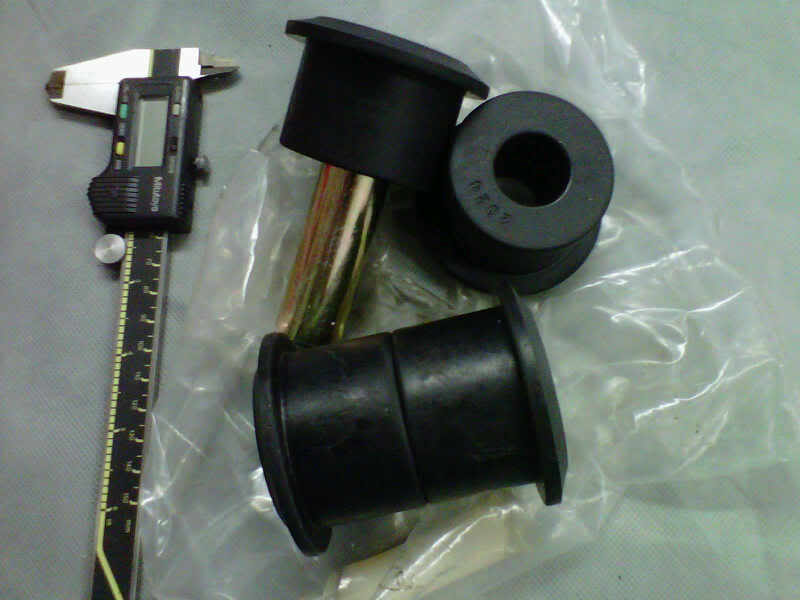
Here the extra stuff...some leafspring pads...some seat belt clips..two sets of 7/8" sway bar bushings...two torsion bar seals..a set of control arm bumpers..a set of hood bumpers...and a set of smaller leaf spring eyelet bushings....
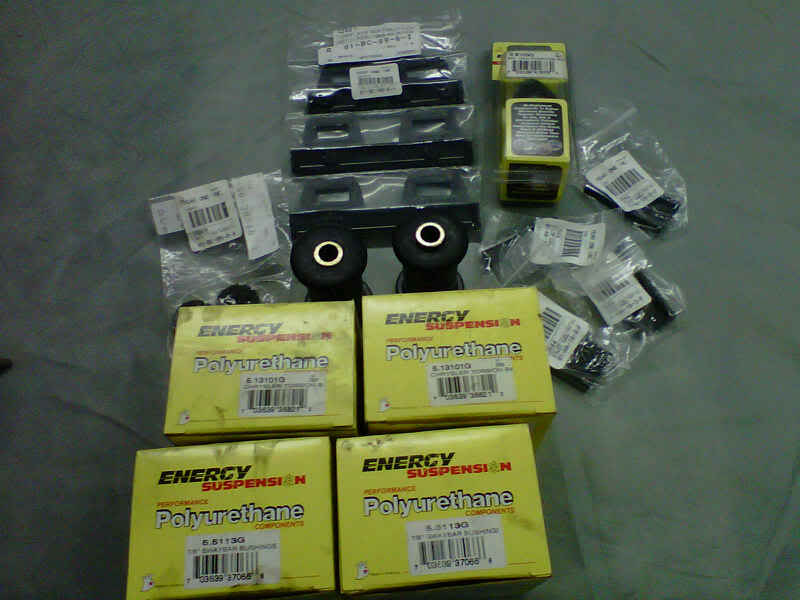
When I did the 440 Dart's front suspension I bought a complete Energy Suspension poly kit...it had extra parts and I ordered some too many and found me some poly bushings for the leaf spring eyelet holes...who would have guess that...I have another pile of stuff that I will let go for 30 bucks plus shipping..PM me if your interested...
Here the extra stuff...some leafspring pads...some seat belt clips..two sets of 7/8" sway bar bushings...two torsion bar seals..a set of control arm bumpers..a set of hood bumpers...and a set of smaller leaf spring eyelet bushings....
11-16-2010, 09:03 PM
#144
Super Moderator
Thread Starter
I did some more work today...
Yesterday I sanded and filled some pits in louver I blasted with some glazing putty...this morning I primed it with two light coats...about five specks of dirt...lightly sand them and one more I hope dirt free coat...going to blast the paint off the other one to...WTH...it has too many specks of dirt in it for my liking....tonight I scrubbed all the dirt off the radiator support seal that I had gotten..It's is pretty rough shape and I want to source another...anyone got one?
Yesterday I sanded and filled some pits in louver I blasted with some glazing putty...this morning I primed it with two light coats...about five specks of dirt...lightly sand them and one more I hope dirt free coat...going to blast the paint off the other one to...WTH...it has too many specks of dirt in it for my liking....tonight I scrubbed all the dirt off the radiator support seal that I had gotten..It's is pretty rough shape and I want to source another...anyone got one?
11-18-2010, 02:10 PM
#145
Super Moderator
Thread Starter
Got some clips for the front moulding and the radiator support seal
I don't know if everyone is familiar with Fastenal but they have a good collection of automotive fasteners..I went at lunch yesterday and picked these up...47 bucks worth for both....
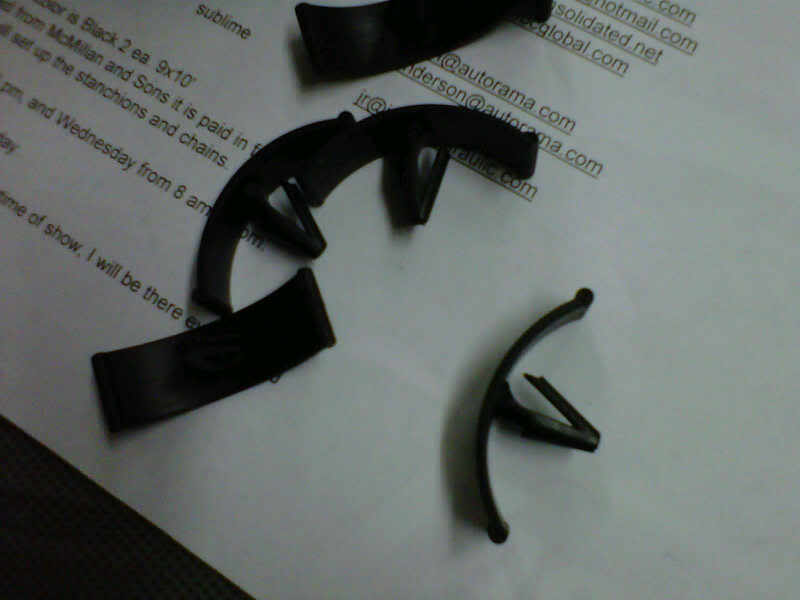
I don't know if everyone is familiar with Fastenal but they have a good collection of automotive fasteners..I went at lunch yesterday and picked these up...47 bucks worth for both....
11-18-2010, 09:23 PM
#146
Super Moderator
Thread Starter
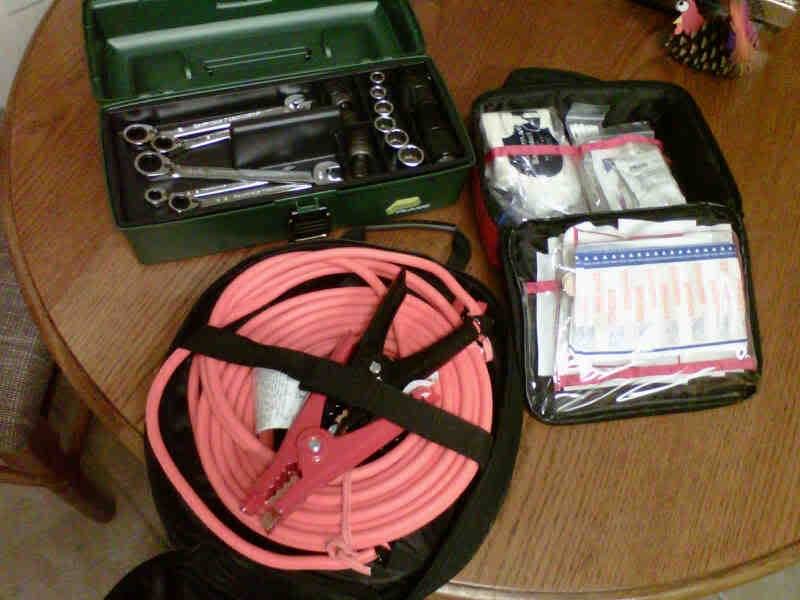
Got some of the car show needs...what the judges want to see
I went to Wally World at lunch time today...you need a tool box with basic tools...a fire extinguisher...jumper cables...first aid kit...and locking gas cap or it has to be taped closed...okay I already had a small tool box an fire extinguisher...had to pick up the first aid kit and jumper cables...cap cap is external twist off type so I will have to tape it with blue painters tape...have to show up with no more than a 1/4 tank of gas also..
Saturday and Sunday will be major cleaning days for the Aspen...next Tuesday will be the day I drive there to drop it off..if it rains they will send a rolloff wreaker free of charge to deliver it there and I will not have to drive in the rain
Saturday and Sunday will be major cleaning days for the Aspen...next Tuesday will be the day I drive there to drop it off..if it rains they will send a rolloff wreaker free of charge to deliver it there and I will not have to drive in the rain
11-19-2010, 02:46 AM
#147
Admin
Got both cars out of the garage...used my blower to clean it out the best I could...closed the garage door most of the way with the fan blowing out at the door...mixed up the paint in a Preval sprayer...4 parts paint...2 parts thinner and 1 part hardner...all PPG paint products..
11-19-2010, 12:57 PM
#148
Super Moderator
Thread Starter
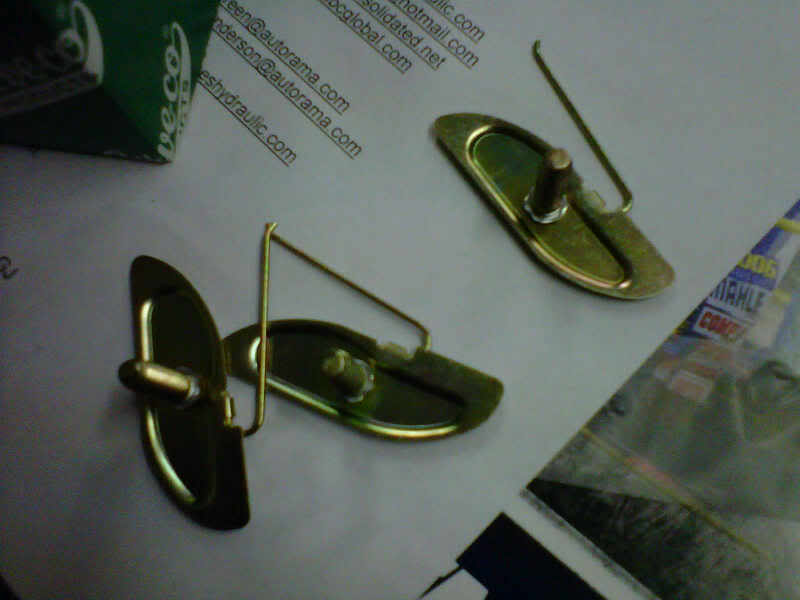
Nope that's the way my piece of crap camera on my Blackberry works....it is larger than most because the hood has two metal loops on it...one goes in the latch which is attached to the studs in the middle and one to the hook mechanism on the side..
Last edited by bremereric; 11-19-2010 at 07:54 PM.
11-19-2010, 07:54 PM
#149
Super Moderator
Thread Starter
Had to find something to do...so I painted the shackles tonight
The old lady was crazy tonight so I fled to the garage and found something to do...paint the shackles for the Aspen...tomorrow back to paint one louver but have given up having them on for the Autorama show...I also have to spend about 4 hours polishing those wheels and then cleaning the inside..Sunday will be detailing the outside to include another good coat of wax...
The old lady was crazy tonight so I fled to the garage and found something to do...paint the shackles for the Aspen...tomorrow back to paint one louver but have given up having them on for the Autorama show...I also have to spend about 4 hours polishing those wheels and then cleaning the inside..Sunday will be detailing the outside to include another good coat of wax...