
I never would think I would own one of these

Mopar Lover
Joined: Apr 2008
Posts: 1,074
Likes: 1
Rattle can rust-oleum clean metal primer....it's white to...if I were to blast and repaint the whole car...then I would shoot it with epoxy....today I back the 440 Dart out and then mask off and spray inside the garage...this will help eliminate overspray carried by the wind.
http://www.preval.com

Thread Starter
Super Moderator
Joined: Sep 2010
Posts: 3,609
Likes: 181
From: Houston, Texas
Epoxy primer makes no more overspray than a rattle can. Also rattle can primer (solvent based) never totally "sets", thus creating paint issues later. Epoxy primer is a chemical reaction and when dry it is stable and permanent. Save the rustoleum for the patio furniture. If you want to use a rattle can type sprayer, they make these with a small glass jar, so that you can use good quality automotive grade products. Just mix your paint and pour it in the jar, and start spraying.

http://www.preval.com
http://www.preval.com
Thread Starter
Super Moderator
Joined: Sep 2010
Posts: 3,609
Likes: 181
From: Houston, Texas
I didn't paint the primer today
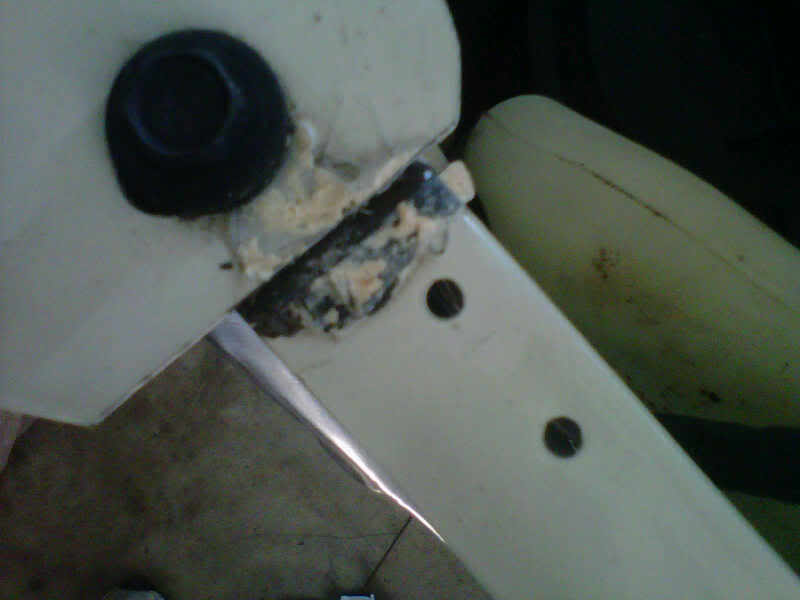
I will visit my PPG dealer in the morning to see what they have to offer as epoxy primer...Crazy4carz...had a good suggestion to use epoxy primer instead of the rattle can rust-oleum primer that I was going to use ...I did however get it all taped up and ready to go...and the passenger fender is moved over to correct the gap...the piece of seam sealer was holding the thing together...it would not budge until I scrapped it off..
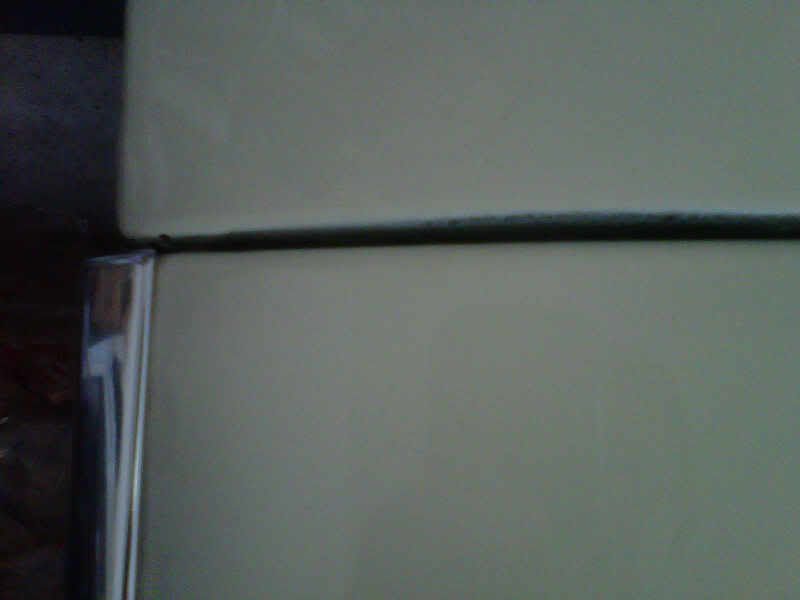
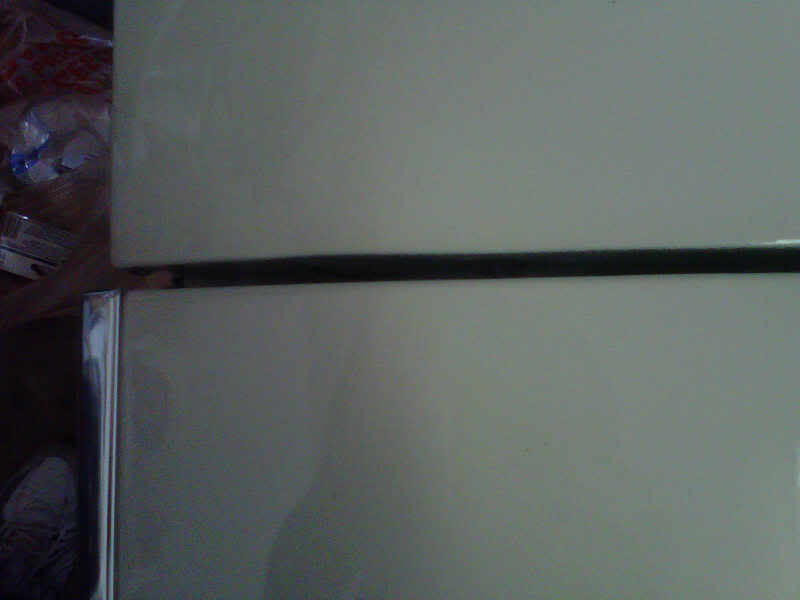
And here it is all taped up and ready to go

And here it is all taped up and ready to go
Thread Starter
Super Moderator
Joined: Sep 2010
Posts: 3,609
Likes: 181
From: Houston, Texas
Further research....
I called my PPG rep Donna today....they have two part epoxy paint in many diffent color combinations....but my first choice is this two part spray can epoxy primer made in Germany and availible at Eastwood...my only question to them will be about the color...looks white on the cap...I want a white primer...if the paint gets scratched or a chip occurs you will see white underneath it..

Spray Max Epoxy Primer aerosol
Item #50771 Z
In Stock - Ready to Ship Today
Only $19.99
2K patented aerosol allows you to paint with a two component paint with no mixing! Spray Max's innovative nozzle and valve technology, combined with its two internal chambers ensure the right ratio is mixed every time. Sprays like a gun, broader spray pattern than conventional aerosols and no mess to clean up. You'll get professional results from an aerosol. Pot life 4 days. 2k rust cure primer in buff has excellent adhesion and corrosion. Can be applied over new and rusty surfaces. Can overcoat with any 1k/2k system. 14.1 oz net weight. Made in Germany
Thread Starter
Super Moderator
Joined: Sep 2010
Posts: 3,609
Likes: 181
From: Houston, Texas
I called my PPG rep Donna today....they have two part epoxy paint in many diffent color combinations....but my first choice is this two part spray can epoxy primer made in Germany and availible at Eastwood...my only question to them will be about the color...looks white on the cap...I want a white primer...if the paint gets scratched or a chip occurs you will see white underneath it..
Spray Max Epoxy Primer aerosol
Item #50771 Z
In Stock - Ready to Ship Today
Only $19.99
2K patented aerosol allows you to paint with a two component paint with no mixing! Spray Max's innovative nozzle and valve technology, combined with its two internal chambers ensure the right ratio is mixed every time. Sprays like a gun, broader spray pattern than conventional aerosols and no mess to clean up. You'll get professional results from an aerosol. Pot life 4 days. 2k rust cure primer in buff has excellent adhesion and corrosion. Can be applied over new and rusty surfaces. Can overcoat with any 1k/2k system. 14.1 oz net weight. Made in Germany

Thread Starter
Super Moderator
Joined: Sep 2010
Posts: 3,609
Likes: 181
From: Houston, Texas
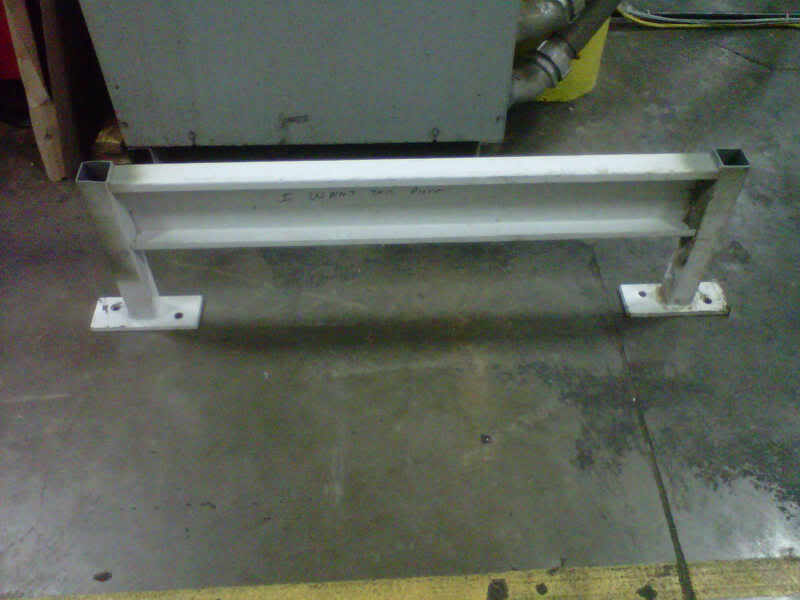
Front end roll around
Got this left over piece of structure at work...cut off and grinded off some extra..now imagine it with rolling casters and bolted to the front of the 5 MPH shocks...this will allow me to roll the car around when the K Member is removed for painting..I have to buy some casters and mount them tomorrow before I take it home..
Thread Starter
Super Moderator
Joined: Sep 2010
Posts: 3,609
Likes: 181
From: Houston, Texas
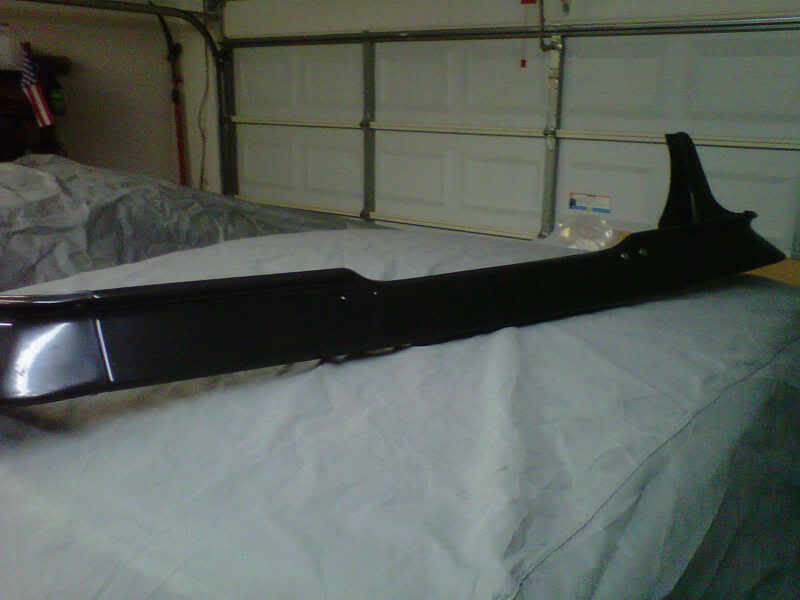
I got my new front spoiler today....$214.00 dollars to the door....going to wet sand it and prime it then paint it.....this one will go on my car and the other in the attic as a spare...as expalined to others..if something happens to this car I like to have spare parts...never know when a board on the road would hit the spoiler and destroy it......sorry but that's the way I think...

Thread Starter
Super Moderator
Joined: Sep 2010
Posts: 3,609
Likes: 181
From: Houston, Texas
Not a whole lot done last night
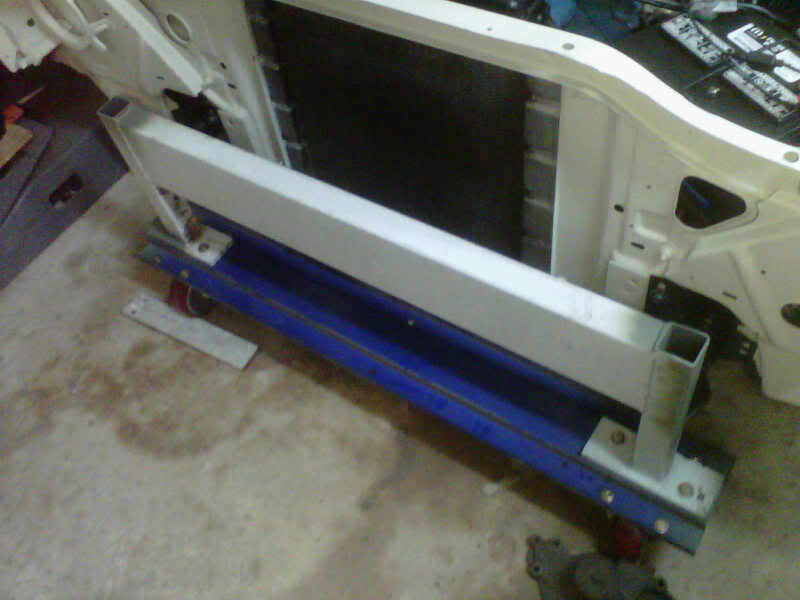
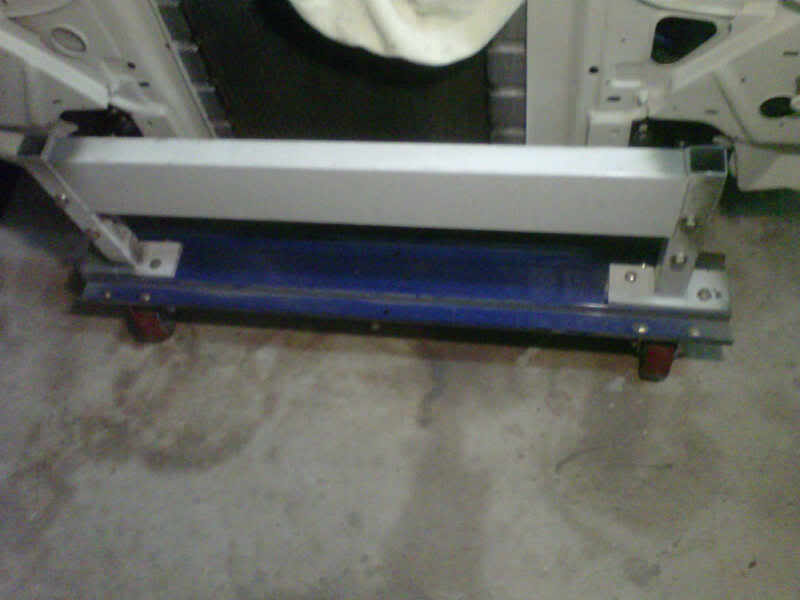
I brought home my roll-about contraption...I did not want to buy casters until I knew it was going to work...I lightly bolted up the front bumper shocks and then saw I would have to through bolt it to them going through the square tubing...that will only make it a stronger attachment...yesterday I added the blue piece of metal at the bottom to serve as a footing to attach the casters....
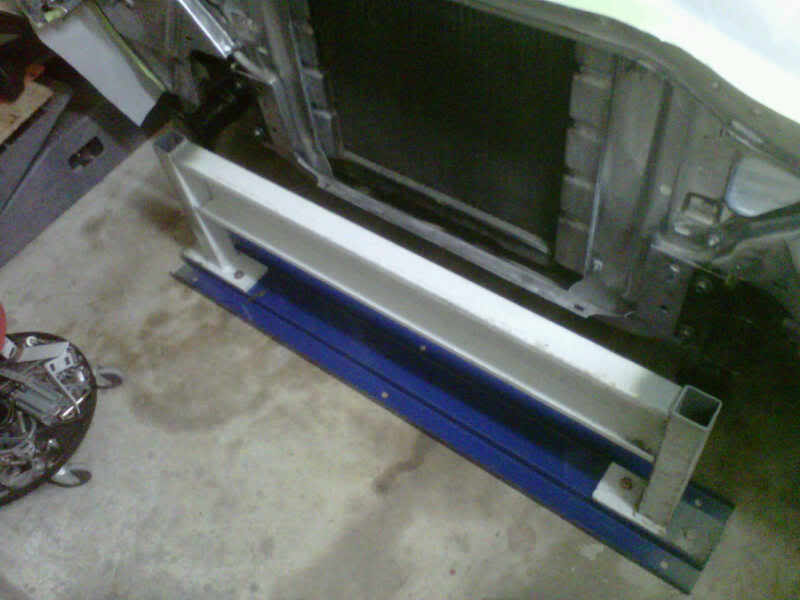

I brought home my roll-about contraption...I did not want to buy casters until I knew it was going to work...I lightly bolted up the front bumper shocks and then saw I would have to through bolt it to them going through the square tubing...that will only make it a stronger attachment...yesterday I added the blue piece of metal at the bottom to serve as a footing to attach the casters....
Mopar Lover
Joined: Apr 2008
Posts: 1,074
Likes: 1
Those bumper mounts are not that tough. I would find someplace else to mount that. Also put something inside the square tubing or else when you tighten it, it will crush. Or, when it gets a lateral load it will crush and fold under. Why do you have to move it while the Kframe is out? Just use jack stands. And why is the Kframe coming out anyway? Detailing? Nah.
Thread Starter
Super Moderator
Joined: Sep 2010
Posts: 3,609
Likes: 181
From: Houston, Texas
No Casters yet...
Went to two places today searching for casters that have a rating of at least 750 pounds no luck yet...I found an empty box that were susposed to have some at 900 pounds...back on the search tomorrow...
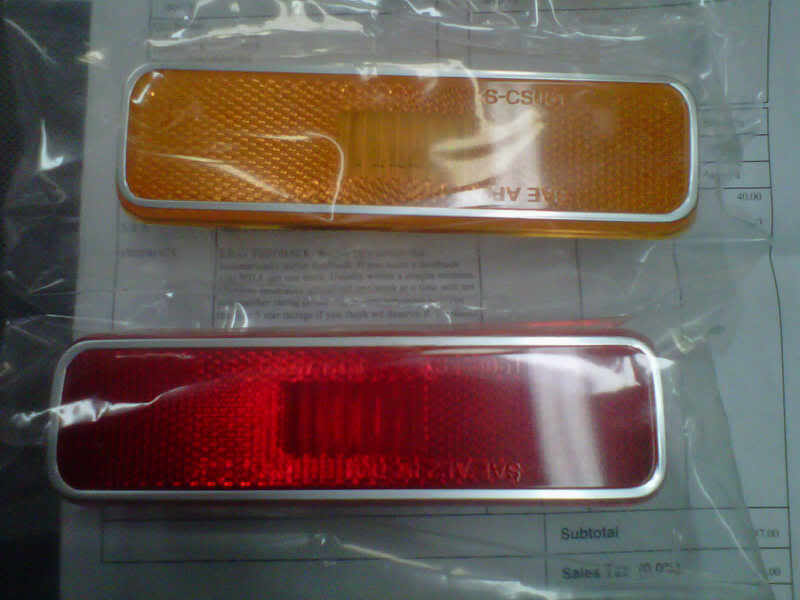
Opened some presents when I got home....first a set of parking light lenses..40 bucks off of e-bay and made in Taiwon...I will not put these on unless paint is done or one gets damaged..
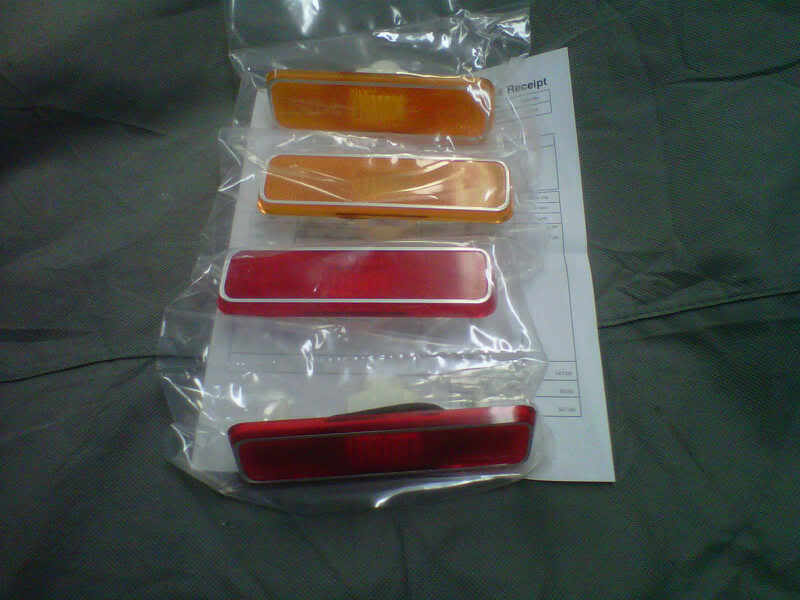
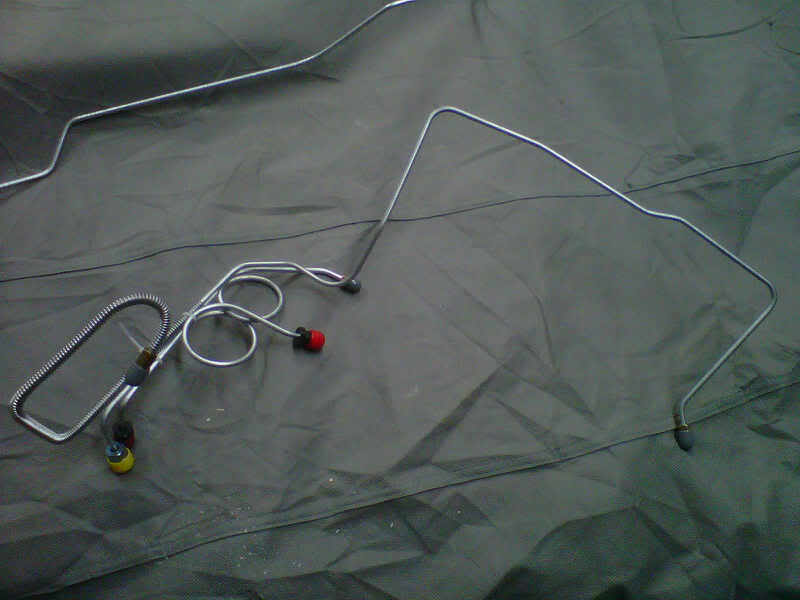
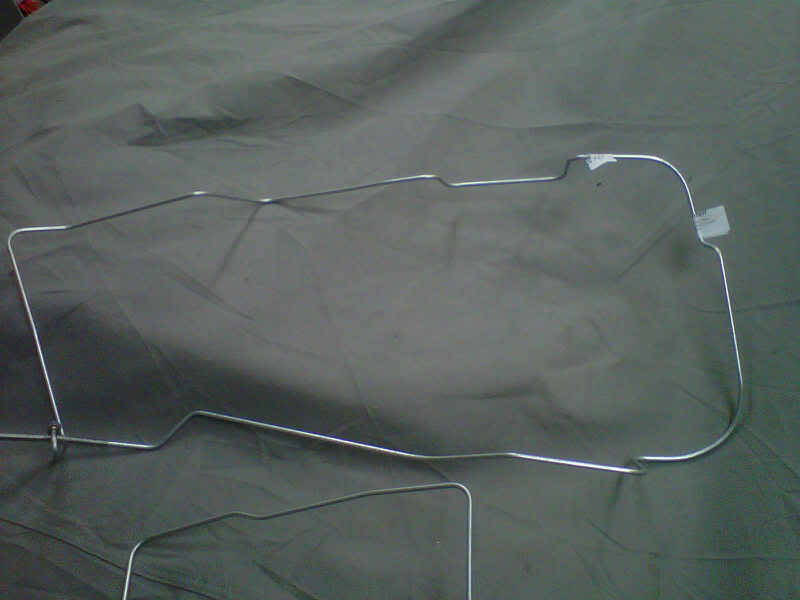
got my brake lines from Inline Tube...the ones from the master cylinder to the proportional valve are verified....the one from the proportional valve to the driver's front wheel is verified...the other long one to the passenger side is not verified at this time..75 bucks plus shipping
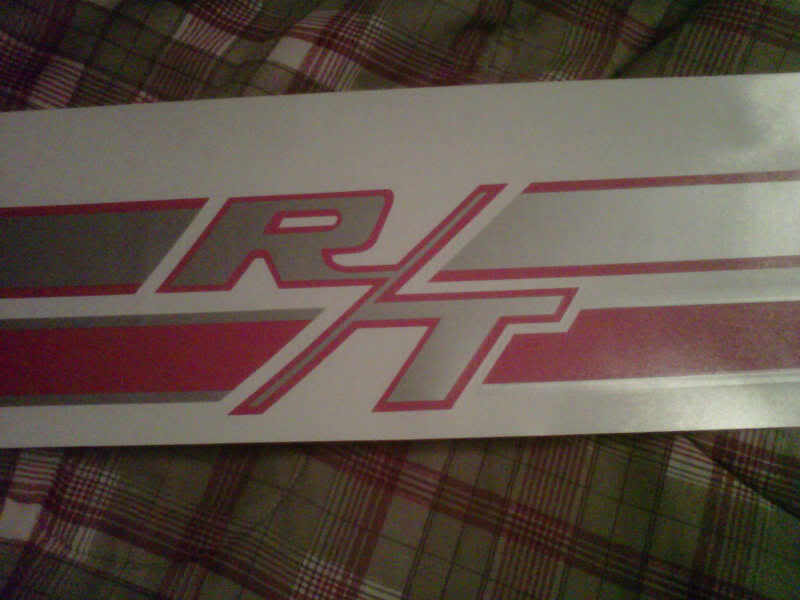
Then I opened the decal kit from Pheonix Graphics...I am not going to slam them at this time but the color pattern is reversed...mine are silver outlined in red on the bottom and the RT symbols are red outlined in silver..I also thought I would have left over decals because one was for the super pak and the other was for the stripes across the trunk lid? A call to them for sure in the morning...

Went to two places today searching for casters that have a rating of at least 750 pounds no luck yet...I found an empty box that were susposed to have some at 900 pounds...back on the search tomorrow...
Opened some presents when I got home....first a set of parking light lenses..40 bucks off of e-bay and made in Taiwon...I will not put these on unless paint is done or one gets damaged..
got my brake lines from Inline Tube...the ones from the master cylinder to the proportional valve are verified....the one from the proportional valve to the driver's front wheel is verified...the other long one to the passenger side is not verified at this time..75 bucks plus shipping
Then I opened the decal kit from Pheonix Graphics...I am not going to slam them at this time but the color pattern is reversed...mine are silver outlined in red on the bottom and the RT symbols are red outlined in silver..I also thought I would have left over decals because one was for the super pak and the other was for the stripes across the trunk lid? A call to them for sure in the morning...
Thread Starter
Super Moderator
Joined: Sep 2010
Posts: 3,609
Likes: 181
From: Houston, Texas
Local caster search was a no go
Went e-baying and found the following...I don't need all four right now but they may come to another use someday....
pKuDO19BMkQyG1!Bw~~_12.JPG)
http://cgi.ebay.com/New-Colson-Caste...item45f61389d8
Went e-baying and found the following...I don't need all four right now but they may come to another use someday....
http://cgi.ebay.com/New-Colson-Caste...item45f61389d8
Thread Starter
Super Moderator
Joined: Sep 2010
Posts: 3,609
Likes: 181
From: Houston, Texas
Last thing to report for today
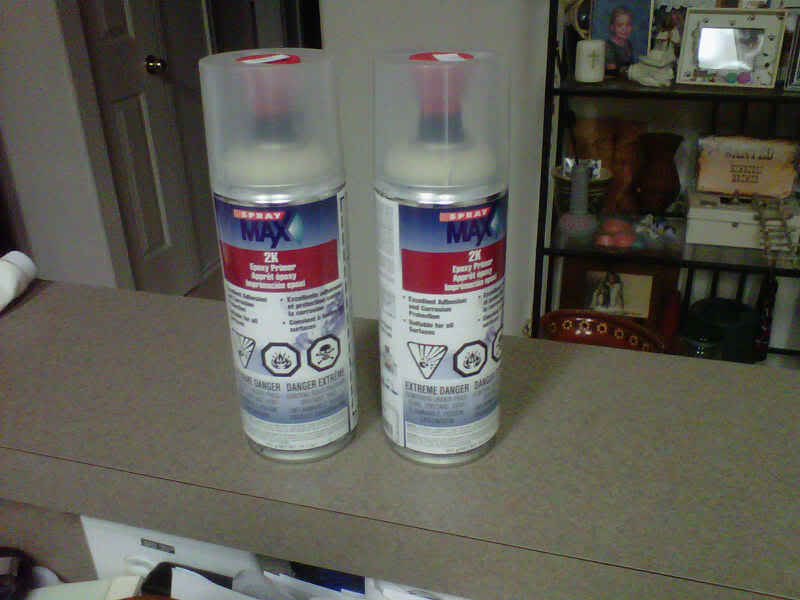
Got my epoxy primer today....2 cans 40.00 plus bucks to get them to the door...67 tomorrow and 68 on Saturday with rain chance starting at 6:00 PM...I will be done before then and I am bringing home a halon lite set from work to put some heat on it..
You take that red plug out of the cap...shake the can for 2 minutes...flip it upside down...stick the plug in the bottom of the can and shake for another two minutes...the spray pattern is adjustable also...leave it up to the Germans...
Thread Starter
Super Moderator
Joined: Sep 2010
Posts: 3,609
Likes: 181
From: Houston, Texas
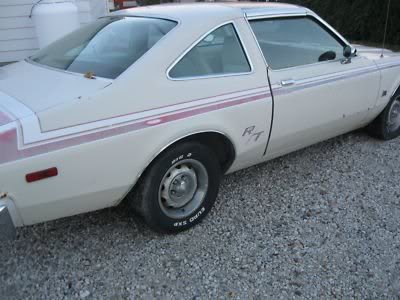
Even though they may be the wrong color combination the other set is on it's way..I got an e-mail from Justin with Pheonix Graphix with a tracking number also...I also found these pics on line of the white Aspen with the faotory looking color scheme oh well the saga continues...now I will have two sets to choose from
Last edited by bremereric; Jan 28, 2011 at 08:14 PM.
Thread Starter
Super Moderator
Joined: Sep 2010
Posts: 3,609
Likes: 181
From: Houston, Texas
Taped, sanded and boxed up..
I sanded some spots....taped up a little more areas and then cardboarded up some areas..when completed I wiped it down with some lacquer thinner...tomorrow is primer day...Sunday is back to the paint booth for some more painting..it will be rainy and cold..
I sanded some spots....taped up a little more areas and then cardboarded up some areas..when completed I wiped it down with some lacquer thinner...tomorrow is primer day...Sunday is back to the paint booth for some more painting..it will be rainy and cold..
Thread Starter
Super Moderator
Joined: Sep 2010
Posts: 3,609
Likes: 181
From: Houston, Texas
Back in white....sort of
Backed out the 440 Dart....layed down two passes of primer and that stuff is great...it does spray like a detail gravity feed gun and dries fast...Eastwood said it was grey...Auto Body Toolmart is where I got it from and they were right...biege....or off white...anyways I have four more things to prime today before the rain..

lights baking it....
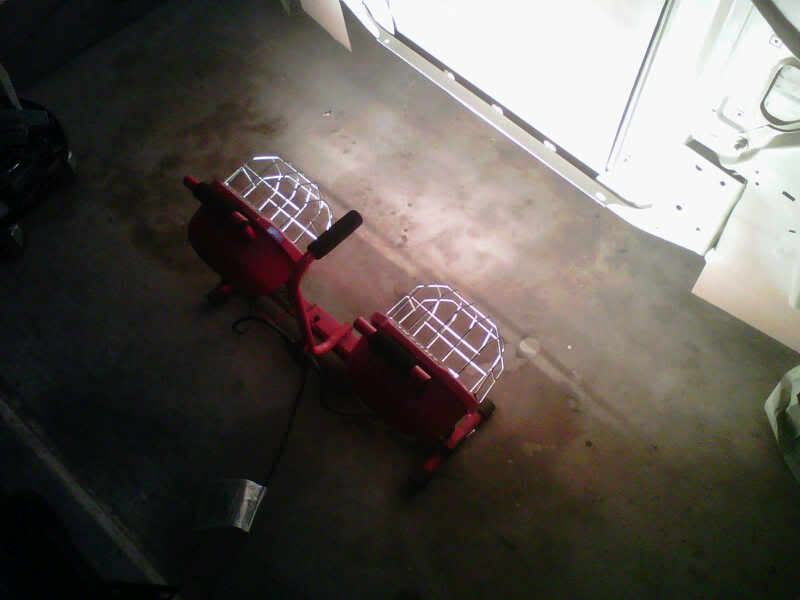
Backed out the 440 Dart....layed down two passes of primer and that stuff is great...it does spray like a detail gravity feed gun and dries fast...Eastwood said it was grey...Auto Body Toolmart is where I got it from and they were right...biege....or off white...anyways I have four more things to prime today before the rain..
lights baking it....
Thread Starter
Super Moderator
Joined: Sep 2010
Posts: 3,609
Likes: 181
From: Houston, Texas
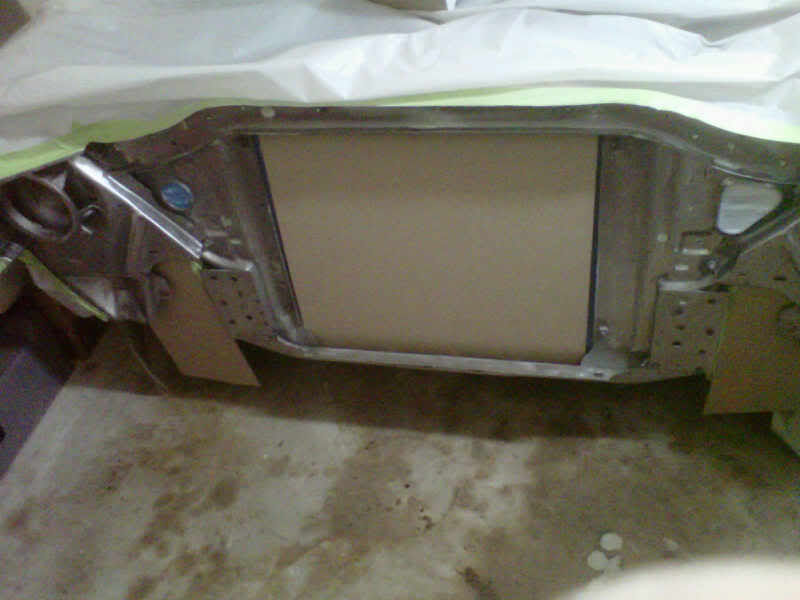
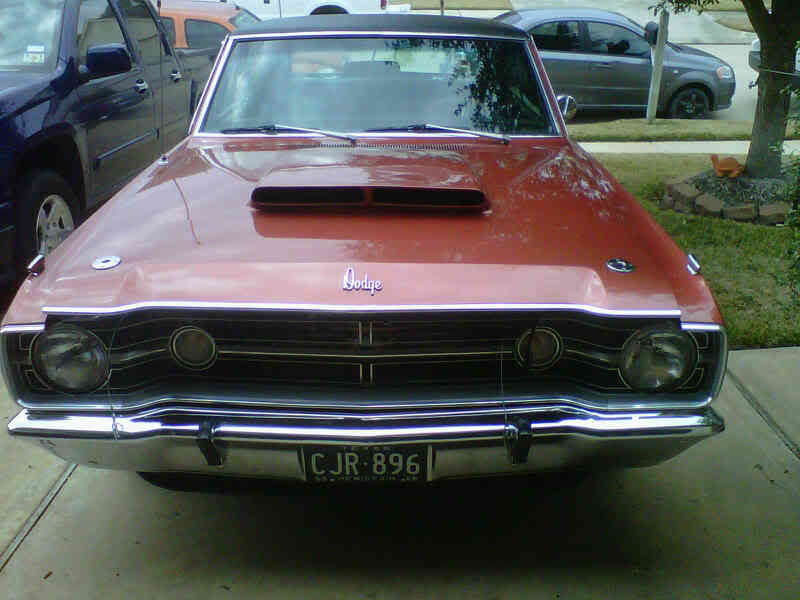
Tape off
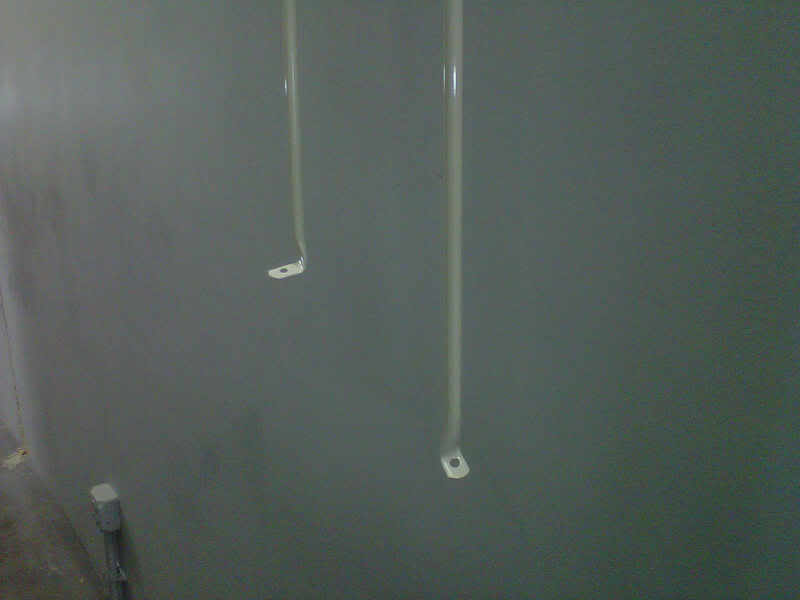
Only had enough of the epoxy primer left in the first can to spray the engine compartment braces...I then took the tape off the front end...looks nice again...I took a pic of the driver's side R/T symbol and they put it on slanted at an angle..I opened the truck and found peeled off paint where the other decal use to run accross the trunk lid...
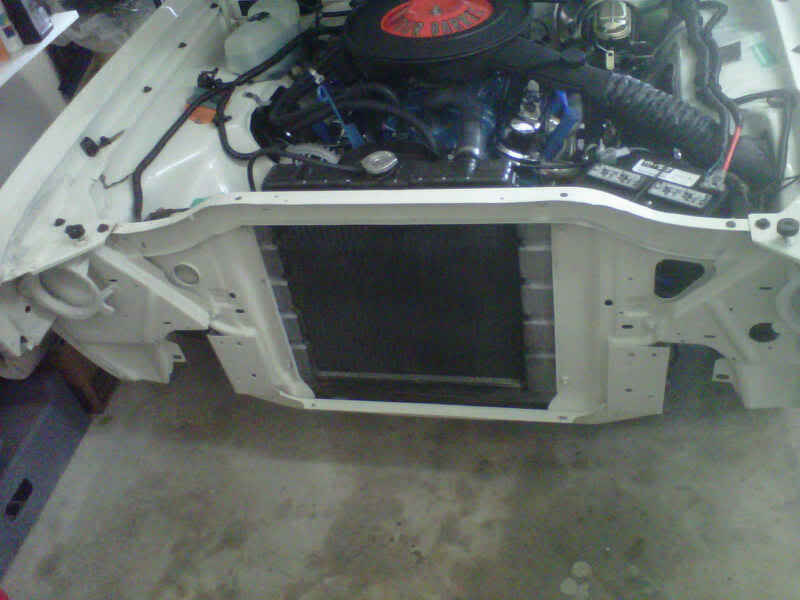
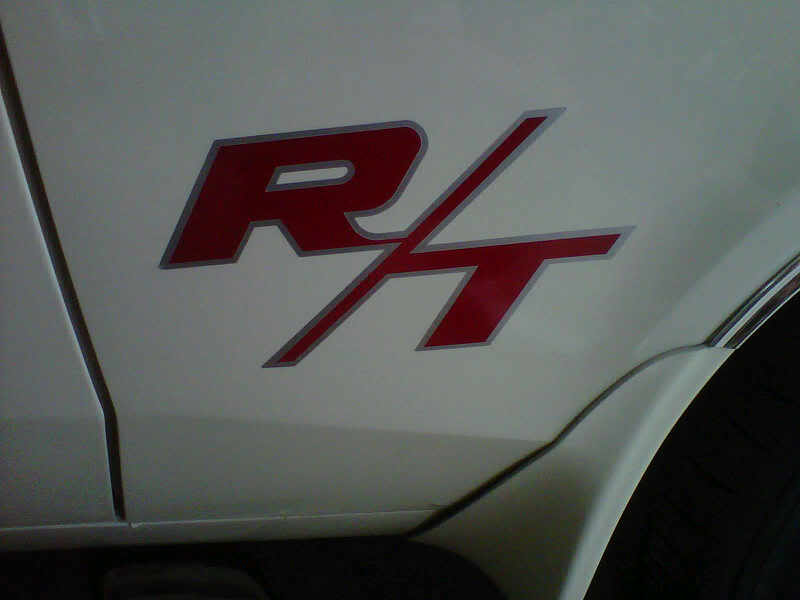
Only had enough of the epoxy primer left in the first can to spray the engine compartment braces...I then took the tape off the front end...looks nice again...I took a pic of the driver's side R/T symbol and they put it on slanted at an angle..I opened the truck and found peeled off paint where the other decal use to run accross the trunk lid...
Thread Starter
Super Moderator
Joined: Sep 2010
Posts: 3,609
Likes: 181
From: Houston, Texas
Great paint day...getting some more done
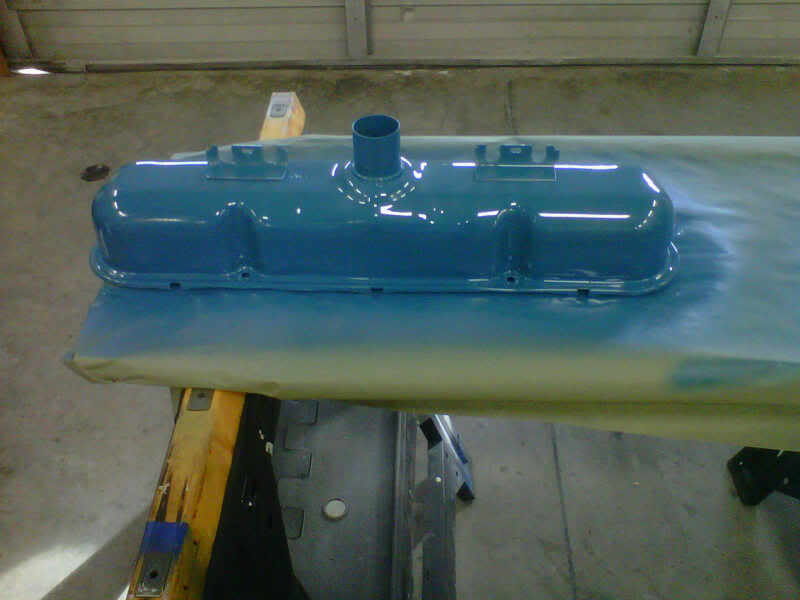
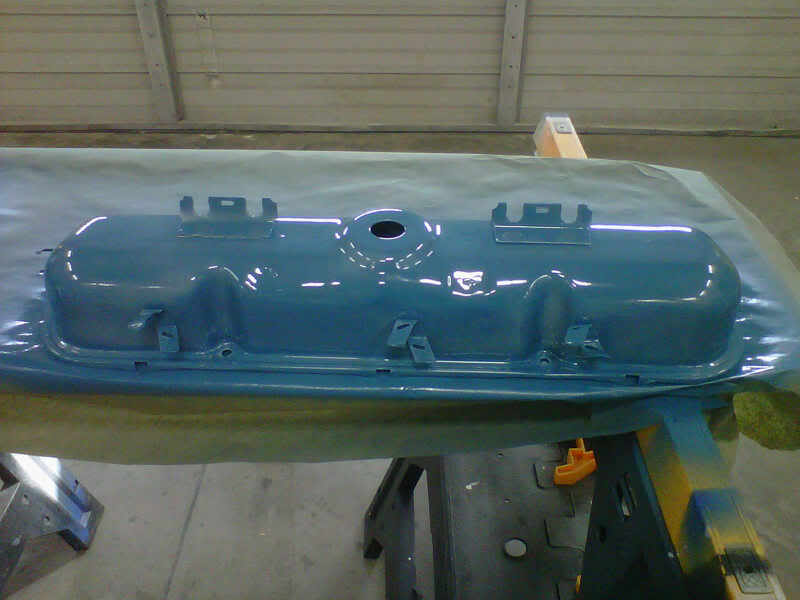
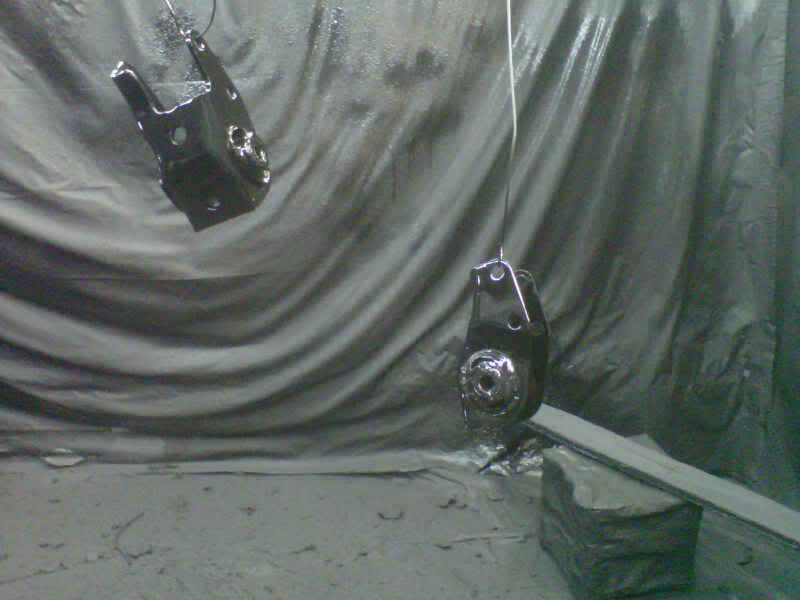
Rainy this morning and warm...this afternoon is partly cloudy and breezy...I used the bed liner srpay booth at work to spray some more parts...inside the bay I shot two coats of 500 degree blue followed by two coats of 500 degree clear...they are still drying when I took the picture..
motor mounts chassis black...
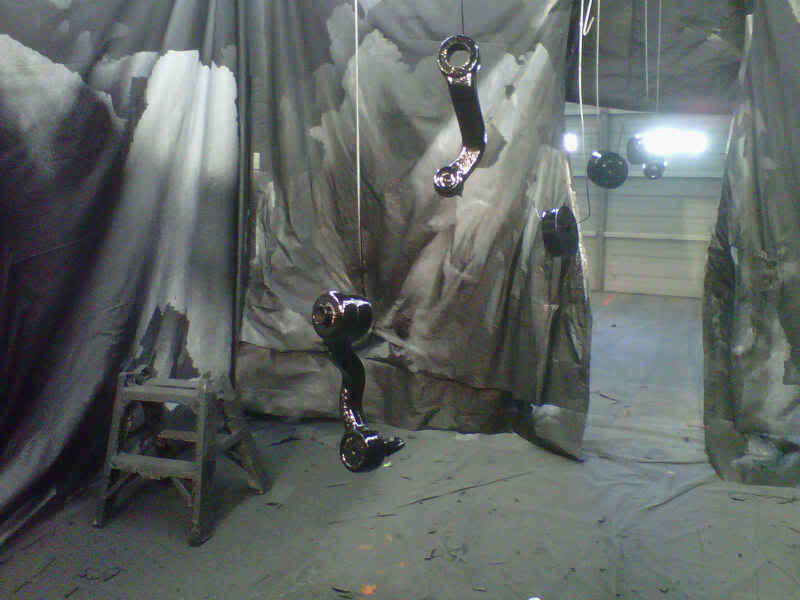
Idler and Pitman arms chassis black...
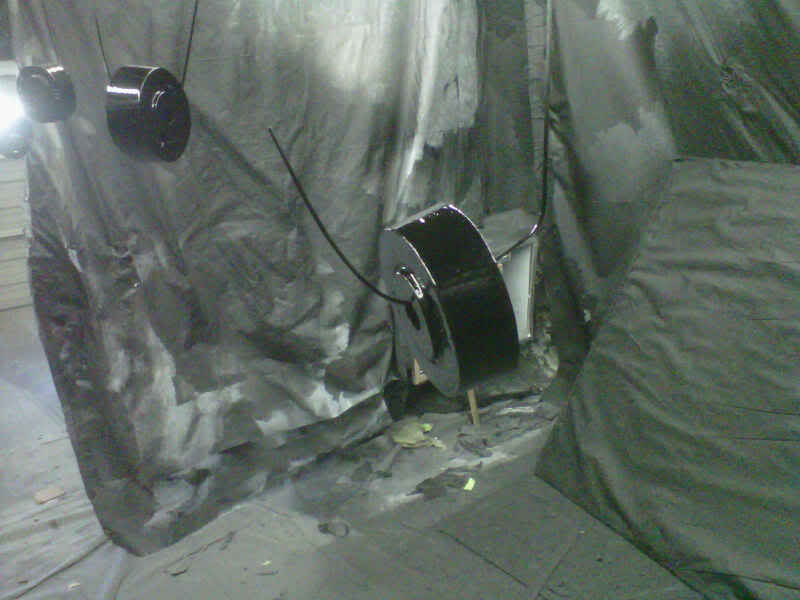
Firm Feel K member biscuits....chassis black...
Engine compartment brace bars...Spinaker white...
I will do my grilling tonight and then take a trip back to pick them up..
Rainy this morning and warm...this afternoon is partly cloudy and breezy...I used the bed liner srpay booth at work to spray some more parts...inside the bay I shot two coats of 500 degree blue followed by two coats of 500 degree clear...they are still drying when I took the picture..
motor mounts chassis black...
Idler and Pitman arms chassis black...
Firm Feel K member biscuits....chassis black...
Engine compartment brace bars...Spinaker white...
I will do my grilling tonight and then take a trip back to pick them up..
Thread Starter
Super Moderator
Joined: Sep 2010
Posts: 3,609
Likes: 181
From: Houston, Texas
Thread Starter
Super Moderator
Joined: Sep 2010
Posts: 3,609
Likes: 181
From: Houston, Texas
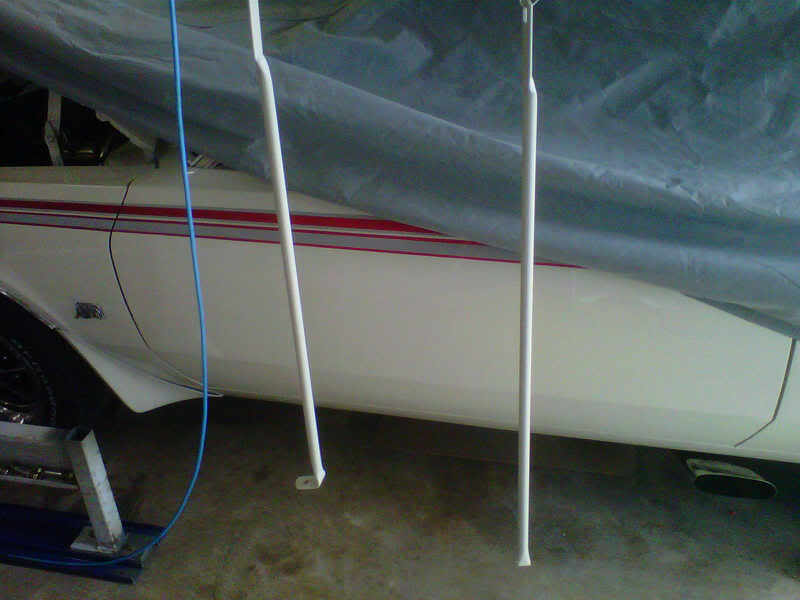
Here's kinda what the valve covers will look like with the white wire separators on them...I am going to wrinkle coat the breather to match the air cleaner...I call it a little old school mixed in with a little new school..

Thread Starter
Super Moderator
Joined: Sep 2010
Posts: 3,609
Likes: 181
From: Houston, Texas
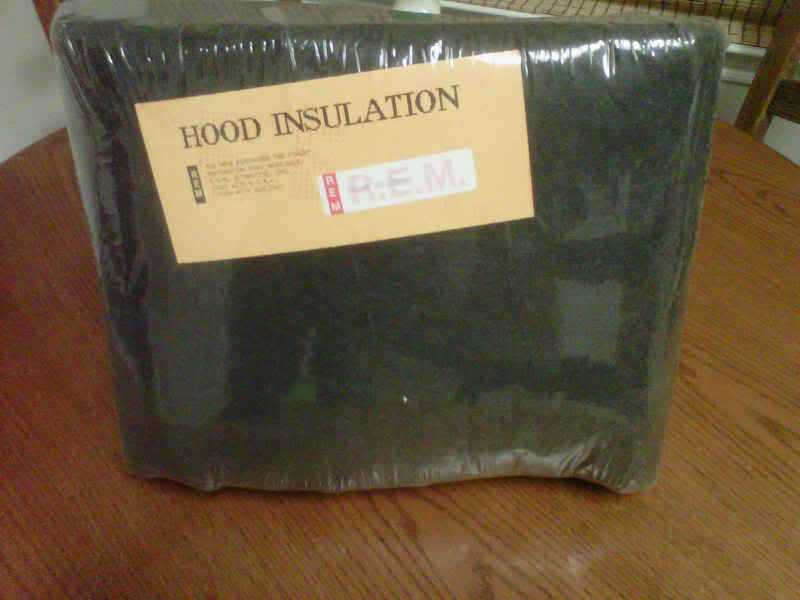
Got wheels and hood insulation
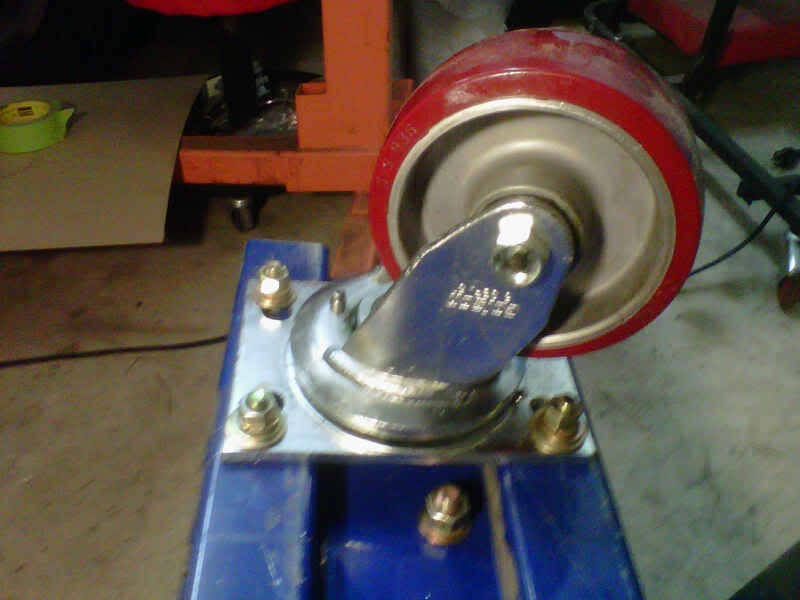
Got my heavy duty casters in the mail today and they are heavy duty....ball bearing swivels and wheels with grease fittings...a breeze to attach....two holes on each one already matched up to holes on the base plate....bolted them down and then drilled four holes and was done....
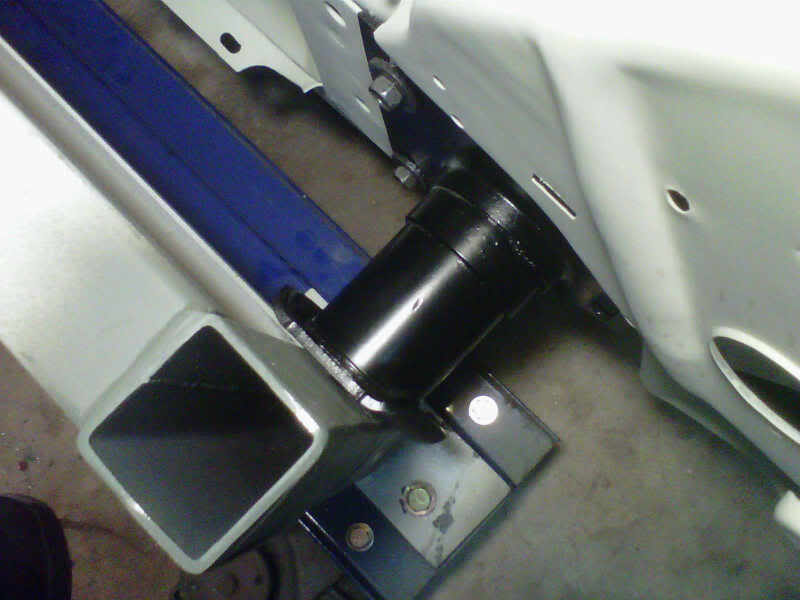
bolted the bumper shocks back on and lined up my roller unit to them..I marked the holes to drill through but will do that tomorrow..I have to cut about 1/4" off each of the hollow tube spacers I got to fit into the square tubing to keep it from crushing when I tighten the bolts..
got me e-bay hood insulation in today..it won't come out of the package for a couple of months...made by REM...
Got my heavy duty casters in the mail today and they are heavy duty....ball bearing swivels and wheels with grease fittings...a breeze to attach....two holes on each one already matched up to holes on the base plate....bolted them down and then drilled four holes and was done....
bolted the bumper shocks back on and lined up my roller unit to them..I marked the holes to drill through but will do that tomorrow..I have to cut about 1/4" off each of the hollow tube spacers I got to fit into the square tubing to keep it from crushing when I tighten the bolts..
got me e-bay hood insulation in today..it won't come out of the package for a couple of months...made by REM...
Thread Starter
Super Moderator
Joined: Sep 2010
Posts: 3,609
Likes: 181
From: Houston, Texas
That's all you can get for these cars...I am told that even from the factory thery were not molded...I have an M body also and it's hood insulation is a flat peice of insulation from the factory...now jump back to 1976 and prior....all day long they had molded and you can get re-popped molded..If I don't like it I pull several molding clips out and remove it...
Thread Starter
Super Moderator
Joined: Sep 2010
Posts: 3,609
Likes: 181
From: Houston, Texas
Drilled the holes and got it lightly mounted on there tonight...used a piece of coat hanger to lower the round spacers down to the holes..then stabbed the bolts through..not much more until this weekend...
Thread Starter
Super Moderator
Joined: Sep 2010
Posts: 3,609
Likes: 181
From: Houston, Texas
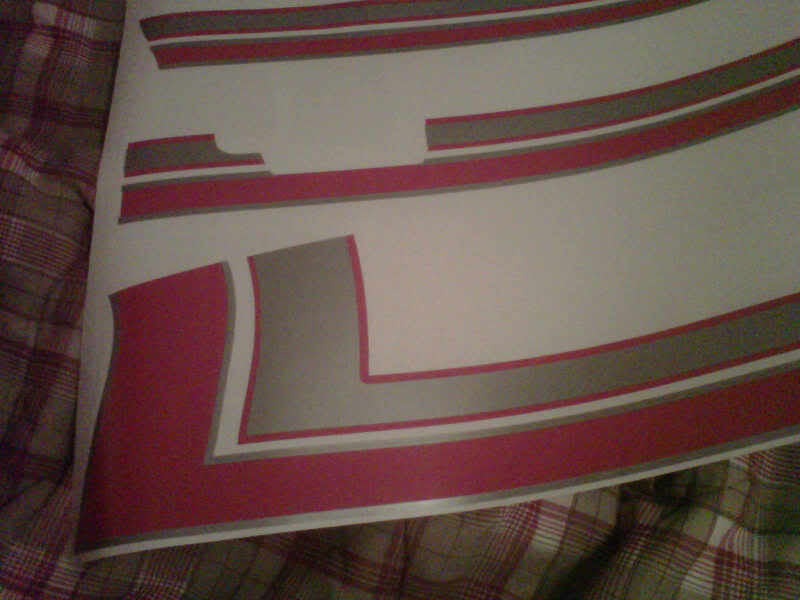
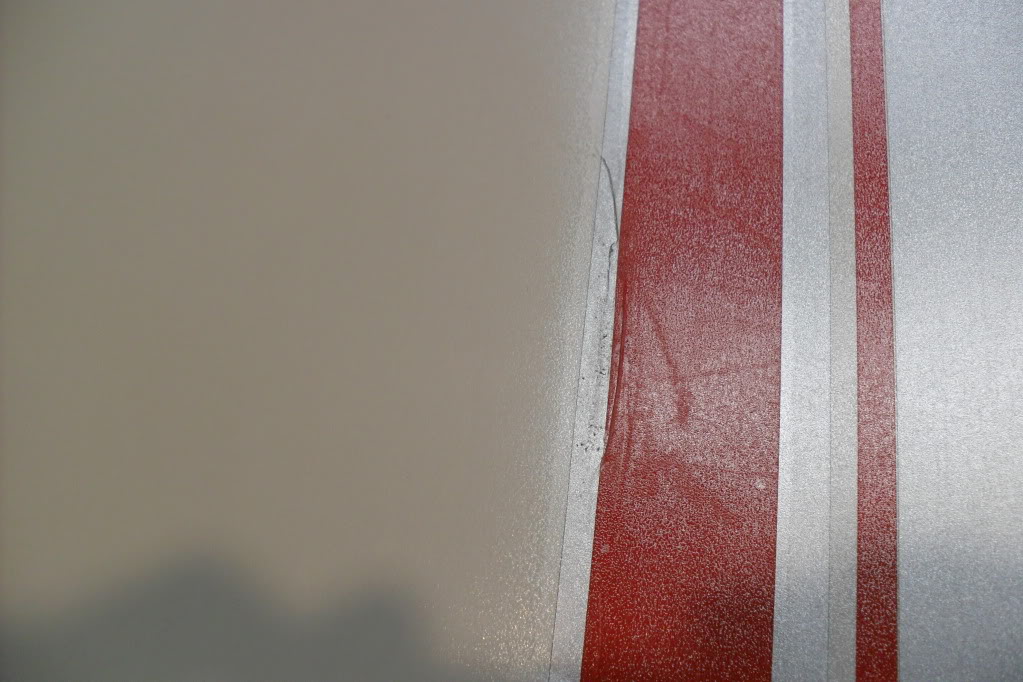
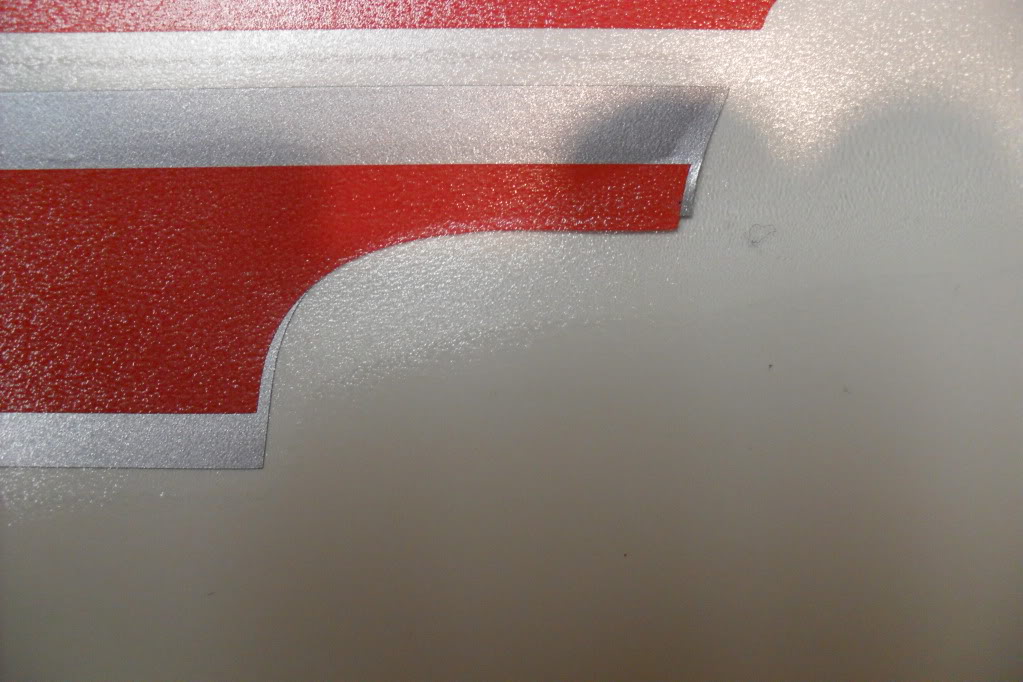
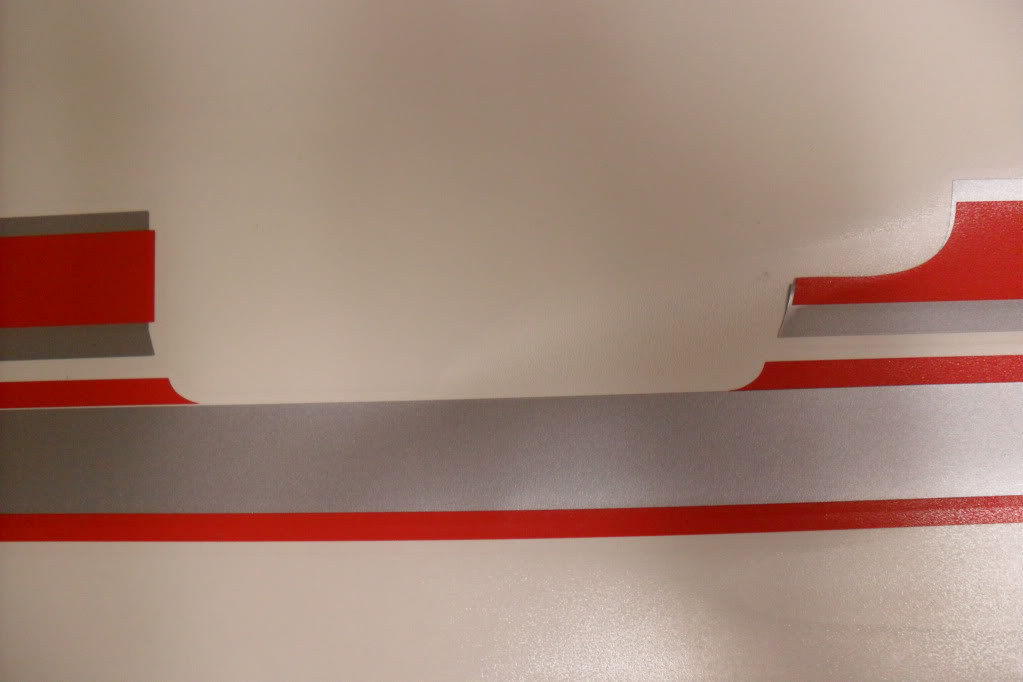
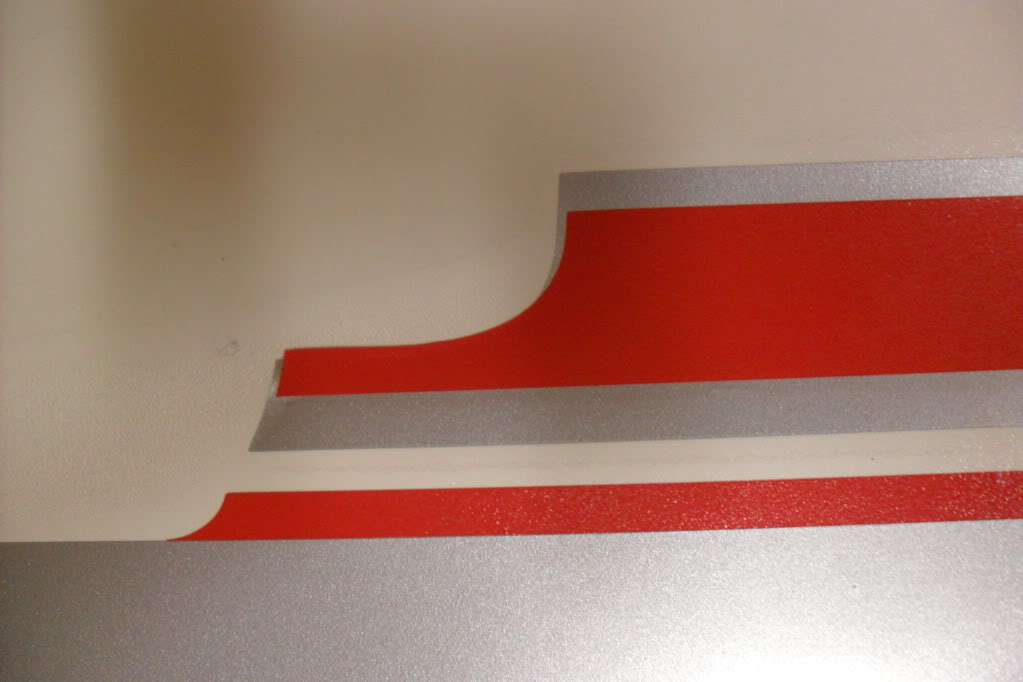
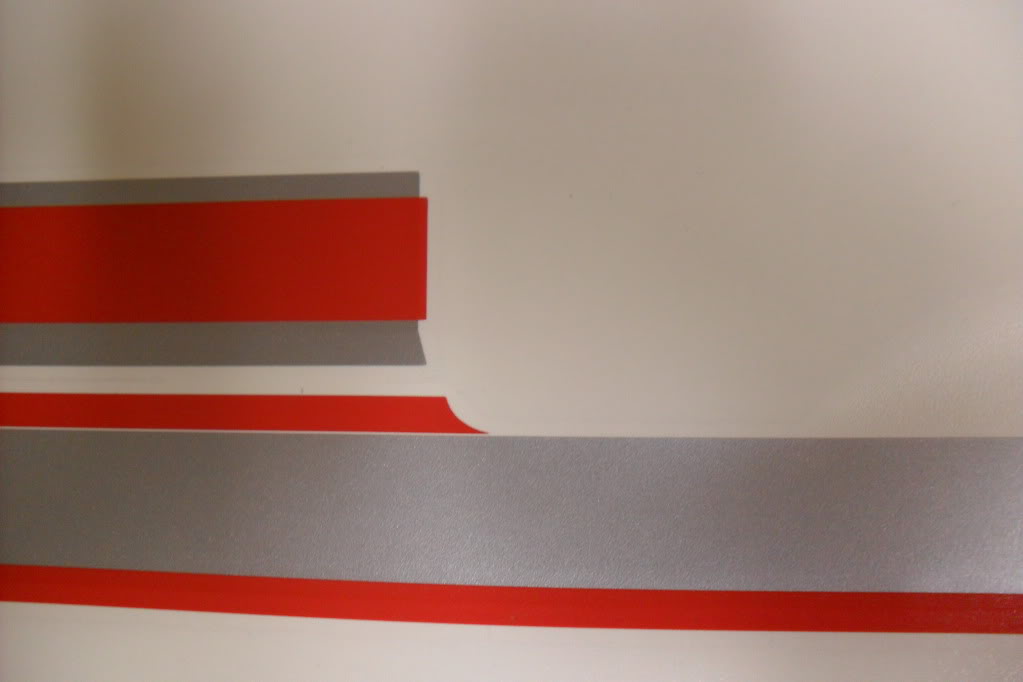
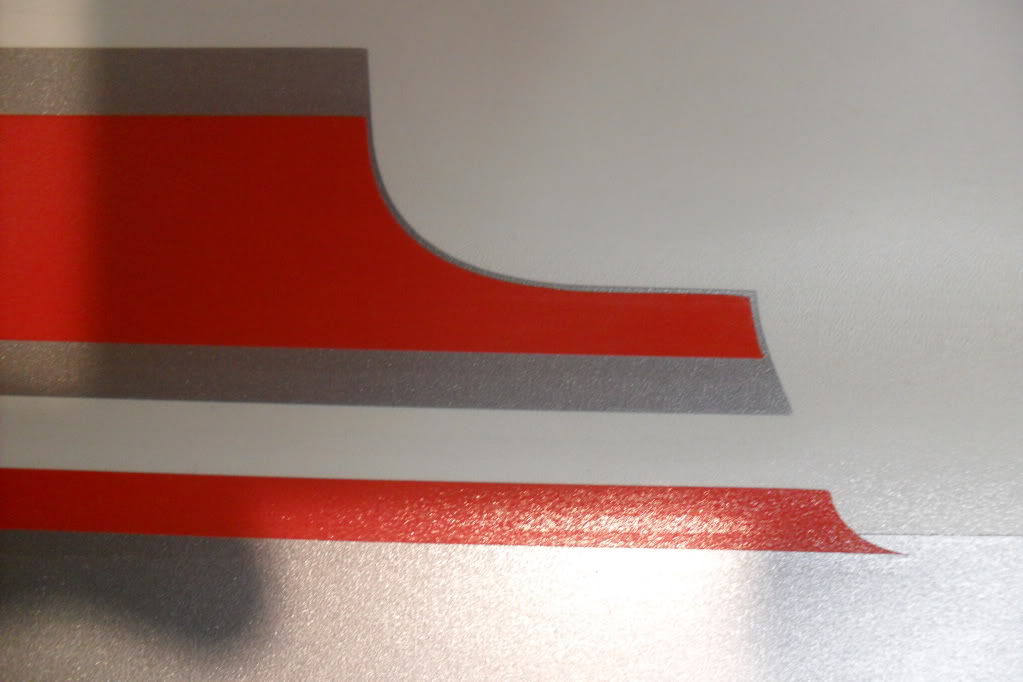
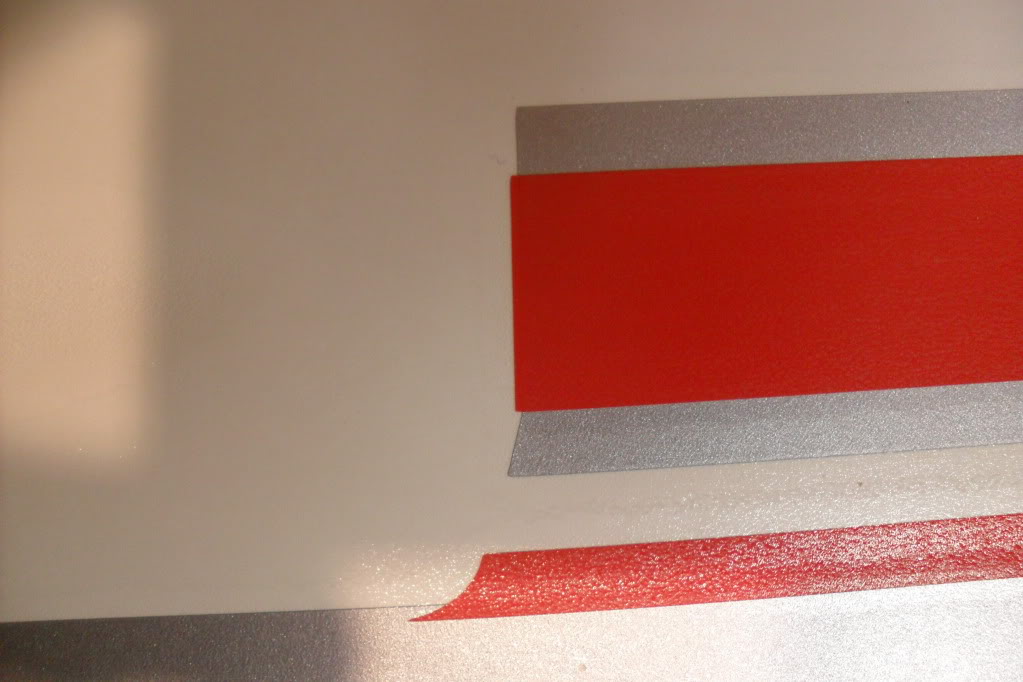
I got the other set of decals last night and am posting some pictures
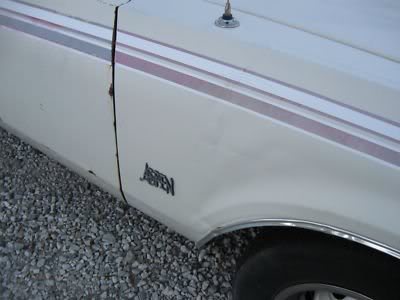
This decal is messed up...it is one of the rear quarter panel ones...
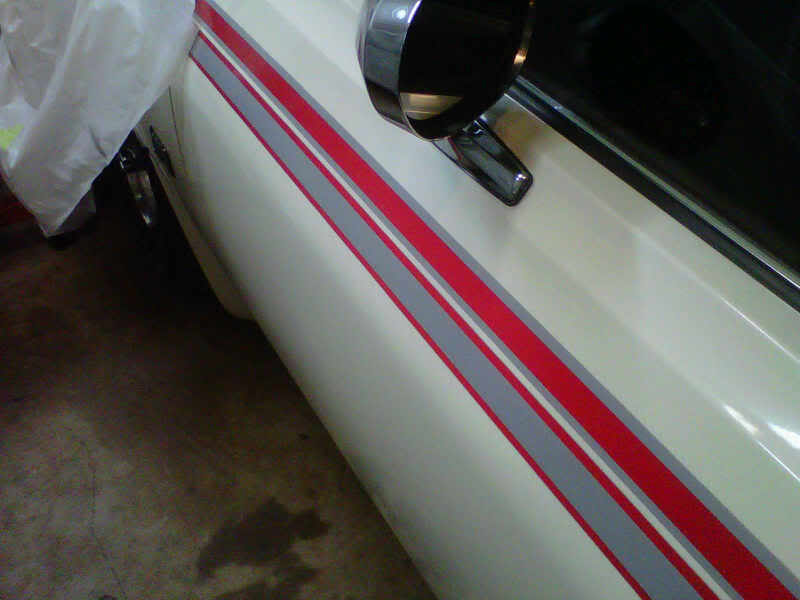
This is what the door ones look like on my car.....
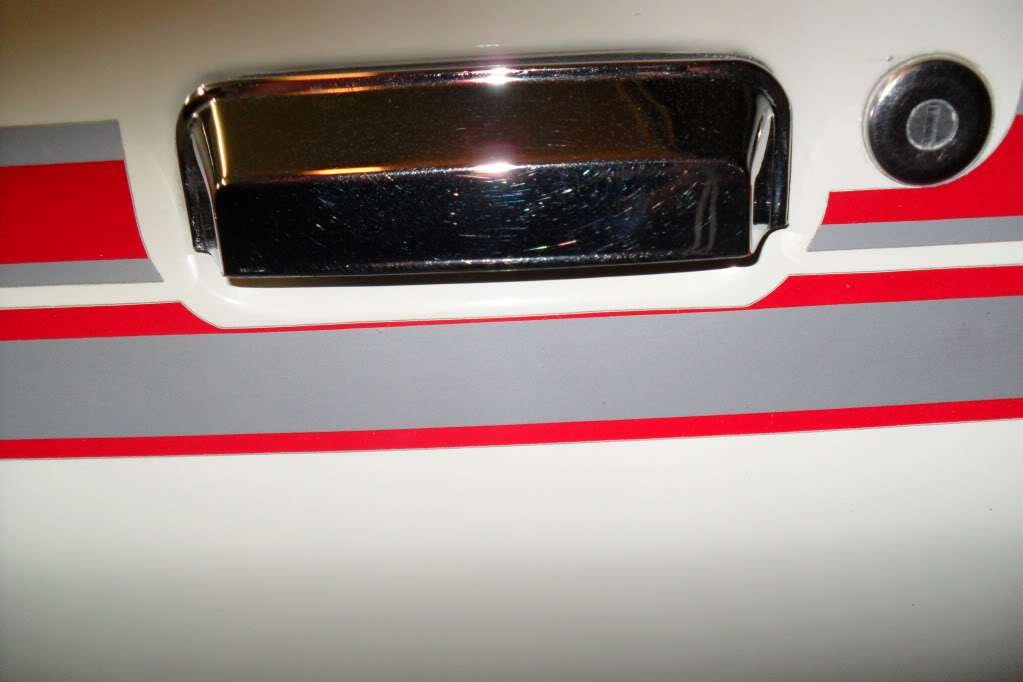
Here's several shots of their's around the door handles...kinda real disappointed...have to send them pictures again and request some new ones..I don't think you would put them on your car..
This is what the door ones look like on my car.....
Here's several shots of their's around the door handles...kinda real disappointed...have to send them pictures again and request some new ones..I don't think you would put them on your car..


