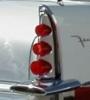
I never would think I would own one of these
 02-21-2011, 09:22 PM
#331
Super Moderator
Thread Starter

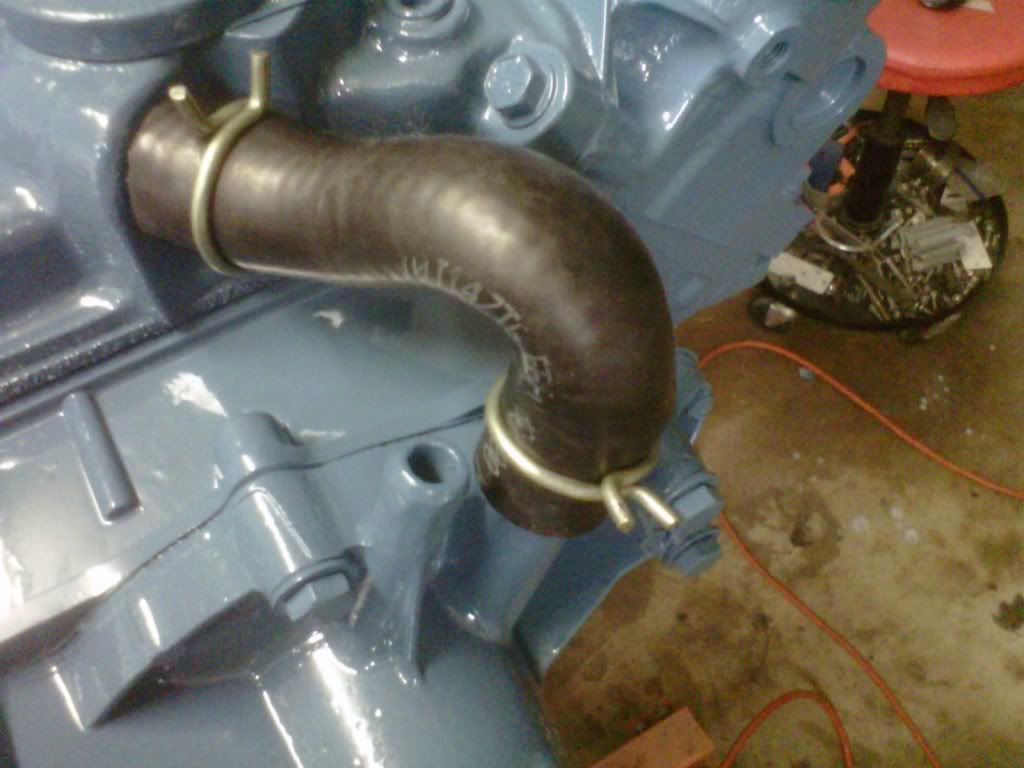
Got to use those special clamp pliers tonight
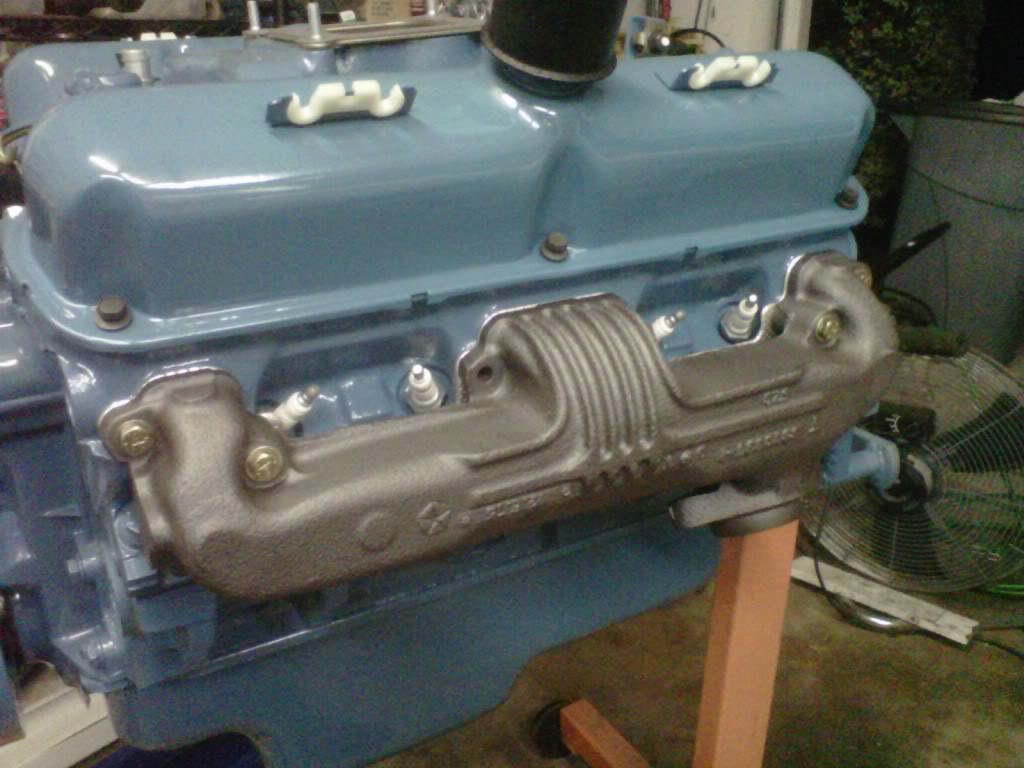
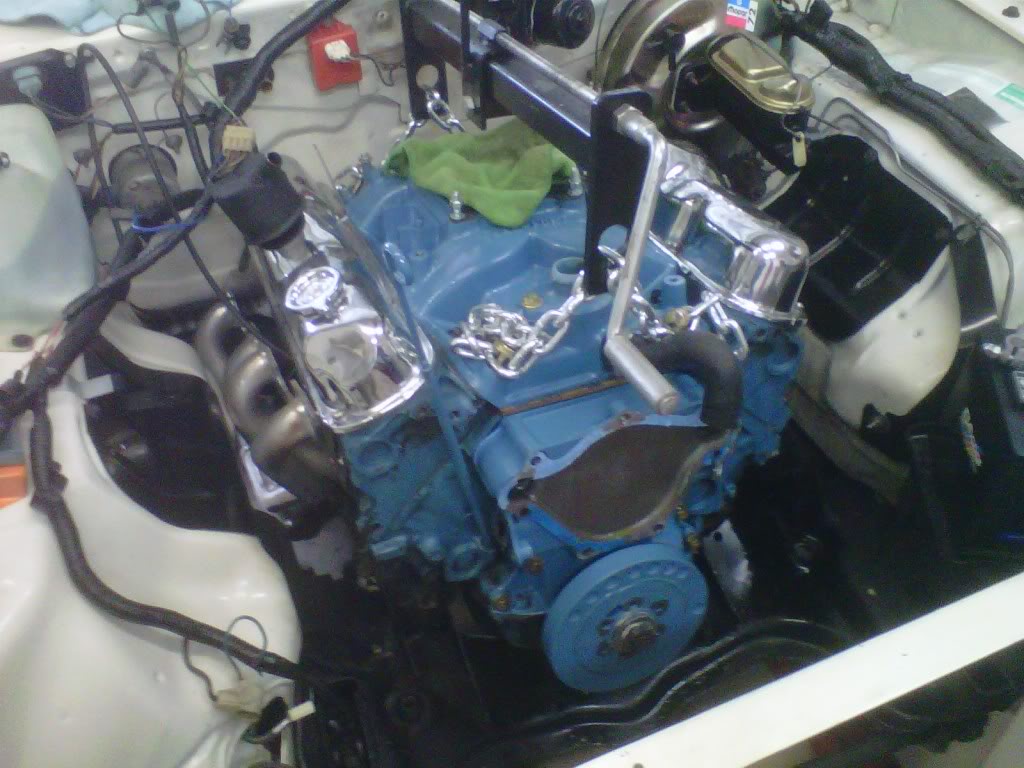
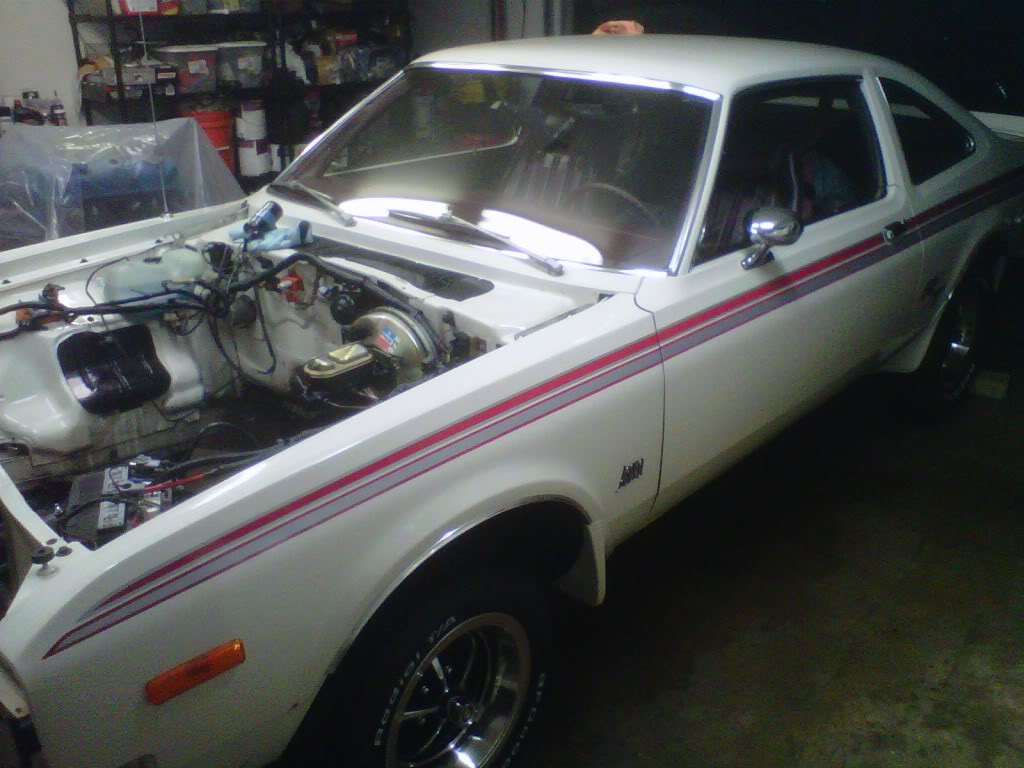
I wanted to get more parts out of my bedroom...so I got one exhaust manifold lightly tightened on to find out what bolts I would need...I am going to paint them with the same high temp...por 15 when I snug them down...
I got to use the new clamp pliers...I found out lubing the hose with some dishwashing soap works wonders when trying to slide the clamp over the hose and into final position..
and last but not least I got the harmonic balancer installed tonight...
 02-22-2011, 02:37 AM
#332
Admin
The motor looks great!
02-22-2011, 12:05 PM
#333
Super Moderator
Thread Starter
FACTORY MANIFOLD GRAY is a high temp gray paint capable of withstanding extreme temperatures up to 1400F. This high temp paint will maintain a durable iron gray color and won't burn off. Can be used on all cars, domestic or foreign, and it meets or exceeds properties and requirements of MIL-C-13370.
 02-22-2011, 12:40 PM
#334
New Member

Join Date: Feb 2011
Posts: 1
Likes: 0
Received 0 Likes
on
0 Posts
1978 Aspen R/T
Beautiful Ride! Would a person be able to purchase aftermarket body parts to make a 1980 Volare look more like the 1977 Aspen R/T?
I really like the look of this car but don't have the to purchase an original.
I really like the look of this car but don't have the
to purchase an original.
Last edited by classicksdreamr; 02-22-2011 at 12:45 PM. Reason: 1977 Aspen not 1978
02-22-2011, 02:40 PM
#335
Super Moderator
Thread Starter
Only new re-popped part is going to be the front spoiler...available at FPAP..First Place Auto Products...Decals at Pheonix Graphics are also available...other than that it is going to be used or NOS parts...just use google as your search engine and type in what your looking for...Eric
 02-22-2011, 08:39 PM
#337
Super Moderator
Thread Starter
02-22-2011, 08:41 PM
#338
Super Moderator
Thread Starter
Made a choice
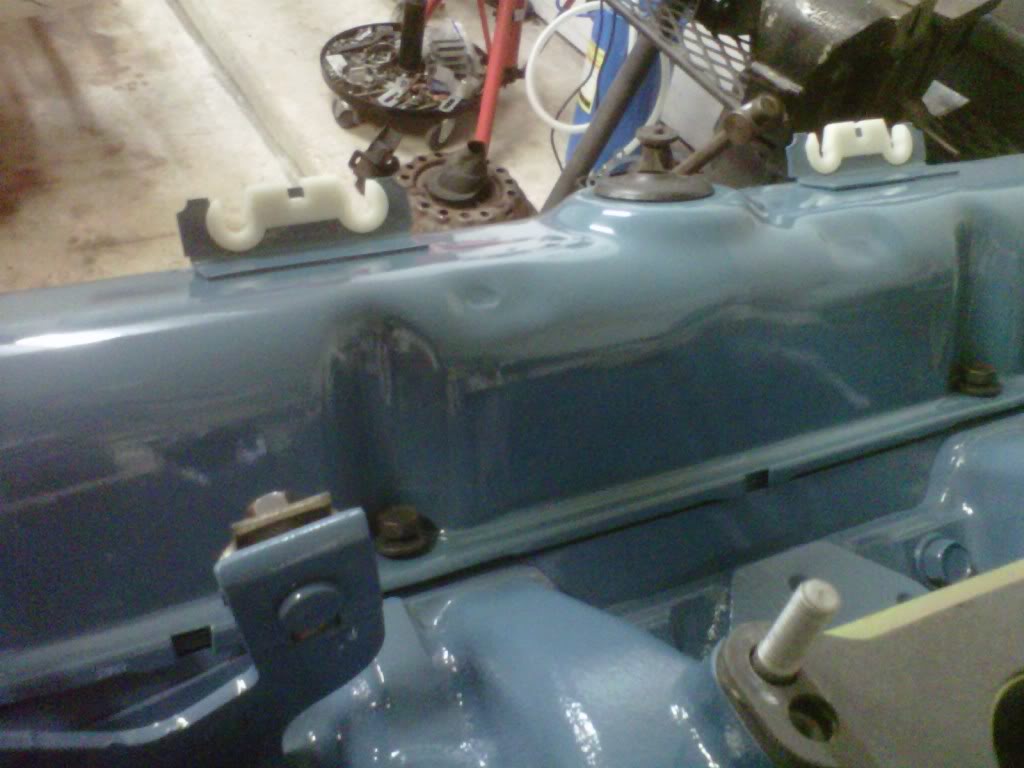
Got those wiring clamps off the valve cover
Got these wiring clamps off of the one valve cover...a couple good twists with a needle nose pliers and they twisted off right at the spot weld...hit the spot weld with my die grinder and just have to strip the paint off and repaint..tomorrow night I will start draining fluids and prepare for engine and tranny pull this weekend...
Got these wiring clamps off of the one valve cover...a couple good twists with a needle nose pliers and they twisted off right at the spot weld...hit the spot weld with my die grinder and just have to strip the paint off and repaint..tomorrow night I will start draining fluids and prepare for engine and tranny pull this weekend...
02-23-2011, 10:07 PM
#339
Super Moderator
Thread Starter
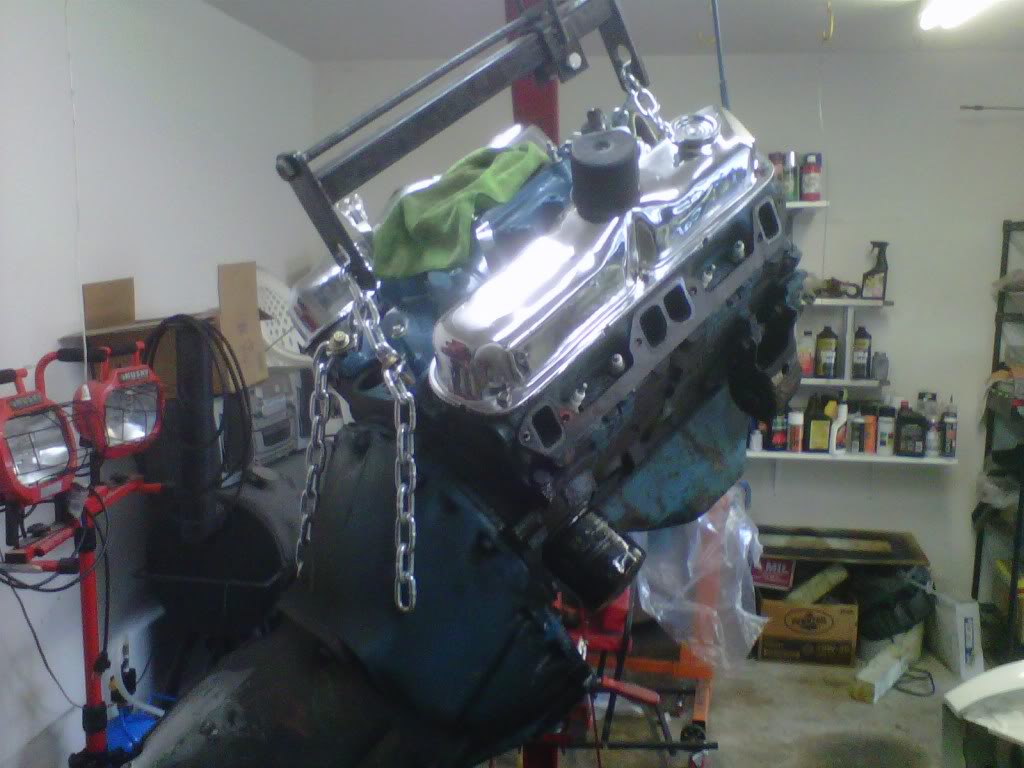
Started pulling stuff off the top tonight
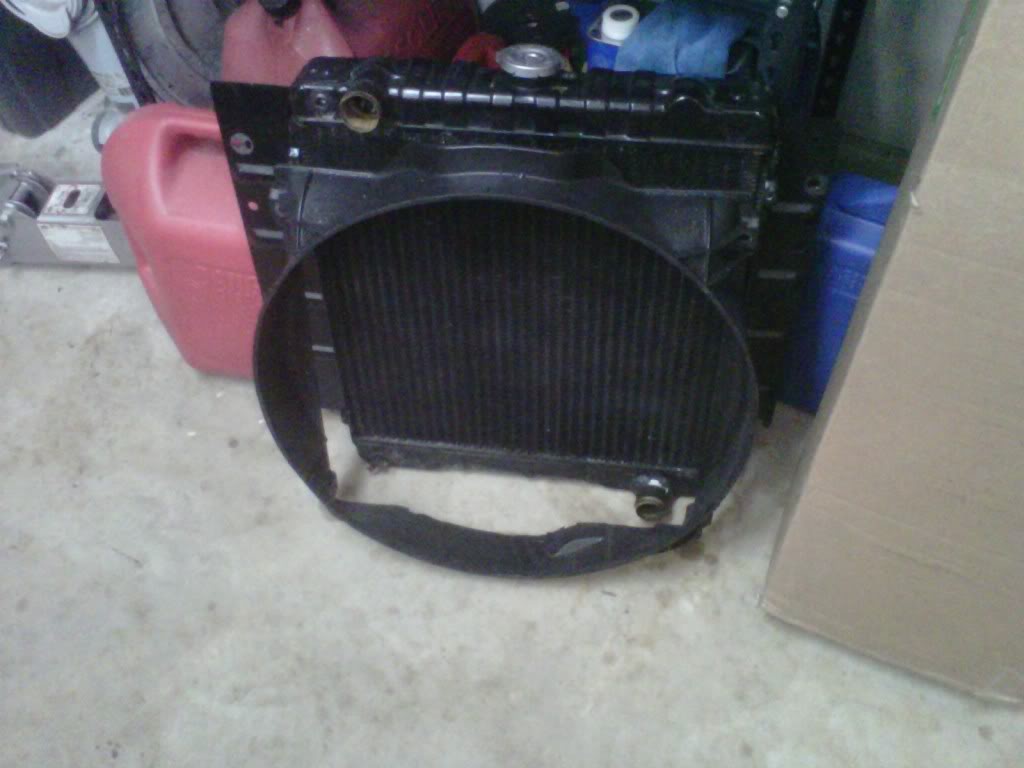
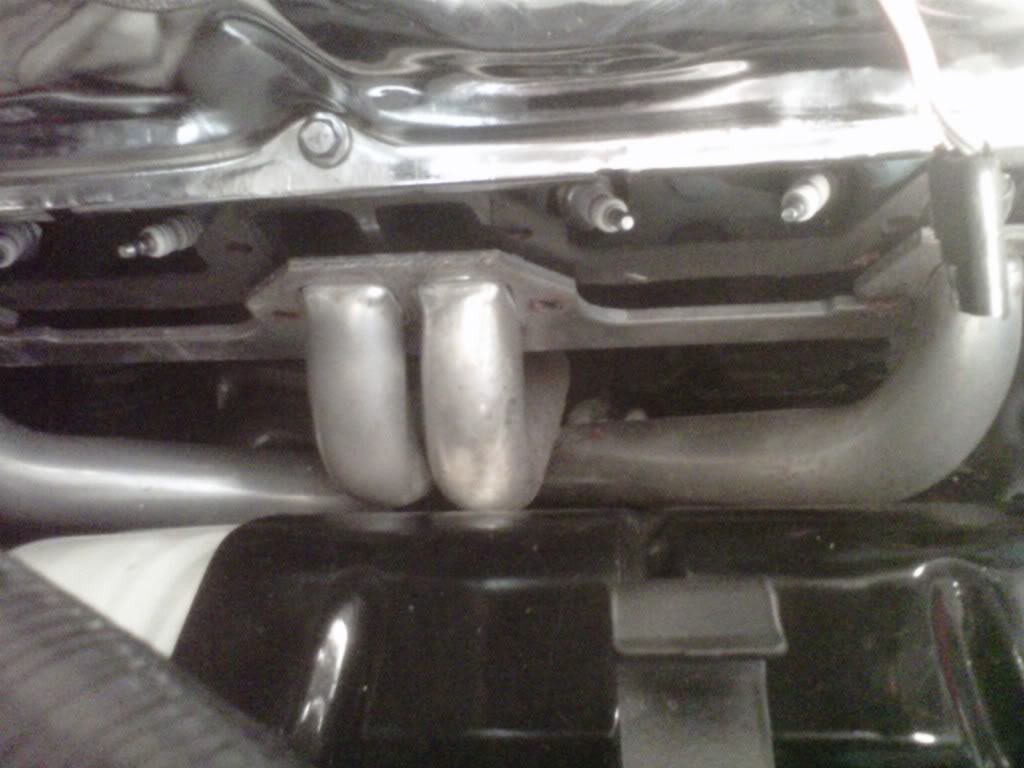
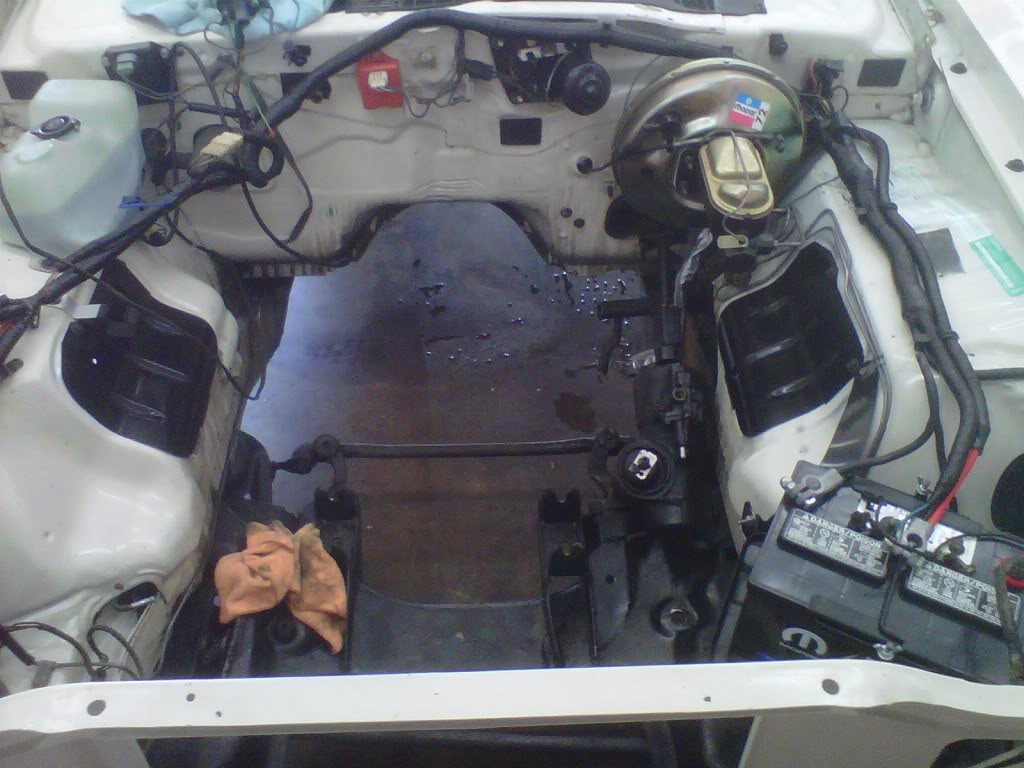
Got the radiator drained and out tonight and alot of other stuff off the top of the engine tonight I also got all of the right bolts for the exhaust manifolds..I may finish the top tomorrow night and get after all the stuff on the bottom in preparation to remove the motor and tranny..believe me I am really glad to get to this point finally...
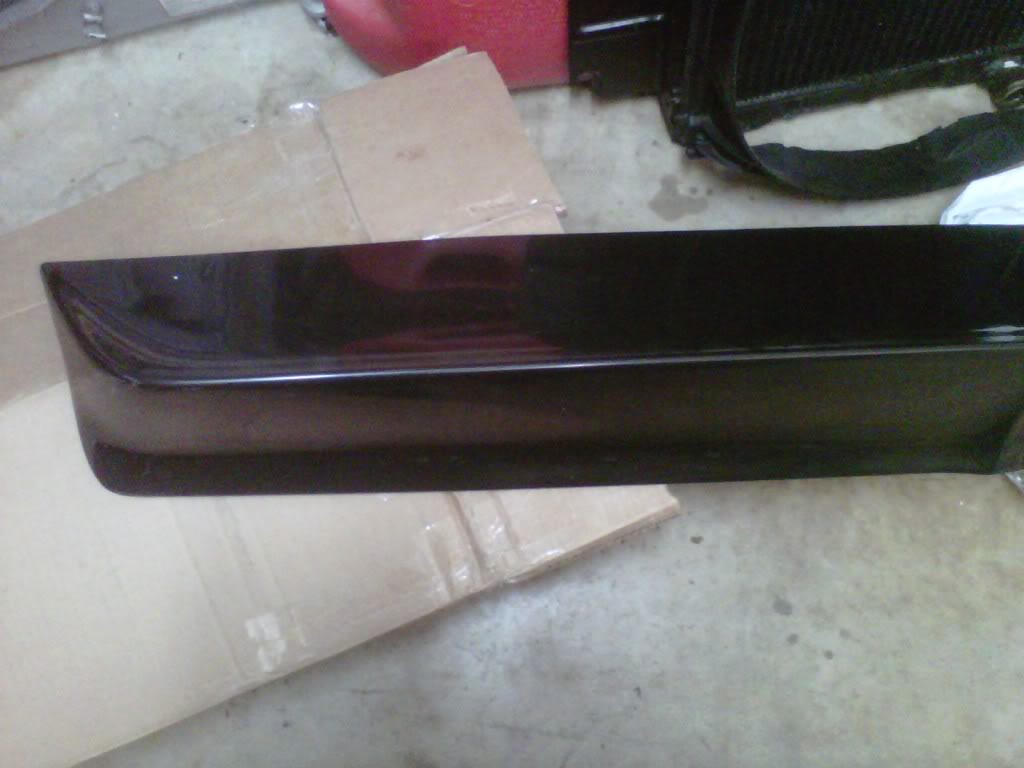
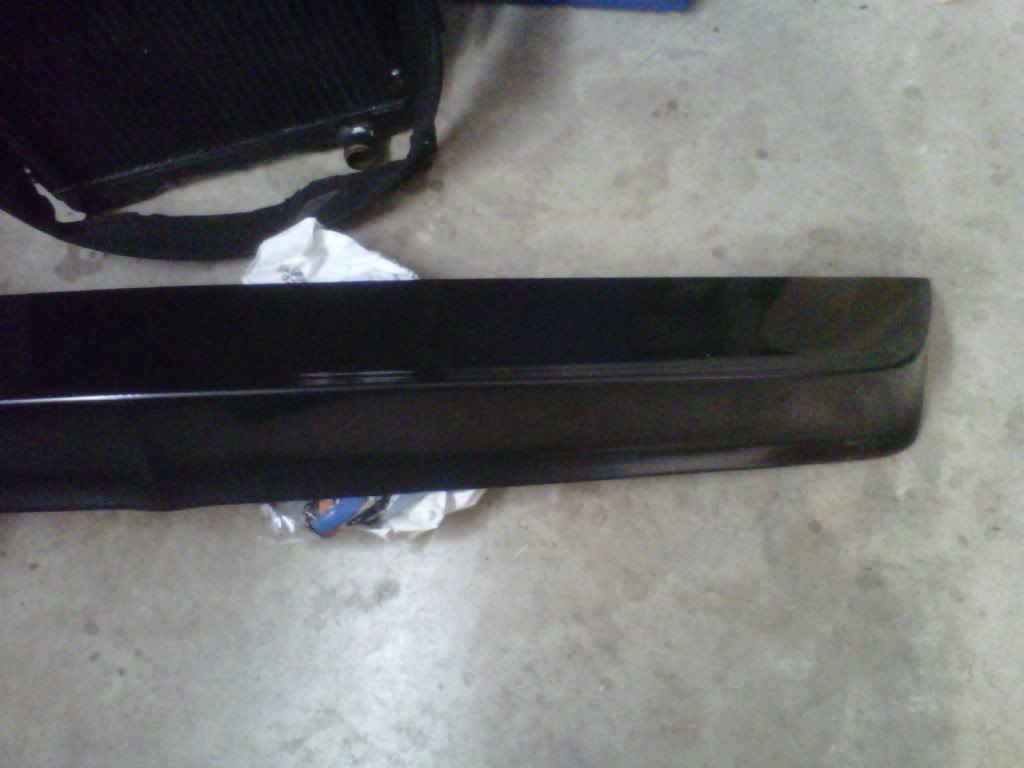
I also got my NOS rear spoiler from Marty at Arizonia Parts....
Got the radiator drained and out tonight and alot of other stuff off the top of the engine tonight I also got all of the right bolts for the exhaust manifolds..I may finish the top tomorrow night and get after all the stuff on the bottom in preparation to remove the motor and tranny..believe me I am really glad to get to this point finally...
I also got my NOS rear spoiler from Marty at Arizonia Parts....
02-24-2011, 09:42 PM
#340
Super Moderator
Thread Starter
Okay I moved two more boxes out of my bedroom
This is what I mean...I have a front bumper..a front and rear spoiler and my grill in my dining room...I have two stacks of boxes with parts in them in my bedroom..
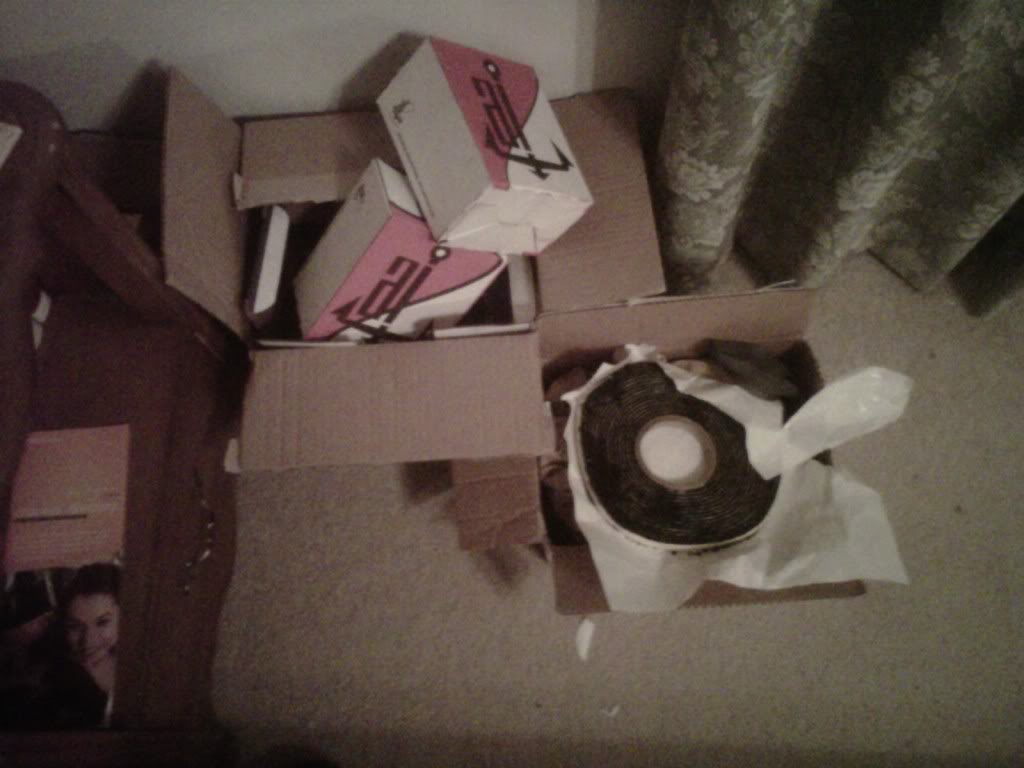
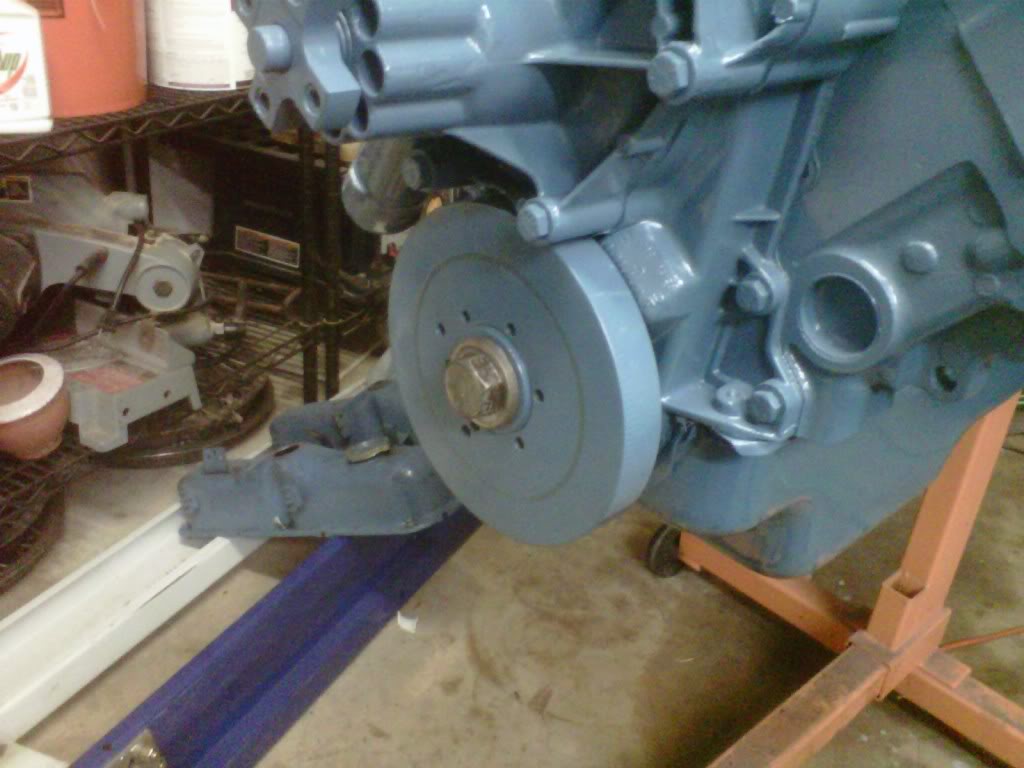
I got two more of them out of the bedroom so that is a move forward..well I got the new motor mounts lightly installed 8 7/16" x 2" bolts with washers on both sides and a lock washer and nut...the factory only used 3 bolts on each side whereas there are four holes?

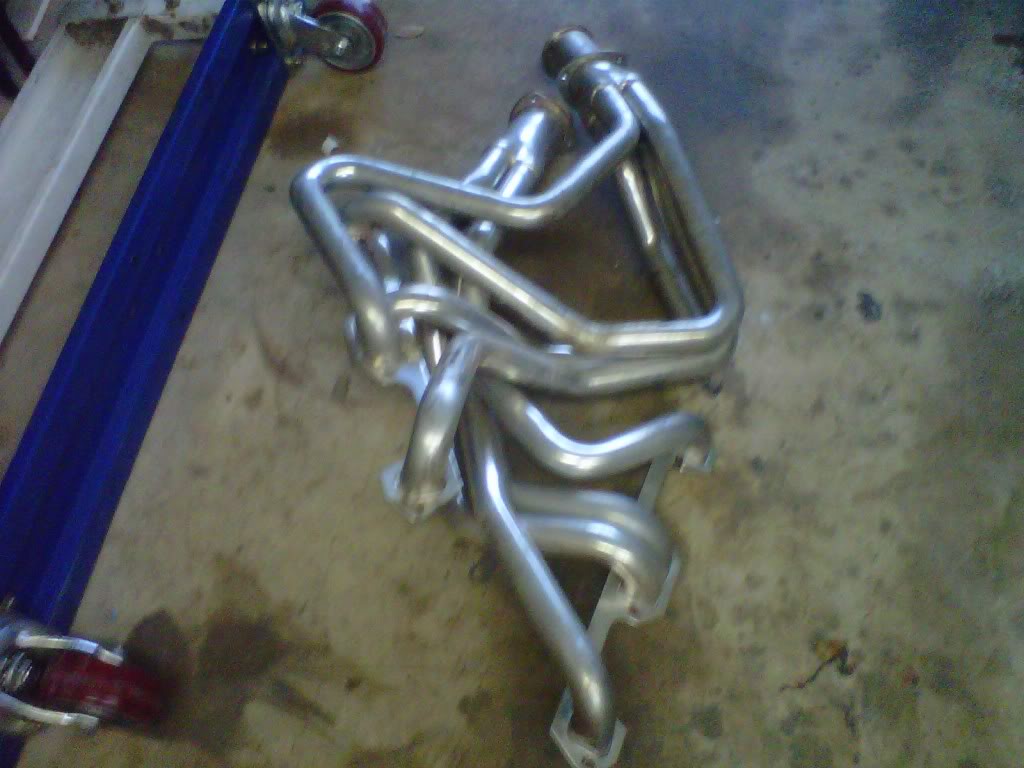
I got all of the stuff off I wanted to on the top including getting the header bolts off..tomorrow up on four jackstand for some fun underneath..
Remember I am using an engine leveler to remove the engine and tranny as one unit so the more off up front the better...
This is what I mean...I have a front bumper..a front and rear spoiler and my grill in my dining room...I have two stacks of boxes with parts in them in my bedroom..
I got two more of them out of the bedroom so that is a move forward..well I got the new motor mounts lightly installed 8 7/16" x 2" bolts with washers on both sides and a lock washer and nut...the factory only used 3 bolts on each side whereas there are four holes?
I got all of the stuff off I wanted to on the top including getting the header bolts off..tomorrow up on four jackstand for some fun underneath..
Remember I am using an engine leveler to remove the engine and tranny as one unit so the more off up front the better...
02-25-2011, 02:59 PM
#342
Super Moderator
Thread Starter
02-25-2011, 07:29 PM
#343
New Member
Join Date: Mar 2010
Location: South Dakota
Posts: 1
Likes: 0
Received 0 Likes
on
0 Posts
I've read all the company info on the POR 15 manifold paint. I have yet to see any exhaust manifold paint that really holds up. I have used the standard POR 15 which is extremely durable. It will be interesting to see how it does.
02-25-2011, 09:21 PM
#344
Super Moderator
Thread Starter
 02-25-2011, 09:21 PM
#345
Super Moderator
Thread Starter
A package showed up this morning but I wasn't ready to open it..
Third time is the charm....Thanks to Justin at Pheonix Graphix they are 100% better now
Third time is the charm....Thanks to Justin at Pheonix Graphix they are 100% better now
 02-25-2011, 10:47 PM
#347
Super Moderator
Thread Starter
Under the car tonight...
I first worked on the shifter removal...I labeled the linkages Left, Right and Center before removing them...I took lots of pictures underneath so that I could come back to them and not be a big dummy when putting it back together...

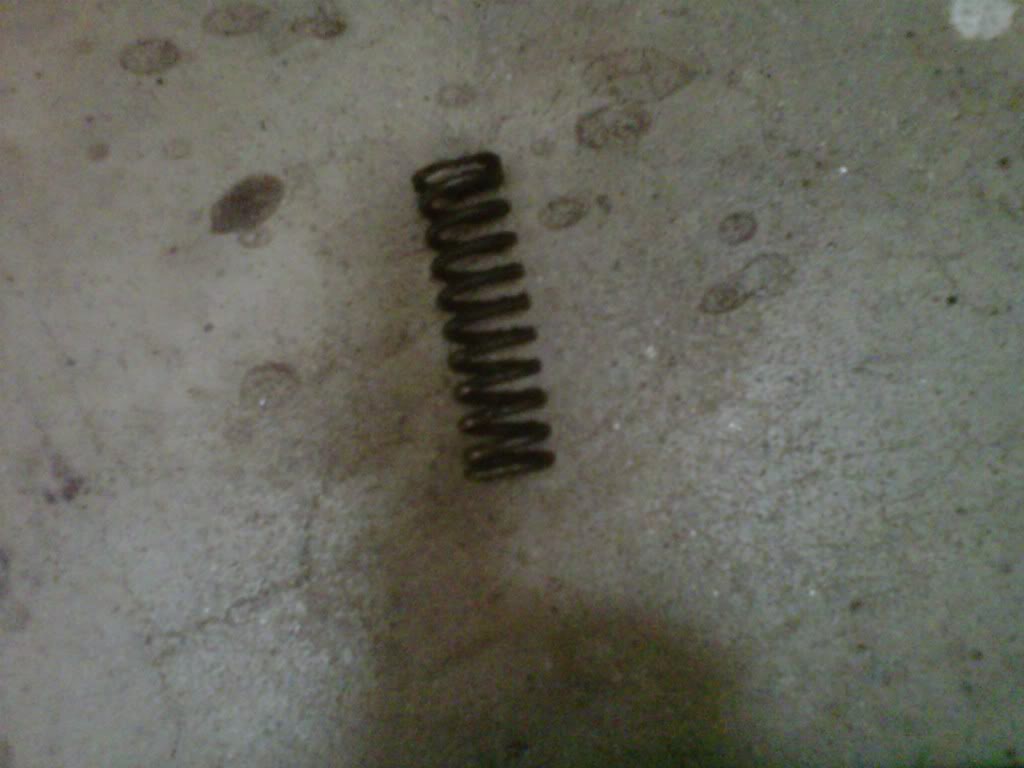
I got the shifter out and before I took it out I noticed a spring laying inside of it...for the life of me I don't have a clue where it might go?
Drive shaft is out and so is the shifter...drive shaft will go to Houston Drivetrain for new u-joints..
Speedo cable and back up light wiring is disconnected..
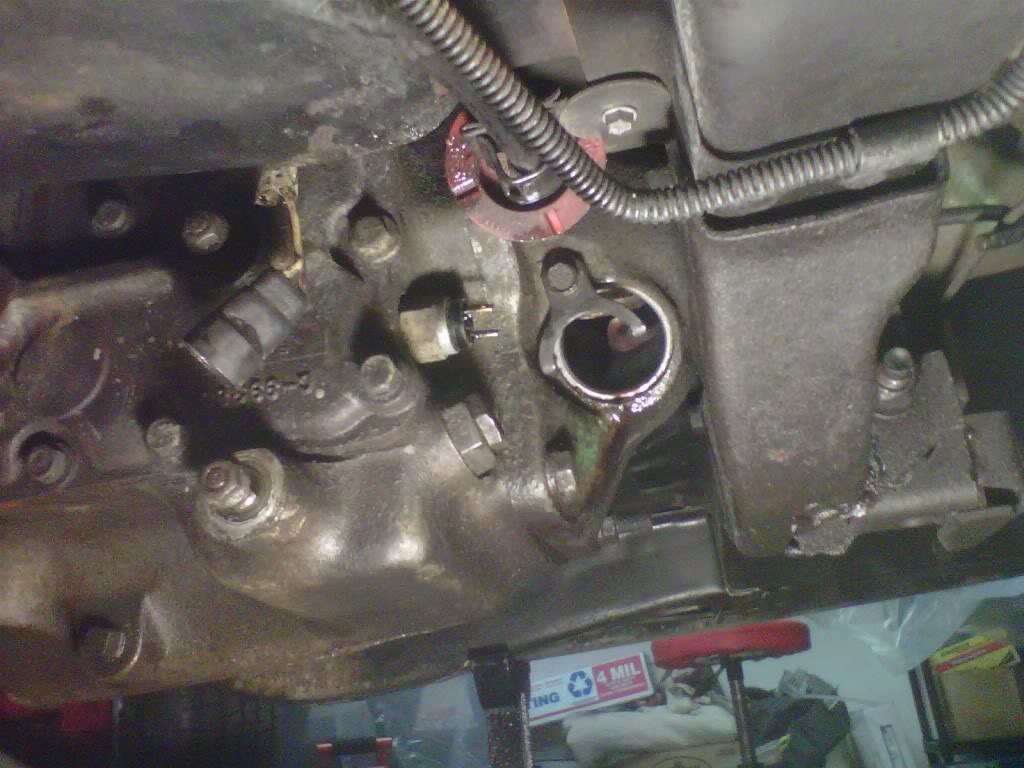
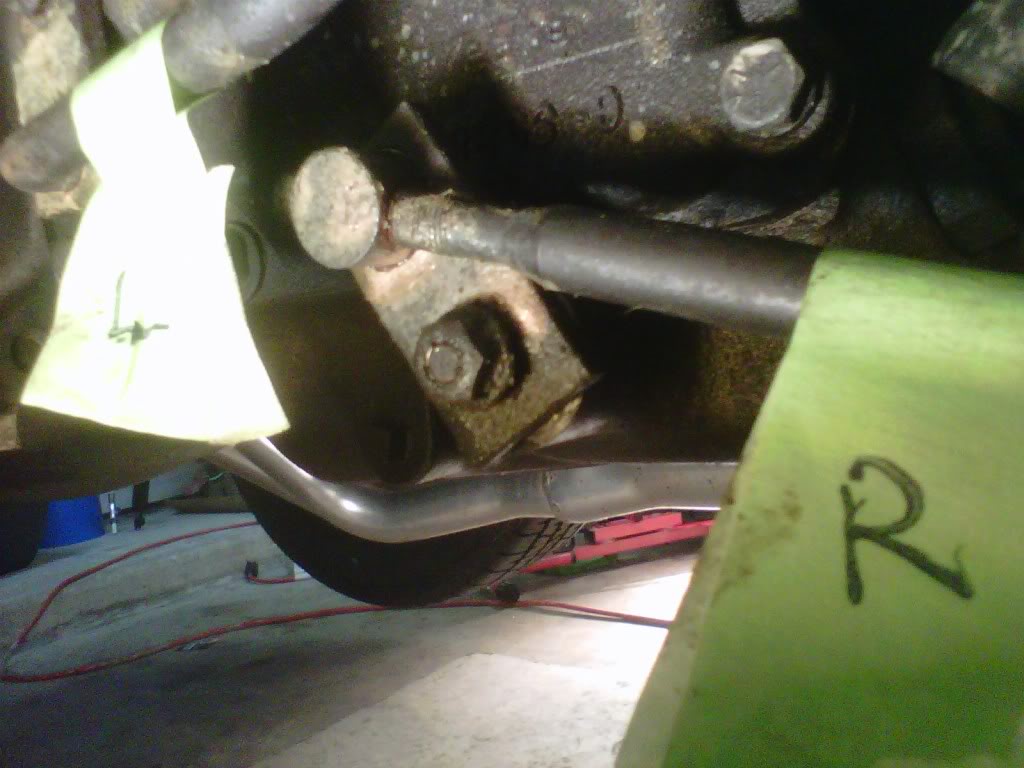
Starter is out of there and the z-bar is disconnected...I was very lucky...where the clutch fork rod connects to the z-bar the retaining clip was gone
I first worked on the shifter removal...I labeled the linkages Left, Right and Center before removing them...I took lots of pictures underneath so that I could come back to them and not be a big dummy when putting it back together...
I got the shifter out and before I took it out I noticed a spring laying inside of it...for the life of me I don't have a clue where it might go?
Drive shaft is out and so is the shifter...drive shaft will go to Houston Drivetrain for new u-joints..
Speedo cable and back up light wiring is disconnected..
Starter is out of there and the z-bar is disconnected...I was very lucky...where the clutch fork rod connects to the z-bar the retaining clip was gone
02-26-2011, 08:55 PM
#348
Super Moderator
Thread Starter
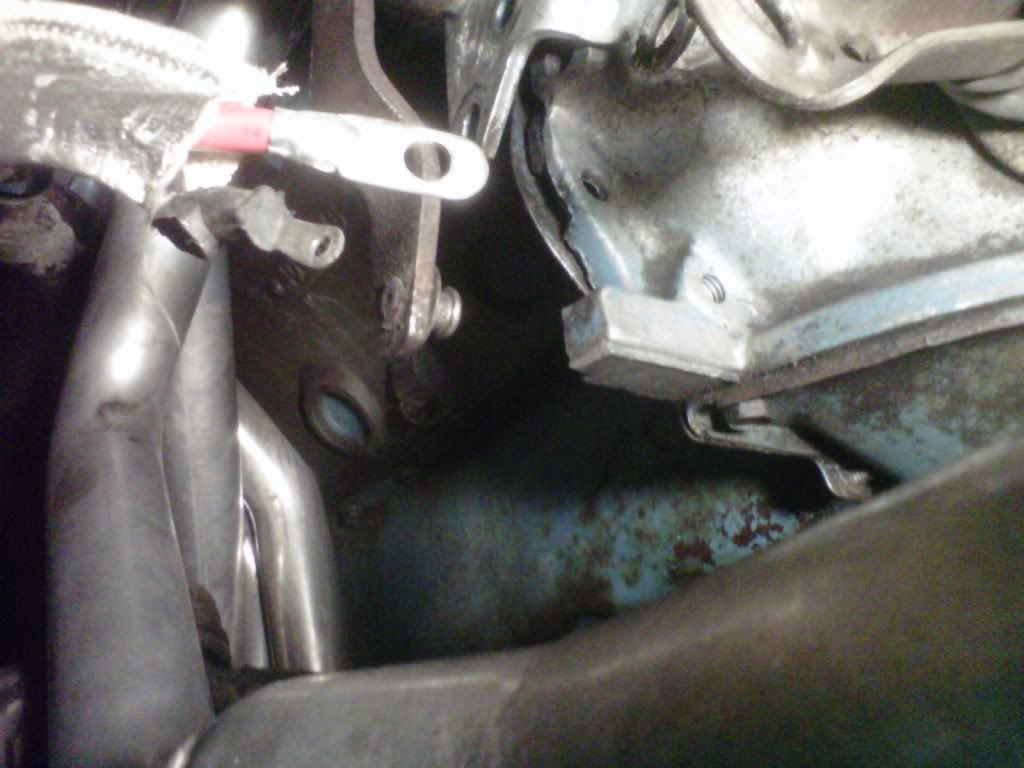
A long but sucessful day...
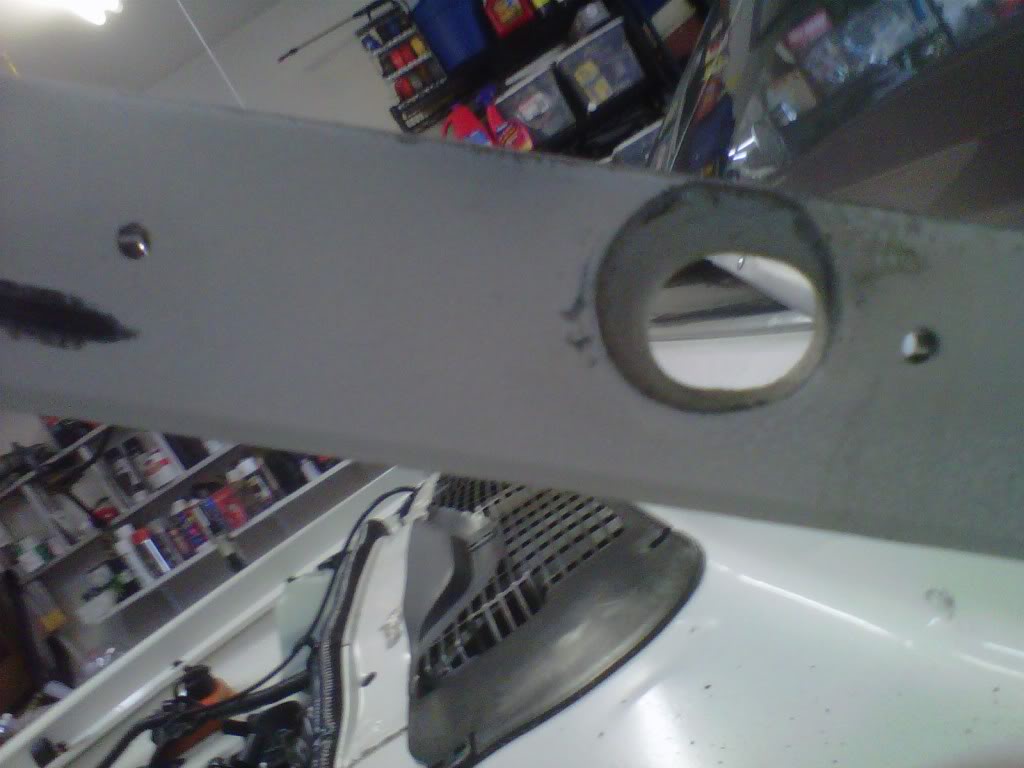
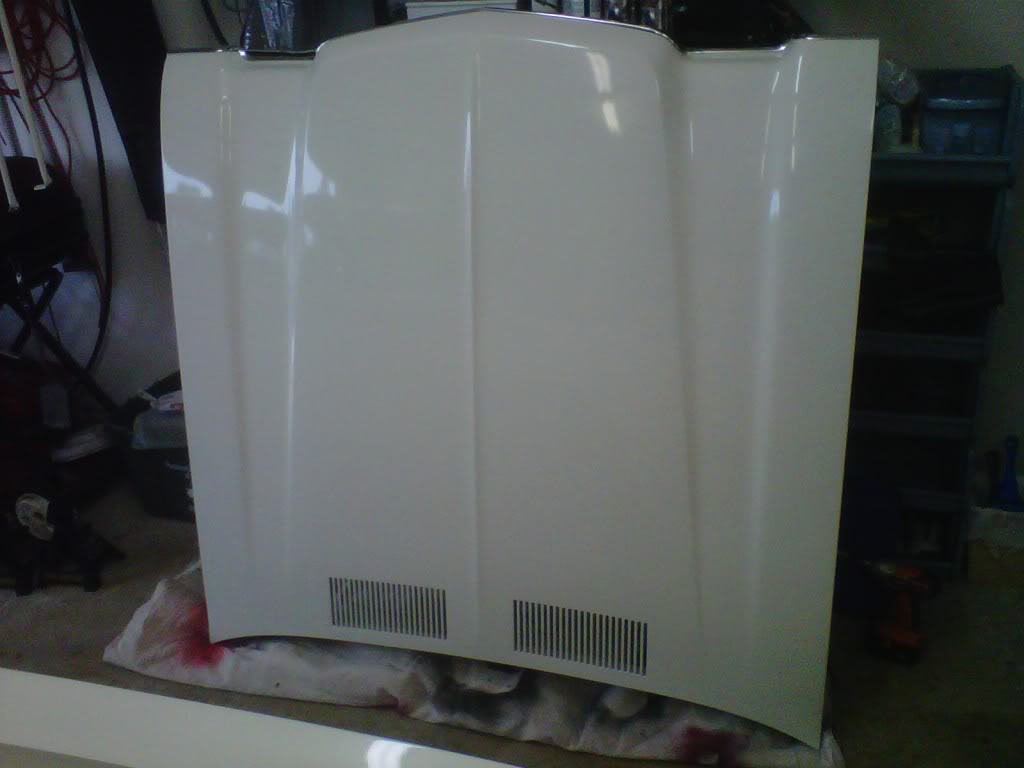
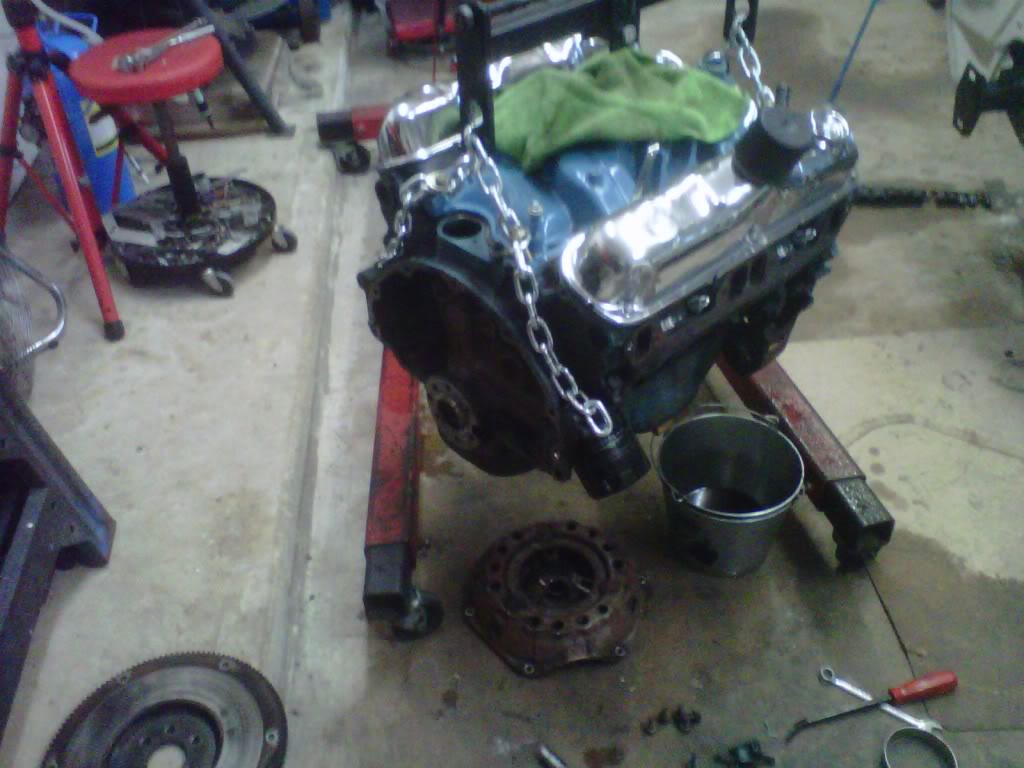
Two Polish neighbors came over and helped me remove the hood...prior to that I took the wife out to breakfast and then went to my storage to drop off the exhaust...the driveshaft and pick up an engine stand..

prior to taking the hood off I drilled two 1/8" alignment holes in each of the hinges...
I got tranny mount and crossmember off after hooking up the leveler...prior to that I went the the Depot and picked up some new 5/16" chain...this time I bolted it to 4 intake manifold bolts...when it goes back in I will use longer head bolts at the inside four corners of he the heads instead...don't want to mess up the paint...
I jacked up the rear pretty high in the air...this gives you a bigger area around the tranny tunnel...

Almost out of there...scary?....

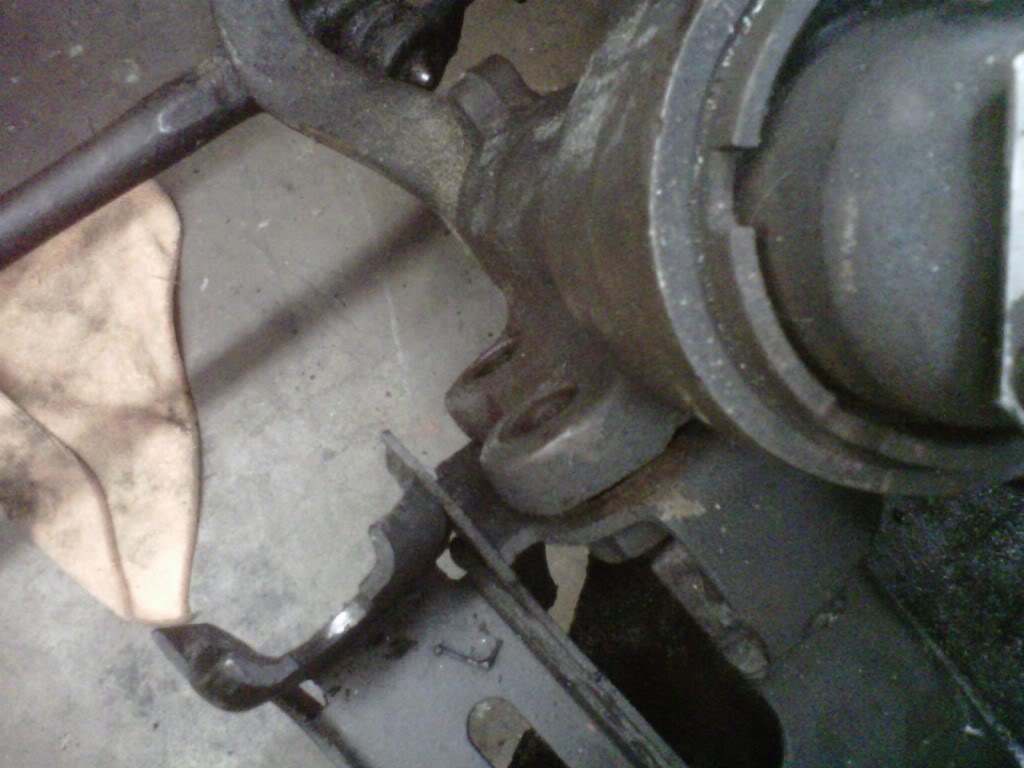
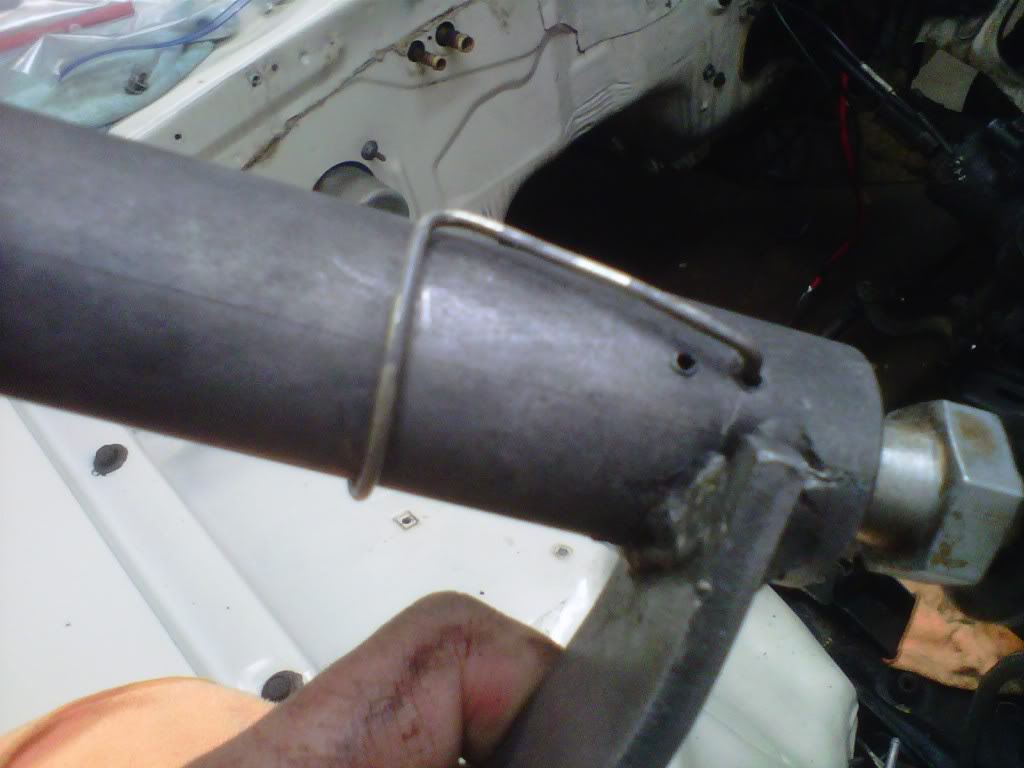
It's outta there...finally...the hardest part was dealing with those headers...OMG...I had to pickle fork the outside tie rod and the pitman arm to release the center link...
I busted the tranny and everything off the back in about 10 minutes...
Two Polish neighbors came over and helped me remove the hood...prior to that I took the wife out to breakfast and then went to my storage to drop off the exhaust...the driveshaft and pick up an engine stand..
prior to taking the hood off I drilled two 1/8" alignment holes in each of the hinges...
I got tranny mount and crossmember off after hooking up the leveler...prior to that I went the the Depot and picked up some new 5/16" chain...this time I bolted it to 4 intake manifold bolts...when it goes back in I will use longer head bolts at the inside four corners of he the heads instead...don't want to mess up the paint...
I jacked up the rear pretty high in the air...this gives you a bigger area around the tranny tunnel...
Almost out of there...scary?....
It's outta there...finally...the hardest part was dealing with those headers...OMG...I had to pickle fork the outside tie rod and the pitman arm to release the center link...
I busted the tranny and everything off the back in about 10 minutes...
Last edited by bremereric; 02-26-2011 at 08:57 PM.
02-26-2011, 09:11 PM
#349
Super Moderator
Thread Starter
A long Day continued
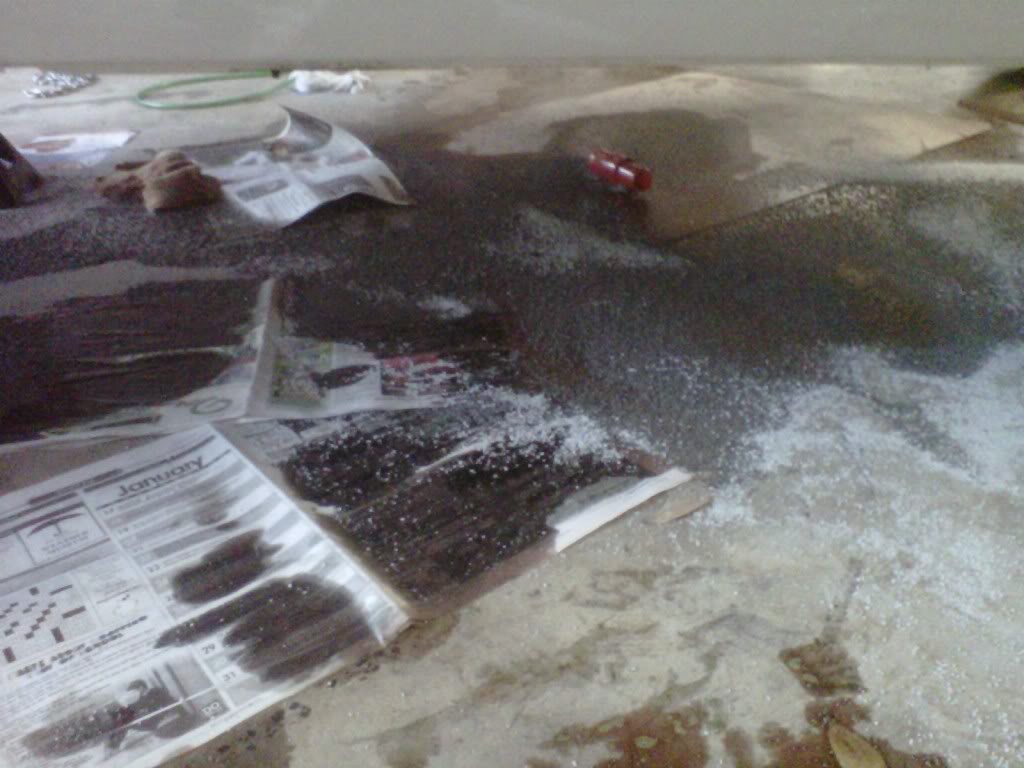
I made a mess of trany fuild and anti-freeze....kitty litter first to soak it up...I swept that up and then hot soapy water and a scrub down...
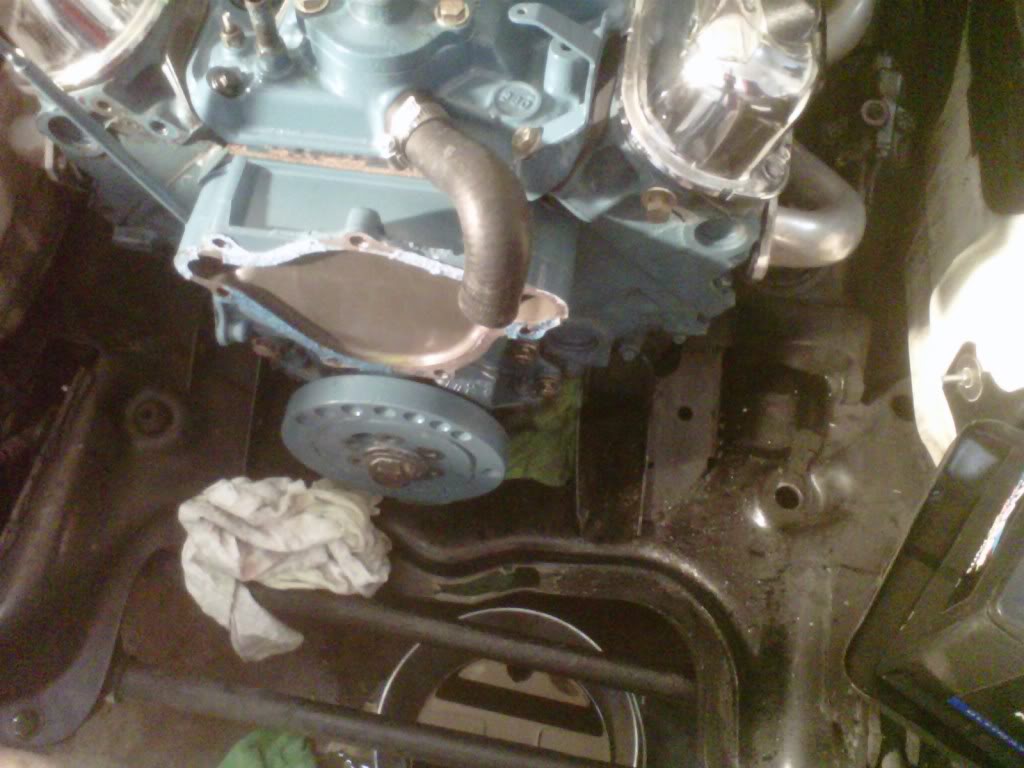
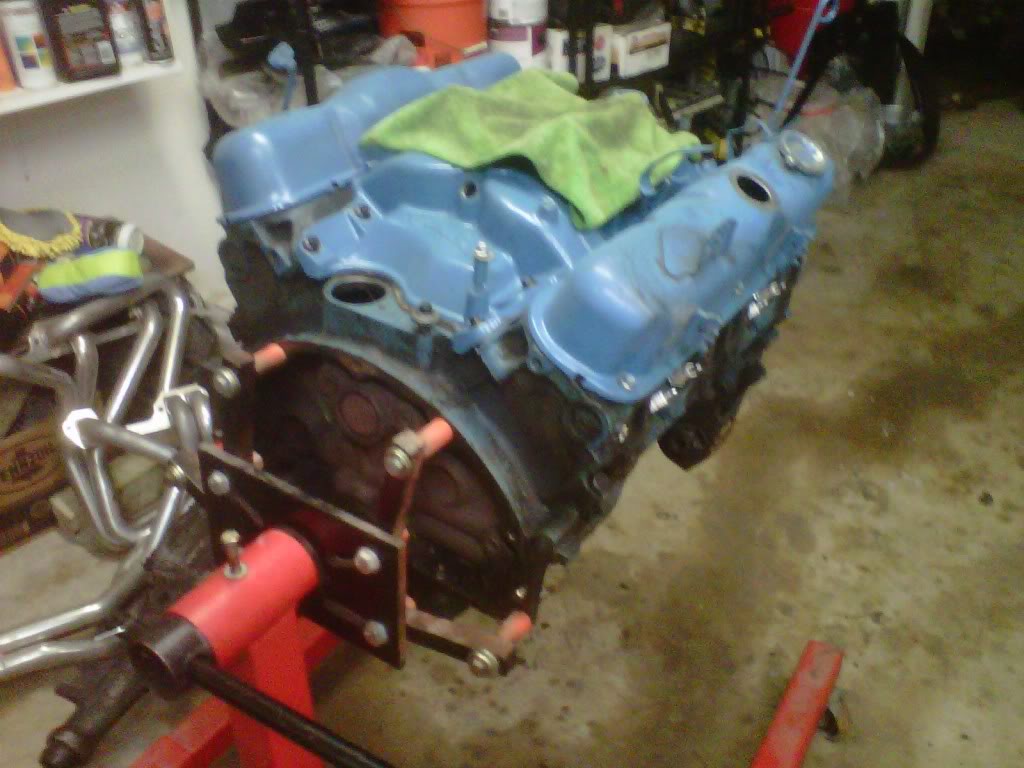
Old engine is on the stand now....
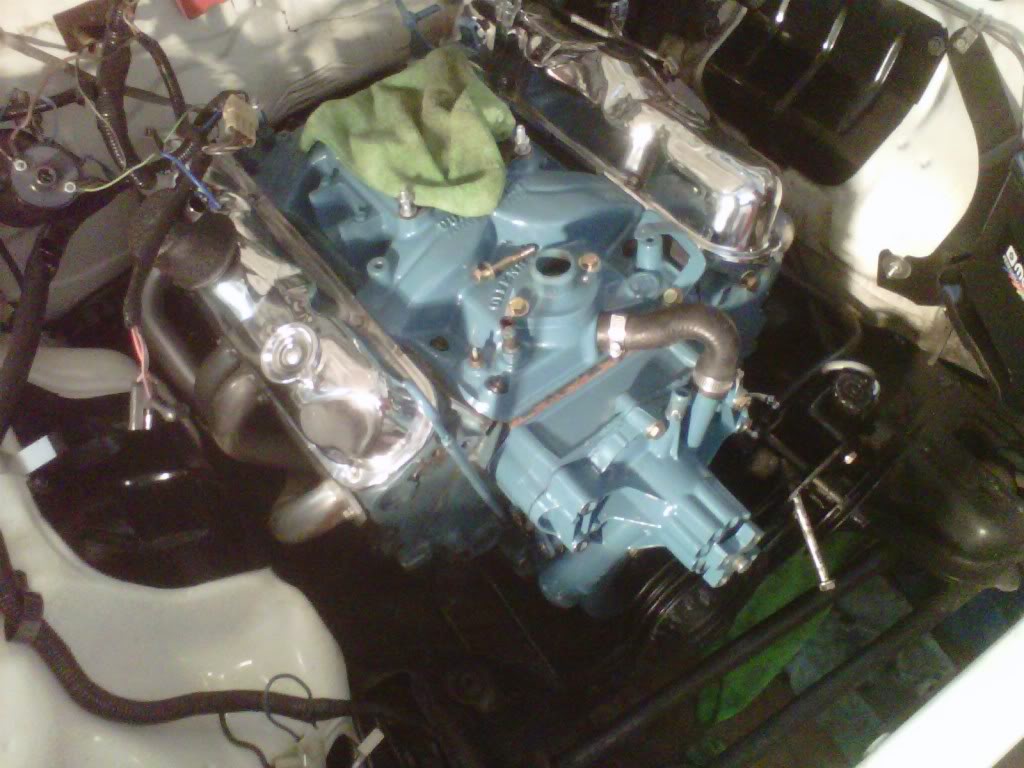
Car is back down and rolled forward...real easy to roll now with one arm....tomorrow is bolt round up and I will take the hoist back to work and probably repaint that valve cover so I can call the new motor complete...
I made a mess of trany fuild and anti-freeze....kitty litter first to soak it up...I swept that up and then hot soapy water and a scrub down...
Old engine is on the stand now....
Car is back down and rolled forward...real easy to roll now with one arm....tomorrow is bolt round up and I will take the hoist back to work and probably repaint that valve cover so I can call the new motor complete...
02-27-2011, 10:07 AM
#350
Super Moderator
Thread Starter
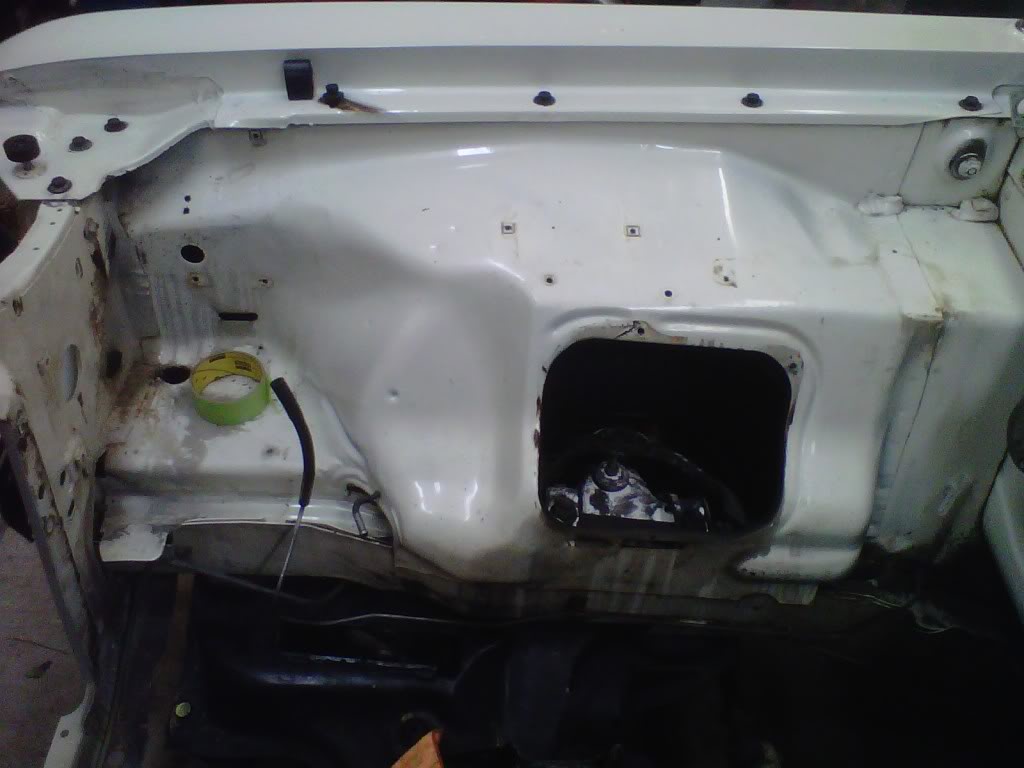
This is why I am doing what I am doing
An engine compartment takes alot of abuse...heat...oil...gas...brake fluid...and even thin paint in some areas...when a nice motor is in there it takes the show and all of the other problem areas are not noticed as much...but when the motor is out of there that's a different story...I did the same thing on my Dart with the exception of detailing the k-member....here goes several pics..
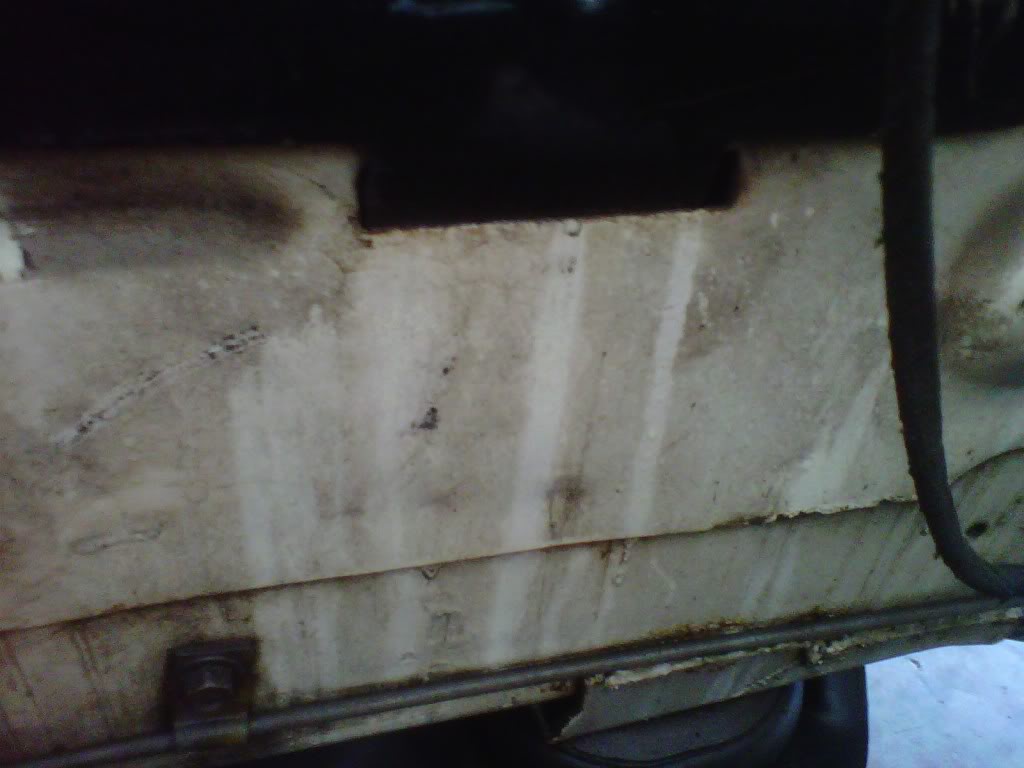
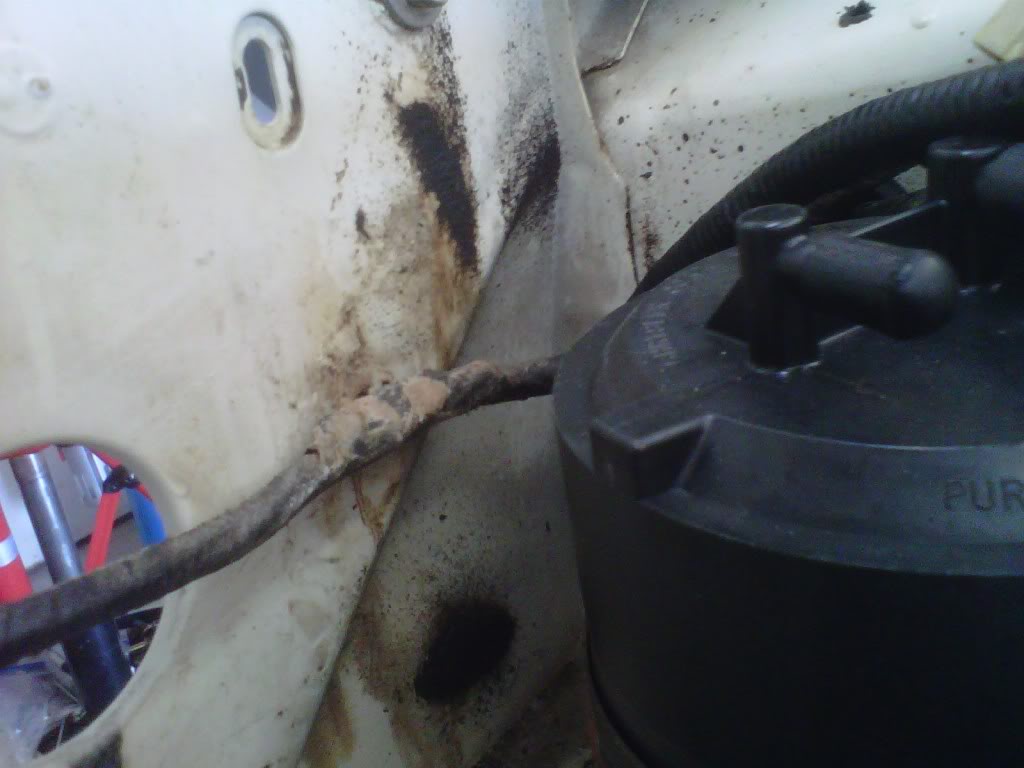
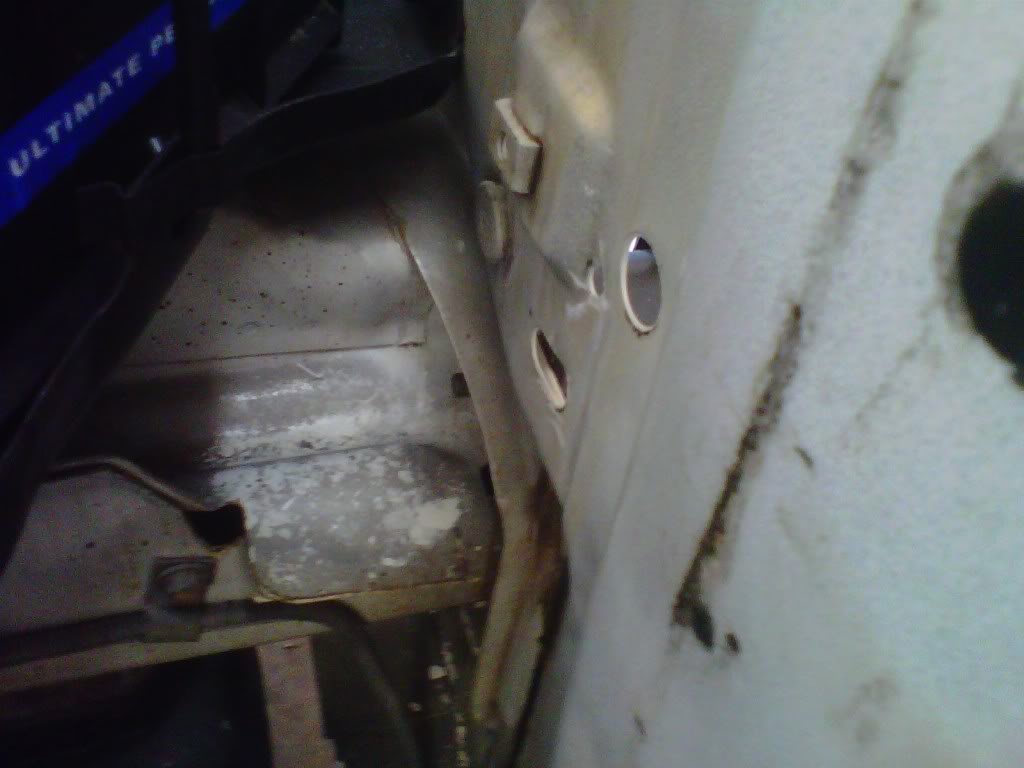
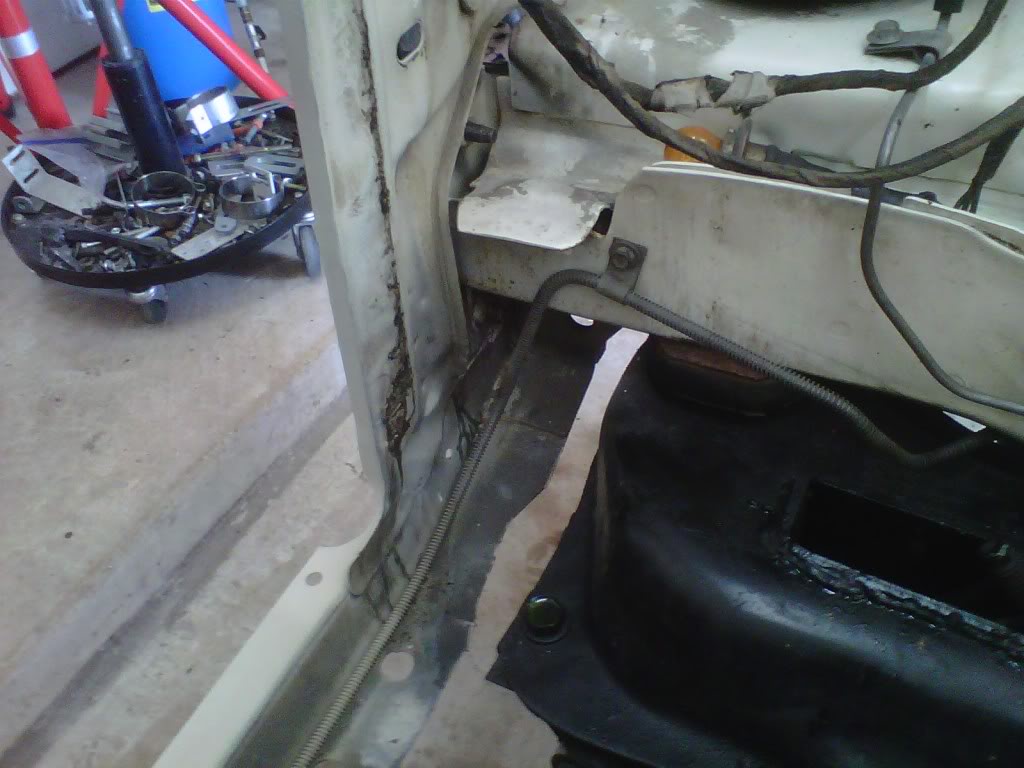
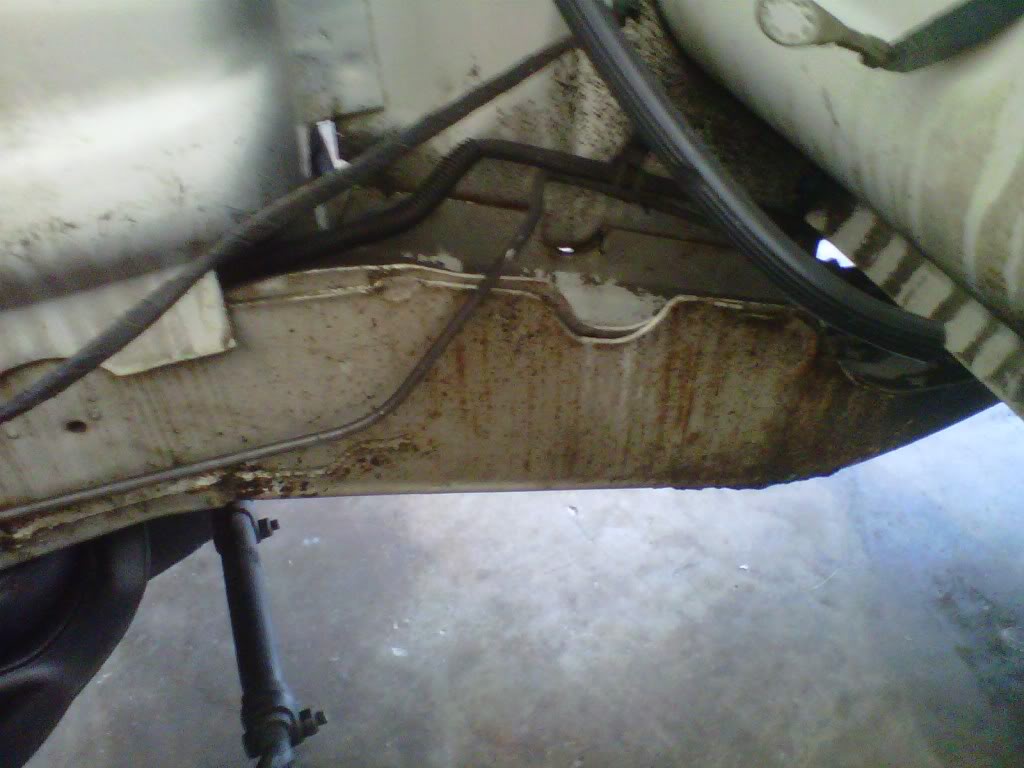
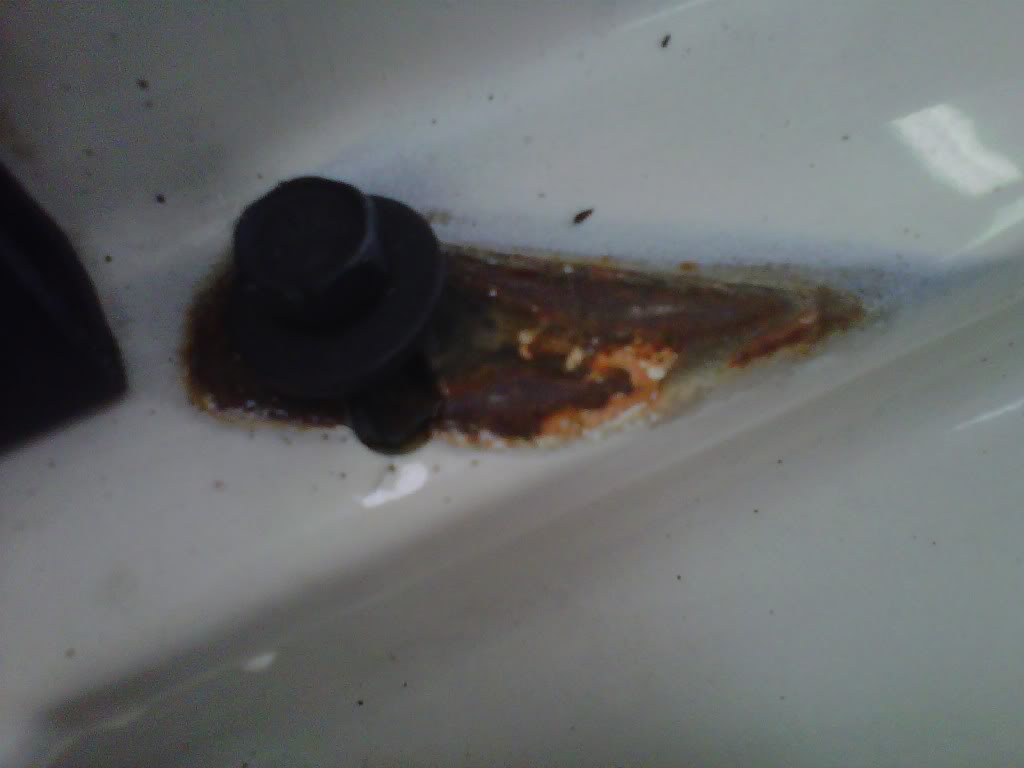
An engine compartment takes alot of abuse...heat...oil...gas...brake fluid...and even thin paint in some areas...when a nice motor is in there it takes the show and all of the other problem areas are not noticed as much...but when the motor is out of there that's a different story...I did the same thing on my Dart with the exception of detailing the k-member....here goes several pics..
02-27-2011, 09:33 PM
#351
Super Moderator
Thread Starter
Back in the big paint booth
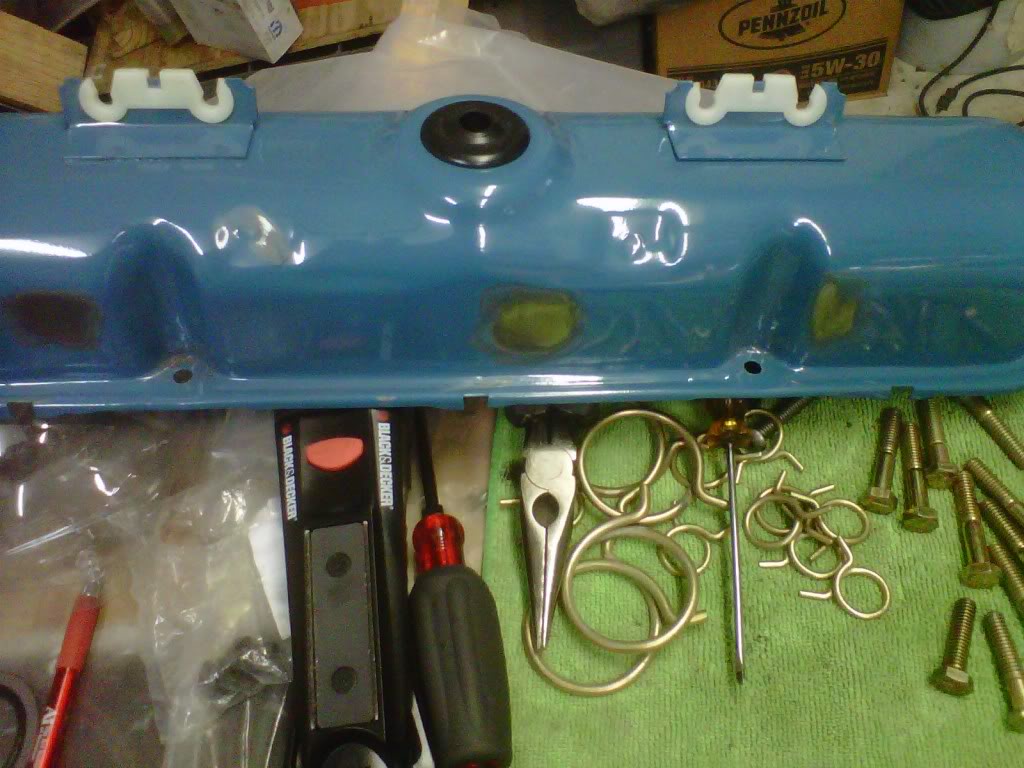
I took the hoist back to work today and no one asked me for a tow on the way there...I then fired up the big paint booth and got the valve cover painted...after paint I could not tell where those wire clamps used to be....three coats of color and two coats of clear..swapped them on the motor tonight..
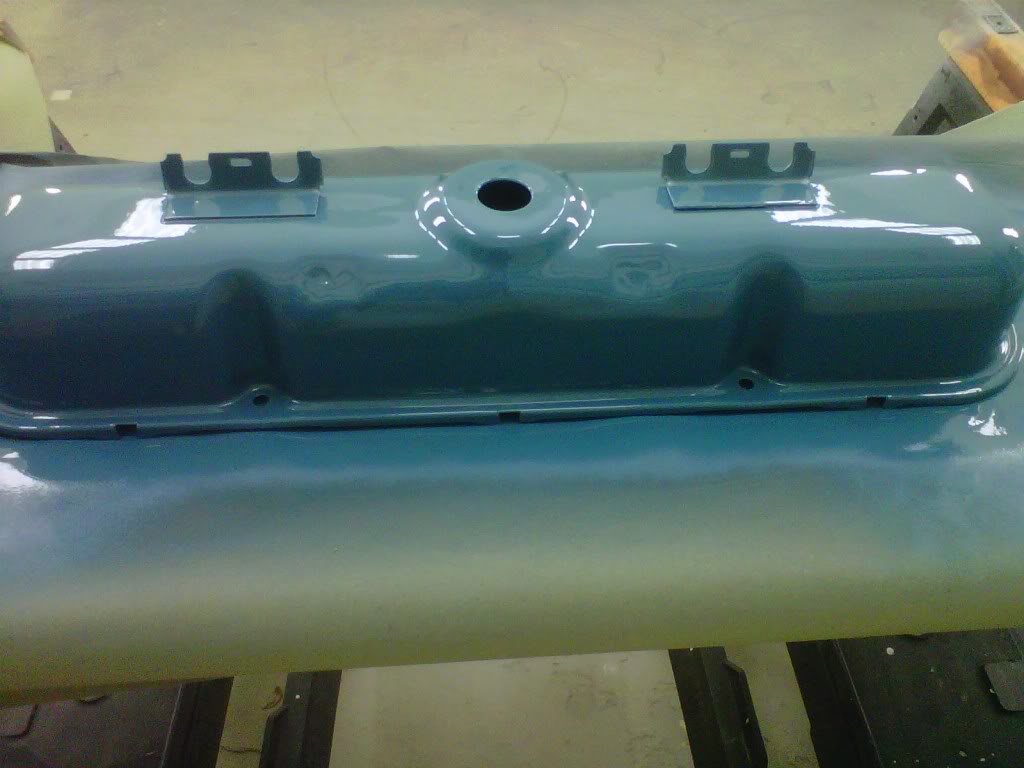
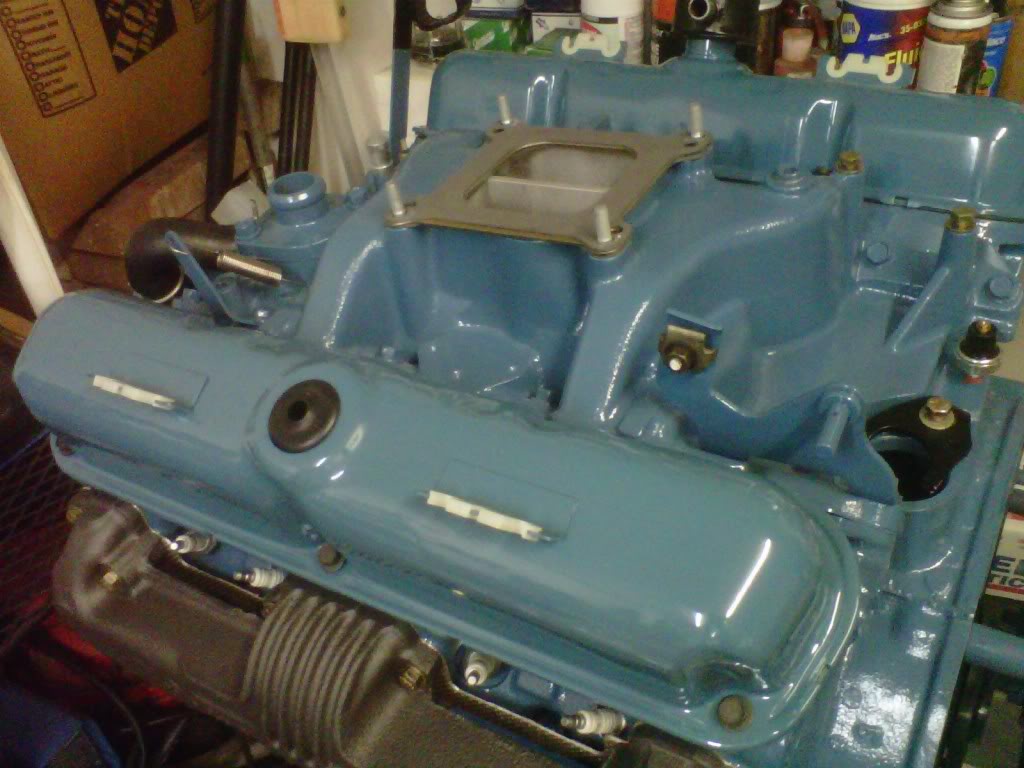
I took the hoist back to work today and no one asked me for a tow on the way there...I then fired up the big paint booth and got the valve cover painted...after paint I could not tell where those wire clamps used to be....three coats of color and two coats of clear..swapped them on the motor tonight..
02-28-2011, 09:04 PM
#352
Super Moderator
Thread Starter
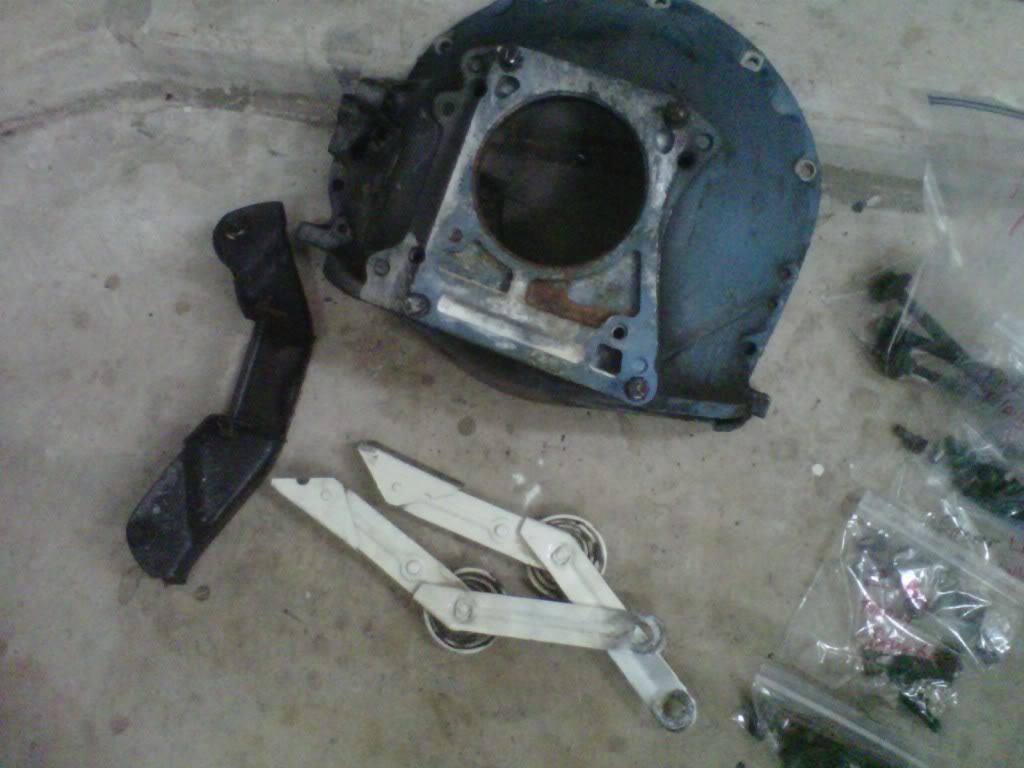
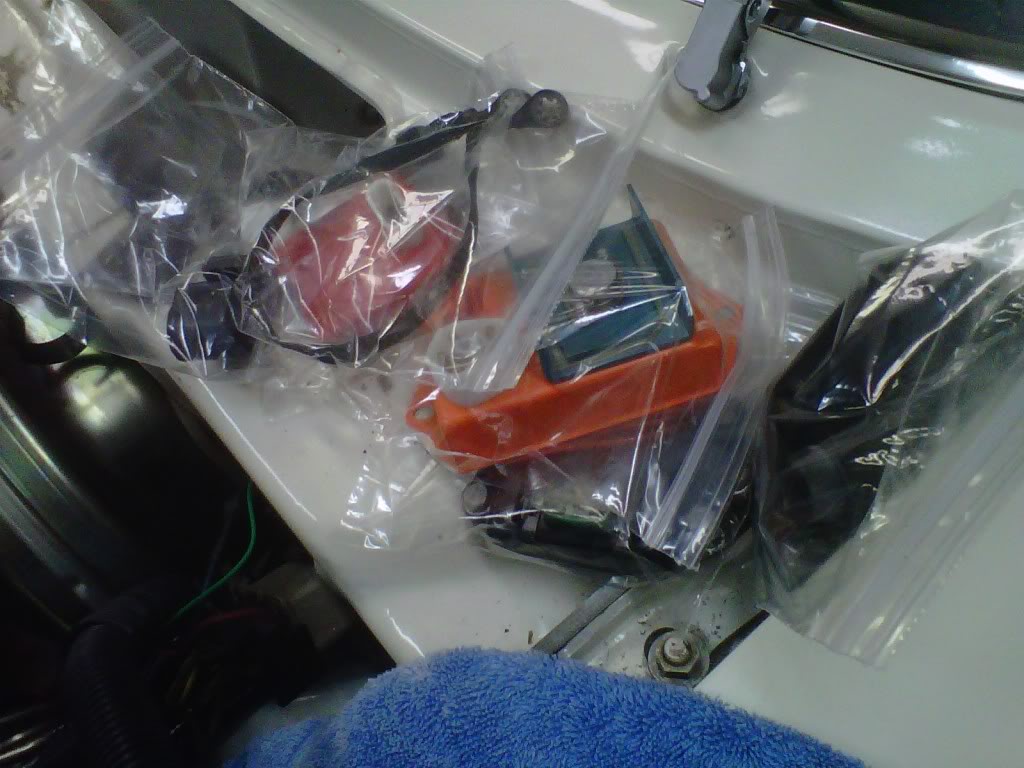
Get ready for blasting and organizing bolts
I got a couple of Items ready for media blasting tomorrow...bell housing...tranny crossmember...and spring hinges off of the hood..I then sorted and bagged some bolts...tomorrow I am going to start removing things out of the engine compartment...lots of pictures to..
 03-01-2011, 10:41 PM
#354
Super Moderator
Thread Starter
Plastic bead media blasting....no harm what so ever to the metal...I have done alot of parts at work...when ever they have something to blast I bring some parts..it won't take rust off only paint...it will make that aluminum bell housing look like new...my friend
03-01-2011, 10:47 PM
#355
Super Moderator
Thread Starter
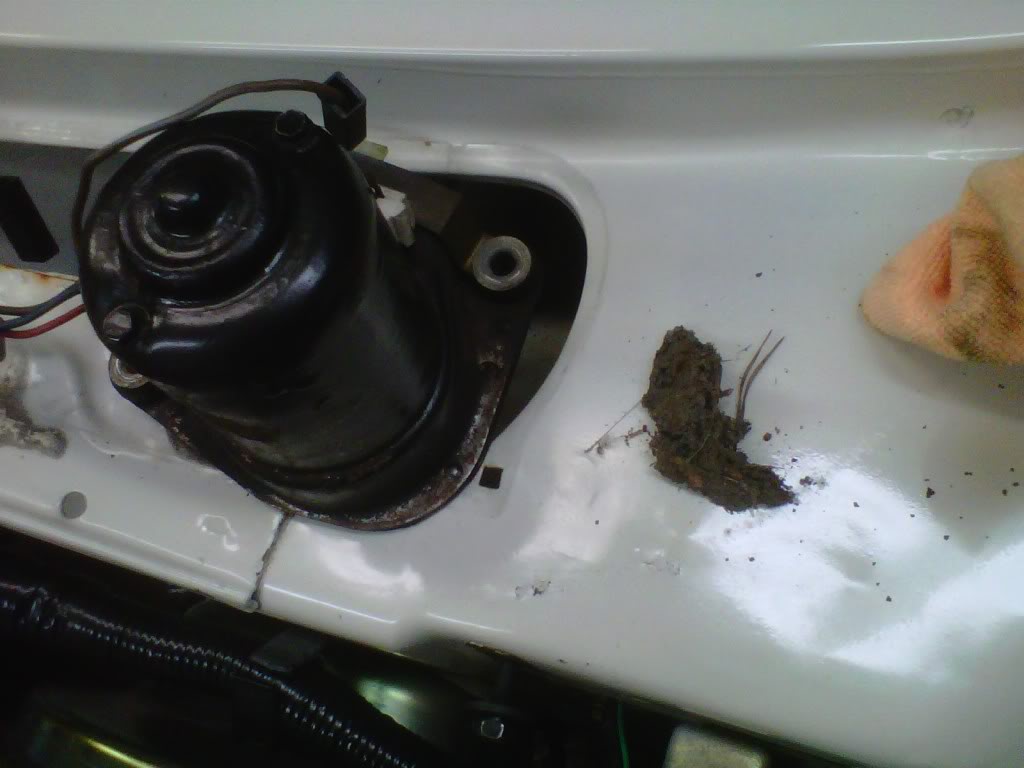
15 minutes to work on the car tonight..
I had a gantry break down at work that I had to fix so I got home late and ate supper...only had about 15 minutes so I took off the cowl cover being very carefull not to break the plastic...I found one small twig and some fine debris in there...no other surprises...this is the easiet car to ever work on...I reached in the cowl with a 7/6 wrench and removed the nut on the back of the wiper motor..three more nuts on the front and it was outta there..
03-01-2011, 10:49 PM
#356
Super Moderator
Thread Starter
Marty Mopar
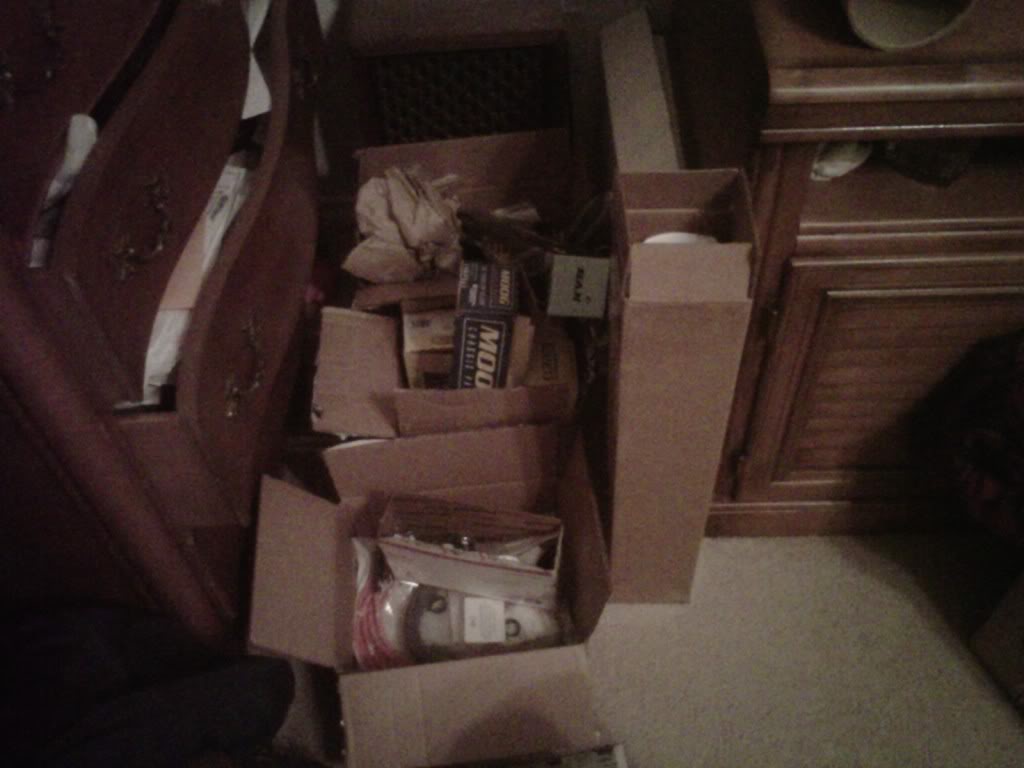
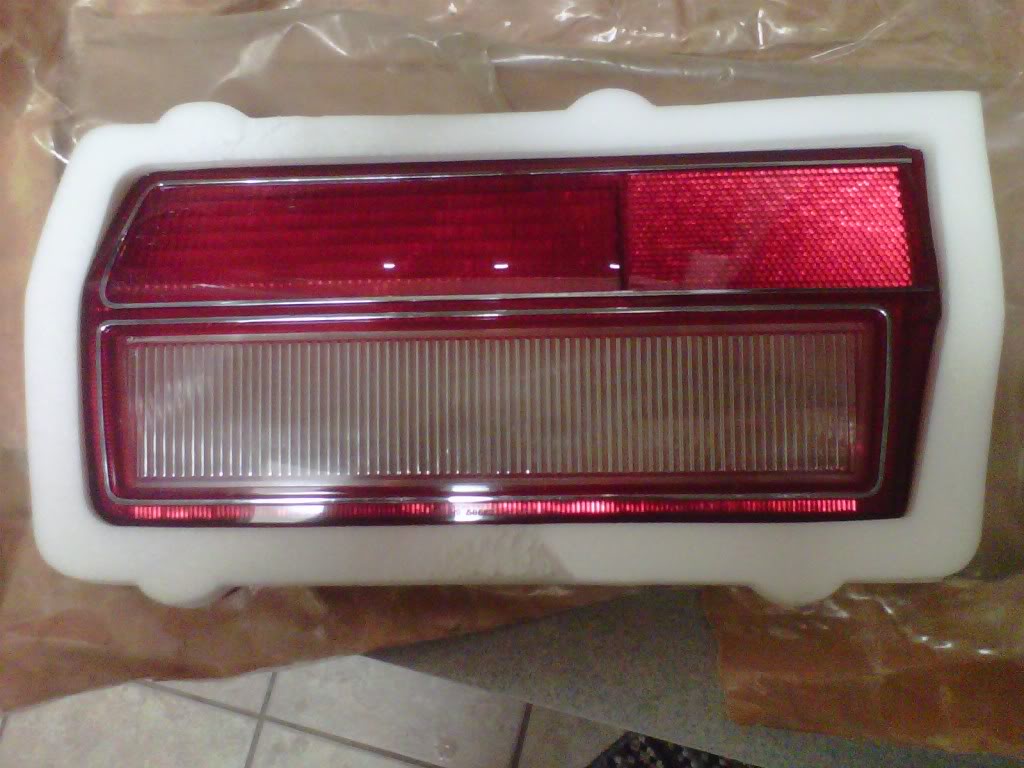
Got some NOS parts from Marty Mopar....these are going to replace my front hood and front fender trim pieces...mine are all in good shape..the big Dodge has a couple of small dents that is alll...the old ones will be kept for spares...Marty gave me two extra boards and a couple of pieces of his old beer cooler for free...
Here are the pieces...some have some glue/tape goo on them I have to clean off this is from the old factory packaging
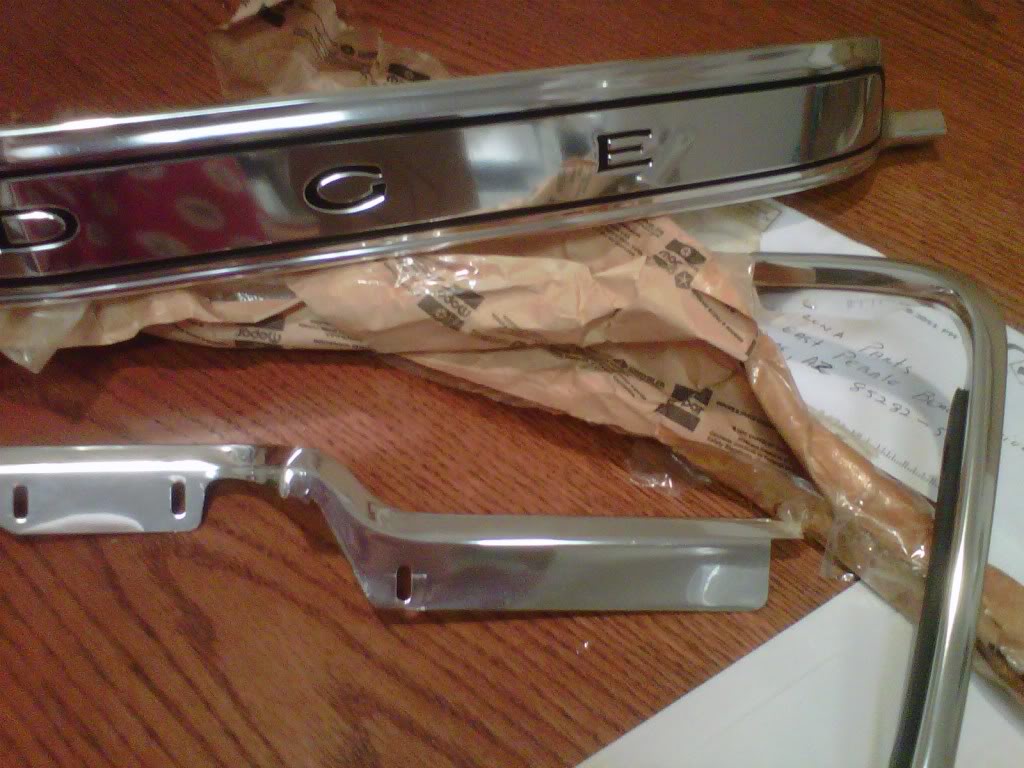
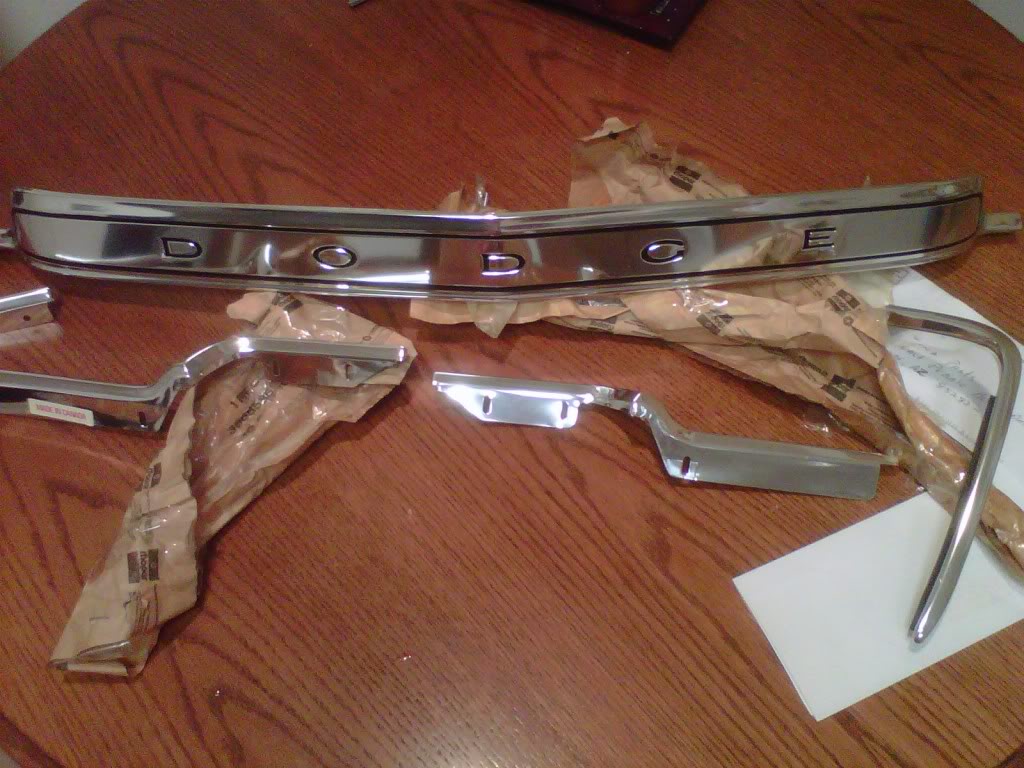
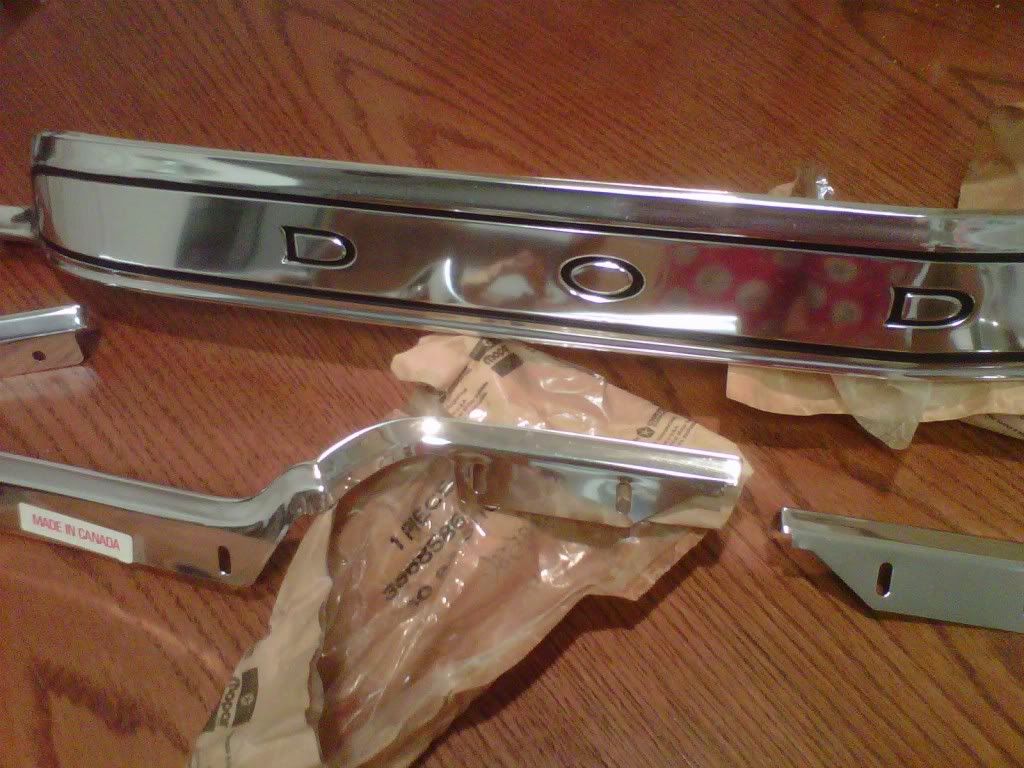
Here are the pieces...some have some glue/tape goo on them I have to clean off this is from the old factory packaging
03-02-2011, 09:02 PM
#357
Super Moderator
Thread Starter
I got busy tonight...for an hour that is...
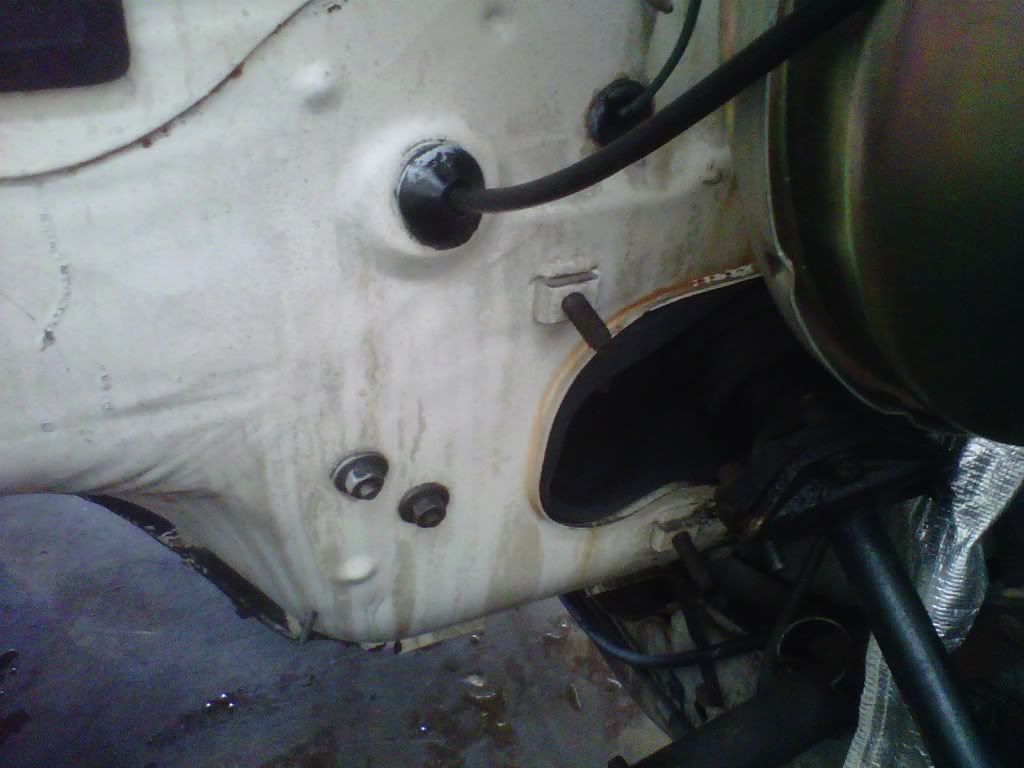
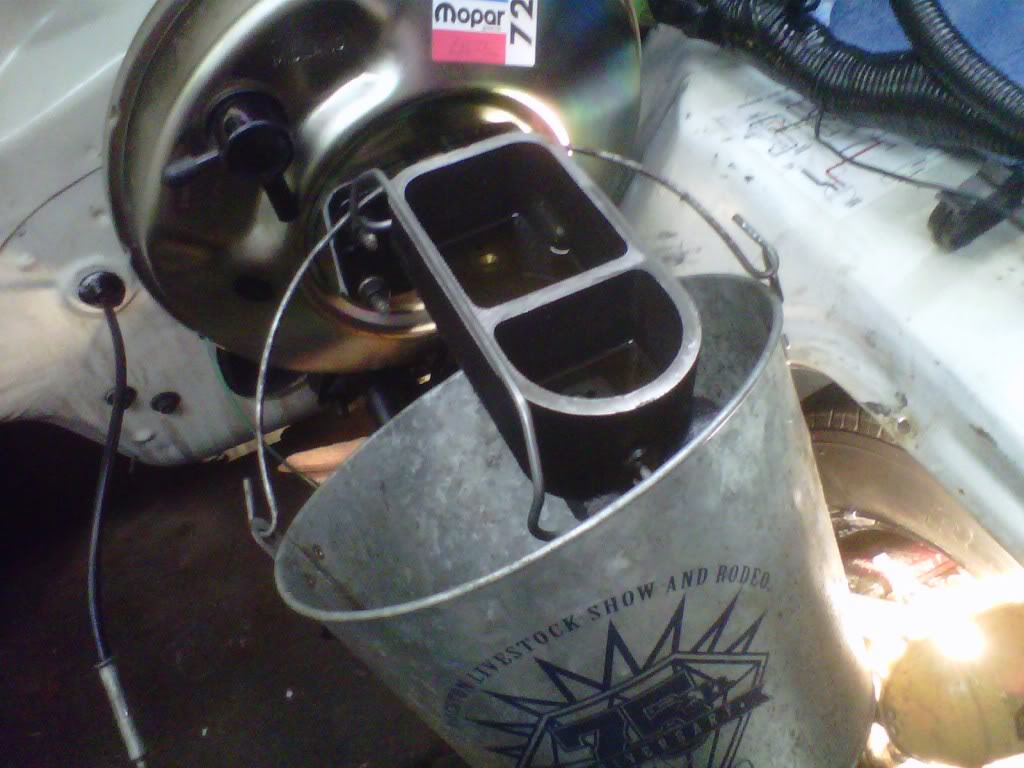
My little battery powered Rigid impact makes for fast work on little bolts and screws...I got busy on the passenger side and made it my way over to the driver's side...I will concentrate on that side tomorrow night..already sprayed down the brake line connections with some Blaster penetrent..
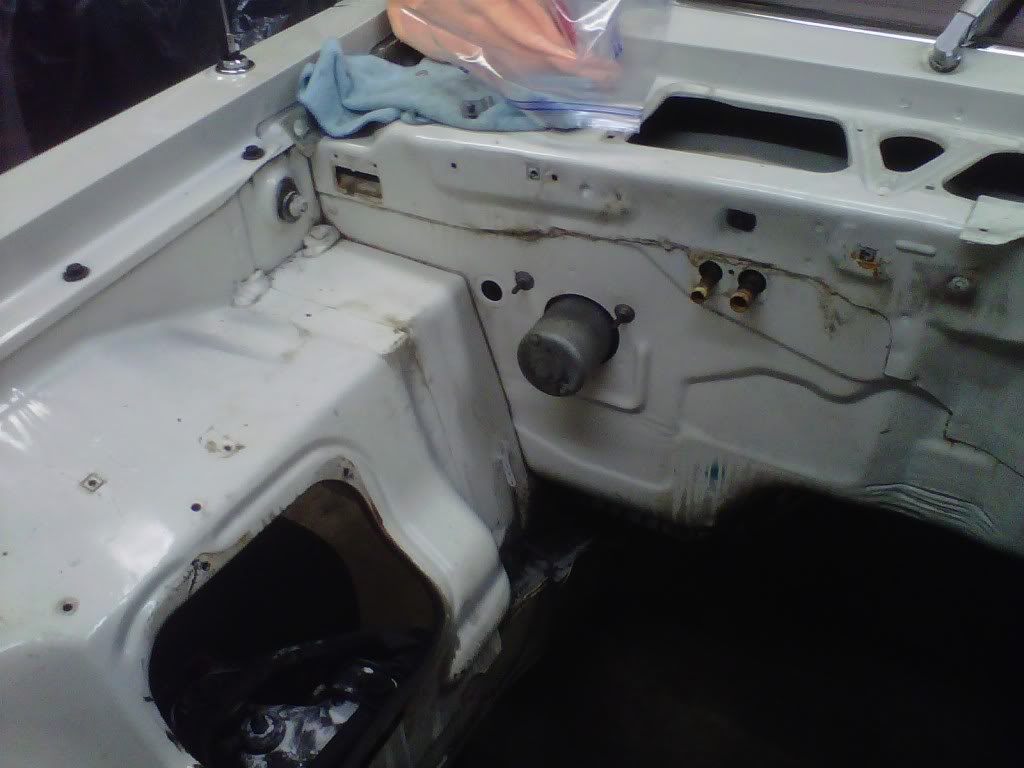
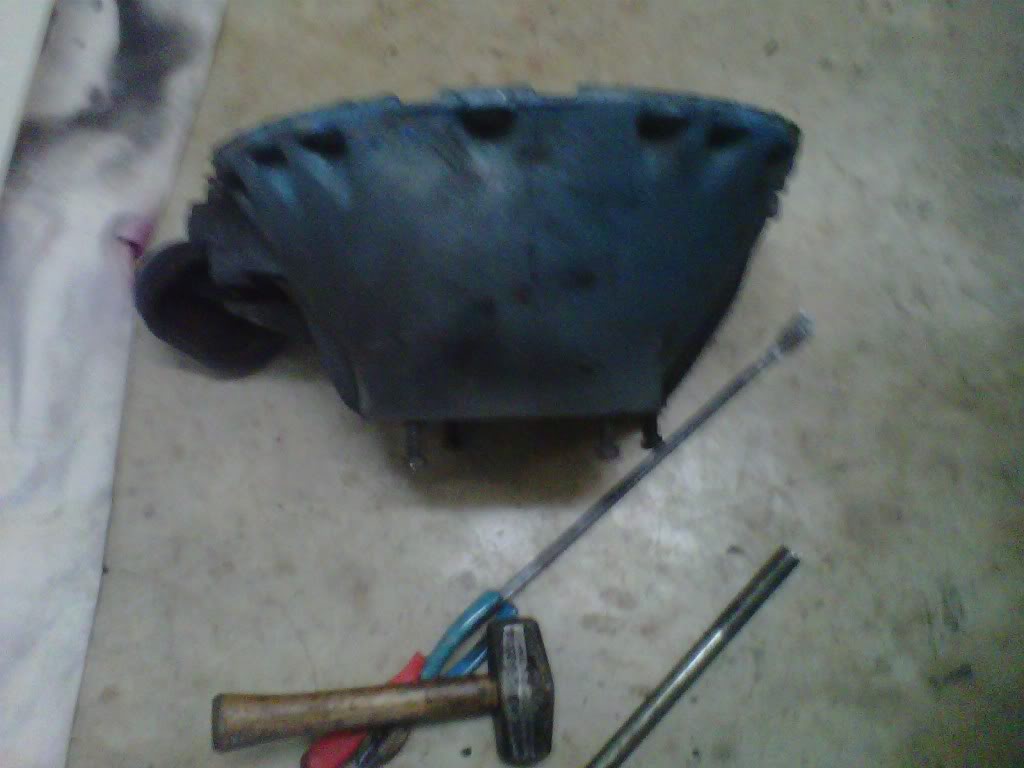
Anyone want a charcoal cannister....

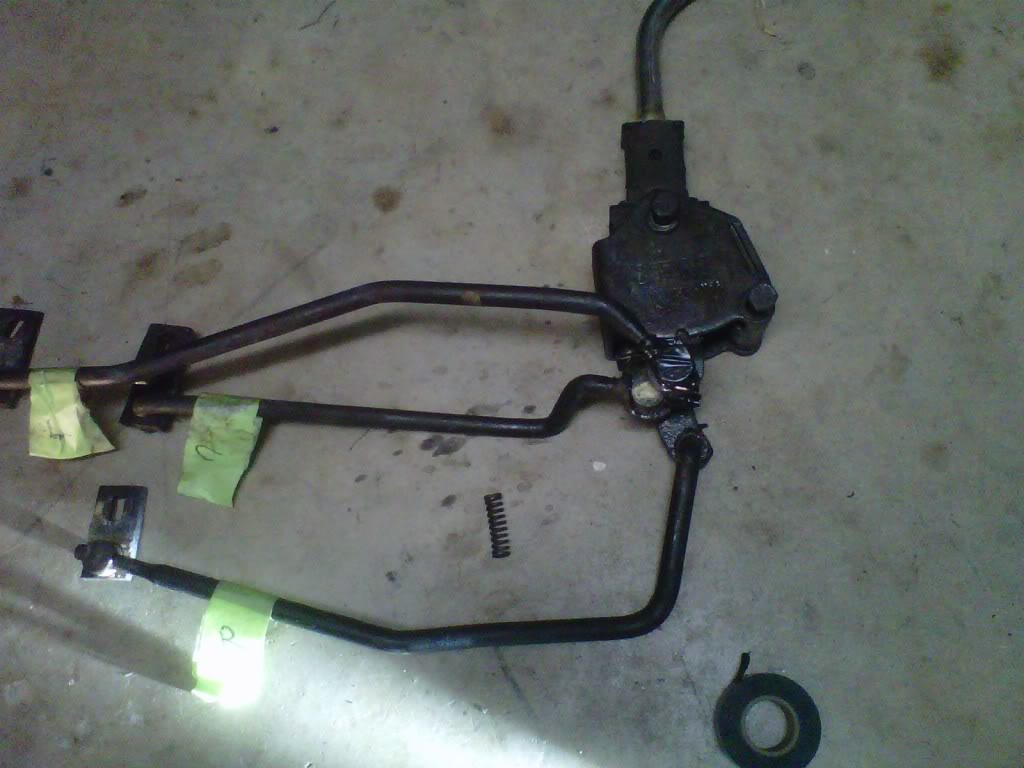
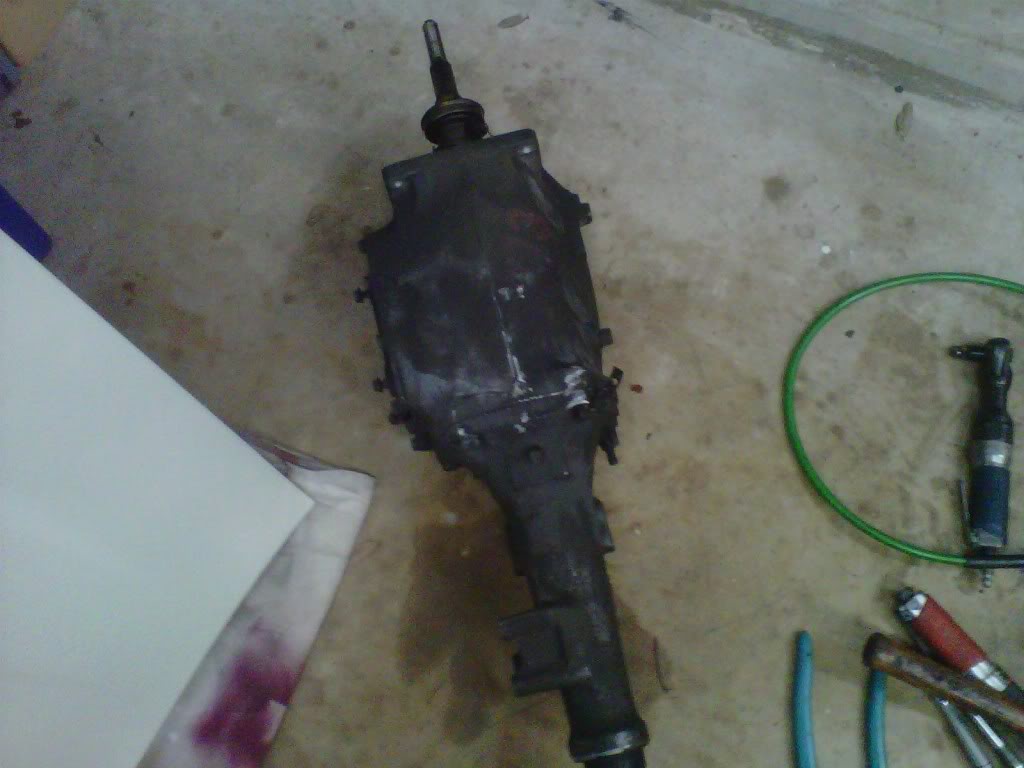
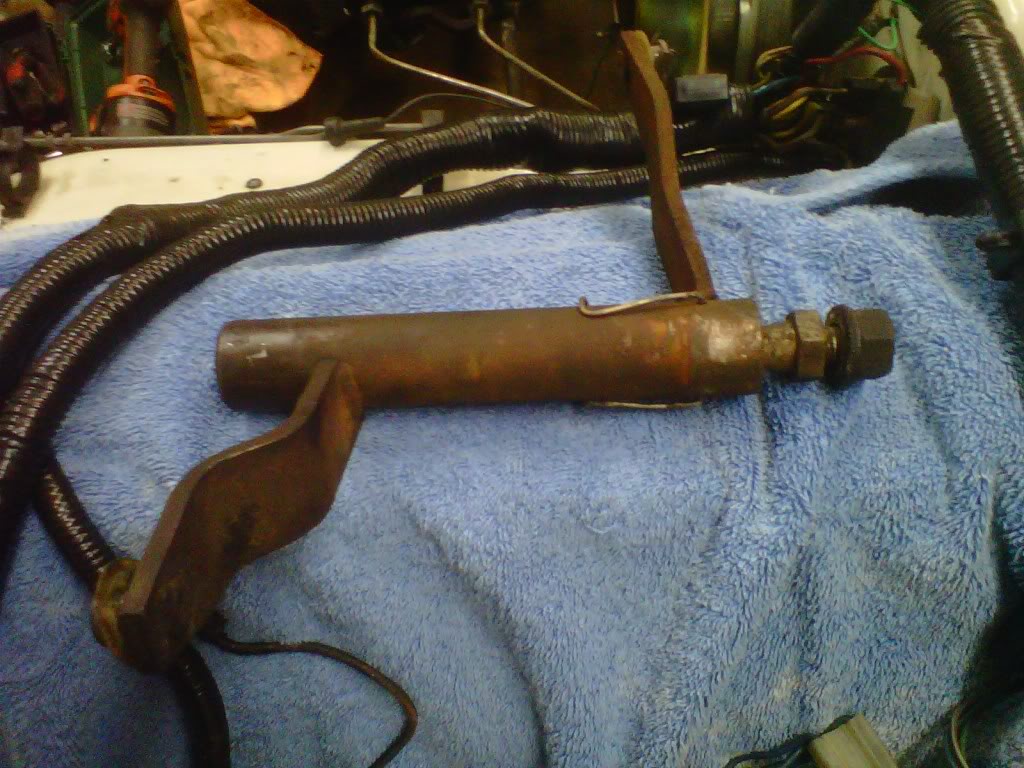
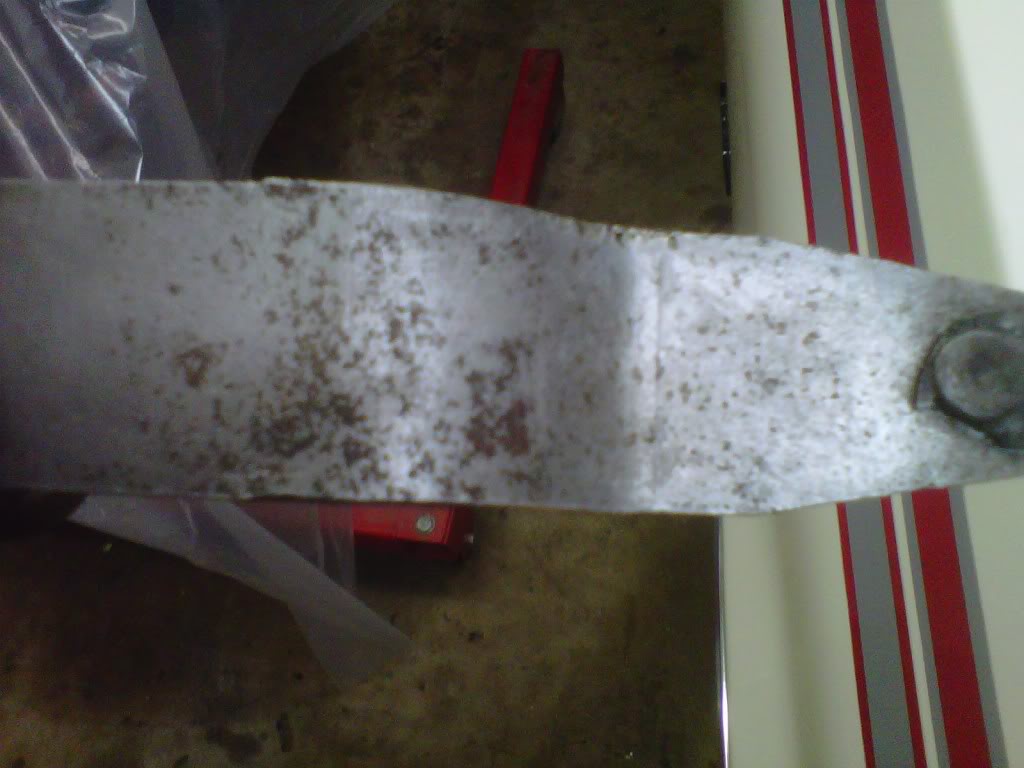
Here is the z-bar in question...I took some measurements and a call to Mancini tomorrow...I am 99% sure that the B body repair kit is the one I need...it will go in the Evaporust bucket tomorrow...
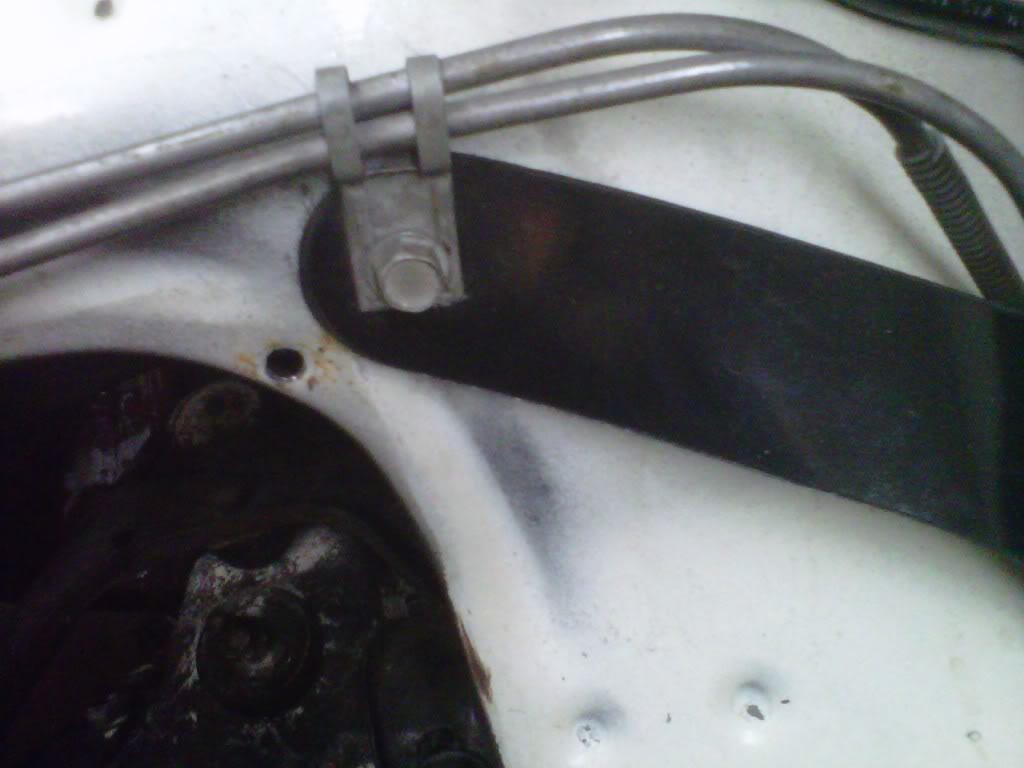
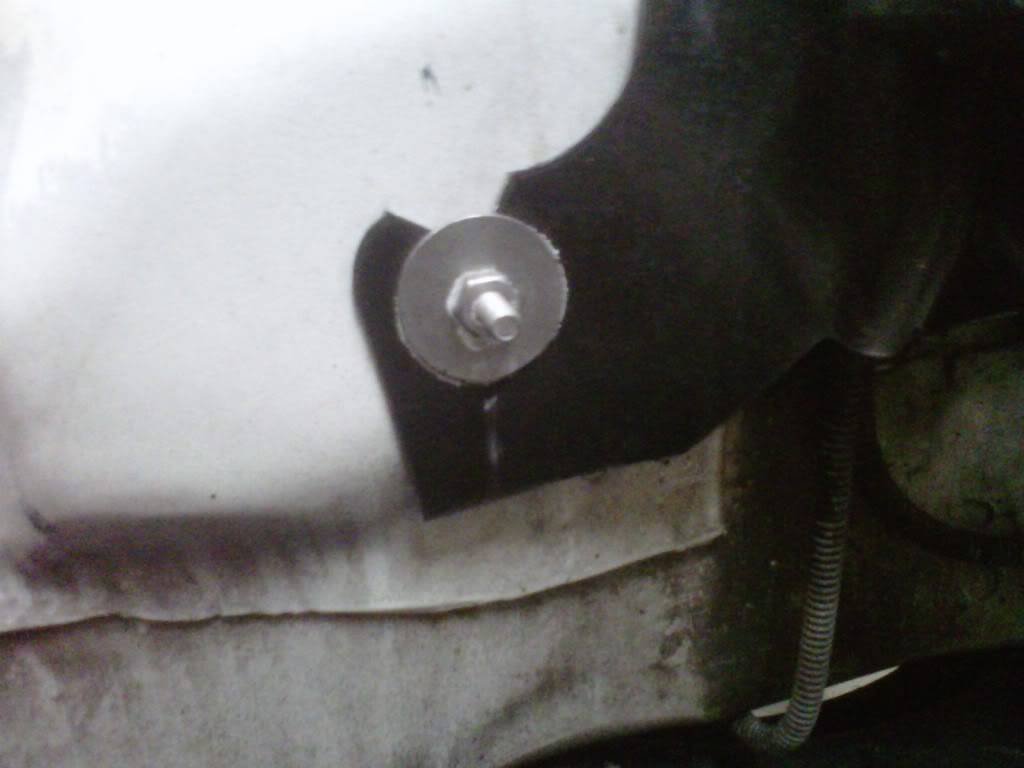
Wiring harness is all the way out...when the booster is out of the way I am going to take the rubber grommet out and feed the wires inside the car..
I bagged up several of the firewall things with their fastners...
Anyone want a charcoal cannister....
Here is the z-bar in question...I took some measurements and a call to Mancini tomorrow...I am 99% sure that the B body repair kit is the one I need...it will go in the Evaporust bucket tomorrow...
Wiring harness is all the way out...when the booster is out of the way I am going to take the rubber grommet out and feed the wires inside the car..
I bagged up several of the firewall things with their fastners...
03-03-2011, 09:03 PM
#358
Super Moderator
Thread Starter
Here's that z-bar after a one night soak
I wiped it off and took some pics...the last one shows some deeper rusty pits...thus it went back in for some more soaking with no chance of hurting the good metal..

03-03-2011, 09:48 PM
#359
Super Moderator
Thread Starter
Okay a little more cleaned up tonight..
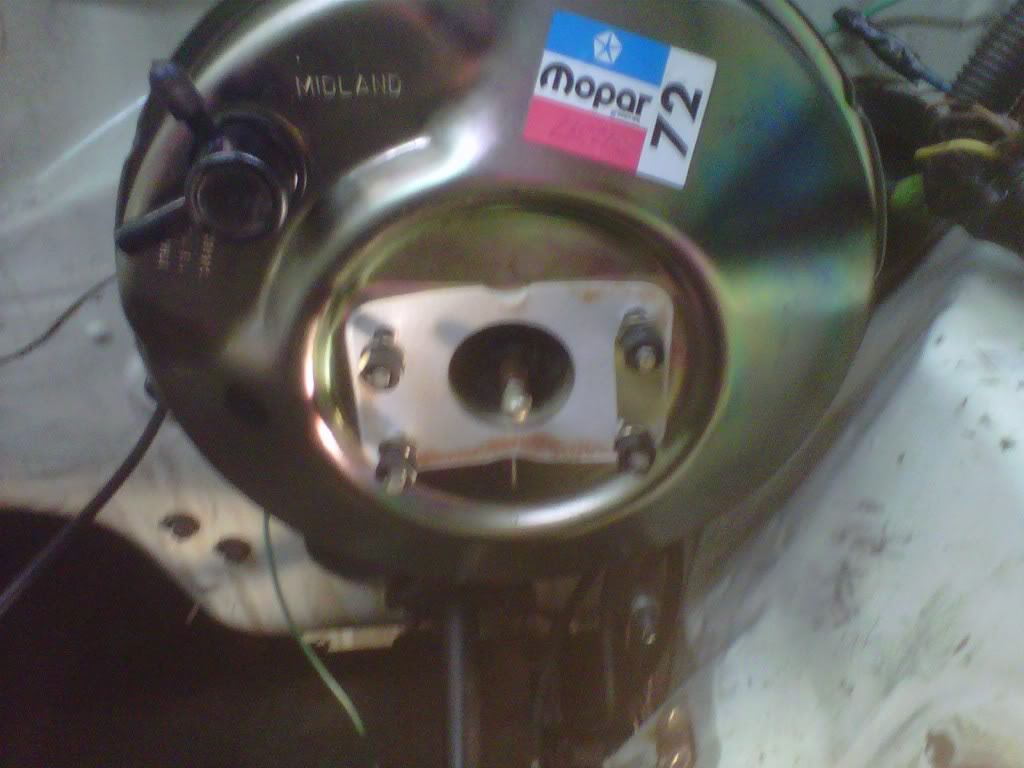
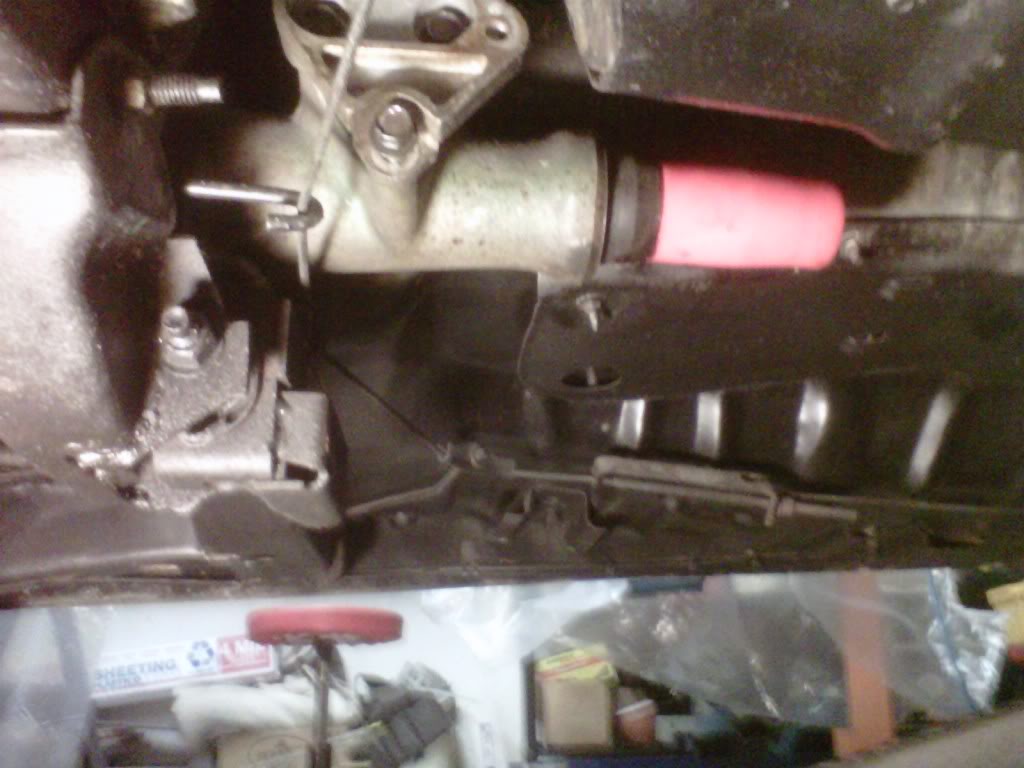
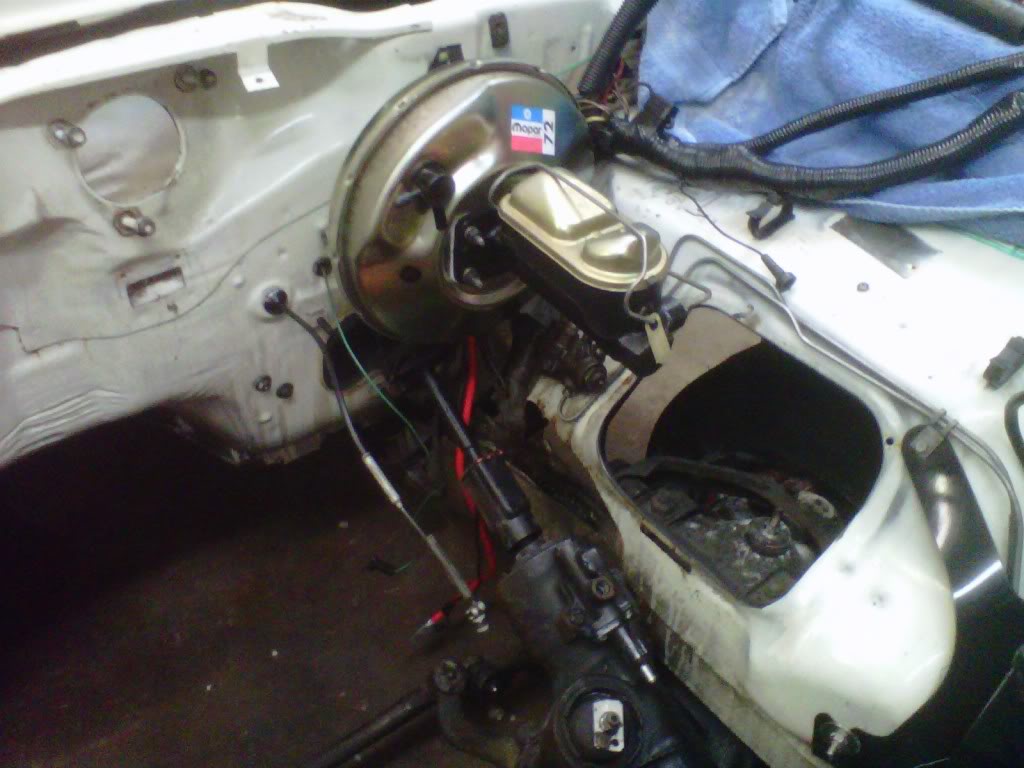
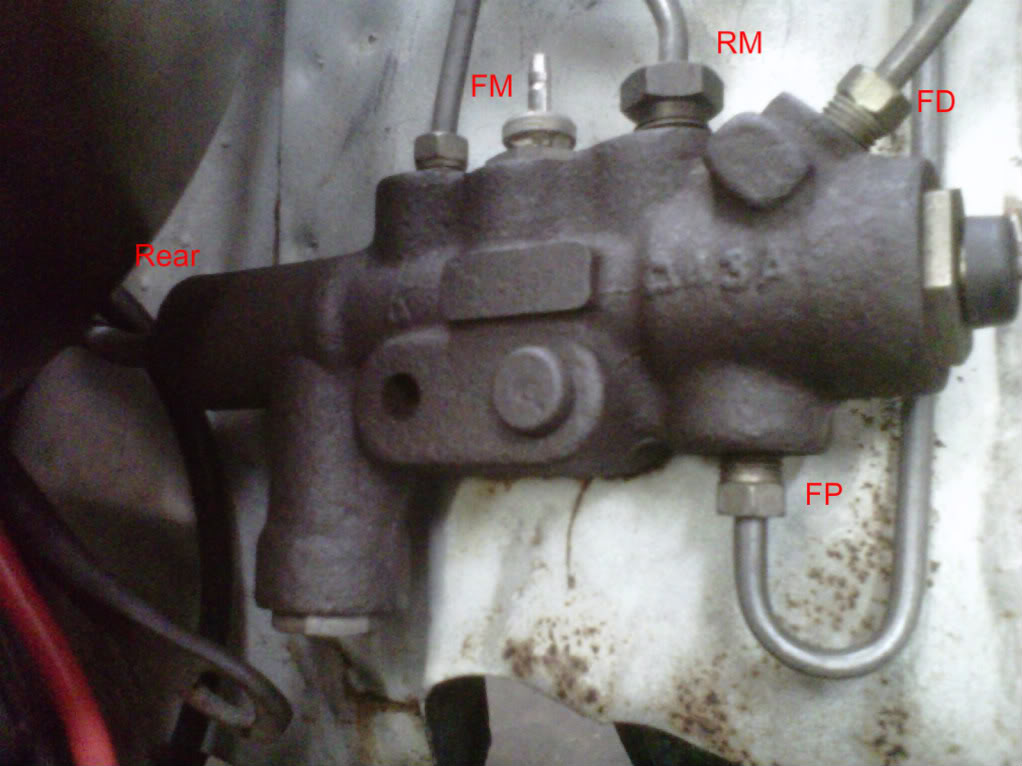
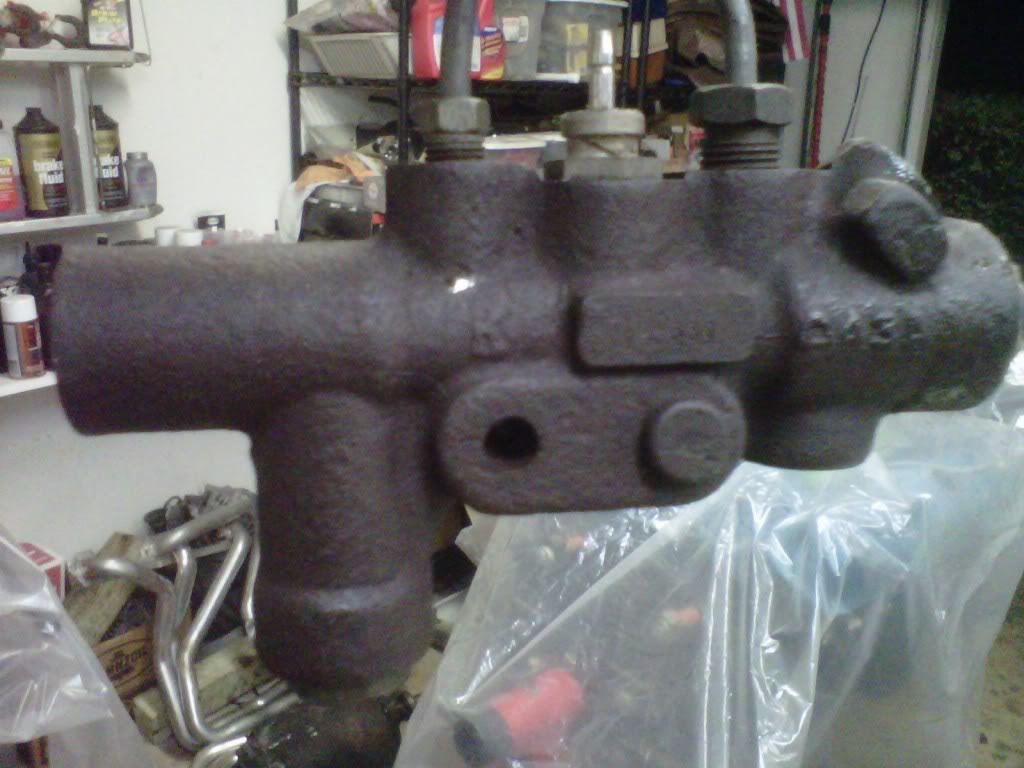
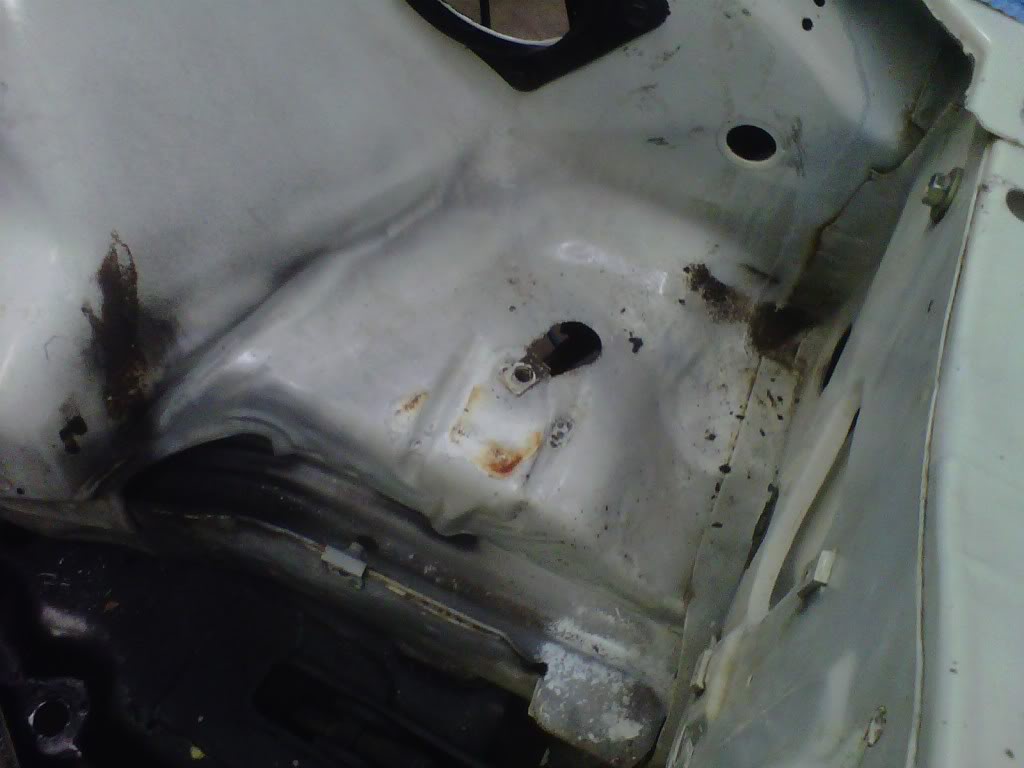
Got the master cylinder drained...got the front hard brake lines out...got the proportional block/valve out...and the battery and battery tray out..took alot of pictures mainly for my memory when putting it back together..I made a special one to remind me how the brakelines hook up to the proportional block/valve and master cylinder...it will go in the bucket of Evaporust too
The rest of the pics are really just to remind me where stuff goes when I put it back together..
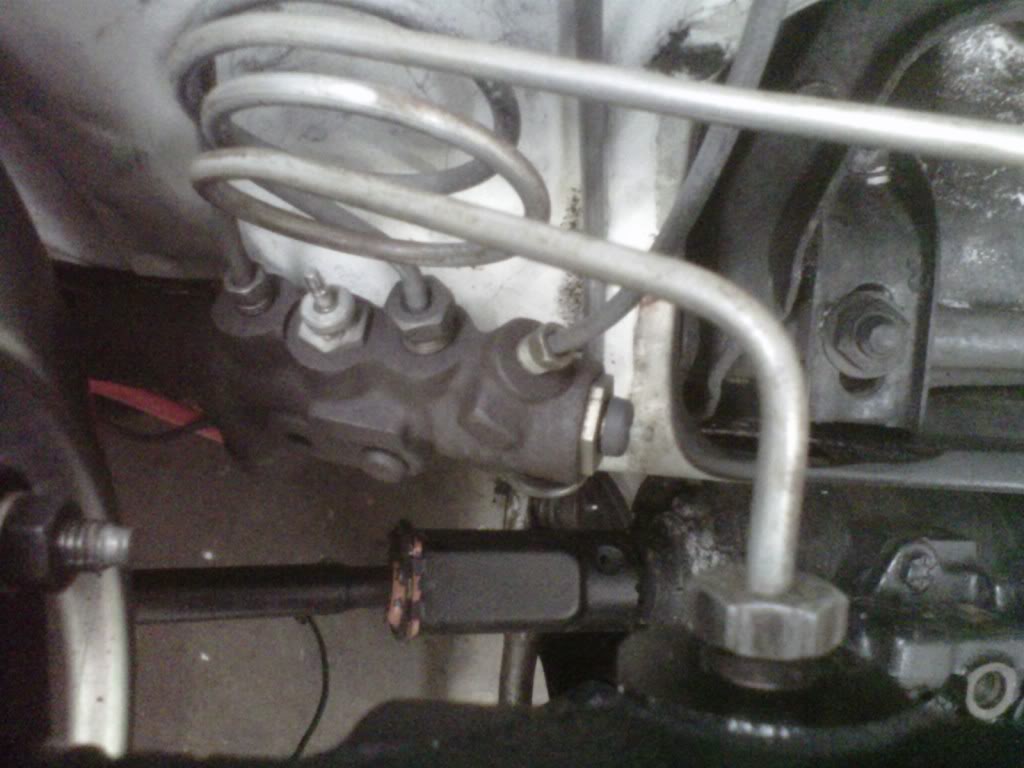
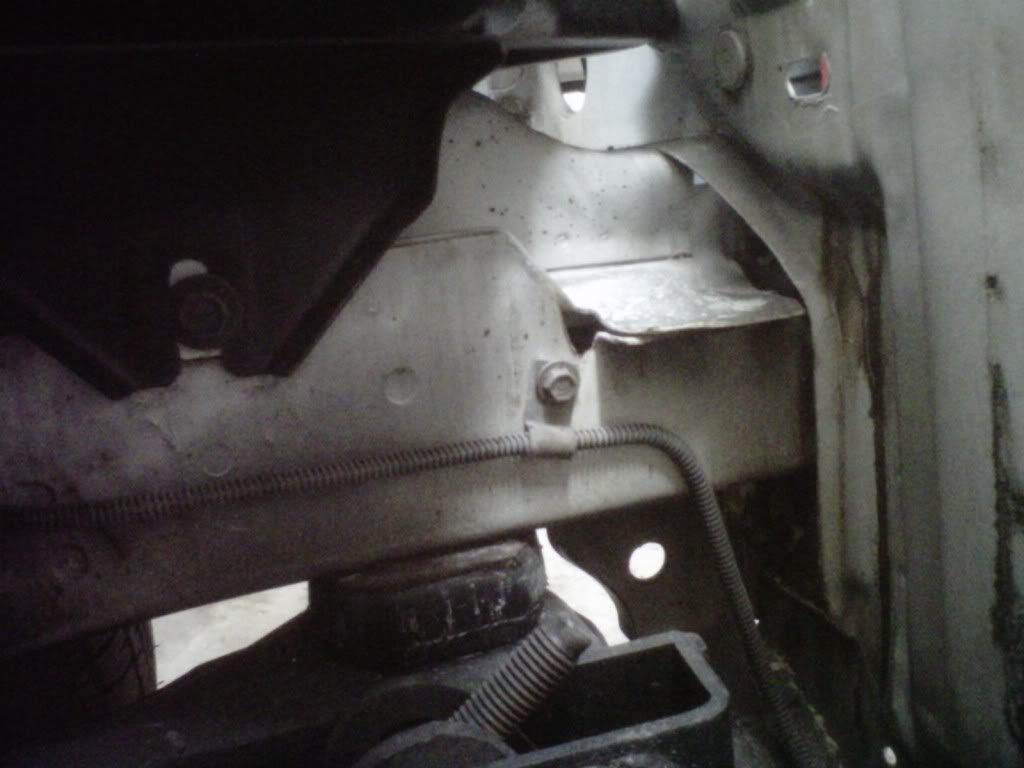
The rest of the pics are really just to remind me where stuff goes when I put it back together..
Last edited by bremereric; 03-03-2011 at 09:57 PM.
03-04-2011, 11:18 PM
#360
Super Moderator
Thread Starter
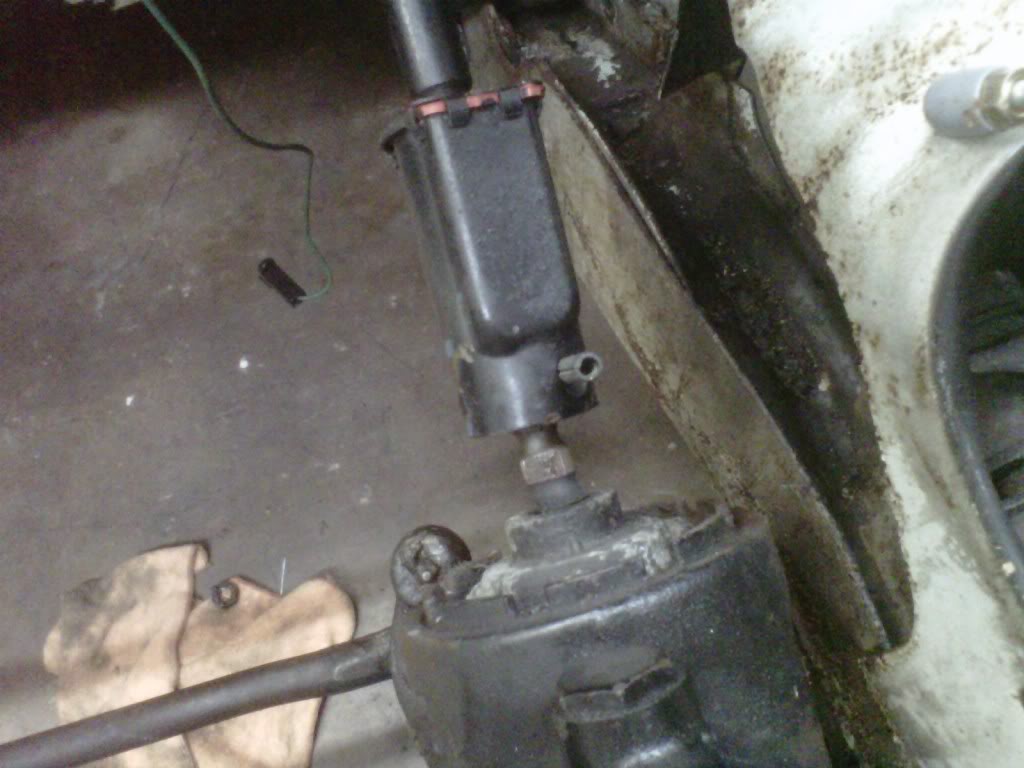
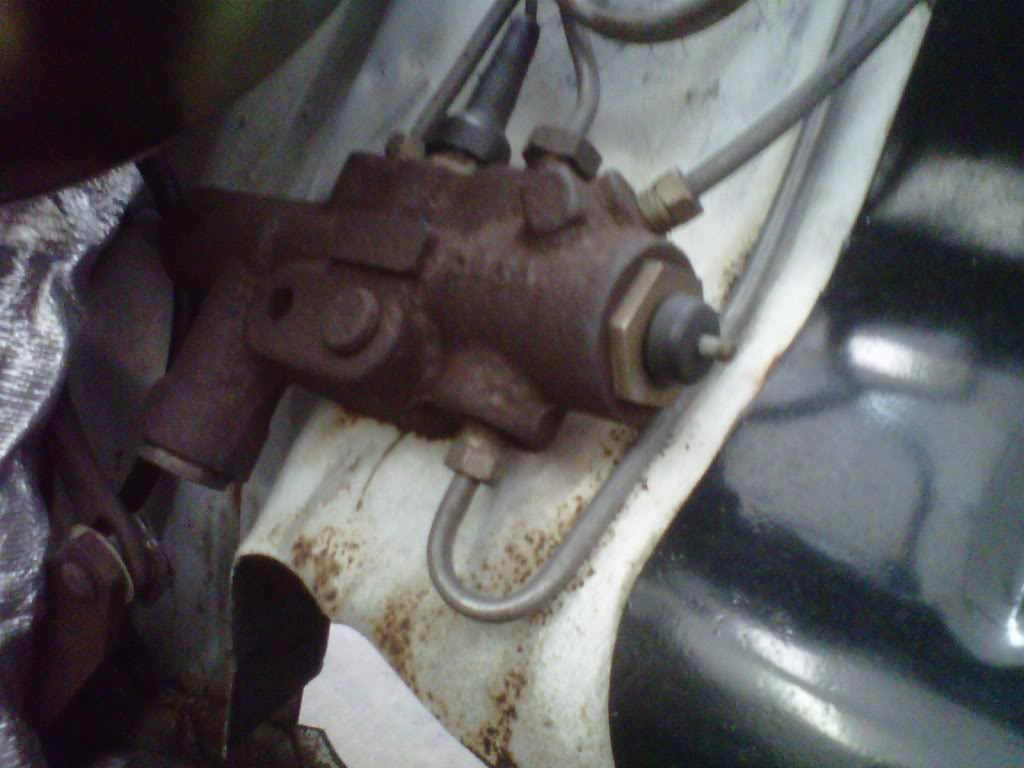
Besides finding out 2 of my 4 brake lines were wrong I did get some done tonight
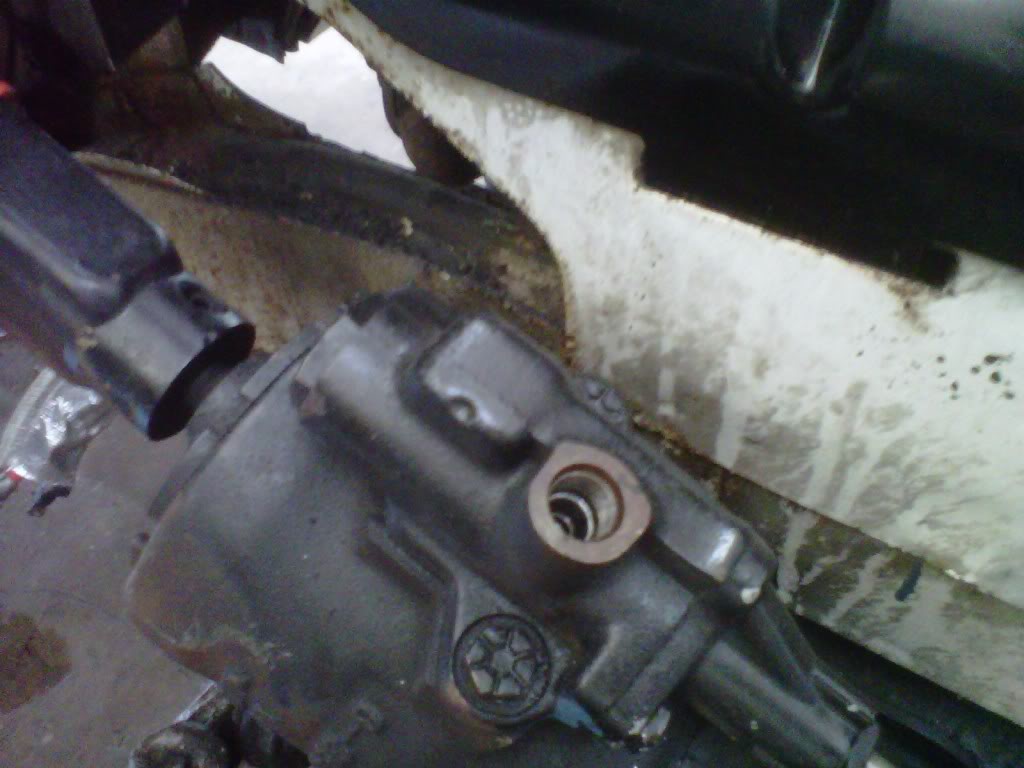
I got the master cylinder out of there...I also got the steering box loose and ready to come out...unlike other cars before they decided to put a stud on the inner most fastener for the gear box...the steering column must come out first before the box can come out...just my luck...I also got the rear hard brake line out...it was very long and had some great bends...what fun it was to get out..I will take some pics on it in the daylight..